
MINKUROW 32x24 LED Lighted Bathroom Mirror
MINKUROW 32"x 24" LED Lighted Bathroom Mirror User Manual
Model: 32x24 LED Lighted Bathroom Mirror
1. Koniec produktuview
The MINKUROW 32"x 24" LED Lighted Bathroom Mirror is a wall-mounted vanity mirror designed for bathroom environments. It features integrated LED lighting with adjustable color temperature and a touch-sensitive control switch. Constructed with a copper-free silver mirror and multiple protective layers, it offers high optical quality and durability. The mirror is IP44 waterproof rated, ensuring safe operation in wet conditions.

Rycina 1: Przód view of the MINKUROW 32"x 24" LED Lighted Bathroom Mirror.
2. Informacje dotyczące bezpieczeństwa
- Zawsze odłączaj zasilanie przed instalacją lub konserwacją.
- Jeśli nie masz pewności, instalację powinien wykonać wykwalifikowany elektryk.
- Do not expose the mirror to excessive moisture beyond its IP44 rating.
- Obchodź się z lustrem ostrożnie, aby zapobiec jego stłuczeniu.
- Ensure the mounting surface is structurally sound to support the mirror's weight (approximately 17.56 pounds).
3. Zawartość opakowania
Prosimy o dokładne sprawdzenie zawartości opakowania. Jeśli brakuje któregokolwiek z elementów lub jest on uszkodzony, prosimy o kontakt z obsługą klienta.
- LED Lighted Bathroom Mirror (1 unit)
- Mounting Hardware (screws, wall plugs, mounting bracket)
- US Plug power cord
- Instrukcja obsługi (ten dokument)
4. Konfiguracja i instalacja
This mirror is designed for wall-mounted vertical installation. Ensure you have the necessary tools (drill, hammer, screwdriver, measuring tape, level) before beginning.
- Przygotuj ścianę: Choose a suitable location on the wall, ensuring it is clean, dry, and capable of supporting the mirror's weight. Use a level to mark the desired height and position for the mounting bracket.
- Wiercenie otworów: Based on the mounting bracket's pre-drilled holes, mark the drilling points on the wall. Use an appropriate drill bit for your wall type (e.g., masonry bit for concrete, wood bit for studs). Drill holes at the marked locations.
- Włóż kołki rozporowe: Gently tap the provided wall plugs (if applicable for your wall type) into the drilled holes using a hammer until they are flush with the wall surface.
- Zamontuj wspornik montażowy: Align the mounting bracket with the wall plugs and secure it firmly to the wall using the provided screws and a screwdriver. Ensure the bracket is level and securely fastened.
- Zawieś lustro: Carefully lift the mirror and align the hanging slots on the back of the mirror with the mounting bracket. Gently lower the mirror onto the bracket, ensuring it is securely seated. Leave a distance of approximately 5mm from the wall for proper ventilation and wiring.
- Podłącz zasilanie: Plug the mirror's power cord into a standard US electrical outlet.

Figure 2: Visual guide for wall mounting the mirror.
5. Instrukcja obsługi
The mirror features a touch-sensitive switch for controlling the LED lighting and adjusting its color temperature.
- Włączanie/wyłączanie: To turn the light ON or OFF, briefly press the circular touch button located on the mirror's surface (within 1 second).
- Dostosuj temperaturę barwową: To change the light color from white (6000K) to warm white (approximately 3500K), press and hold the circular touch button for 3 seconds. Release the button once the desired color temperature is achieved.
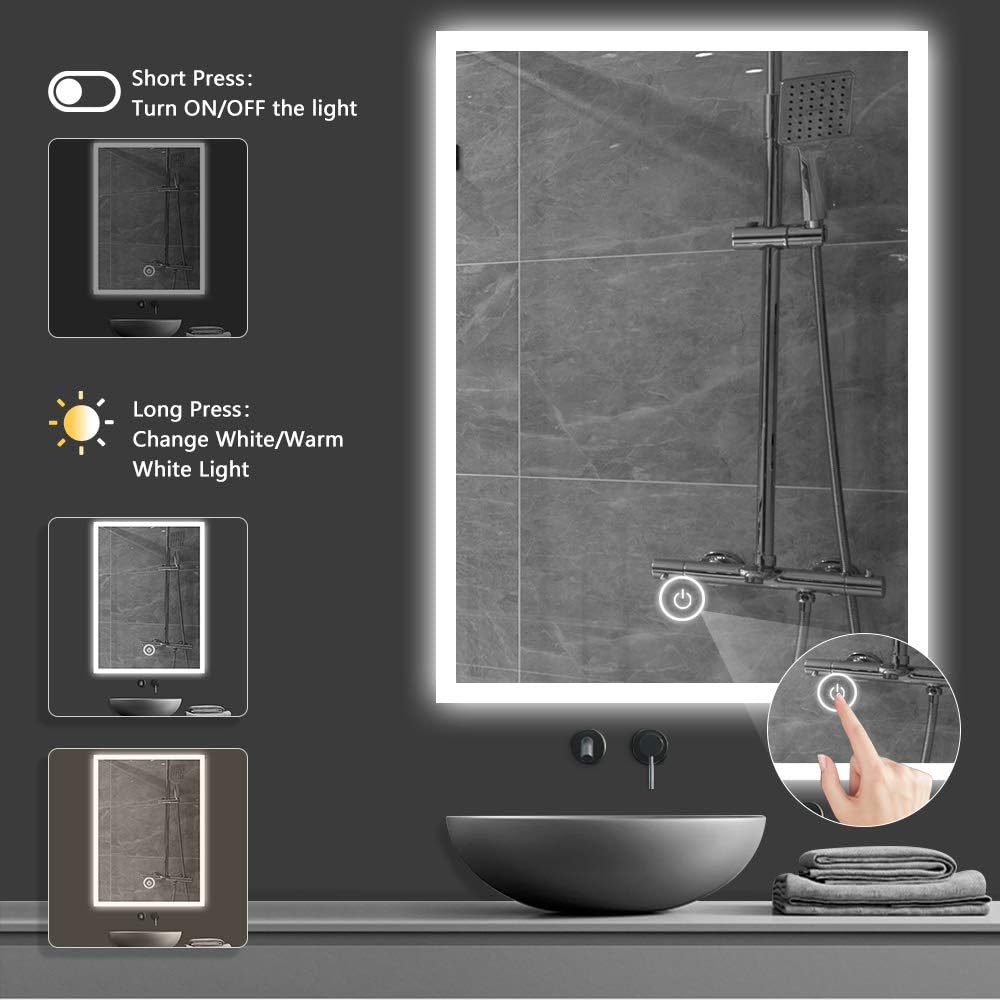
Figure 3: Touch switch operation for light control and color temperature adjustment.

Figure 4: Details on LED color temperature and lifespan.
6. Konserwacja
- Czyszczenie: Użyj miękkiego, damp cloth and a mild, non-abrasive glass cleaner to clean the mirror surface. Avoid using harsh chemicals or abrasive materials that could damage the mirror or its coating.
- Pielęgnacja ramy: Przetrzyj ramę aluminiową miękką, suchą szmatką.
- Elementy elektryczne: Ensure the power is disconnected before cleaning near electrical components. Do not spray water directly onto the mirror's edges or electrical parts.
- Kontrola: Okresowo należy sprawdzać osprzęt montażowy i połączenia elektryczne, aby mieć pewność, że są bezpieczne.
7. Rozwiązywanie Problemów
| Problem | Możliwa przyczyna | Rozwiązanie |
|---|---|---|
| Światło się nie włącza. | Brak zasilania, luźne połączenie, uszkodzony przełącznik. | Check if the mirror is properly plugged in. Ensure the power outlet is functional. Verify all connections are secure. If the issue persists, contact customer support. |
| Światło migocze lub jest słabe. | Unstable power supply; LED degradation (unlikely given lifespan). | Ensure stable power supply. If flickering continues, contact customer support. |
| Touch switch is unresponsive. | Moisture on switch; temporary malfunction. | Ensure the touch switch area is dry and clean. Try unplugging the mirror for a few minutes and then plugging it back in to reset. |
8. Specyfikacje
| Funkcja | Szczegół |
|---|---|
| Marka | MINKUROW |
| Model | 32"L x 24"W LED Lighted Bathroom Mirror |
| Wymiary produktu | 32" dł. x 24" szer. (80 cm x 60 cm) |
| Grubość | Około 3.47 cm (1.37 cala) |
| Waga przedmiotu | 17.56 funta |
| Materiał ramy | Aluminium |
| Materiał lustrzany | Copper-Free Silver Mirror (Float Glass with multiple protective layers) |
| Typ montażu | Wall Mount (Vertical) |
| Cechy specjalne | Adjustable Light Color (White/Warm White), Lighted, Touch Sensor, IP44 Waterproof |
| Temperatura barwowa diody LED | 6000K (White) to ~3500K (Warm White) |
| Żywotność diody LED | 100,000 godziny |
| CRI | >80 |
| Źródło zasilania | US Plug (AC 110-120V) |
| Stopień wodoodporności | IP44 |

Rysunek 5: Wymiary produktu.

Figure 6: High-quality silver mirror construction layers.
9. Gwarancja i wsparcie
For warranty information, technical support, or assistance with installation and operation, please contact MINKUROW customer service. Refer to your purchase documentation for specific warranty terms and contact details.
Obsługa klienta: Please visit the official MINKUROW website or contact the seller through your purchase platform for support.
Ask a question about this manual
Ask about setup, troubleshooting, compatibility, parts, safety, or missing instructions. Manuals+ will review the question and use this page’s manual context to help answer it.