
1. Wprowadzenie
The PNI House IP516 is a 16-channel Network Video Recorder (NVR) designed for advanced surveillance systems, supporting up to 5MP IP cameras and H.265 video compression. This NVR allows for local and remote monitoring, recording, and management of your security cameras. It is compatible with ONVIF protocol cameras, offering flexibility in camera selection. This manual provides essential information for the proper installation, operation, and maintenance of your PNI House IP516 NVR.
2. Zawartość opakowania
Sprawdź, czy w przesyłce znajdują się wszystkie wymienione poniżej elementy. Jeśli brakuje któregokolwiek z nich lub jest on uszkodzony, skontaktuj się ze sprzedawcą.
- PNI House IP516 NVR Unit
- Mysz USB
- Zasilacz
- Instrukcja obsługi (ten dokument)
- CD with Software
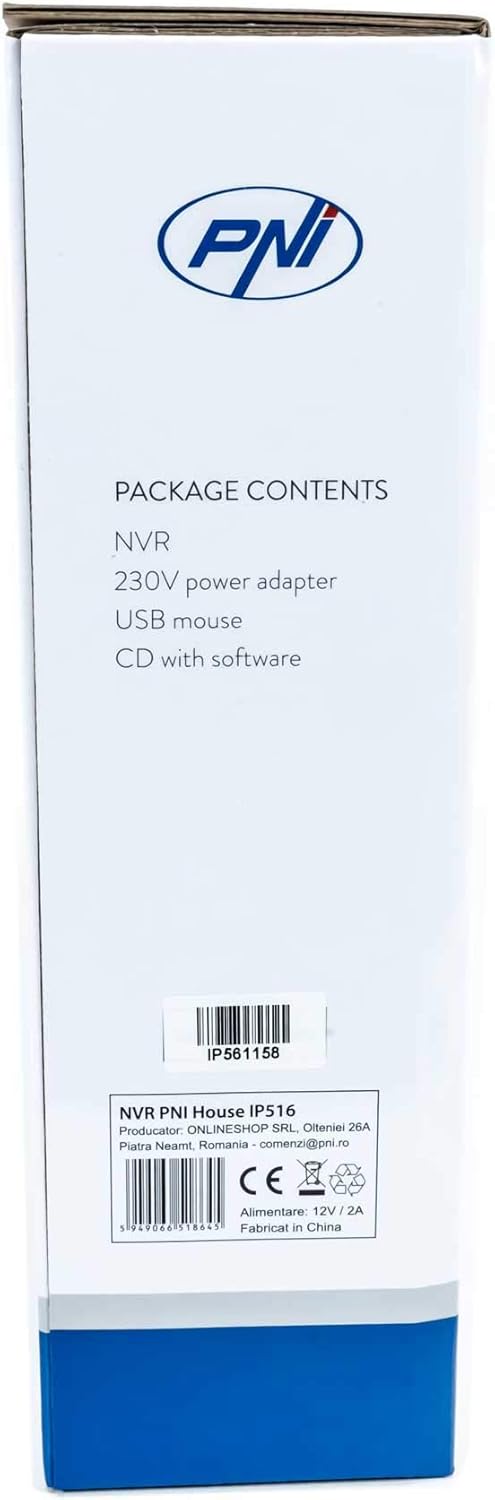
Image: Side of the NVR box detailing the package contents.

Image: The PNI House IP516 NVR unit, power adapter, and USB mouse included in the package.
3. Koniec produktuview
3.1 Panel przedni
The front panel of the NVR features indicator lights for system status.
- PWR (moc): Oznacza, że rejestrator NVR jest włączony.
- REC (Nagrywanie): Flashes when recording is active.
- NET (Sieć): Wskazuje aktywność sieci.

Obraz: Przód view of the PNI House IP516 NVR, showing the power, record, and network indicator lights.
3.2 Panel tylny
The rear panel provides all necessary connection ports for the NVR.
- Port VGA: Podłącza się do monitora VGA.
- Port HDMI: Connects to an HDMI monitor or TV for high-definition video output.
- LAN Port (RJ45 10/100 Mbps): Connects to your network router or switch.
- Porty USB (x2): For connecting the USB mouse, external storage, or for system upgrades.
- Wejście zasilania 12 V DC: Podłączany do dołączonego zasilacza.

Obraz: Tył view of the PNI House IP516 NVR, displaying VGA, HDMI, LAN, USB, and DC 12V power input ports.
4. Konfiguracja
4.1 Instalacja dysku twardego (opcjonalnie)
The NVR supports a hard drive up to 8 TB for video storage. It is recommended to use dedicated CCTV hard drives for optimal reliability and endurance.
- Odkręć i zdejmij górną pokrywę NVR.
- Podłącz kabel danych SATA i kabel zasilający rejestratora NVR do dysku twardego.
- Przymocuj dysk twardy do obudowy rejestratora NVR za pomocą dołączonych śrub.
- Załóż górną pokrywę i przykręć ją śrubami.
4.2 Połączenia początkowe
- Connect a monitor to the NVR's VGA or HDMI port.
- Podłącz mysz USB do jednego z portów USB rejestratora NVR.
- Podłącz kabel Ethernet do portu LAN rejestratora NVR i routera sieciowego lub przełącznika.
- Connect the power adapter to the NVR's DC 12V input and then plug it into a power outlet. The NVR will power on automatically.
4.3 First Boot and Basic Configuration
Po pierwszym uruchomieniu NVR przeprowadzi Cię przez kreatora konfiguracji początkowej. Postępuj zgodnie z instrukcjami wyświetlanymi na ekranie, aby:
- Ustaw silne hasło dla konta administratora.
- Skonfiguruj ustawienia daty i godziny.
- Format the installed hard drive (if applicable).
- Perform network settings (DHCP is usually enabled by default).
- Szukaj and add IP cameras to the NVR. The NVR supports up to 16 cameras at 2560x1920px (5MP) and is compatible with ONVIF protocol cameras.
5. Obsługa rejestratora NVR
5.1 Obsługa lokalna
Use the connected mouse to navigate the NVR's graphical user interface (GUI) on the monitor. Right-click to access the main menu, which includes options for live view, playback, recording settings, system configuration, and more.
5.2 Dostęp zdalny
The PNI House IP516 NVR can be accessed remotely for live viewing, playback, and configuration.
- Mobile Application (XMEye): Download the XMEye app from the Android Play Store or Apple App Store. Register an account, add your NVR by scanning its QR code or entering its serial number, and then you can view your cameras from anywhere with an internet connection.
- PC Software (General CMS): Install the General CMS software from the included CD or download it from the PNI support website. This software allows for comprehensive management of your NVR and cameras from a Windows PC.
5.3 Zarządzanie nagraniami
Rejestrator NVR obsługuje różne tryby nagrywania:
- Ciągłe nagrywanie: Nagrywa 24/7.
- Zaplanowane nagrywanie: Nagrania z określonych okresów czasu.
- Nagrywanie z wykrywaniem ruchu: Nagrywa tylko wtedy, gdy kamery wykryją ruch.
Configure these settings in the NVR's menu under 'Record' or 'Storage' settings.
5.4 Detekcja ruchu i alerty
When motion is detected, the system can trigger various alerts:
- Powiadomienia mobilne: Text notifications sent via the XMEye mobile application.
- Powiadomienia email: An email sent to a predefined address.
- Przesyłanie FTP: The recording saved to an FTP server.
These alert settings can be configured in the NVR's 'Alarm' or 'Event' menu.
6. Konserwacja
6.1 Zarządzanie dyskiem twardym
Regularly check the status of your hard drive in the NVR's storage settings. If the hard drive becomes full, the NVR will typically overwrite the oldest recordings (loop recording). You may need to format the hard drive periodically if you encounter issues or wish to clear all data.
6.2 Aktualizacje systemu
Periodically check the PNI support website for firmware updates. Firmware updates can improve performance, add new features, or fix bugs. Follow the instructions provided with the firmware update carefully to avoid damaging the device.
6.3 Czyszczenie
Ensure the NVR unit is kept clean and free from dust. Use a soft, dry cloth to wipe the exterior. Do not use liquid cleaners or aerosols directly on the unit.
7. Rozwiązywanie Problemów
| Problem | Możliwa przyczyna | Rozwiązanie |
|---|---|---|
| Rejestrator NVR nie włącza się | Brak zasilania; uszkodzony zasilacz | Sprawdź podłączenie zasilania, przetestuj zasilacz, spróbuj użyć innego gniazdka. |
| Brak wyjścia wideo na monitorze | Loose cable; incorrect input selected on monitor | Ensure VGA/HDMI cable is securely connected; select correct input on monitor. |
| Nie można uzyskać zdalnego dostępu do NVR | Network issue; incorrect app settings; NVR not connected to internet | Verify NVR network connection; check router settings; ensure correct NVR ID/serial in app. |
| Kamery nie wyświetlają | Camera not powered; network issue; incorrect camera IP/protocol | Check camera power and network cables; ensure cameras are ONVIF compatible; verify camera IP addresses. |
| Brak nagrywania | Hard drive not installed/formatted; recording schedule not set; motion detection not configured | Install and format HDD; configure recording schedule; set up motion detection zones and sensitivity. |
8. Specyfikacje
| Funkcja | Szczegół |
|---|---|
| Numer modelu | IP516 |
| Kanały | 16 |
| Maksymalna rozdzielczość | 5 MP (2560 x 1920 pikseli) |
| Kompresja wideo | H.265 |
| Kompatybilne urządzenia | IP Cameras, Smartphone |
| Technologia łączności | HDMI, USB, VGA, RJ45 Ethernet |
| Interfejs komunikacyjny | RJ45 10/100 Mb/s |
| Maksymalna pojemność magazynowa | 8 TB (dysk twardy) |
| Porty USB | 2 |
| Pobór mocy | 10 watów |
| Numer części producenta | PNI-1920P |
9. Gwarancja
The PNI House IP516 NVR comes with a standard manufacturer's warranty. Please refer to the warranty card included in your package or visit the official PNI webSzczegółowe warunki gwarancji, jej okres obowiązywania i procedury serwisowe znajdziesz na stronie. Zachowaj dowód zakupu na wypadek roszczeń gwarancyjnych.
10. Wsparcie
For technical support, troubleshooting assistance, or further inquiries regarding your PNI House IP516 NVR, please visit the official PNI website or contact their customer service department. You can find contact information and additional resources on the PNI brand store page: PNI Brand Store.