
1. Wprowadzenie
Thank you for choosing the MEDIACOM MCI 899 UHF PRO Wireless Microphone System. This system is designed to provide high-quality audio transmission with excellent reliability and ease of use. Featuring dual handheld microphones and a robust receiver, it is suitable for a variety of applications including home entertainment, stage performances, karaoke, and public speaking events. Please read this manual carefully to ensure proper setup, operation, and maintenance of your new wireless microphone system.
2. Koniec produktuview
2.1 Główne cechy
- UHF Wireless Microphone System with Dual Handsets for Multifunctional Use
- 96 Selectable Frequency Channels to minimize interference in all environments
- Smooth Wireless Operation with a wide range of over 50 meters
- Each Handset has a display screen to indicate channel number and signal strength
- Ideal for indoor and outdoor use including home, stage shows, karaoke parties, educational and religious gatherings, etc.
- Cardioid and Omni Polar Patterns
2.2 Składniki
The MEDIACOM MCI 899 UHF PRO system includes the following components:
- 1 x odbiornik bezprzewodowy UHF
- 2 x bezprzewodowe mikrofony ręczne
- 1 x zasilacz do odbiornika
- 1 x 6.35 mm kabel audio
- 1 x Skrócona instrukcja obsługi

Image: The complete MEDIACOM MCI 899 UHF PRO Wireless Microphone System, showing the receiver unit and two handheld microphones.
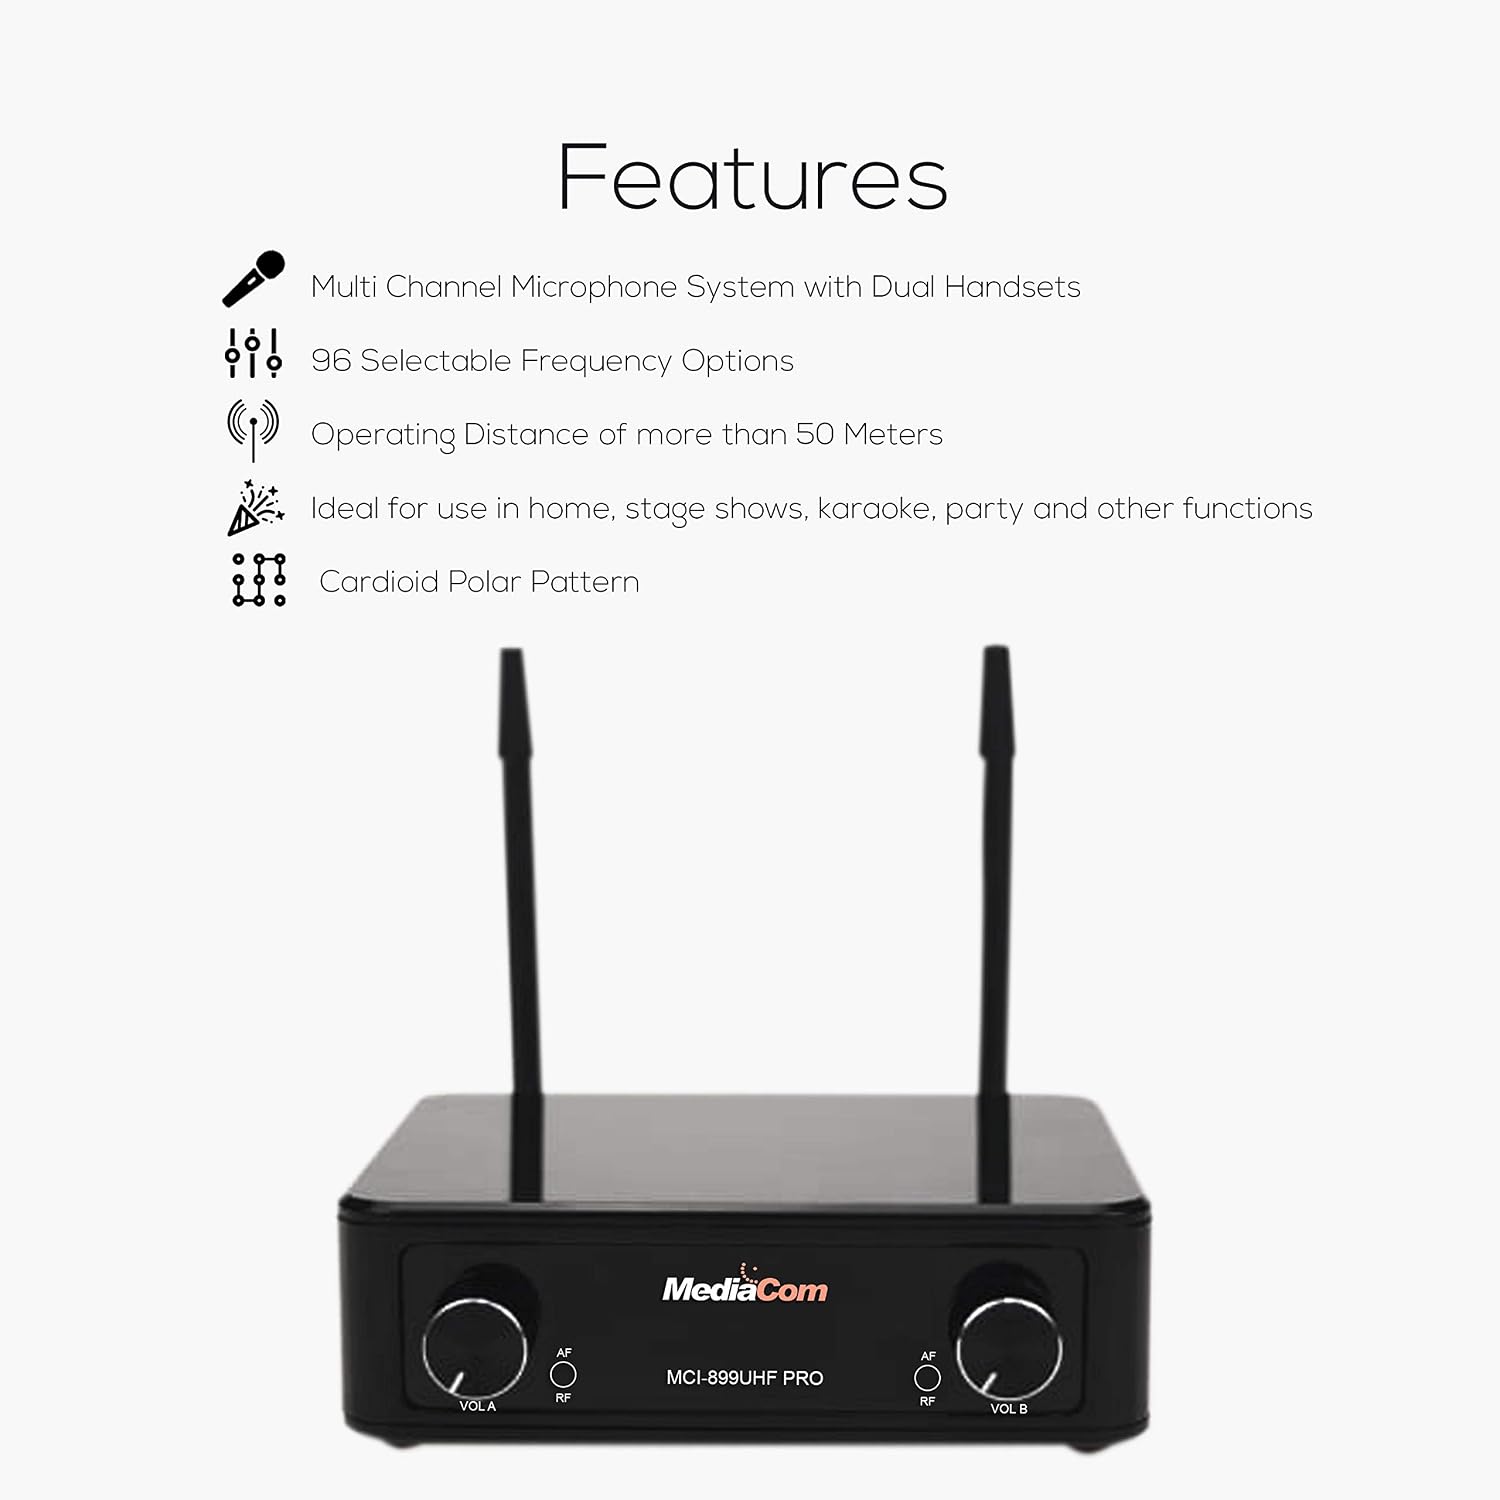
Image: Diagram illustrating the key features of the microphone system, including multi-channel support, selectable frequencies, and operating distance.
3. Instrukcje konfiguracji
3.1 Podłączenie odbiornika
- Podłączenie zasilania: Connect the provided power adapter to the 'DC IN' port on the back of the receiver. Plug the adapter into a suitable power outlet.
- Wyjście audio: Connect one end of the 6.35mm audio cable to the 'MIX OUT' port on the receiver. Connect the other end to the audio input (e.g., 'MIC IN', 'AUX IN') of your mixer, power amplifier, karaoke machine, or active speaker.
- Konfiguracja anteny: Ensure both antennas ('ANT-A' and 'ANT-B') are securely attached to the receiver and positioned vertically for optimal signal reception.
- Włączanie: Flip the 'ON/OFF' switch on the receiver to the 'ON' position. The power indicator light should illuminate.
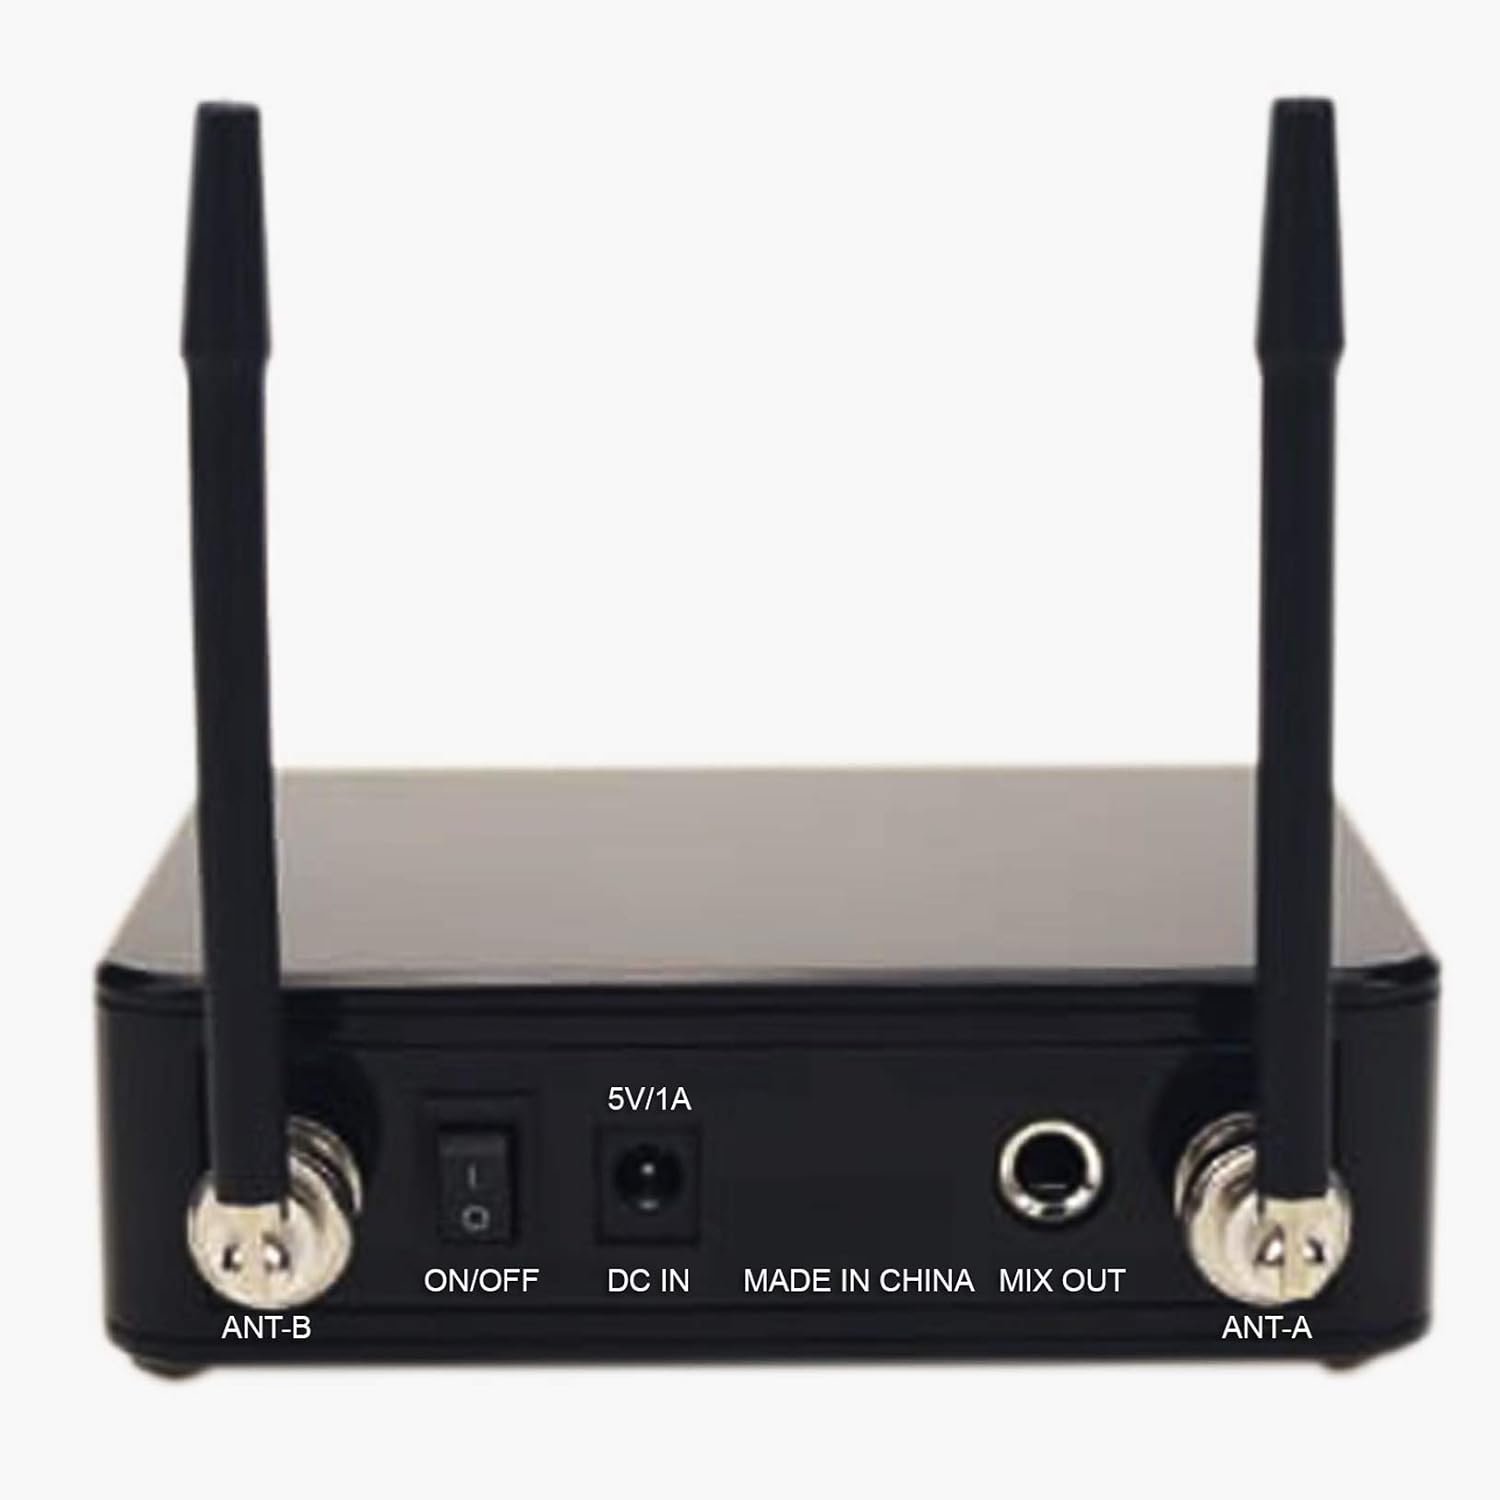
Image: Rear panel of the receiver, highlighting the ON/OFF switch, DC IN, MIX OUT, and antenna connections.

Image: A visual guide demonstrating how to connect the receiver to various audio devices such as a mixer, power amplifier, karaoke machine, or active speaker.
3.2 Konfiguracja mikrofonu
- Montaż baterii: Unscrew the bottom part of each microphone to access the battery compartment. Insert two AA batteries (not included) into each microphone, ensuring correct polarity (+/-).
- Włączanie: Slide the power switch on each microphone to the 'ON' position. The microphone display should light up, showing the channel number and signal strength.
- Parowanie kanałów: The microphones should automatically pair with the receiver. If interference occurs, you can change the frequency channel on the microphone. Refer to the 'Operating Instructions' section for details on changing channels.

Obraz: szczegółowy view of one of the handheld microphones, showing its power switch and display area.
4. Instrukcja obsługi
4.1 Podstawowa obsługa
- Włączanie/wyłączanie: Use the 'ON/OFF' switch on the receiver and the power switch on each microphone to turn the units on or off.
- Regulacja głośności: Adjust the volume for each microphone independently using the 'VOL A' and 'VOL B' knobs on the receiver.
- Wskaźniki sygnału: The 'RF' (Radio Frequency) indicator on the receiver will light up when a microphone is connected and transmitting. The 'AF' (Audio Frequency) indicator will light up when audio is being received.
4.2 Changing Frequency Channels
If you experience interference, you can change the operating frequency of the microphones:
- On the microphone, locate the channel selection button (usually near the display).
- Press the button to cycle through the available 96 frequency channels.
- Observe the receiver's 'RF' indicator. When a clear channel is selected, the 'RF' indicator should be stable, and the audio quality should improve.
- Ensure both the microphone and receiver are on the same channel for proper operation.
4.3 Wskazówki dotyczące optymalnej wydajności
- Maintain a clear line of sight between the microphones and the receiver whenever possible.
- Unikaj umieszczania odbiornika w pobliżu dużych metalowych przedmiotów lub innych urządzeń elektronicznych, które mogą powodować zakłócenia.
- Keep the operating distance within 50 meters for best performance.
- Regularly check microphone battery levels to prevent unexpected power loss during use.
5. Konserwacja
5.1 Czyszczenie
- Przetrzyj odbiornik i mikrofony miękką, suchą ściereczką.
- Nie należy używać płynnych środków czyszczących ani materiałów ściernych, gdyż mogą one uszkodzić wykończenie lub wewnętrzne elementy.
5.2 Wymiana baterii
- Replace batteries in the microphones when the display indicates low power or when audio quality degrades.
- Always use fresh AA batteries and dispose of old batteries responsibly.
5.3 Przechowywanie
- When not in use for extended periods, remove batteries from the microphones to prevent leakage.
- Przechowuj system w chłodnym, suchym miejscu, z dala od bezpośredniego światła słonecznego i ekstremalnych temperatur.
6. Rozwiązywanie Problemów
6.1 Brak dźwięku
- Sprawdź moc: Ensure both the receiver and microphones are powered on.
- Poziomy głośności: Verify that the volume knobs on the receiver and the connected audio device are turned up.
- Połączenie kablowe: Confirm the 6.35mm audio cable is securely connected from the receiver's 'MIX OUT' to the audio input of your sound system.
- Poziom naładowania baterii: Check microphone battery levels and replace if low.
6.2 Interference or Poor Sound Quality
- Zmień kanał: Select a different frequency channel on the microphone to avoid interference from other wireless devices.
- Dystans: Ensure the microphones are within the effective operating range (up to 50 meters) of the receiver.
- Przeszkody: Remove any large metal objects or other electronic devices between the microphones and the receiver.
- Pozycja anteny: Ensure receiver antennas are positioned vertically and unobstructed.
6.3 Microphone Not Pairing
- Cykl zasilania: Turn off both the microphone and receiver, then turn them back on.
- Sprawdzenie baterii: Sprawdź, czy baterie są prawidłowo zainstalowane i czy są wystarczająco naładowane.
- Niezgodność kanałów: Verify that the microphone and receiver are attempting to connect on compatible channels.
7. Specyfikacje
| Specyfikacja | Szczegół |
|---|---|
| Marka | MEDIACOM |
| Nazwa modelu | MCI899 |
| Numer części | MCI899U |
| Nazwa typu produktu | UHF Multi-Channel Wireless Microphones |
| Technologia łączności | Bezprzewodowy |
| Typ złącza | 6.35 mm Jack |
| Funkcja specjalna | Bezprzewodowy |
| Zawarte komponenty | Szybki przewodnik |
| Wzór biegunowy | Cardioid, Omni |
| Współczynnik kształtu mikrofonu | Ręczny |
| Źródło zasilania | Zasilany bateryjnie |
| Tworzywo | Semi-metal |
| Stosunek sygnału do szumu | 80dB |
| Platforma sprzętowa | Maszyna karaoke |
| Liczba kanałów | 96 |
| Zakres częstotliwości | 20 Hz - 20 kHz |
| Producent | MEDIACOM |
8. Gwarancja i wsparcie
8.1 Informacje o gwarancji
This MEDIACOM MCI 899 UHF PRO Wireless Microphone System comes with a manufacturer's warranty of two years from the date of purchase. This warranty covers defects in materials and workmanship under normal use. Please retain your proof of purchase for warranty claims.
Gwarancja nie obejmuje uszkodzeń powstałych w wyniku:
- Nieprawidłowa instalacja lub obsługa.
- Przypadkowe uszkodzenie, niewłaściwe użycie, nadużycie lub zaniedbanie.
- Repairs or modifications performed by unauthorized service personnel.
- Normalne zużycie.
8.2 Obsługa klienta
For technical assistance, troubleshooting beyond this manual, or warranty inquiries, please contact MEDIACOM customer support. Refer to the contact information provided with your product packaging or visit the official MEDIACOM webstronie, aby uzyskać szczegółowe informacje na temat pomocy technicznej.