
1. Wprowadzenie
This manual provides detailed instructions for the setup, operation, and maintenance of your BMW Multi-Function Clock, Alarm, and Weather Station. This device combines a digital clock, an alarm with a snooze function, and a weather station that displays temperature. Please read this manual carefully before use to ensure proper functionality and to maximize your experience with the product.
2. Zawartość opakowania
Proszę sprawdzić zawartość opakowania po rozpakowaniu. Jeśli brakuje któregokolwiek elementu lub jest on uszkodzony, prosimy o kontakt ze sprzedawcą.
- BMW Multi-Function Clock, Alarm, and Weather Station Unit
- Instrukcja obsługi (ten dokument)
3. Konfiguracja
3.1. Instalacja baterii
Urządzenie wymaga 2 baterie AAA (not included) for operation. Follow these steps to install the batteries:
- Znajdź pokrywę komory baterii z tyłu urządzenia.
- Aby otworzyć komorę, delikatnie przesuń lub unieś pokrywę.
- Włóż dwie baterie AAA, zwracając uwagę na prawidłową biegunowość (+ i -), zgodnie ze wskazaniami wewnątrz komory.
- Dokładnie załóż pokrywę komory baterii.
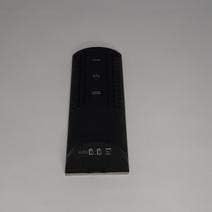
Rysunek 3.1: Z powrotem view of the device, illustrating the battery compartment and control buttons for setup.
3.2. Pierwsze włączenie zasilania
After battery installation, the device display will illuminate, and it will typically show a default time or begin searching for a signal (if applicable for weather functions). Proceed to the operating instructions to set the time and other functions.
4. Instrukcja obsługi
4.1. Ustawianie czasu i daty
Aby ustawić aktualną godzinę i datę:
- Naciśnij i przytrzymaj TRYB button (usually located on the back or side) for a few seconds until the time display starts flashing.
- Użyj UP or W DÓŁ buttons (often labeled '+' or '-') to adjust the hour.
- Naciskać TRYB again to confirm the hour and move to the minutes.
- Dostosuj minuty za pomocą UP or W DÓŁ pikolak.
- Kontynuuj naciskanie TRYB and adjusting with GÓRA/DÓŁ for year, month, and day settings.
- Naciskać TRYB po raz ostatni, aby wyjść z trybu ustawień.
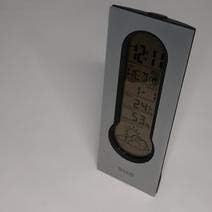
Rysunek 4.1: Front display of the device, showing the digital clock, temperature, and weather forecast icons.
4.2. Ustawianie alarmu
Aby ustawić godzinę alarmu:
- W normalnym trybie wyświetlania czasu naciśnij przycisk ALARM przycisk (lub TRYB repeatedly until 'AL' or an alarm icon appears).
- Naciśnij i przytrzymaj ALARM Naciskaj przycisk, aż zacznie migać godzina alarmu.
- Użyj UP or W DÓŁ przyciski umożliwiające ustawienie żądanej godziny alarmu.
- Naciskać ALARM again to confirm the hour and move to the minutes.
- Dostosuj minuty za pomocą UP or W DÓŁ pikolak.
- Naciskać ALARM one last time to save the alarm setting. An alarm icon will typically appear on the display to indicate the alarm is active.
4.3. Using Snooze Function
Gdy zabrzmi alarm, naciśnij DRZEMKA button (usually a large button on the top of the unit) to temporarily silence the alarm. The alarm will sound again after a few minutes (typically 5-10 minutes, depending on the model). To turn off the alarm completely, press any other button or let it ring until it automatically stops.

Rysunek 4.2: Szczyt view of the device, highlighting the prominent SNOOZE button.
4.4. Wyświetlacz temperatury
The device continuously displays the ambient temperature. The temperature unit (Celsius or Fahrenheit) can usually be switched by pressing a dedicated button (e.g., 'C/F' or 'TEMP') or by holding down one of the adjustment buttons during time setting.
4.5. Weather Station Function
The integrated weather station provides a basic weather forecast using graphical icons (e.g., sun, clouds, rain). This forecast is based on internal barometric pressure changes and is an estimation for the local area. It is not connected to external weather services.
5. Konserwacja
5.1. Czyszczenie
To clean the device, use a soft, dry cloth. Do not use abrasive cleaners, solvents, or chemical sprays, as these can damage the surface and electronic components. Avoid getting moisture into the device.
5.2. Wymiana baterii
When the display dims or functions become erratic, it is time to replace the batteries. Follow the battery installation steps in Section 3.1. Always replace both batteries at the same time with new AAA batteries.
6. Rozwiązywanie Problemów
Jeśli napotkasz problemy z urządzeniem, zapoznaj się z poniższymi typowymi problemami i ich rozwiązaniami:
- Wyświetlacz jest pusty lub przyciemniony:
Check if batteries are installed correctly. Replace with fresh AAA batteries. - Nieprawidłowa godzina lub data:
Refer to Section 4.1 to reset the time and date. Ensure you confirm each setting step. - Alarm nie włącza się:
Verify that the alarm is set and activated (look for an alarm icon on the display). Ensure the volume is not set to zero if adjustable. - Odczyt temperatury wydaje się niedokładny:
Ensure the device is not placed in direct sunlight, near heat sources, or in drafts, which can affect readings. Allow some time for the sensor to stabilize after placement. - Weather forecast icons are not changing:
The weather forecast is based on local barometric pressure changes and may take time to update. It provides a general trend, not a precise forecast.
7. Specyfikacje
| Funkcja | Szczegół |
|---|---|
| Marka | BMW |
| Numer modelu | 06017443015007 |
| Cechy specjalne | Alarm, Snooze, Temperature Display |
| Źródło zasilania | Bateria |
| Typ baterii | 2 baterie AAA (brak w zestawie) |
| ASIN | B089QGJ9VR |
8. Gwarancja i wsparcie
This product is covered by a standard manufacturer's warranty. For specific warranty terms and conditions, please refer to the documentation provided at the time of purchase or contact your retailer. For technical support or service inquiries, please reach out to the point of purchase or the manufacturer's customer service department.