
1. Wprowadzenie
Dziękujemy za zakupasing the Vonyx VSA15 Active Bi-Amplified Speaker. This manual provides important information regarding the safe operation, installation, and maintenance of your speaker. Please read it thoroughly before use and keep it for future reference.
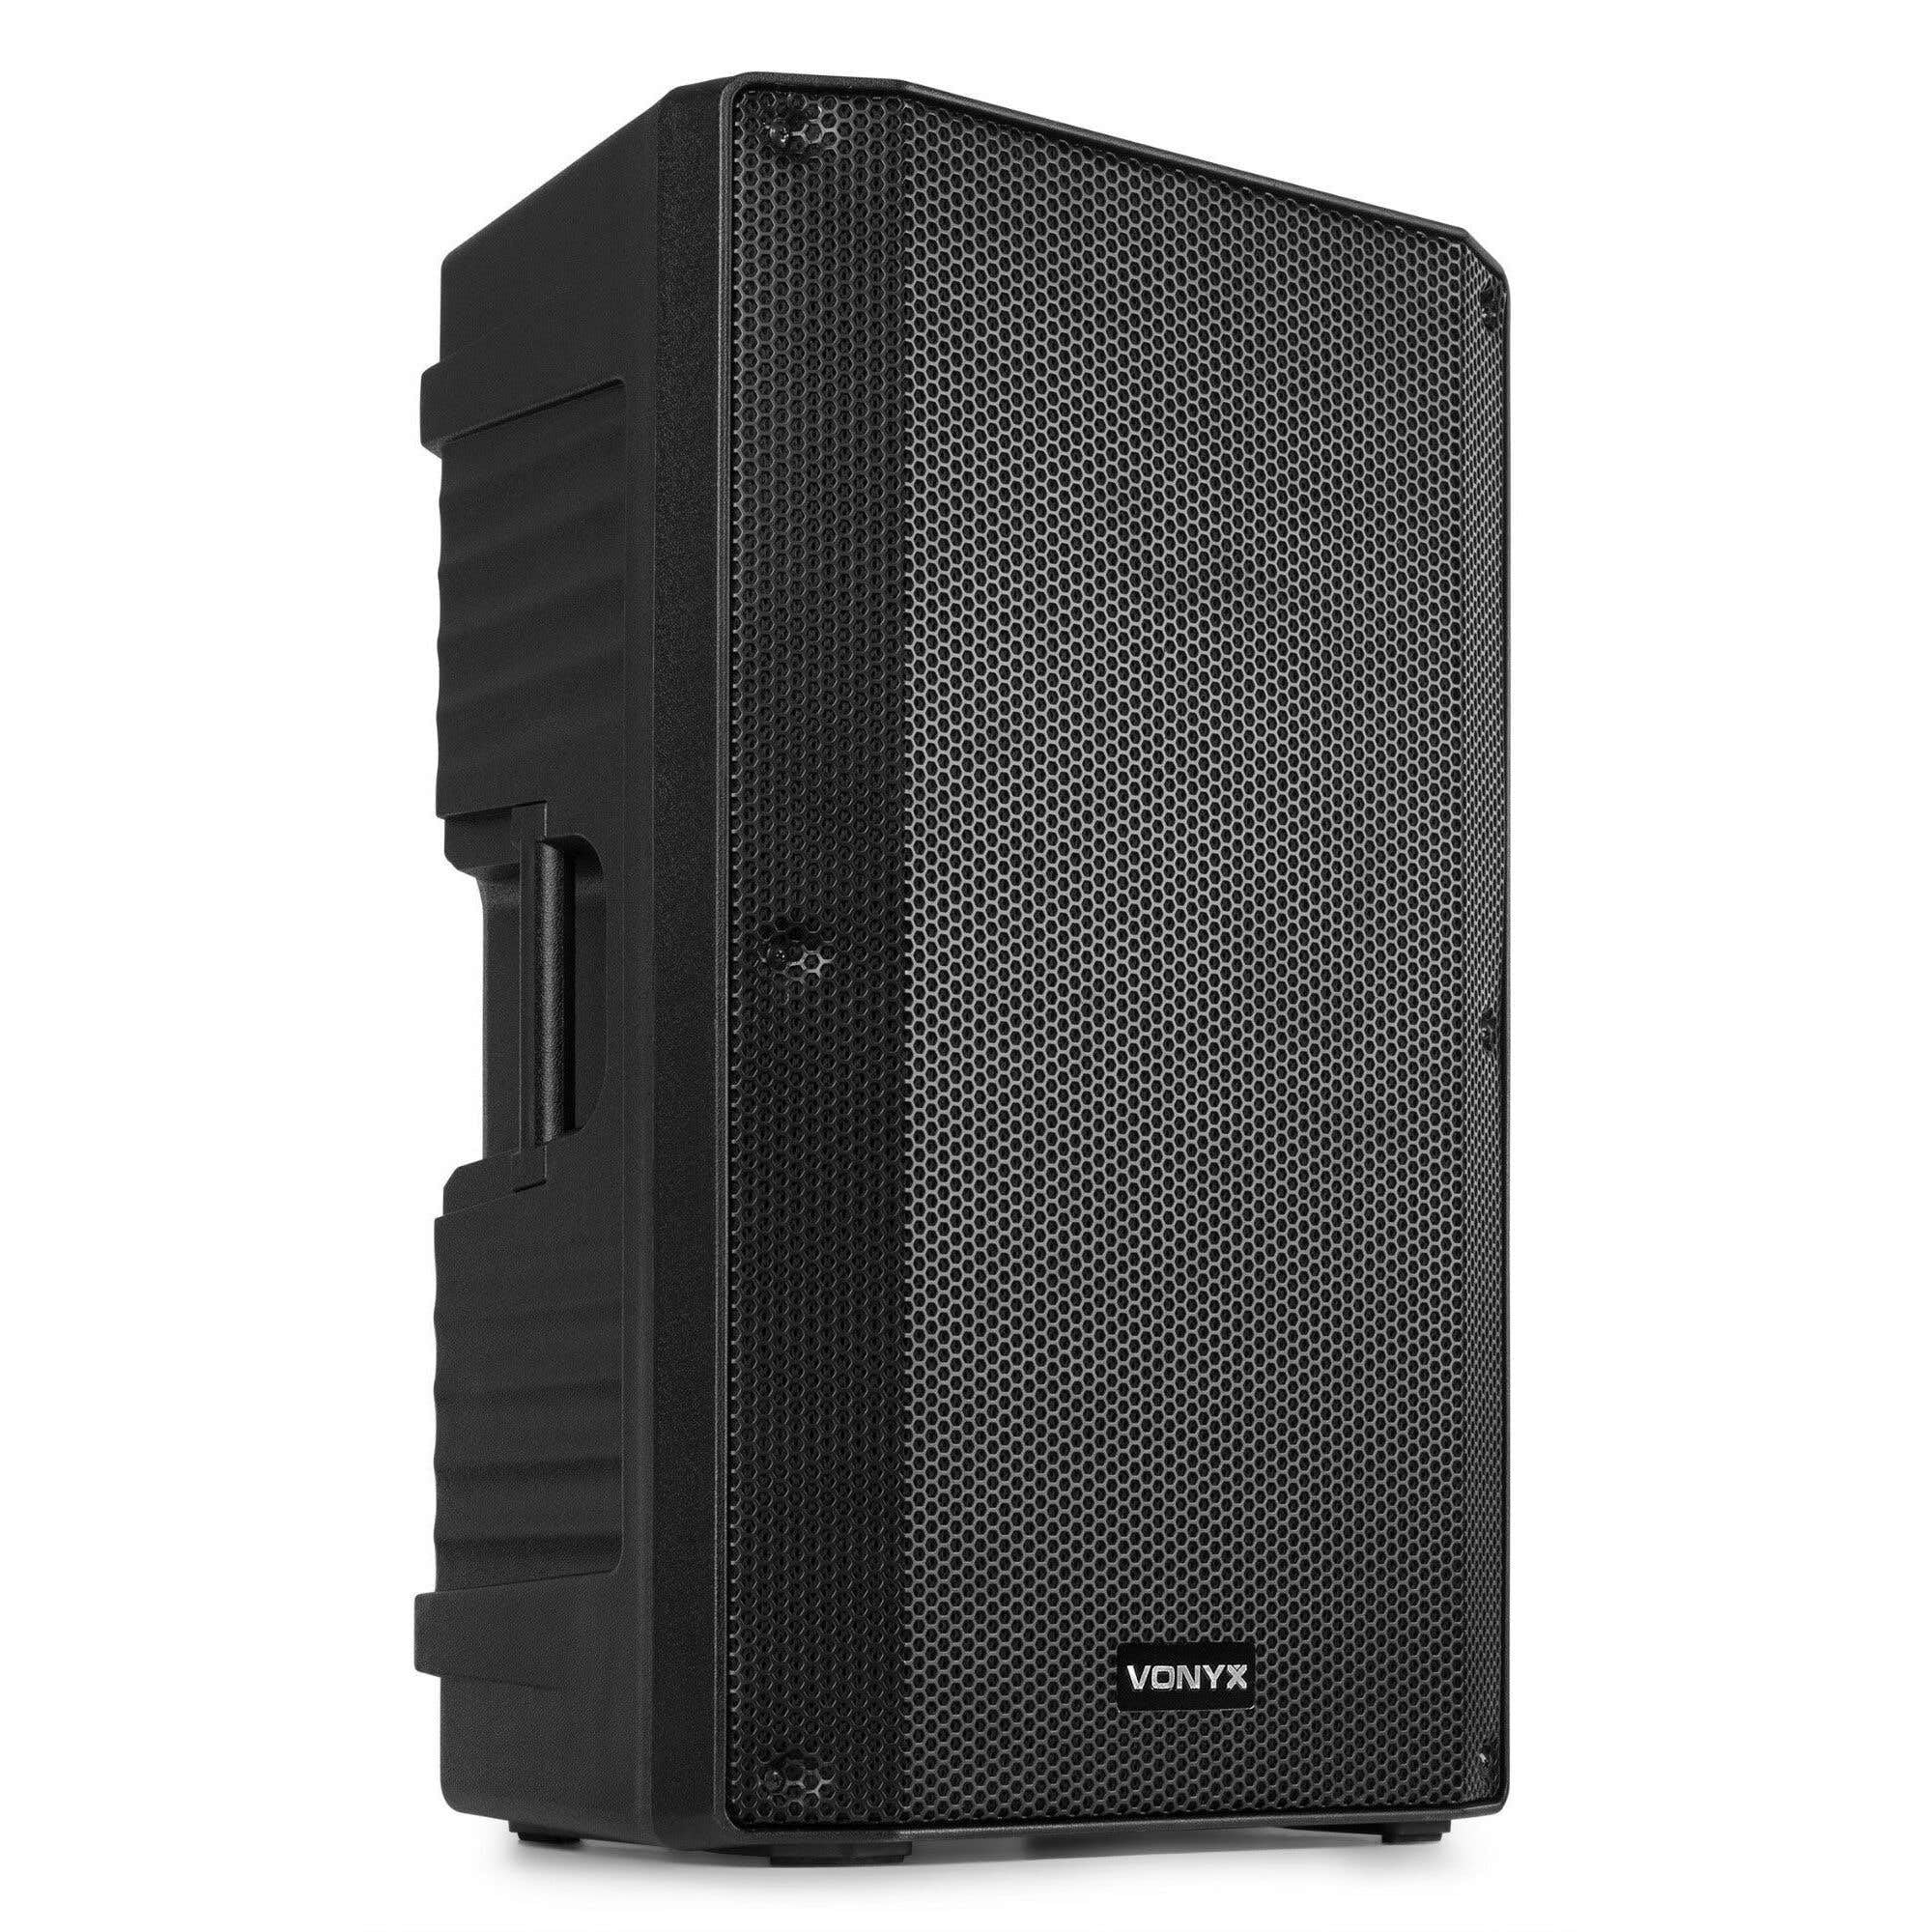
Obraz 1.1: Widok z przodu pod kątem view of the Vonyx VSA15 active speaker.
2. Instrukcje bezpieczeństwa
Aby zmniejszyć ryzyko porażenia prądem, nie zdejmuj pokrywy. Wewnątrz nie ma części, które mogą być serwisowane przez użytkownika. Zleć naprawę wykwalifikowanemu personelowi serwisowemu.
- Zasilanie: Upewnij się, że napięcie zasilaniatage matches the rating on the speaker.
- Wentylacja: Do not block ventilation openings. Install according to manufacturer's instructions.
- Woda i wilgoć: Nie wystawiaj urządzenia na działanie deszczu ani wilgoci. Nie stawiaj na urządzeniu przedmiotów wypełnionych płynami.
- Ciepło: Nie należy instalować urządzenia w pobliżu źródeł ciepła, takich jak grzejniki, kratki wentylacyjne, piece i inne urządzenia wytwarzające ciepło.
- Kable: Chroń przewód zasilający przed deptaniem i przytrzaśnięciem.
- Czyszczenie: Czyścić wyłącznie suchą szmatką.
- Montowanie: Używaj tylko ze stojakiem, statywem, wspornikiem lub stołem określonym przez producenta lub sprzedawanym z urządzeniem.
3. Koniec produktuview
3.1 Główne cechy
- Powerful 15-inch woofer with 1000 watts maximum output.
- Integrated 2-way active crossover for optimized sound.
- Bi-amplified design with integrated ampliyfikator.
- Multiple inputs: Microphone (XLR/Jack), Guitar (Jack), Line (RCA/XLR/Jack).
- Line output for connecting additional speakers.
- Durable ABS plastic housing with metal grille.
- Equipped with wheels and large handles for easy transport.
- 35mm pole mount for stand installation.
3.2 Panel sterowania i połączenia
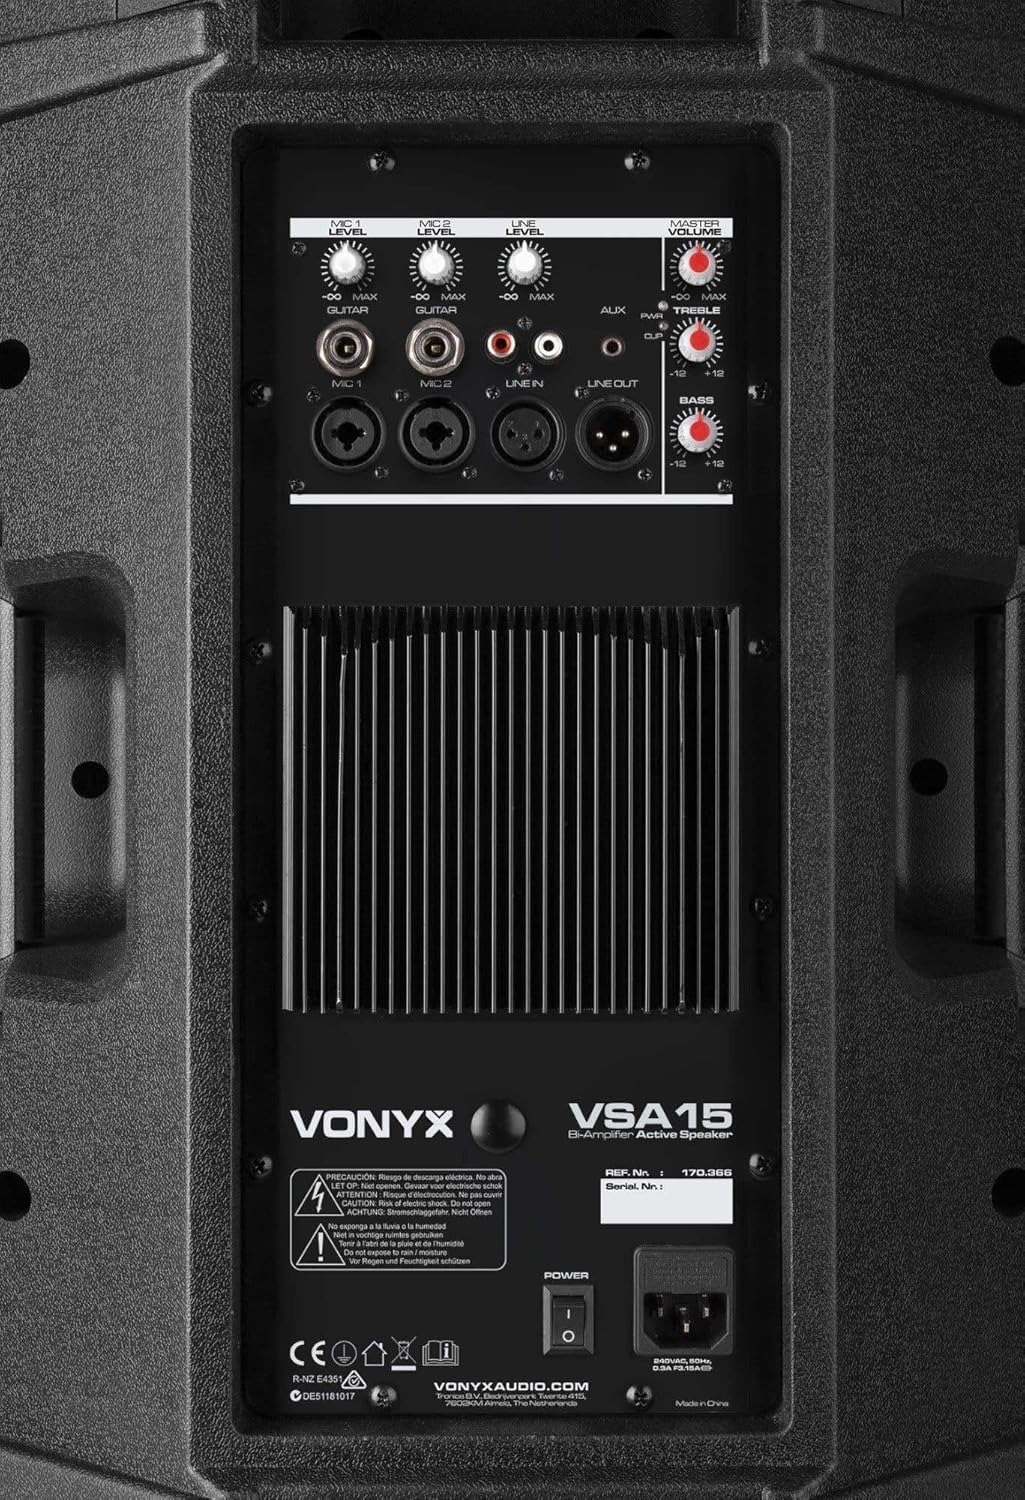
Image 3.2.1: Rear control panel showing inputs, outputs, and volume controls.
- Wejście MIC 1: XLR/Jack combo input for microphone.
- Wejście MIC 2: XLR/Jack combo input for microphone.
- Wejście GITARA: 1/4" Jack input for guitar.
- Wejście liniowe: RCA/XLR/Jack inputs for line-level audio sources (e.g., mixer, CD player).
- Wejście AUX: Auxiliary input for portable devices.
- Wyjście LINE: XLR output for connecting to another active speaker or mixer.
- Regulacja głośności: Individual volume controls for MIC 1, MIC 2, GUITAR, LINE, and MASTER.
- Sterowanie korektorem: Treble and Bass adjustment knobs.
- Przycisk zasilania: Wyłącznik zasilania urządzenia.
- Pobór mocy: Złącze zasilania IEC do głównego kabla zasilającego.
4. Konfiguracja
4.1 Rozpakowanie
Carefully remove the speaker from its packaging. Inspect the unit for any signs of damage during transit. Retain the original packaging for future transport or storage.
4.2 Umieszczenie
The VSA15 speaker can be placed on a flat, stable surface or mounted on a standard 35mm speaker pole stand. Ensure the speaker is stable and secure to prevent tipping.

Obraz 4.2.1: Dół view with integrated wheels and 35mm pole mount socket.

Image 4.2.2: Top handle for easy lifting and transport.
4.3 Połączenie zasilania
- Upewnij się, że wyłącznik zasilania głośnika jest w pozycji WYŁĄCZONY.
- Connect the supplied power cable to the IEC power input on the rear panel of the speaker.
- Plug the other end of the power cable into a suitable 230V AC power outlet.
4.4 Połączenia audio
Podłącz źródła dźwięku do odpowiednich wejść na tylnym panelu:
- Mikrofony: Use XLR or 1/4" Jack cables to connect microphones to the MIC 1 or MIC 2 inputs.
- Gitara: Use a 1/4" Jack cable to connect a guitar to the GUITAR input.
- Urządzenia liniowe: Use RCA, XLR, or 1/4" Jack cables to connect mixers, CD players, or other line-level audio sources to the LINE inputs.
- Dodatkowi prelegenci: To connect another active speaker, use an XLR cable from the LINE OUT of the VSA15 to the input of the second speaker.
5. Instrukcja obsługi
- Włączanie: After all connections are made, turn on the speaker using the power switch on the rear panel.
- Regulacja głośności: Start with all individual input volume controls and the MASTER volume control set to their minimum positions.
- Input Level Setting: Gradually increase the volume control for the specific input you are using (MIC 1, MIC 2, GUITAR, LINE) until the desired level is achieved.
- Głośność: Adjust the MASTER volume control to set the overall output level of the speaker.
- Kontrola tonów: Use the TREBLE and BASS knobs to adjust the high and low frequencies to your preference.
- Wyłączone: Before disconnecting power or cables, turn the MASTER volume down and then switch off the speaker.
Notatka: Avoid operating the speaker at excessively high volumes for extended periods to prevent damage to the components and hearing loss.
6. Konserwacja
- Czyszczenie: Regularly clean the speaker cabinet with a soft, dry cloth. Do not use abrasive cleaners or solvents.
- Krata: Keep the metal grille free from dust and debris to ensure proper sound dispersion and cooling.
- Składowanie: When not in use for extended periods, store the speaker in a dry, dust-free environment, preferably in its original packaging.
- Kontrola: Periodically check all cables and connections for wear or damage. Replace any faulty cables immediately.
7. Rozwiązywanie Problemów
| Problem | Możliwa przyczyna | Rozwiązanie |
|---|---|---|
| Brak dźwięku. |
|
|
| Zniekształcony dźwięk. |
|
|
| Brzęczenie lub brzęczenie. |
|
|
8. Specyfikacje
| Numer modelu | VSA15 |
| Marka | VONYKS |
| Maksymalna moc wyjściowa | 1000 watów |
| Średnica głośnika niskotonowego | 15 cali |
| Średnica głośnika wysokotonowego | 1.35 cali |
| Odpowiedź częstotliwościowa | 35 Hz (Lower limit, full range not specified) |
| Technologia łączności | Wired (Jack, XLR, RCA) |
| Tryb wyjścia audio | Stereo (Implied by 2.1 channels, but typically mono for a single PA speaker) |
| Wejście Voltage | 230 wolty |
| Materiał szafki | Tworzywo ABS |
| Typ głośnika | Monitor / Active PA Speaker |
| Zalecane zastosowania | Public speeches, musical performances, DJ events, home parties, karaoke, indoor and outdoor events. |
| Waga przedmiotu | 16.4 kilograma |
| Wymiary (wys. x szer. x gł.) | 68cm x 42cm x 36cm (approximate, based on image) |

Image 8.1: Approximate dimensions of the VSA15 speaker.
9. Gwarancja i wsparcie
Information regarding warranty coverage and customer support is typically provided with your purchase documentation or can be found on the official Vonyx website. Please refer to these resources for details on warranty periods, service procedures, and contact information for technical assistance.
For further assistance, please visit the official VONYX webstrona: www.vonyxaudio.com