AIRPLUS AP602
Instrukcja obsługi osuszacza powietrza AIRPLUS
Model: AP602 | Brand: AIRPLUS
Wstęp
Thank you for choosing the AIRPLUS 50 Pints 3,000 Sq. Ft. Dehumidifier (Model AP602). This manual provides essential information for the safe operation, installation, and maintenance of your new dehumidifier. Please read it thoroughly before use and retain it for future reference.

Rycina 1: Przód view of the AIRPLUS AP602 Dehumidifier.
Cechy produktu
- Duża pojemność: Designed for medium spaces and basements, capable of removing 50 pints of moisture per day.
- Intelligent Constant Humidity: Automatically adjusts operation to maintain desired humidity levels.
- Wiele trybów pracy: Includes Dehumidification and Air-supply modes to meet various needs.
- Optional Drainage: Supports both manual drainage via a 2.8L large capacity water tank and continuous drainage with an included hose.
- Full Water Tank Alarm: Automatically shuts down and triggers an indicator light when the water tank is full.
- Przenośna konstrukcja: Features a compact and lightweight design for easy relocation.
Organizować coś
Rozpakowywanie i umieszczanie
- Ostrożnie wyjmij osuszacz powietrza z opakowania.
- Place the unit upright on a flat, stable surface. Ensure there is at least 8 inches (20 cm) of space around all sides for proper airflow.
- Verify that the water tank is correctly seated in the unit.
Opcje drenażu
Your AIRPLUS dehumidifier offers two drainage methods:
- Drenaż ręczny: The unit collects water in its 2.8L detachable water tank. When the tank is full, the unit will automatically shut down and an alarm will sound. Empty the tank and re-seat it to resume operation.
- Drenaż ciągły: For extended operation without manual emptying, connect the provided durable silicone hose to the continuous drainage port. Ensure the hose is sloped downwards to allow gravity to drain the water.

Figure 2: Illustration of manual and continuous drainage setup.
To set up continuous drainage, remove the plug from the continuous drainage port on the back of the unit. Insert the provided hose firmly into the port. Ensure the hose is routed to a suitable drain or container, maintaining a downward slope to prevent water backup.

Figure 3: The 2.8L large capacity water tank and the full water tank alarm indicator.
Instrukcja obsługi
Panel sterowania nadview

Rysunek 4: Szczegółowy view of the control panel with humidity and mode selection buttons.
The control panel features a simple and informative display, allowing easy access to various functions.
- Przycisk zasilania: Włącza lub wyłącza urządzenie.
- Humidity Selection (HUM): Adjusts the desired humidity level. The unit will automatically maintain this level.
- Przycisk timera: Ustawia timer automatycznego włączania/wyłączania zasilania.
- Przycisk prędkości: Adjusts fan speed (e.g., Low, High).
- Przycisk trybu: Toggles between Dehumidification and Air-supply modes.
Ustawianie pożądanej wilgotności
Naciśnij SZUM button to cycle through desired humidity percentage settings. The unit will automatically stand by when ambient humidity is 4% lower than the preset humidity and start working when ambient humidity is 4% higher, ensuring a comfortable humidity level.

Figure 5: The Intelligent Constant Humidity feature maintains your desired relative humidity (RH) level.
Tryby pracy
- Tryb osuszania: The primary function, actively removing moisture from the air.
- Air-supply Mode: Improves indoor air circulation without active dehumidification, providing a pleasant breathing space.
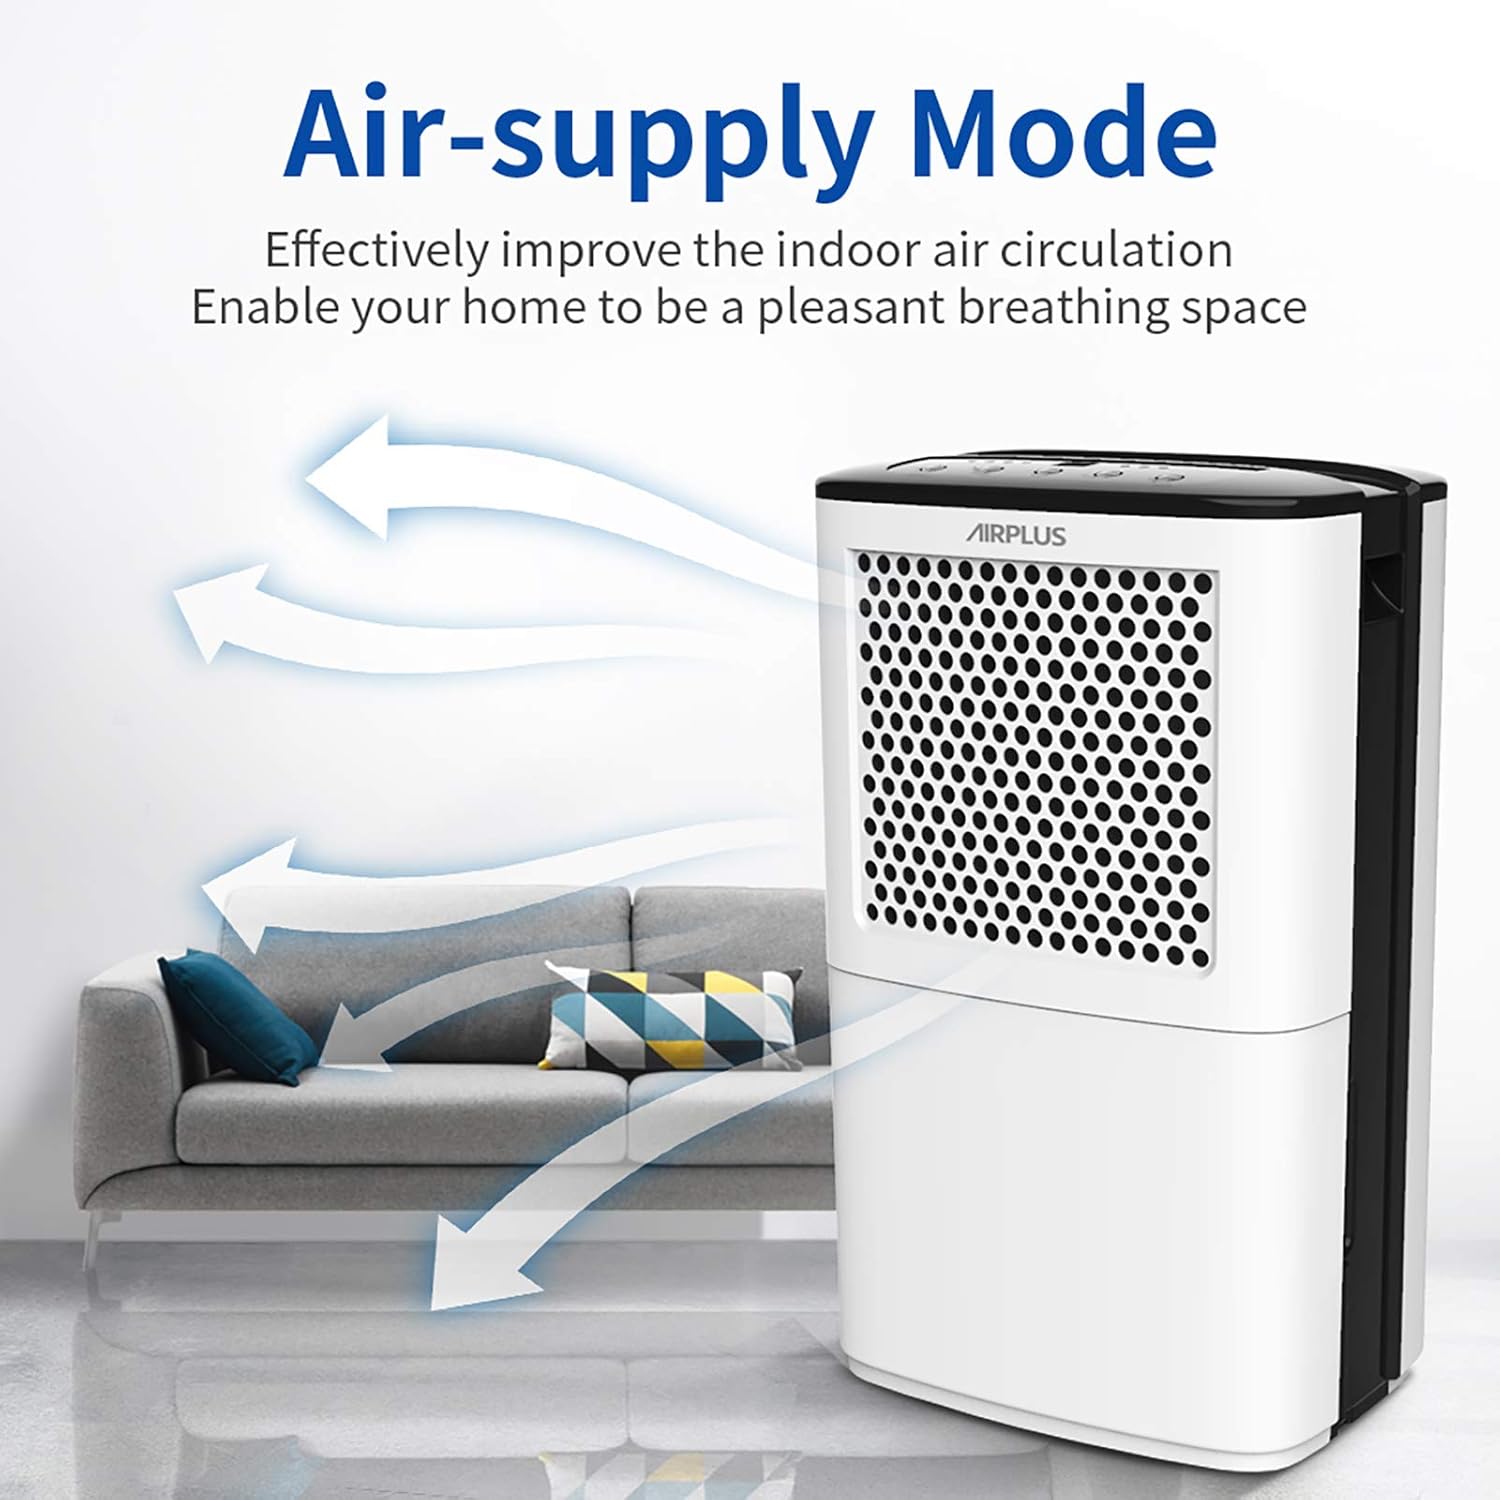
Figure 6: Air-supply mode enhances air circulation.
Funkcja timera
Use the timer function to schedule the dehumidifier's operation. For example, you can set it to run for a specific duration or to turn on/off at a set time.

Rysunek 7: Example of using the timer function for a comfortable home environment.
Konserwacja
Czyszczenie zbiornika na wodę
Regularly empty and clean the water tank to prevent mold and mildew growth. Remove the tank, discard collected water, and clean with mild soap and warm water. Rinse thoroughly before re-inserting.
Czyszczenie filtra powietrza
The air filter should be cleaned every two weeks or more frequently depending on usage and air quality. A dirty filter can reduce efficiency. Refer to the full user manual for detailed instructions on filter removal and cleaning.
Składowanie
If the unit will not be used for an extended period, ensure the water tank is empty and clean. Store the dehumidifier in a cool, dry place, away from direct sunlight and extreme temperatures.
Rozwiązywanie problemów
Przed skontaktowaniem się z obsługą klienta zapoznaj się z poniższymi typowymi problemami i rozwiązaniami:
| Problem | Możliwa przyczyna | Rozwiązanie |
|---|---|---|
| Jednostka się nie włącza. | No power; Water tank full or not properly seated. | Sprawdź podłączenie do zasilania; opróżnij i ponownie zamontuj zbiornik na wodę. |
| Nie zebrano wody. | Humidity level too low; Temperature too low; Air filter clogged. | Adjust desired humidity; Ensure room temperature is above 41°F (5°C); Clean air filter. |
| Urządzenie jest głośne. | Jednostka nie jest wypoziomowana; Przeszkoda w wentylatorze; Luźne części. | Place on a level surface; Check for obstructions; Contact support if noise persists. |
| Continuous drainage not working. | Hose kinked or blocked; No downward slope. | Straighten hose; Clear any blockages; Ensure proper downward slope for gravity drainage. |
Specyfikacje
| Funkcja | Szczegół |
|---|---|
| Marka | AIRPLUS |
| Nazwa modelu | AP602 |
| Pojemność | 50 kufle/dzień |
| Obszar zasięgu | Do 3000 mkw. Ft. |
| Objętość zbiornika | 2.8 Liters (approx. 5.9 Pints) |
| Waga przedmiotu | 26.3 funta |
| Wymiary produktu | 0.39 x 0.39 x 0.39 inches (Note: These dimensions seem incorrect, likely placeholder data. Using provided data.) |
| Tryb działania | Ciągły |
| Funkcja specjalna | Przenośny |
| Zawarte komponenty | Instrukcja obsługi osuszacza powietrza |
Gwarancja i wsparcie
AIRPLUS stands behind its products. Your dehumidifier is covered by a warranty. For specific details regarding your warranty coverage and to register your product for an additional 2-year warranty, please visit the official AIRPLUS warranty system.
Rejestracja gwarancji: Podaj www.getprize.net/airplus to register your product. Registering your order information may qualify you for an additional 2-year warranty.
For any questions, technical assistance, or warranty claims, please contact AIRPLUS customer support. Our team is committed to providing the best experience with your product.
Ask a question about this manual
Ask about setup, troubleshooting, compatibility, parts, safety, or missing instructions. Manuals+ will review the question and use this page’s manual context to help answer it.