1. Wprowadzenie
This manual provides detailed instructions for the installation, operation, and maintenance of your Anlapus 1080p HD-TVI Surveillance Camera. Please read this manual thoroughly before using the product to ensure proper function and safety.
The Anlapus HD-TVI camera is designed for both indoor and outdoor surveillance, offering high-definition video quality and robust performance in various environmental conditions.
2. Zawartość opakowania
Sprawdź, czy wszystkie wymienione poniżej elementy znajdują się w Twojej paczce. Jeśli brakuje któregokolwiek z nich lub jest on uszkodzony, skontaktuj się z obsługą klienta.
- 4 x Anlapus 1080p HD-TVI Cameras
- 4 kable wideo BNC
- 1 x Zasilacz
- 1 x kabel rozdzielający zasilanie 1 do 4
- 4 x naklejek ostrzegawczych
- 4 x Mounting Screw Bags (including screws and wall plugs)
- 4 x szablony otworów montażowych
- 1 x Skrócona instrukcja obsługi
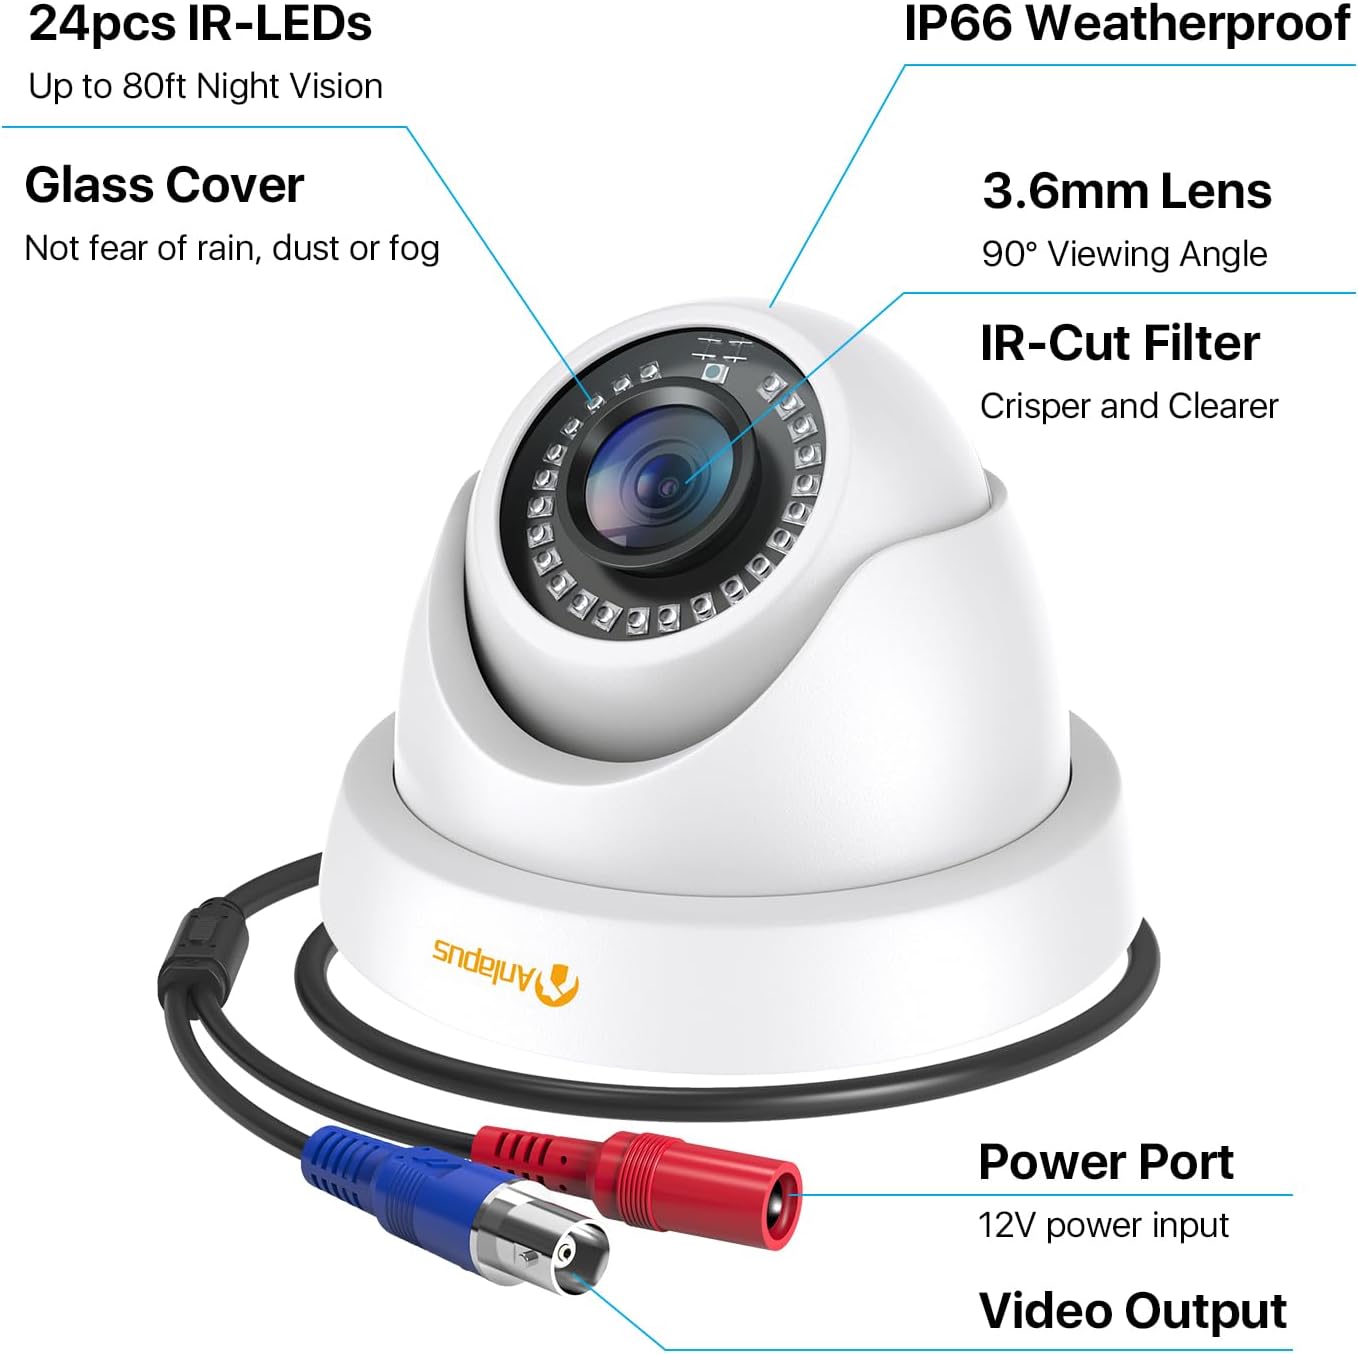
3. Funkcje produktu
- Rozdzielczość HD 1080p: Zapewnia wyraźny i szczegółowy obraz wideotage (1920x1080 pixels).
- Szeroki Viewkąt ing: Equipped with a 3.6mm lens, offering a 90-degree field of view.
- HD-TVI Compatibility: Designed to work with HD-TVI DVRs. Ensure your DVR supports HD-TVI technology.
- Zaawansowane widzenie w nocy: Features 24 IR-Cut LEDs for up to 24 meters (80 feet) of clear black and white night vision.
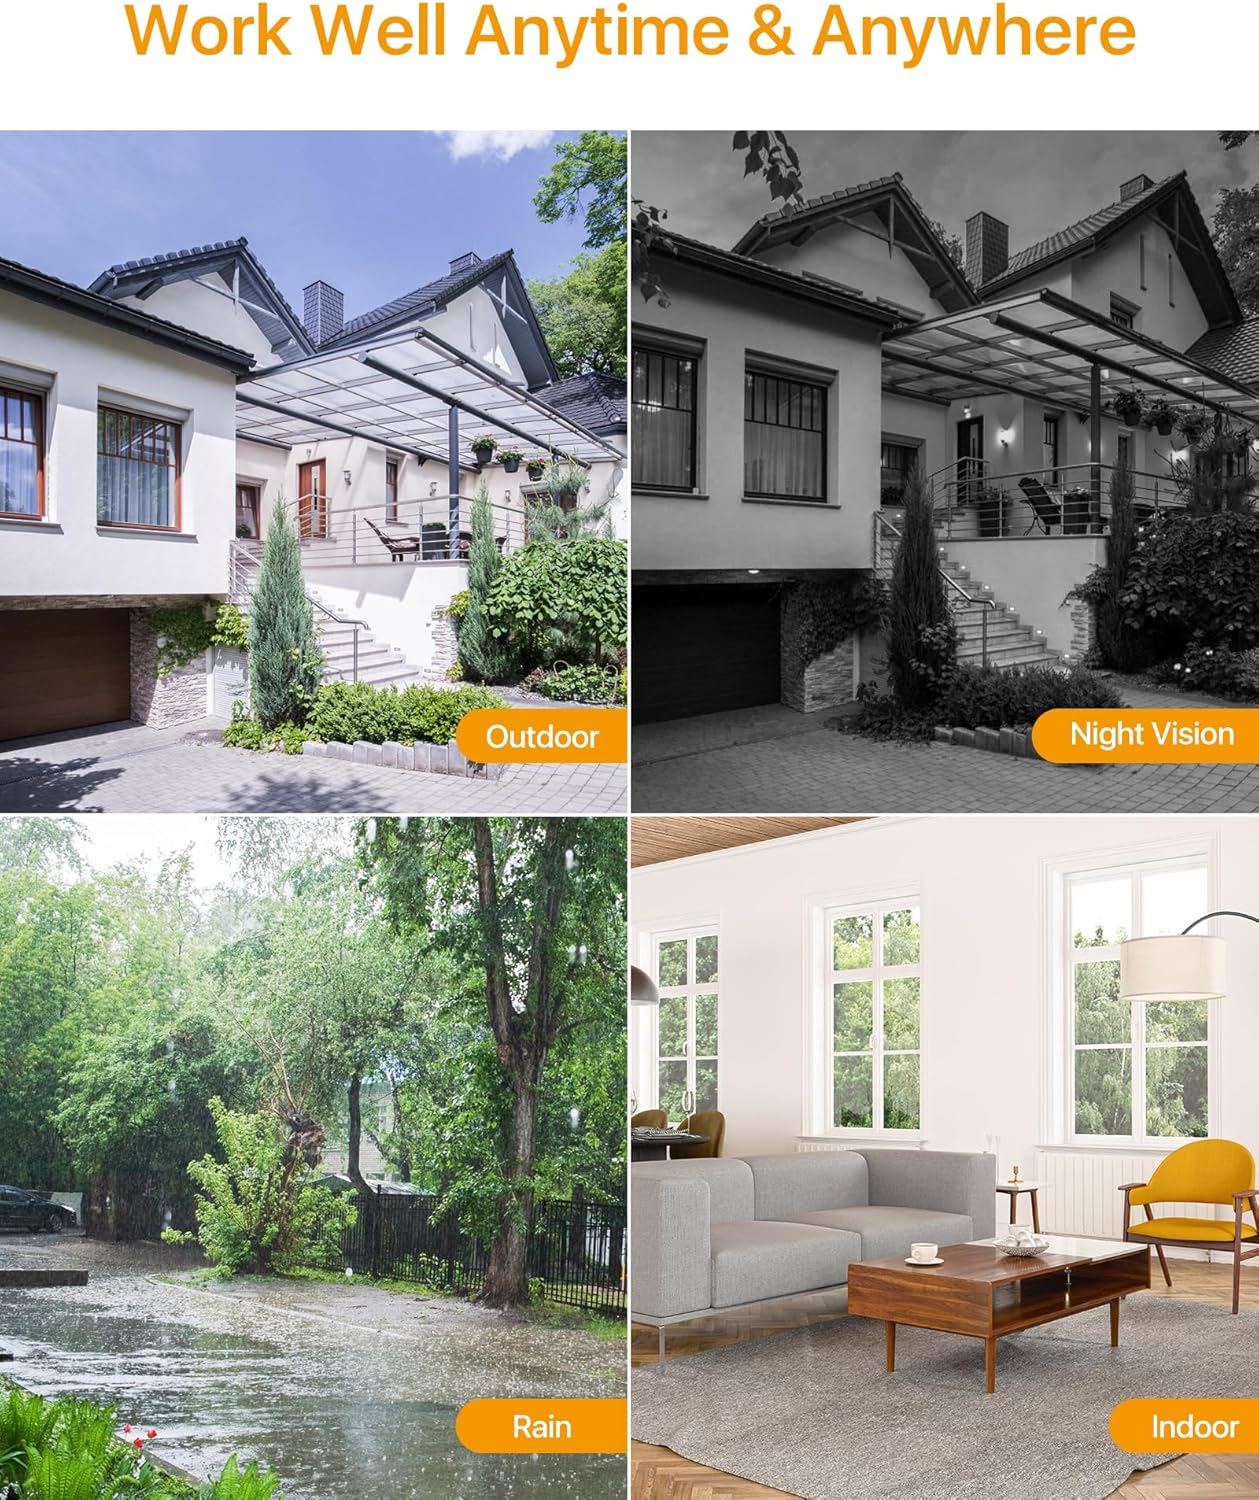
- Stopień ochrony przed warunkami atmosferycznymi IP66: Robust metal housing ensures protection against dust and water, suitable for both indoor and outdoor use in various weather conditions.
- Elastyczny montaż: Features a 3-axis adjustable bracket for ceiling or wall mounting, allowing 360-degree horizontal and 180-degree vertical adjustment.




4. Konfiguracja i instalacja
4.1 Lista kontrolna przed instalacją
- Ensure your DVR is compatible with HD-TVI cameras.
- Plan the camera placement to cover desired surveillance areas.
- Ensure power outlets are accessible for the camera power supply.
- Gather necessary tools: drill, screwdriver, ladder (if mounting high).
4.2 Montaż kamery
- Select a suitable mounting location (wall or ceiling) that provides the desired viewing angle and is within reach of the BNC cable and power supply.
- Use the provided mounting hole template to mark the drill points on the surface.
- Wywierć otwory pilotujące w zaznaczonych miejscach.
- Insert the wall plugs into the drilled holes (if mounting on masonry or drywall).
- Secure the camera base to the surface using the provided screws.
- Adjust the camera angle using the 3-axis bracket. The bracket allows for 360-degree horizontal rotation and 180-degree vertical tilt. Tighten the adjustment screws once the desired angle is achieved.
4.3 Podłączanie aparatu
Aby zapoznać się z prawidłowym okablowaniem, należy zapoznać się ze schematem połączeń poniżej.
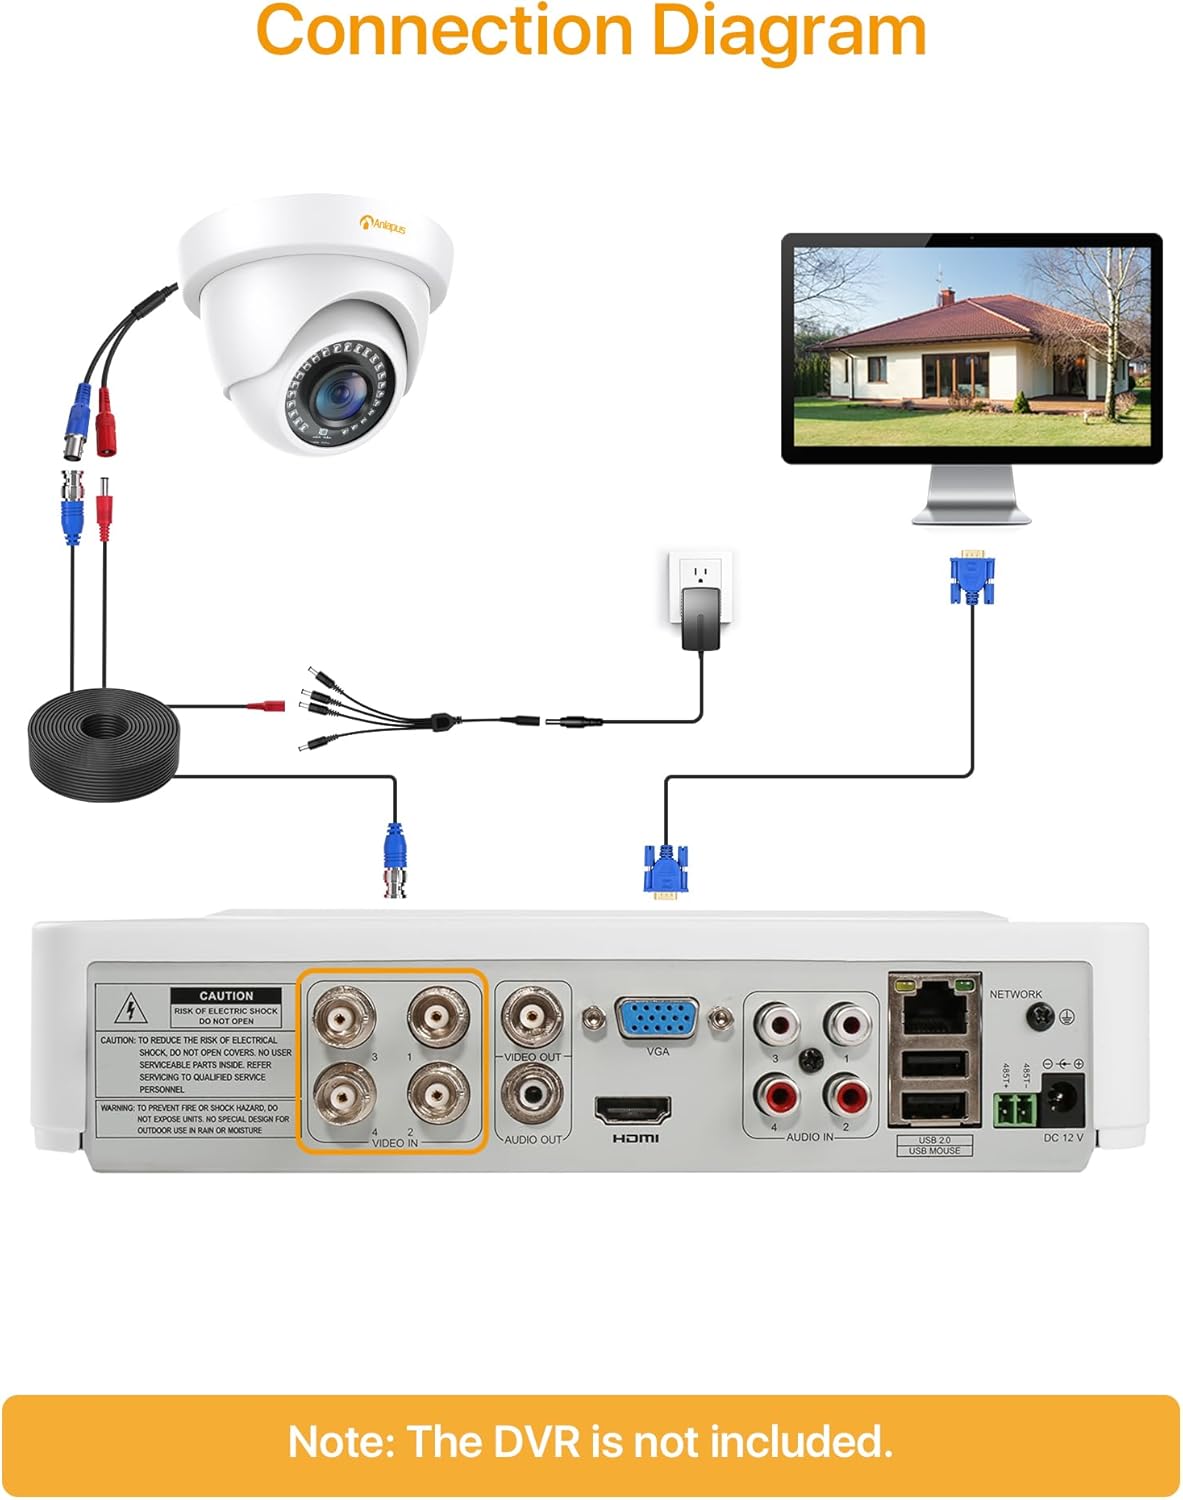
- Connect one end of the BNC video cable to the video output port of the camera.
- Connect the other end of the BNC video cable to a "VIDEO IN" port on your HD-TVI DVR.
- Connect the camera's power input to one of the outputs on the 1-to-4 power splitter cable.
- Connect the power supply to the 1-to-4 power splitter cable.
- Podłącz zasilacz do standardowego gniazdka elektrycznego.
- Repeat these steps for all cameras.
Ważny: Przed włączeniem systemu upewnij się, że wszystkie połączenia są zabezpieczone.
5. Instrukcja obsługi
Once the cameras are properly installed and connected to your HD-TVI DVR, refer to your DVR's instruction manual for specific operating procedures, including:
- Viewna żywotage z kamer.
- Recording and playback of video.
- Configuring motion detection and alerts.
- Accessing the system remotely via mobile app or web interfejs.
- Adjusting camera settings (if supported by your DVR).
The Anlapus camera provides a continuous video feed to the DVR. Its night vision capabilities activate automatically in low-light conditions.
6. Konserwacja
- Czyszczenie: Okresowo czyść obiektyw i obudowę aparatu miękką,amp szmatką. Unikaj środków czyszczących o działaniu ściernym i rozpuszczalników.
- Kontrola kabla: Regularly check all cables for signs of wear, damage, or loose connections.
- Aktualizacje oprogramowania układowego: While the camera itself does not typically require firmware updates, ensure your DVR's firmware is up-to-date for optimal performance and compatibility.
- Ochrona środowiska: Although the camera is IP66 weatherproof, extreme weather conditions (e.g., heavy snow, ice) may temporarily affect performance. Ensure the camera is securely mounted to withstand strong winds.
7. Rozwiązywanie Problemów
| Problem | Możliwa przyczyna | Rozwiązanie |
|---|---|---|
| No image on DVR screen |
|
|
| Słaba jakość obrazu / niewyraźne wideo |
|
|
| Nie działa noktowizor |
|
|
If you encounter issues not covered here, please contact Anlapus customer support.
8. Specyfikacje
| Numer modelu | AJ-A4K-202T4-WPES |
| Rozdzielczość wideo | 1080p (1920 x 1080 pikseli) |
| Obiektyw | 3.6mm |
| Viewing kąt | 90 stopni |
| Zakres noktowizora | Do 24 metrów (80 stóp) |
| Diody podświetlające | 24 pcs IR-Cut LEDs |
| Ocena odporności na warunki atmosferyczne | IP66 |
| Tworzywo | Metal |
| Technologia łączności | Przewodowy (BNC) |
| Moc wejściowa | 12 wolty |
| Pobór mocy | 12 watów |
| Wymiary (dł. x szer. x wys.) | Wymiary 42.9 x 27 x 8.71 cm |
| Waga | 2.61 kilograms (for the package) |
| Zalecane zastosowanie | Nadzór |
| Kompatybilne urządzenia | Cyfrowy rejestrator wideo (DVR) |
9. Gwarancja i wsparcie
Anlapus products are designed for reliability and performance. For warranty information and technical support, please refer to the warranty card included in your package or visit the official Anlapus webstrona.
If you require assistance with installation, troubleshooting, or have any questions regarding your Anlapus surveillance camera, please contact our customer support team. Contact details can typically be found on the Anlapus brand store page or in the quick start guide.