1. Ważne instrukcje bezpieczeństwa
Please read all instructions carefully before using the CREATE Thera Classic Espresso Machine. Retain this manual for future reference. Incorrect operation may result in damage to the appliance or personal injury.
- Upewnij się, że urządzenie jest podłączone do uziemionego gniazdka elektrycznego o odpowiednim napięciu.tage (240 V).
- Nie zanurzaj urządzenia, przewodu zasilającego ani wtyczki w wodzie ani innych płynach.
- Keep hands and cords away from hot surfaces and steam. The steam wand and portafilter can become very hot during operation.
- Always turn off the machine and unplug it before cleaning or when not in use.
- Nie używaj urządzenia, jeśli przewód lub wtyczka są uszkodzone lub jeśli urządzenie działa nieprawidłowo lub zostało w jakikolwiek sposób uszkodzone.
- To urządzenie jest przeznaczone wyłącznie do użytku domowego. Nie używać na zewnątrz.
- Dzieci powinny znajdować się pod nadzorem, aby mieć pewność, że nie bawią się urządzeniem.
2. Koniec produktuview i komponenty
Familiarize yourself with the parts of your CREATE Thera Classic Espresso Machine.

Obraz 2.1: Przód view of the CREATE Thera Classic Espresso Machine, showing the control panel, portafilter, and drip tray with two espresso cups.

Obraz 2.2: All removable components of the espresso machine laid out, including the portafilter, single and double shot filter baskets, measuring spoon with tamper, and the water tank.
Główne składniki:
- Panel sterowania: Power button, single shot button, double shot button, pressure gauge, steam knob.
- Zbiornik na wodę: Removable tank for fresh water. Capacity: 1.25 Liters.
- Uchwyt filtra: Handle with filter basket holder.
- Koszyki filtracyjne: For single and double espresso shots, or ESE pods.
- Dysza pary: Do spieniania mleka i przygotowywania gorącej wody.
- Taca ociekowa: Wyjmowana tacka służąca do zbierania nadmiaru płynów.
- Łyżka miarowa/Tampeee: For measuring ground coffee and tamping it into the filter basket.
3. Konfiguracja i pierwsze użycie
3.1 Rozpakowanie
- Ostrożnie usuń wszystkie materiały opakowaniowe i sprawdź, czy wszystkie elementy są obecne.
- Clean the water tank, portafilter, filter baskets, and drip tray with warm water and mild detergent. Rinse thoroughly.
- Wytrzyj zewnętrzną część urządzenia za pomocąamp płótno.
3.2 Napełnianie zbiornika na wodę
- Wyjmij zbiornik na wodę z tyłu urządzenia.
- Napełnij zbiornik świeżą, zimną wodą do poziomu MAX. Nie przekraczaj linii MAX.
- Umieść zbiornik na wodę z powrotem na swoim miejscu i upewnij się, że jest prawidłowo osadzony.
3.3 Priming the Machine (First Use or After Extended Storage)
Priming ensures the water system is filled and ready for operation.
- Sprawdź, czy zbiornik na wodę jest pełny.
- Place a large container under the portafilter head and another under the steam wand.
- Plug in the machine and press the power button (usually indicated by a power symbol or a light). The indicator light will illuminate.
- Once the machine has heated up (indicator light stops flashing or turns solid), press the double shot button to run water through the portafilter head until water flows steadily.
- Turn the steam knob to release steam/hot water through the steam wand until water flows steadily. Close the steam knob.
- Maszyna jest teraz przygotowana i gotowa do użycia.
4. Instrukcja obsługi
4.1 Przygotowanie espresso z kawy mielonej
- Przygotuj maszynę: Ensure the water tank is filled and the machine is powered on and preheated.
- Przygotuj uchwyt filtra: Włóż wybrany filtr (pojedynczy lub podwójny) do uchwytu filtra.
- Dodaj kawę: Use the measuring spoon to add freshly ground espresso coffee to the filter basket. For a single shot, use one level spoon; for a double, use two.
- Tamp Kawa: Użyj tamper end of the measuring spoon to press the coffee grounds firmly and evenly. Ensure the surface is level.
- Zamontuj uchwyt filtra: Align the portafilter with the group head (INSERT position) and twist it firmly to the right until it is securely locked (LOCK position).
- Umieść kubki: Umieść jedną lub dwie filiżanki do espresso na tacce ociekowej, bezpośrednio pod wylewkami uchwytu filtra.
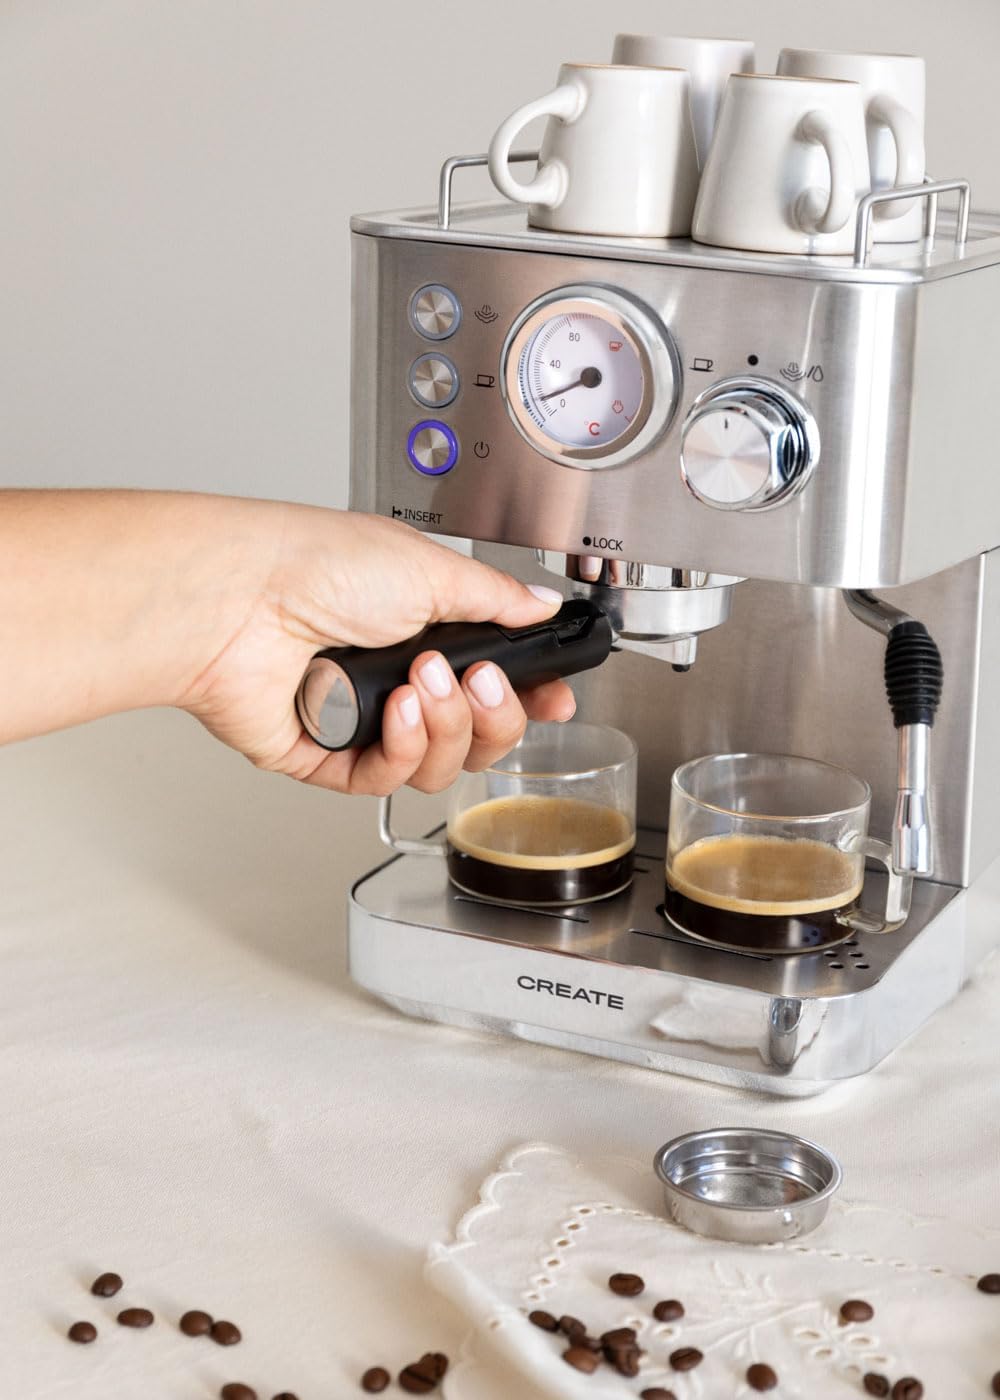
- Zaparz Espresso: Press the single shot or double shot button. The machine will begin brewing. The pressure gauge will indicate the brewing pressure.
- Przestań warzyć: The machine may stop automatically, or you can press the button again to stop brewing manually when the desired volume is reached.
- Wyjmij uchwyt filtra: Carefully twist the portafilter to the left to remove it. Dispose of the used coffee grounds.
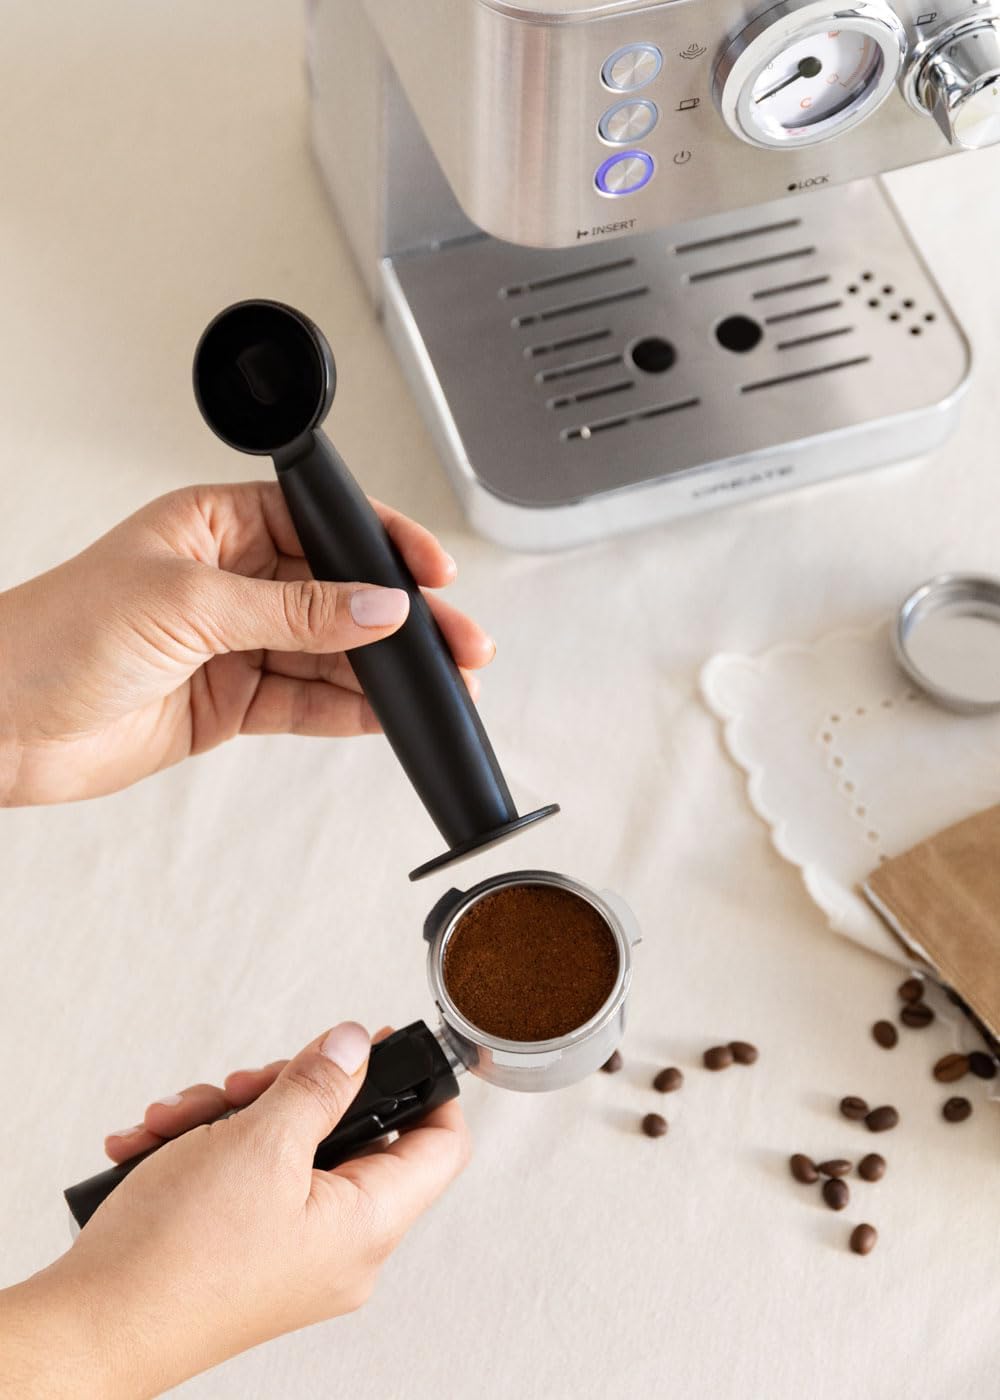
Obraz 4.1: Ręka tamping ground coffee into the portafilter for espresso preparation.
Obraz 4.2: A hand inserting the portafilter into the group head of the espresso machine.

Obraz 4.3: Espresso being brewed into two clear glass cups, showing the rich crema.
4.2 Making Espresso with ESE Single-Dose Pods
- Follow steps 1-2 from 'Making Espresso with Ground Coffee'. Use the specific filter basket designed for ESE pods if provided.
- Włóż jedną saszetkę ESE do koszyka filtra. Nie wkładajamp.
- Follow steps 5-9 from 'Making Espresso with Ground Coffee'.
4.3 Spienianie mleka
- Przygotuj mleko: Napełnij dzbanek do spieniania mleka ze stali nierdzewnej zimnym mlekiem (mlecznym lub roślinnym) tuż poniżej dzióbka.
- Aktywuj Steama: Ensure the machine is preheated. Turn the steam knob to the steam position. Wait for the steam indicator light to illuminate steadily, indicating the machine has reached steaming temperature.
- Dysza pary czyszczącej: Briefly open the steam knob to release any condensed water from the wand into the drip tray, then close it.
- Spienione mleko: Insert the steam wand tip just below the surface of the milk. Open the steam knob fully. Move the pitcher up and down slightly to create foam.
- Podgrzej mleko: Once desired foam is achieved, lower the wand deeper into the milk to heat it without adding more air. Continue until the pitcher is hot to the touch.
- Zatrzymaj parowanie: Zamknij pokrętło pary i wyjmij dzbanek.
- Czyszczenie dyszy parowej: Natychmiast wytrzyj dyszę parową wodą.amp Ściereczką usuń resztki mleka. Ponownie na krótko otwórz pokrętło pary, aby usunąć mleko z wnętrza dyszy, a następnie zamknij je.

Obraz 4.4: A hand holding a frothing pitcher while the steam wand froths milk.
5. Konserwacja i czyszczenie
Regularne czyszczenie zapewnia optymalną wydajność i wydłuża żywotność ekspresu do kawy.
5.1 Codzienne czyszczenie
- Uchwyt filtra i koszyki filtracyjne: Po każdym użyciu wyjmij uchwyt filtra, usuń fusy z kawy i opłucz uchwyt filtra oraz koszyk filtra gorącą wodą.
- Dysza pary: As described in section 4.3, clean immediately after each use.
- Taca ociekowa: Codziennie opróżniaj i płucz tackę ociekową lub gdy wskaźnik zacznie się unosić.
- Zewnętrzny: Wytrzyj obudowę urządzenia miękką, damp płótno. Nie używaj ściernych środków czyszczących ani szorstkich gąbek.
5.2 Odkamienianie
Z czasem w urządzeniu mogą gromadzić się osady mineralne (kamień), co wpływa na jego wydajność. Odkamieniaj urządzenie co 2-3 miesiące lub częściej, jeśli masz twardą wodę.
- Use a commercially available descaling solution specifically designed for espresso machines. Follow the manufacturer's instructions for mixing the solution with water.
- Napełnij zbiornik na wodę roztworem odkamieniającym.
- Umieść duży pojemnik pod uchwytem filtra i dyszą pary.
- Run half of the solution through the portafilter by pressing the double shot button.
- Open the steam knob to run the remaining solution through the steam wand.
- Wyłącz urządzenie i odczekaj 15–20 minut.
- Dokładnie opróżnij i wypłucz zbiornik na wodę. Napełnij go świeżą wodą.
- Repeat steps 3-5 with fresh water to rinse the machine completely.
6. Rozwiązywanie Problemów
Jeśli masz problemy z urządzeniem, zapoznaj się z poniższymi, często spotykanymi problemami i ich rozwiązaniami.
| Problem | Możliwa przyczyna | Rozwiązanie |
|---|---|---|
| Brak dozowania kawy | No water in tank; Clogged filter; Machine not primed. | Fill water tank; Clean filter basket; Prime the machine. |
| Coffee brews too slowly or not at all | Fusy z kawy są zbyt drobne lubampZbyt mocne; Zatkany filtr. | Use coarser grind; Tamp less firmly; Clean filter. |
| Coffee brews too quickly, weak coffee | Coffee grounds too coarse or not enough coffee; Not tamped wystarczy. | Use finer grind; Use more coffee; Tamp mocniej. |
| Brak pary z dyszy | Steam wand clogged; Machine not at steaming temperature. | Wyczyść dyszę pary; poczekaj, aż kontrolka pary zacznie świecić światłem ciągłym. |
| Wyciek wody z maszyny | Water tank not seated correctly; Drip tray full; Portafilter not secured. | Reseat water tank; Empty drip tray; Secure portafilter firmly. |
Jeśli po wypróbowaniu tych rozwiązań problem nadal występuje, skontaktuj się z obsługą klienta.
7. Specyfikacje
Technical details for the CREATE Thera Classic Espresso Machine.

Obraz 7.1: Dimensional drawing of the espresso machine, indicating height, width, and depth measurements.
- Marka: TWORZYĆ
- Numer modelu: AXleftj (also 59225_115714)
- Styl: KLASYCZNY
- Moc: 1100 W
- Tomtage: 240 V
- Ciśnienie: 20 bar
- Pojemność zbiornika na wodę: 1.25 litrów
- Wymiary produktu: 30.1 x 20.2 x 31.3 cm (dł. x szer. x wys.)
- Waga: 4.5 kilogramów
- Tworzywo: Stal nierdzewna
- Zgodność: Ground coffee and ESE single-dose pods
8. Gwarancja i wsparcie
For warranty information, please refer to the documentation provided at the time of purchase. This typically includes details on coverage period and terms.
For technical support, spare parts, or service inquiries, please visit the official CREATE weblub skontaktuj się z działem obsługi klienta. Dane kontaktowe zazwyczaj znajdują się na opakowaniu produktu lub u producenta. webstrona.