Wstęp
This manual provides detailed instructions for the safe and efficient operation of your JVC KD-T812BT CD Receiver. Please read this manual thoroughly before using the product and keep it for future reference. This unit features integrated Alexa, Bluetooth hands-free calling and audio streaming, a high-performance tuner, sound processor, USB, AUX, and Spotify Control.
Organizować coś
Rozpakowanie i zawartość opakowania
Ostrożnie wyjmij wszystkie elementy z opakowania. Przed przystąpieniem do instalacji upewnij się, że wszystkie elementy są obecne.
- KD-T812BT Main Unit
- Panel przedni
- Przednia rama
- Installation Sleeve
- Wiązka przewodów ISO
- Release Hooks (2x)
- Mikrofon
Instalacja
Professional installation is recommended for optimal performance and safety. Refer to the included wiring harness diagram for correct connections. Ensure the vehicle's battery is disconnected before starting installation.
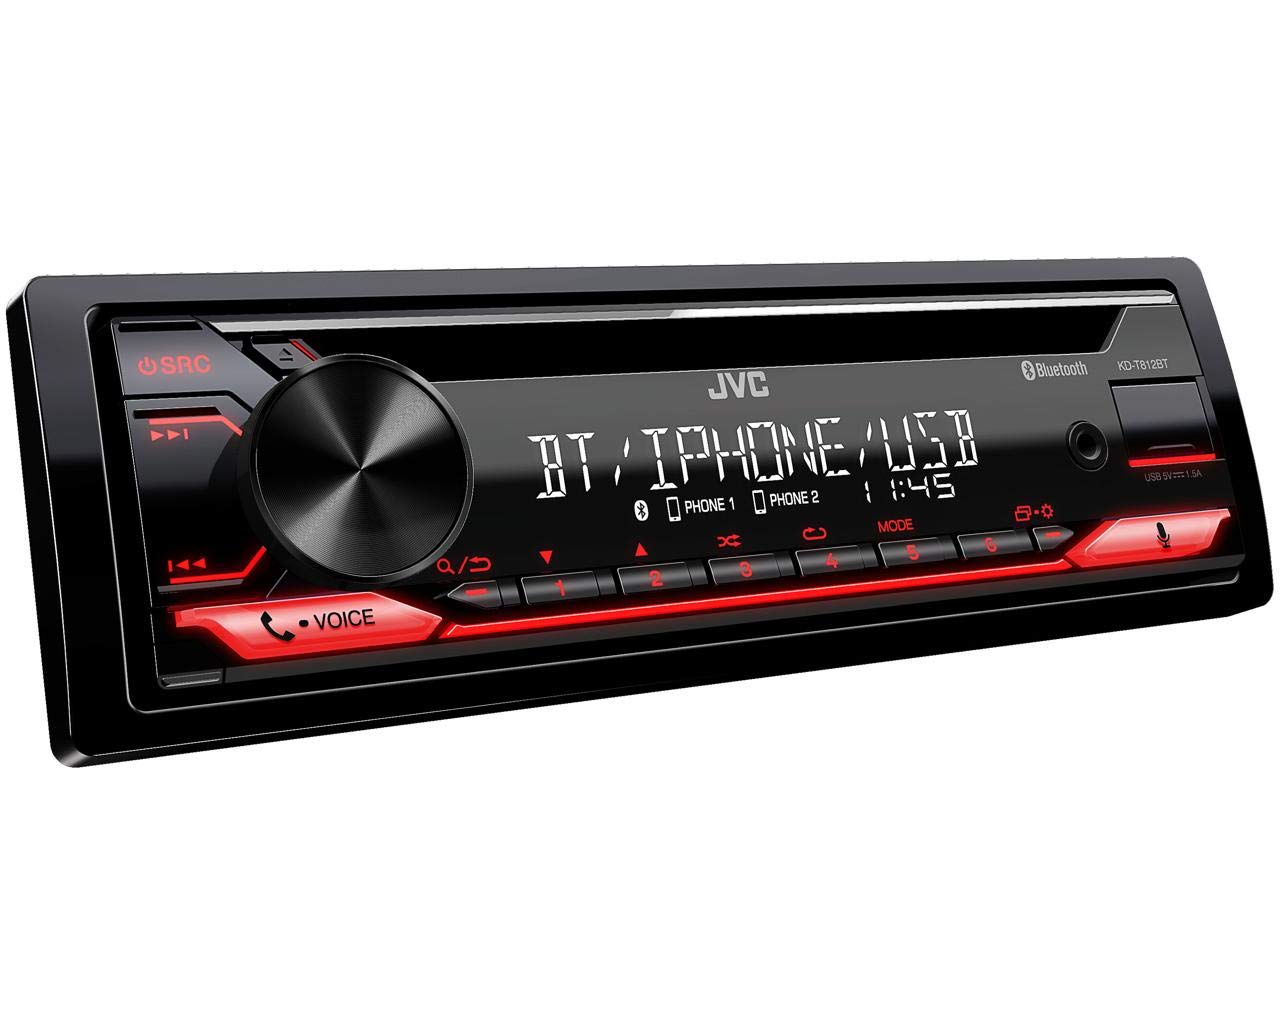
Rycina 1: Przód view of the JVC KD-T812BT CD Receiver. This image shows the main display, control knob, source button, and various function buttons with red illumination.

Rysunek 2: Tył view of the JVC KD-T812BT CD Receiver, illustrating the wiring harness connector, antenna input, and RCA pre-out connections.
Pierwsze włączenie zasilania
- Po zakończeniu montażu należy ponownie podłączyć akumulator pojazdu.
- Naciśnij SRC przycisk, aby włączyć urządzenie.
- Postępuj zgodnie z instrukcjami wyświetlanymi na ekranie, aby przeprowadzić początkową konfigurację, obejmującą m.in. wybór języka.
Parowanie Bluetooth
To use Bluetooth features, you must pair your smartphone with the receiver.
- Włącz Bluetooth w swoim smartfonie.
- On the KD-T812BT, navigate to the Bluetooth menu.
- Wybierz „Parowanie” lub „Wyszukiwanie urządzeń”.
- Select "KD-T812BT" from your smartphone's Bluetooth device list.
- Jeśli zostaniesz o to poproszony, potwierdź kod parowania na obu urządzeniach.
- Up to two phones can be connected simultaneously for hands-free calls, and up to five smartphones for audio playback.

Figure 3: Illustration representing the Bluetooth hands-free calling feature, highlighting wireless connectivity for communication.
Aplikacja JVC Remote
Download the JVC Remote App from your smartphone's app store to control the receiver directly from your device.

Figure 4: Icon representing the JVC Remote App, which allows smartphone control of the receiver.
Instrukcja obsługi
Podstawowe sterowanie
- Włączanie/wyłączanie: Naciśnij SRC button. Hold to turn off.
- Regulacja głośności: Obróć duże centralne pokrętło.
- Wybór źródła: Naciśnij SRC button repeatedly to cycle through sources (CD, USB, Tuner, Bluetooth Audio, AUX).
- Nawigacja po menu: Use the central knob and surrounding buttons to navigate menus.
Odtwarzanie CD
- Insert a CD into the disc slot with the label side up. The unit will automatically begin playback.
- Użyj Pominąć guziki (<< / >>) to change tracks.
- Naciśnij Wstrzymaj/Odtwórz przycisk, aby wstrzymać lub wznowić odtwarzanie.
- To eject a CD, press the Wyrzucać przycisk.
Odtwarzanie USB
Connect a USB storage device to the USB port. The unit supports AAC, MP3, WMA, WAV, and FLAC audio formats. The USB port also provides 1.5A charging for smartphones.

Figure 5: Logo indicating compatibility with iPhone and iPod devices for direct connection via USB.

Figure 6: Icon illustrating the USB port's capability to provide up to 1.5A charging current for connected devices.
Tuner radiowy
Select the Tuner source. Use the Szukać buttons to find stations. Press and hold to auto-seek. Store your favorite stations using the preset buttons (1-6).
- RDS (system danych radiowych): Displays station information, program type, and traffic announcements where available.
- Pamięć stacji: The unit supports 18 FM and 6 MW station presets.
Streaming audio przez Bluetooth
Once paired, select Bluetooth Audio as the source. You can stream music from your smartphone. The advanced AVRCP 1.6 profile allows for convenient searching of individual music tracks directly from the car stereo.
Rozmowy bez użycia rąk
When a paired phone receives a call, the unit will display caller information. Use the Odpowiedź I Zakończ połączenie buttons on the unit to manage calls. The external microphone ensures clear communication.
Integracja z Alexą
With the Alexa app installed on your smartphone and connected via Bluetooth, you can use voice commands for various functions, including playing music, checking traffic, creating shopping lists, and getting news updates.

Figure 7: Logo indicating the integration of Amazon Alexa voice services within the receiver.
Kontrola Spotify
Connect your smartphone running the Spotify app via Bluetooth or USB. You can then control Spotify playback directly from the receiver, including track selection and playlist browsing.

Figure 8: Logo representing the Spotify Control feature, allowing direct control of Spotify from the head unit.
Ustawienia dźwięku
Access the sound menu to adjust audio settings:
- 13-pasmowy parametryczny korektor iEQ: Allows precise adjustment of frequency response.
- DSP (Digital Signal Processor) with Time Alignment: Optymalizuje dźwięktagpoprzez regulację opóźnienia dla każdego głośnika.
- Aktywny crossover: Configures frequency ranges for connected speakers and subwoofers.

Figure 9: Icon representing the Digital Sound Processor (DSP) capabilities for advanced audio tuning.
Ustawienia wyświetlania
Adjust the brightness of the display and button illumination through the system settings menu. The unit features a 13-digit VA LCD display for good readability.
Konserwacja
Czyszczenie urządzenia
Wipe the unit's surface with a soft, dry cloth. For stubborn dirt, use a cloth lightly dampened with water. Avoid using abrasive cleaners or solvents, as they can damage the finish.
Płyty czyszczące
Handle CDs by their edges. If a CD is dirty, wipe it gently from the center outwards with a soft, lint-free cloth. Do not use solvents or abrasive cleaners.
Rozwiązywanie problemów
If you encounter issues with your KD-T812BT, refer to the following common problems and solutions:
| Problem | Możliwa przyczyna | Rozwiązanie |
|---|---|---|
| Brak zasilania | Loose wiring connection; Blown fuse. | Sprawdź połączenia zasilania i uziemienia. Sprawdź i wymień bezpiecznik, jeśli to konieczne. |
| Brak dźwięku | Głośność jest zbyt niska; Wyciszenie włączone; Problem z okablowaniem głośników. | Increase volume. Deactivate mute. Check speaker connections. |
| Połączenie Bluetooth nie działa | Urządzenie nie jest w trybie parowania; Zakłócenia; Jest już połączone z innym urządzeniem. | Ensure both devices are in pairing mode. Move closer to the unit. Disconnect from other devices. |
| CD/USB playback error | Dirty or scratched disc; Incompatible file format; Damaged USB device. | Clean or replace disc. Ensure files are supported formats. Try a different USB device. |
If the problem persists after attempting these solutions, please contact JVC customer support.
Specyfikacje
| Funkcja | Specyfikacja |
|---|---|
| Numer modelu | KD-T812BT |
| Marka | JVC |
| Technologia łączności | Bluetooth, USB |
| Typ kontrolera | Amazon Alexa |
| Cechy specjalne | RDS, Spotify |
| Kompatybilne urządzenia | Smartfon |
| Kodowanie dźwięku | Stereofoniczny |
| Tryb wyjścia audio | Stereofoniczny |
| Konfiguracja kanału dźwięku przestrzennego | 4.0 |
| Moc wyjściowa | 200 Watts (4 x 50 W) |
| Liczba kanałów | 4 |
| Internet Application | Spotify |
| Metoda kontroli | Aplikacja |
| Format mediów cyfrowych | MP3 audio, WAV, WMA, AAC, FLAC |
| Kolor | Czarny |
| Prąd ładowania USB | Do 1.5 A |
| Wyświetlacz | 13-digit VA LCD |
Informacje o gwarancji
Ten produkt jest objęty a 2-letnia gwarancja producenta. Please retain your proof of purchase for warranty claims. The warranty covers defects in materials and workmanship under normal use. It does not cover damage caused by misuse, accident, unauthorized modification, or improper installation.
For detailed warranty terms and conditions, please refer to the warranty card included with your product or visit the official JVC webstrona.
Obsługa klienta
For further assistance, technical support, or service inquiries, please contact JVC customer support. You can find contact information on the official JVC webstronie internetowej lub w dokumentacji dołączonej do produktu.
Before contacting support, please have your product model number (KD-T812BT) and purchase details ready.
Oficjalny JVC Webstrona: www.jvc.com