1. Wprowadzenie
Thank you for choosing the Jayron Desktop Digital Countdown Timer. This versatile timer is designed to assist you with various timing needs, from cooking and exercise to study and work. It features multiple programmable timers, a clock function, and an adjustable alarm to ensure you never miss an important moment.
Please read this manual carefully to understand the full functionality and ensure proper use of your device.
2. Funkcje produktu
- Countdown & Count-Up: Features 4 programmable timers (T1 / T2 / T3 / T4) with a timing range of 99 hours, 59 minutes, and 59 seconds. Monitor different timing events simultaneously. Settings can be reset. The timer retains data for direct accumulation even when the display is off.
- Funkcja zegara: Displays time in 12/24-hour format, switchable to adapt to your preference. A dedicated button allows for easy clock setting. The clock continues to run even when the display is turned off.
- Łatwy do odczytania wyświetlacz: Equipped with a large LCD screen and big digits for clear readability.
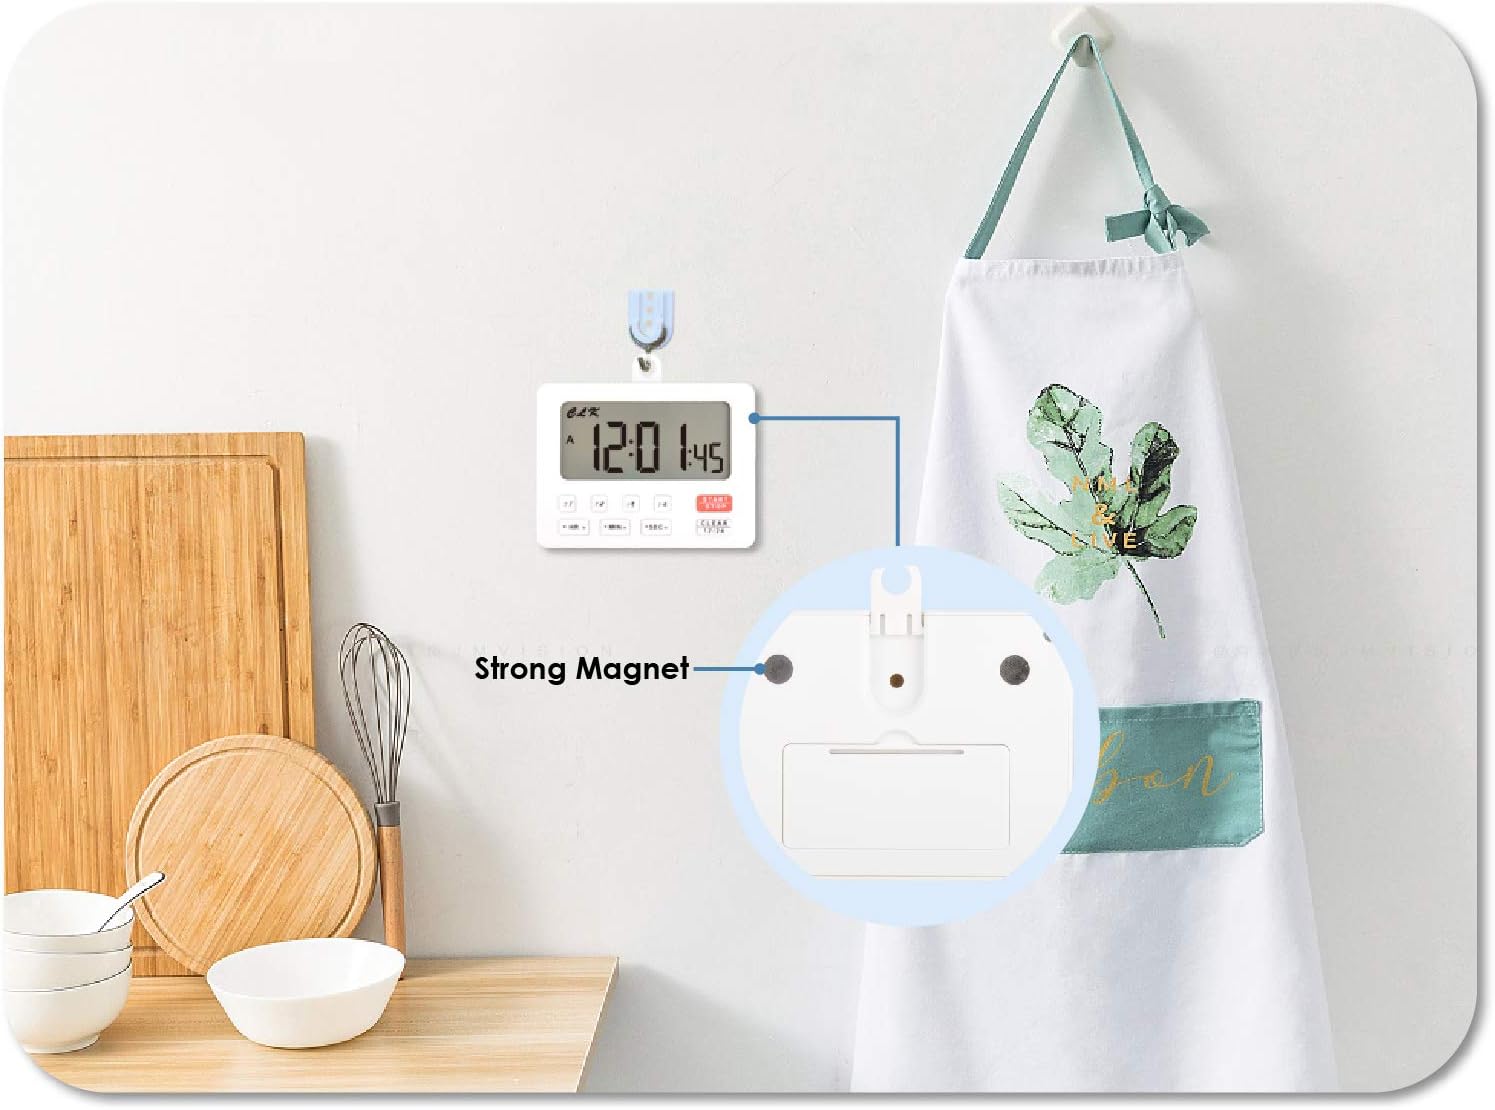
- Wszechstronne rozmieszczenie: Includes magnet adsorption for attachment to metal surfaces (e.g., refrigerator, oven) and a hanging hole for wall hooks or brackets.
- Słyszalny alarm: Adjustable volume settings (Low/High/OFF). Each of the four timers has a distinct sound reminder. The buzzer lasts for 1 minute when time is up; press any button to stop.
- Moc: Wymaga 2 baterii AAA (brak w zestawie).
- Kontrola wyświetlania: Screen can be turned on/off to conserve battery.
3. Konfiguracja
3.1 Instalacja baterii
- Znajdź komorę baterii z tyłu timera.
- Otwórz pokrywę komory baterii.
- Włóż dwie baterie AAA (nie ma ich w zestawie), zwracając uwagę na prawidłową biegunowość (+/-).
- Dokładnie zamknij pokrywę komory baterii.
3.2 Opcje rozmieszczenia
Timer oferuje elastyczne opcje rozmieszczenia:
- Adsorpcja magnetyczna: The back of the timer features strong magnets, allowing it to be securely attached to metal surfaces such as refrigerators, ovens, or whiteboards.
- Wiszący otwór: A built-in hanging hole allows you to hang the timer on a wall hook or bracket.

4. Działanie
4.1 Ustawianie zegara
- Press the 'CLEAR 12/24' button to switch between 12-hour and 24-hour display modes.
- To set the time, press and hold the 'HR' button to adjust hours, 'MIN' for minutes, and 'SEC' for seconds.
- The clock will continue to run even if the display is turned off.

4.2 Using Countdown Timers (T1, T2, T3, T4)
The timer features four independent countdown timers. Each can be set and operated separately.
- Select the desired timer (T1, T2, T3, or T4) by pressing its respective button. The selected timer will be indicated on the display.
- Press and hold the 'HR' button to set hours, 'MIN' for minutes, and 'SEC' for seconds for the selected timer.
- Press the 'START/STOP' button to begin the countdown.
- To pause the countdown, press 'START/STOP' again. Press it once more to resume.
- To clear a timer's setting, select the timer and press the 'CLEAR 12/24' button.
- When a countdown reaches zero, the alarm will sound for 1 minute. Press any button to stop the alarm.
4.3 Using Count-Up Function
The timer can also be used as a stopwatch (count-up function).
- Ensure the selected timer (T1, T2, T3, or T4) is cleared (displaying 00:00:00).
- Press the 'START/STOP' button to begin counting up from zero.
- Press 'START/STOP' again to pause the count-up. Press it once more to resume.
- To clear the count-up time, press the 'CLEAR 12/24' button while the timer is paused.

4.4 Regulacja głośności alarmu
The alarm volume can be adjusted using the switch on the side of the timer.
- Slide the switch to 'High' for a loud alarm.
- Slide the switch to 'Low' for a softer alarm.
- Slide the switch to 'OFF' to mute the alarm.

4.5 Film instruktażowy
5. Konserwacja
- Czyszczenie: Przetrzyj timer miękką, suchą ściereczką. Nie używaj środków czyszczących o właściwościach ściernych ani nie zanurzaj urządzenia w wodzie.
- Wymiana baterii: When the display dims or the timer functions erratically, replace the AAA batteries. Always replace both batteries at the same time.
- Składowanie: Jeśli timer będzie przechowywany przez dłuższy czas, należy wyjąć baterie, aby zapobiec ich wyciekowi.
6. Rozwiązywanie Problemów
- Timer się nie włącza: Check if batteries are inserted correctly with the right polarity. Ensure batteries are new or fully charged.
- Wyświetlacz jest przyciemniony lub pusty: Wymień baterie AAA.
- Alarm nie działa: Check the alarm volume switch on the side of the timer and ensure it is set to 'Low' or 'High', not 'OFF'.
- Timer nie odlicza: Ensure you have pressed the 'START/STOP' button after setting the time.
- Wyświetlany jest nieprawidłowy czas: Re-set the clock using the 'HR', 'MIN', 'SEC' buttons and verify the 12/24-hour mode.
7. Specyfikacje
| Funkcja | Szczegół |
|---|---|
| Marka | Jayron |
| Numer modelu | JR-HM206 (UPC: 791328973816) |
| Kolor | Biały |
| Zakres czasowy | 99 Hours, 59 Minutes, 59 Seconds |
| Number of Timers | 4 (T1, T2, T3, T4) |
| Wyświetlacz zegara | Możliwość przełączania 12/24 godzin |
| Głośność alarmu | Low / High / OFF |
| Źródło zasilania | Baterie 2 x AAA (brak w zestawie) |
| Opcje montażu | Magnetic back, Hanging hole |
| Waga przedmiotu | 78 gram |
| Rozmiar ekranu | 65 milimetrów |

8. Gwarancja i wsparcie
This Jayron Desktop Digital Countdown Timer comes with a two-year warranty from the date of purchase.
For technical support, warranty claims, or any questions regarding your product, please contact Jayron customer service through the retailer where you purchased the product or visit the official Jayron webwitryna do informacji kontaktowych.