
Wstęp
This manual provides detailed instructions for the assembly, installation, and maintenance of your vidaXL Gabion Wall (Model 143582). This gabion wall is designed for various landscape applications, including retaining walls, decorative garden features, and sound barriers. Please read these instructions carefully before beginning assembly to ensure safe and correct installation.
The gabion wall consists of galvanised steel mesh panels that form a cage, which is then filled with stones or other suitable materials. Its robust construction ensures durability and stability.
Informacje dotyczące bezpieczeństwa
- Always wear appropriate personal protective equipment (PPE) such as gloves, safety glasses, and sturdy footwear during assembly and filling.
- Gabion walls can be heavy, especially when filled. Ensure the installation site is stable and can support the weight.
- Exercise caution when handling wire mesh panels to avoid cuts or scrapes.
- When filling the gabion, ensure stones are placed carefully to prevent injury from falling objects.
- If constructing a tall gabion wall, consider consulting a professional engineer to ensure structural integrity and compliance with local building codes.
- Trzymaj dzieci i zwierzęta domowe z dala od miejsca montażu.
Zawartość opakowania
Before starting assembly, verify that all components are present and undamaged. The package for Model 143582 typically includes:
- Galvanised steel mesh panels (sides, front, back, top, bottom)
- Spiral connectors or C-rings for assembly
- Internal bracing wires or tie rods (for larger gabions to prevent bulging)
- Lid panels
Note: Stones for filling the gabion are not included and must be sourced separately.
Konfiguracja i montaż
Follow these steps to assemble and install your gabion wall:
Krok 1: Przygotuj miejsce
Choose a level and stable surface for your gabion wall. For permanent structures, a compacted gravel base or concrete foundation is recommended to prevent settling and ensure stability. Clear any debris or vegetation from the area.
Step 2: Unpack and Lay Out Components
Carefully unpack all mesh panels and connectors. Lay them out on a flat surface to identify each piece.
Krok 3: Złóż podstawę
Connect the bottom panel to the side panels using the spiral connectors or C-rings. Ensure all connections are secure. The panels should form an open box structure.
Step 4: Erect the Sides and Ends
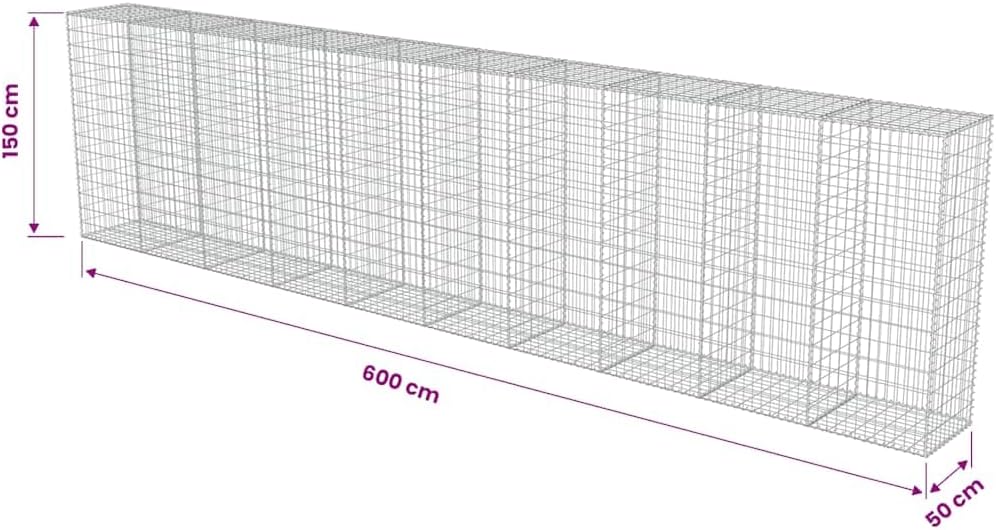
Attach the remaining side and end panels to form the full cage. Use spiral connectors or C-rings along all vertical edges. For longer gabions, internal diaphragms (divider panels) may be included to prevent bulging. Install these at regular intervals as per the design.

Step 5: Install Bracing Wires (if applicable)
For gabions taller than 1 meter or those with significant length, bracing wires (also known as tie rods or stiffeners) are crucial. These wires connect opposite faces of the gabion internally to prevent the sides from bulging outwards when filled. Install them horizontally at approximately 30-45 cm intervals as you fill the gabion.

Step 6: Fill the Gabion
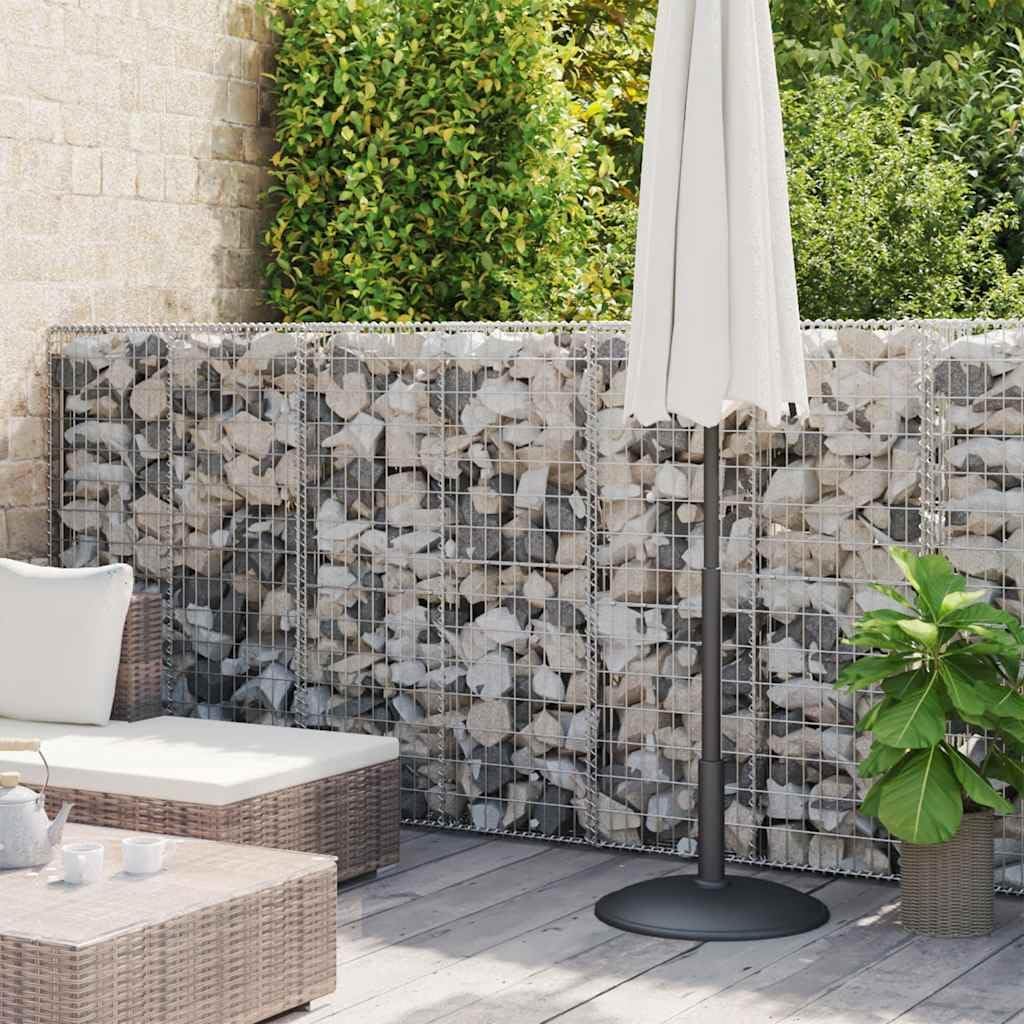
Begin filling the gabion with suitable, durable, and non-frost-susceptible stones. Stones should be larger than the mesh openings to prevent them from falling out. Fill the gabion in layers, carefully placing stones to minimize voids and ensure a dense, stable fill. As you fill, ensure the sides remain vertical and do not bulge. If using bracing wires, install them as you fill each layer.
Krok 7: Zabezpiecz pokrywę
Once the gabion is filled to the desired level, place the lid panel on top. Secure the lid to the top edges of the side panels using spiral connectors or C-rings. Ensure the lid is tightly fastened to prevent stones from shifting or escaping.
Obsługa i użytkowanie
The vidaXL Gabion Wall is designed for various outdoor applications:
- Retaining Wall: Use to hold back soil on sloped terrain. Ensure proper drainage behind the wall.
- Privacy Screen: Create a natural and robust privacy barrier in your garden or patio.
- Decorative Feature: Fill with various types of stones, glass, or other materials to create a unique aesthetic.
- Sound Barrier: The dense stone fill can help reduce noise transmission.
- Garden Edging: Define garden beds or pathways with a sturdy and attractive border.
Ensure the gabion is stable and properly filled for its intended use. Avoid placing excessive weight or pressure on the top or sides of the gabion that could compromise its structure.
Konserwacja
The galvanised steel construction of your gabion wall requires minimal maintenance:
- Regularna kontrola: Periodically check the gabion for any signs of damage, corrosion, or bulging. Ensure all connections remain secure.
- Czyszczenie: If desired, the exterior mesh can be cleaned with water and a soft brush to remove dirt or debris. Avoid harsh chemicals that could damage the galvanised coating.
- Stone Settlement: Over time, stones may settle. If significant voids appear, carefully remove the lid and add more stones to maintain the desired fill level and structural integrity.
Rozwiązywanie problemów
| Problem | Możliwa przyczyna | Rozwiązanie |
|---|---|---|
| Gabion sides are bulging | Insufficient internal bracing wires; uneven filling; stones too small. | Partially empty the gabion, install additional bracing wires, and refill evenly. Ensure stones are larger than mesh openings. |
| Gabion appears unstable or leaning | Inadequate foundation; uneven ground; improper filling. | Ensure the base is level and compacted. For significant instability, professional assessment may be required. |
| Stones falling out of the mesh | Stones are too small for the mesh size. | Remove small stones and replace with larger ones. Ensure the lid is securely fastened. |
| Corrosion or rust spots on mesh | Damage to galvanised coating; prolonged exposure to harsh conditions. | Clean the affected area and apply a galvanising repair spray or rust-inhibiting paint. |
Specyfikacje
| Funkcja | Szczegół |
|---|---|
| Marka | vidaXL |
| Numer modelu | 143582 |
| Tworzywo | Galvanised Steel (cage), Stone (filling material, not included) |
| Kolor | Srebrny |
| Wymiary całkowite (dł. x szer. x wys.) | 600 cm x 50 cm x 150 cm (236 cala x 19.7 cala x 59 cala) |
| Waga przedmiotu | 87.2 kg (empty cage) |
| Liczba sztuk | 3 (likely refers to main sections/modules) |
| Styl | Klasyczny |
| UPC | 756483917570 |
Gwarancja i wsparcie
For warranty information or technical support, please refer to the original purchase documentation or contact vidaXL customer service directly. Keep your proof of purchase and model number (143582) handy when contacting support.
You can typically find contact information on the vidaXL official webna stronie internetowej lub za pośrednictwem sprzedawcy, u którego produkt został zakupiony.


