
Wstęp
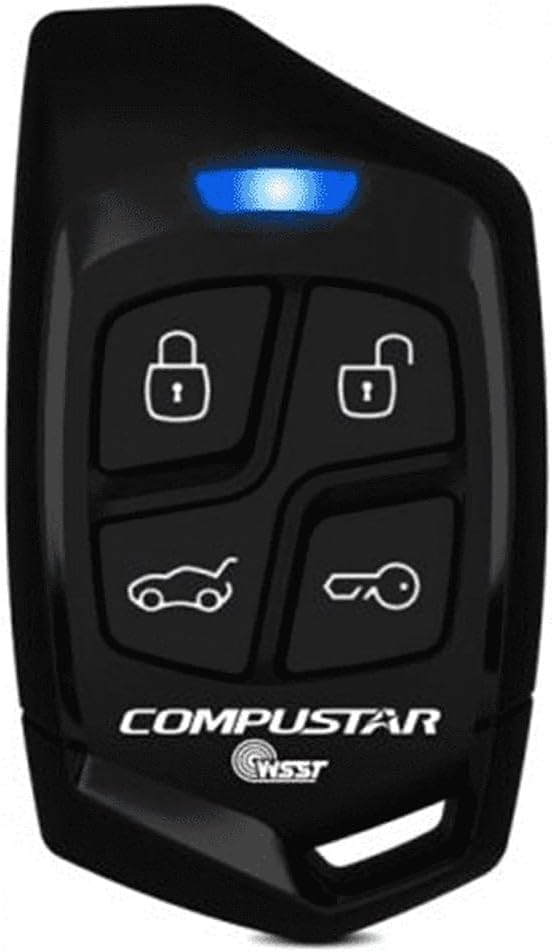
This manual provides essential information for the proper use and maintenance of your Compustar 1WG10R-SS Replacement Remote Transmitter. This device is designed to replace a lost or damaged remote for compatible Compustar remote start and security systems. It features a 4-button layout with a blue LED indicator for clear operation.
Ważna uwaga: This product is a replacement remote transmitter only. It does not include an antenna or a complete remote start system. Professional programming by an authorized Compustar dealer is highly recommended for proper functionality.

Rycina 1: Przód view of the Compustar 1WG10R-SS Replacement Remote Transmitter, showing the four control buttons and blue LED indicator.
Organizować coś
Instalacja baterii
The Compustar 1WG10R-SS remote requires two CR2016 coin cell batteries. Follow these steps to install or replace the batteries:
- Locate the small notch or seam on the side of the remote casing.
- Carefully pry open the remote casing using a small, flat-head screwdriver or a similar tool. Exercise caution to avoid damaging the casing lub komponentów wewnętrznych.
- Remove the old batteries, if present. Note the orientation of the positive (+) and negative (-) terminals.
- Insert two new CR2016 batteries, ensuring they are correctly oriented with the positive (+) side facing up, as indicated inside the battery compartment.
- Align the two halves of the remote casing and gently press them together until they snap securely into place.
Rysunek 2: Tył view of the Compustar 1WG10R-SS Remote Transmitter, illustrating the area where the casing can be opened for battery access.
Programowanie pilota
The 1WG10R-SS remote transmitter must be programmed to your vehicle's Compustar system to function correctly. This process typically requires specialized tools and knowledge. It is strongly recommended to have the remote programmed by an authorized Compustar dealer or a professional installer.
Attempting to program the remote yourself without proper instructions or equipment may lead to system malfunction or damage. Consult your vehicle's original Compustar system manual or contact an authorized dealer for programming services.
Instrukcja obsługi
The 1WG10R-SS remote features four primary buttons for controlling your Compustar system. The blue LED indicator provides visual feedback on button presses and system status.
- Przycisk blokujący (🔒): Naciśnij ten przycisk raz, aby zablokować drzwi pojazdu i uzbroić system bezpieczeństwa.
- Przycisk odblokowania (🔓): Naciśnij ten przycisk raz, aby odblokować drzwi pojazdu i wyłączyć system bezpieczeństwa.
- Trunk/Aux Button (🚗): This button typically controls the trunk release or an auxiliary function, depending on your system's installation. Consult your installer for specific functionality.
- Start/Stop Button (🔑): Press and hold this button for approximately 2-3 seconds to remote start or stop your vehicle's engine. The blue LED will flash to confirm the command.
Wskaźnik LED: The blue LED will illuminate briefly with each button press, indicating that a signal has been sent. Different flash patterns or durations may indicate specific system statuses, as detailed in your main Compustar system manual.
Konserwacja
Wymiana baterii
When the remote's range decreases significantly or the blue LED indicator becomes dim or unresponsive, it is likely time to replace the batteries. Refer to the Instalacja baterii section for detailed instructions on replacing the two CR2016 batteries.
Czyszczenie
To clean the remote transmitter, use a soft, dry cloth. For stubborn dirt, a slightly damp cloth with mild soap can be used, but ensure no moisture enters the remote's casing. Avoid using harsh chemicals, solvents, or abrasive cleaners, as these can damage the remote's finish or internal components.
Składowanie
Store the remote in a cool, dry place away from direct sunlight, extreme temperatures, and high humidity. Avoid placing heavy objects on the remote or exposing it to strong magnetic fields, which could affect its performance.
Rozwiązywanie problemów
- Pilot nie odpowiada:
- Sprawdź baterie. Wymień je, jeśli są stare lub rozładowane.
- Ensure you are within the operating range of your vehicle's Compustar system.
- Verify that the remote is properly programmed to your system. If not, or if it has been reset, professional re-programming may be required.
- Blue LED Not Lighting Up:
- This usually indicates dead or improperly installed batteries. Replace the batteries and ensure correct orientation.
- Zredukowany zakres działania:
- Weak batteries can reduce range. Replace them.
- Environmental factors such as large buildings, hills, or radio interference can affect range. Try operating the remote in a different location.
- Ensure there are no obstructions between the remote and the vehicle's antenna.
If you continue to experience issues after performing these troubleshooting steps, please contact an authorized Compustar dealer for assistance.
Specyfikacje
| Numer modelu | 1WG10R-SS |
| Liczba przycisków | 4 |
| Wskaźnik LED | Niebieski |
| Typ zdalny | 1-Way SS Remote |
| Typ baterii | CR2016x2 |
| Kompatybilne urządzenia | ANT-1WSS-25 |
| Kolor | Czarny |
| Funkcja specjalna | Ergonomic |
Gwarancja i wsparcie
For information regarding the warranty of your Compustar 1WG10R-SS Replacement Remote Transmitter, please refer to the official Compustar website or the documentation provided with your original Compustar system. Warranty terms and conditions may vary.
For technical support, programming assistance, or service, please contact an authorized Compustar dealer. You can find a list of authorized dealers on the official Compustar webstrona: www.compustar.com/support/