Wstęp
This manual provides detailed instructions for the safe and efficient operation, setup, and maintenance of your Einhell TC-PN 50 pneumatic stapler and nailer. Please read this manual thoroughly before using the tool to ensure proper function and safety. This 2-in-1 combination tool is designed for various renovation and repair tasks in workshops, homes, and garages.
Instrukcje bezpieczeństwa
Podczas korzystania z elektronarzędzi zawsze należy przestrzegać podstawowych zasad bezpieczeństwa, aby zmniejszyć ryzyko pożaru, porażenia prądem i obrażeń ciała. Zachowaj tę instrukcję na przyszłość.
- Stosuj ochronę oczu: Zawsze zakładaj okulary ochronne, aby chronić się przed latającymi odłamkami.
- Noś ochronę słuchu: Podczas pracy należy stosować ochronę słuchu.
- Noś ochronę rąk: Use gloves to protect hands.
- Odłączyć dopływ powietrza: Przed przystąpieniem do regulacji, usuwania zacięć lub serwisowania narzędzia należy zawsze odłączyć dopływ powietrza.
- Zabezpieczanie przedmiotu obrabianego: Ensure the workpiece is stable and secured before fastening.
- Ciśnienie robocze: Nie należy przekraczać maksymalnego ciśnienia roboczego określonego dla danego narzędzia.
- Utrzymuj czystość: Trzymaj ręce i części ciała z dala od obszaru strzelania.
- Prawidłowa wentylacja: Stosować w dobrze wentylowanym miejscu.
Produkt ponadview
Familiarize yourself with the components of your Einhell TC-PN 50.
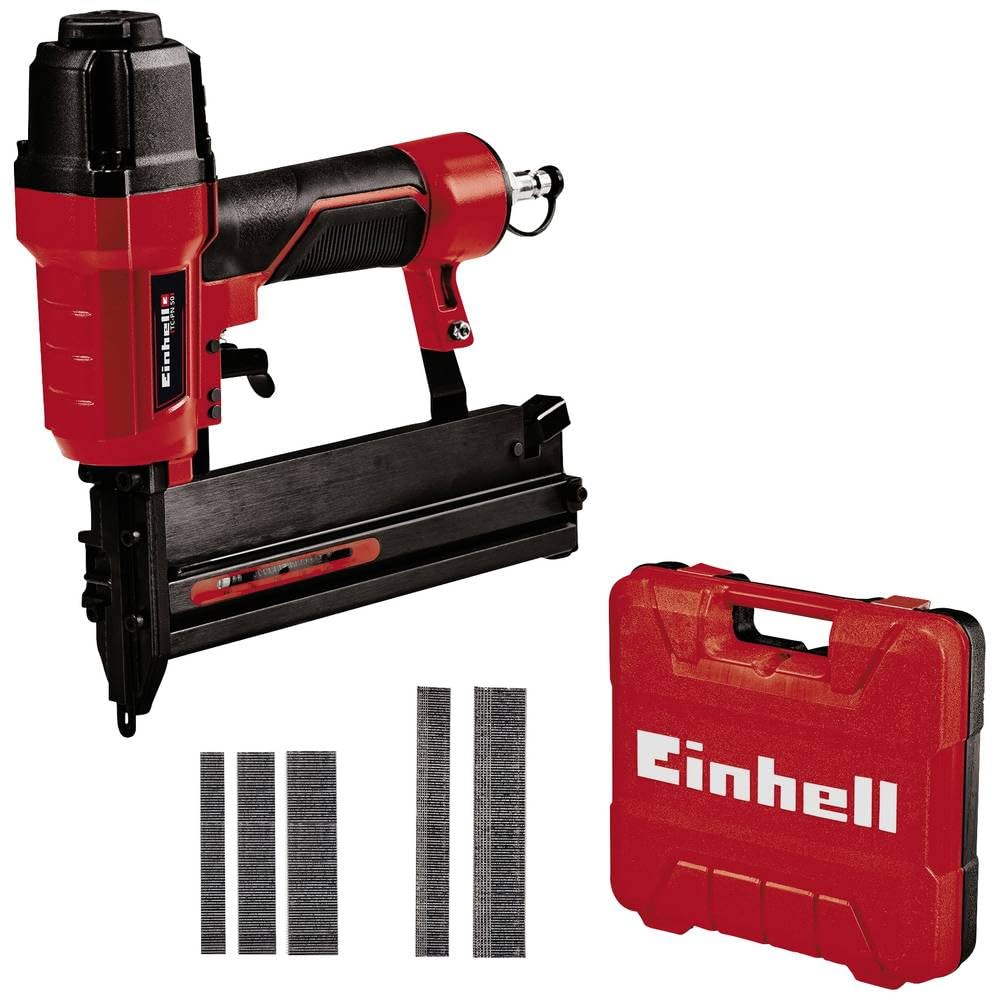
Rysunek 1: Główny view of the Einhell TC-PN 50 pneumatic stapler/nailer. The tool features a red and black housing, an ergonomic grip, and a magazine for fasteners. Staples and nails are visible on the wooden surface in the foreground.
- Wlot powietrza: Connection point for the compressed air hose.
- Spust: Aktywuje mechanizm zapinający.
- Magazyn: Holds staples or nails. Features a level indicator.
- Koło regulacji głębokości: Allows precise setting of fastening depth.
- Safety Nose: Must be pressed against the workpiece for the tool to fire.
- Uchwyt antypoślizgowy: Zaprojektowane z myślą o wygodnej i bezpiecznej obsłudze.
Organizować coś
1. Connecting to Air Compressor
- Upewnij się, że sprężarka powietrza jest wyłączona i rozhermetyzowana.
- Connect a suitable air hose (minimum 9mm inner diameter for optimal performance) to the air inlet of the TC-PN 50.
- Set the air compressor's output pressure to the recommended operating pressure (refer to specifications).
- Włącz sprężarkę powietrza.
2. Loading Staples or Nails
The tool uses both staples (13-40mm) and nails (15-50mm).
- Przed przystąpieniem do montażu elementów złącznych należy odłączyć dopływ powietrza.
- Locate the magazine release latch and open the magazine.
- Insert a strip of staples or nails into the magazine, ensuring they are oriented correctly.
- Zamknij magazynek dokładnie, aż się zatrzaśnie.
- Check the level indicator to confirm fasteners are loaded.

Rysunek 2: The Einhell TC-PN 50 pneumatic stapler/nailer shown with strips of staples and nails, illustrating the types of fasteners compatible with the tool. The magazine's level indicator is visible.
3. Regulacja głębokości
Use the depth adjustment wheel to control how deep the fasteners are driven into the material.
- Turn the wheel clockwise to increase fastening depth.
- Turn the wheel counter-clockwise to decrease fastening depth.
- Always test the depth setting on a scrap piece of material before working on your final project.
Operacyjny
- Ensure all safety precautions are followed and the air supply is connected.
- Place the safety nose firmly against the workpiece where you intend to fasten. The safety nose must be fully depressed for the tool to fire.
- Squeeze the trigger to drive a staple or nail.
- Zwolnij spust i podnieś narzędzie z obrabianego przedmiotu.
- Periodically check the fastener level indicator and reload as needed.
Notatka: The anti-slip grip ensures comfortable and safe operation, even during extended use.
Konserwacja
Regularna konserwacja zapewnia długowieczność i optymalną wydajność narzędzia.
- Olejowanie: Before each use, apply 2-3 drops of pneumatic tool oil into the air inlet. This lubricates internal components.
- Czyszczenie: Keep the tool clean and free from dust and debris. Use a dry cloth to wipe down the exterior. Do not use harsh chemicals.
- Filtr powietrza: Regularly check and clean the air filter on your compressor to ensure clean air supply to the tool.
- Składowanie: Store the tool in its transport and storage case in a dry, secure location away from direct sunlight and extreme temperatures. Disconnect from air supply before storage.
Rozwiązywanie problemów
Oto rozwiązania typowych problemów, z którymi możesz się spotkać:
| Problem | Możliwa przyczyna | Rozwiązanie |
|---|---|---|
| Narzędzie nie uruchamia się | No air supply, low air pressure, safety nose not depressed, empty magazine, jammed fastener. | Check air connection and pressure, ensure safety nose is fully pressed, reload fasteners, clear jam (disconnect air first). |
| Fasteners not driven deep enough | Low air pressure, depth adjustment too shallow, incorrect fastener length for material. | Increase air pressure, adjust depth wheel, use longer fasteners if necessary. |
| Fasteners driven too deep / damaging material | High air pressure, depth adjustment too deep. | Decrease air pressure, adjust depth wheel. |
| Tool leaks air | Loose connections, damaged O-rings/seals. | Tighten connections, inspect and replace damaged seals (consult service center if unsure). |
Specyfikacje
| Numer modelu | 4137790 |
| Wymiary produktu (dł. x szer. x wys.) | Wymiary 25.6 x 5.5 x 26 cm |
| Waga | 2.76 kilograma |
| Tworzywo | Plastikowy |
| Pojemność zapięcia | Full strip (approx. 100 fasteners) |
| Staple Lengths | 13-40 mm |
| Długości paznokci | 15-50 mm |
| Recommended Air Hose Inner Diameter | 9 mm |
| Cechy specjalne | 2-in-1 combination tool (stapler and nailer), depth adjustment, anti-slip grip, level indicator. |
Gwarancja i wsparcie
For warranty information or technical support, please refer to the official Einhell webOdwiedź stronę internetową lub skontaktuj się z działem obsługi klienta. Zachowaj paragon jako dowód zakupu.