1. Wprowadzenie
The ThermoPro TP200B is a digital indoor/outdoor thermometer designed to monitor temperature and humidity levels in your environment. This manual provides detailed instructions for setting up, operating, and maintaining your device to ensure accurate readings and optimal performance.
2. Zawartość opakowania
- 1 x ThermoPro TP200B Main Unit (Indoor Display)
- 1 x Outdoor Temperature Sensor (Wireless)
- 5 x baterie AAA (w zestawie)
- 1 x Instrukcja obsługi
3. Główne cechy
- Large Backlit Display with Large Digits: Features a 3.3-inch LCD display with large digits for easy readability, even in low light conditions.
- Rekordy maks./min.: Stores and displays maximum and minimum temperature and humidity records for the past 24 hours.
- Color Air Comfort Indicator: A visual indicator with an arrow shows current air conditions (Dry/Comfort/Wet), allowing for environmental adjustments.
- Bardzo dokładne odczyty: Equipped with a premium sensor for precise temperature and humidity measurements, accurate to ±2°F and ±2-3%RH.
- Przyjazny dla użytkownika projekt: Easily adjust settings with three front-facing buttons.
- Wiele opcji umieszczenia: Can be wall-mounted, placed on a tabletop, or attached via magnetic back.
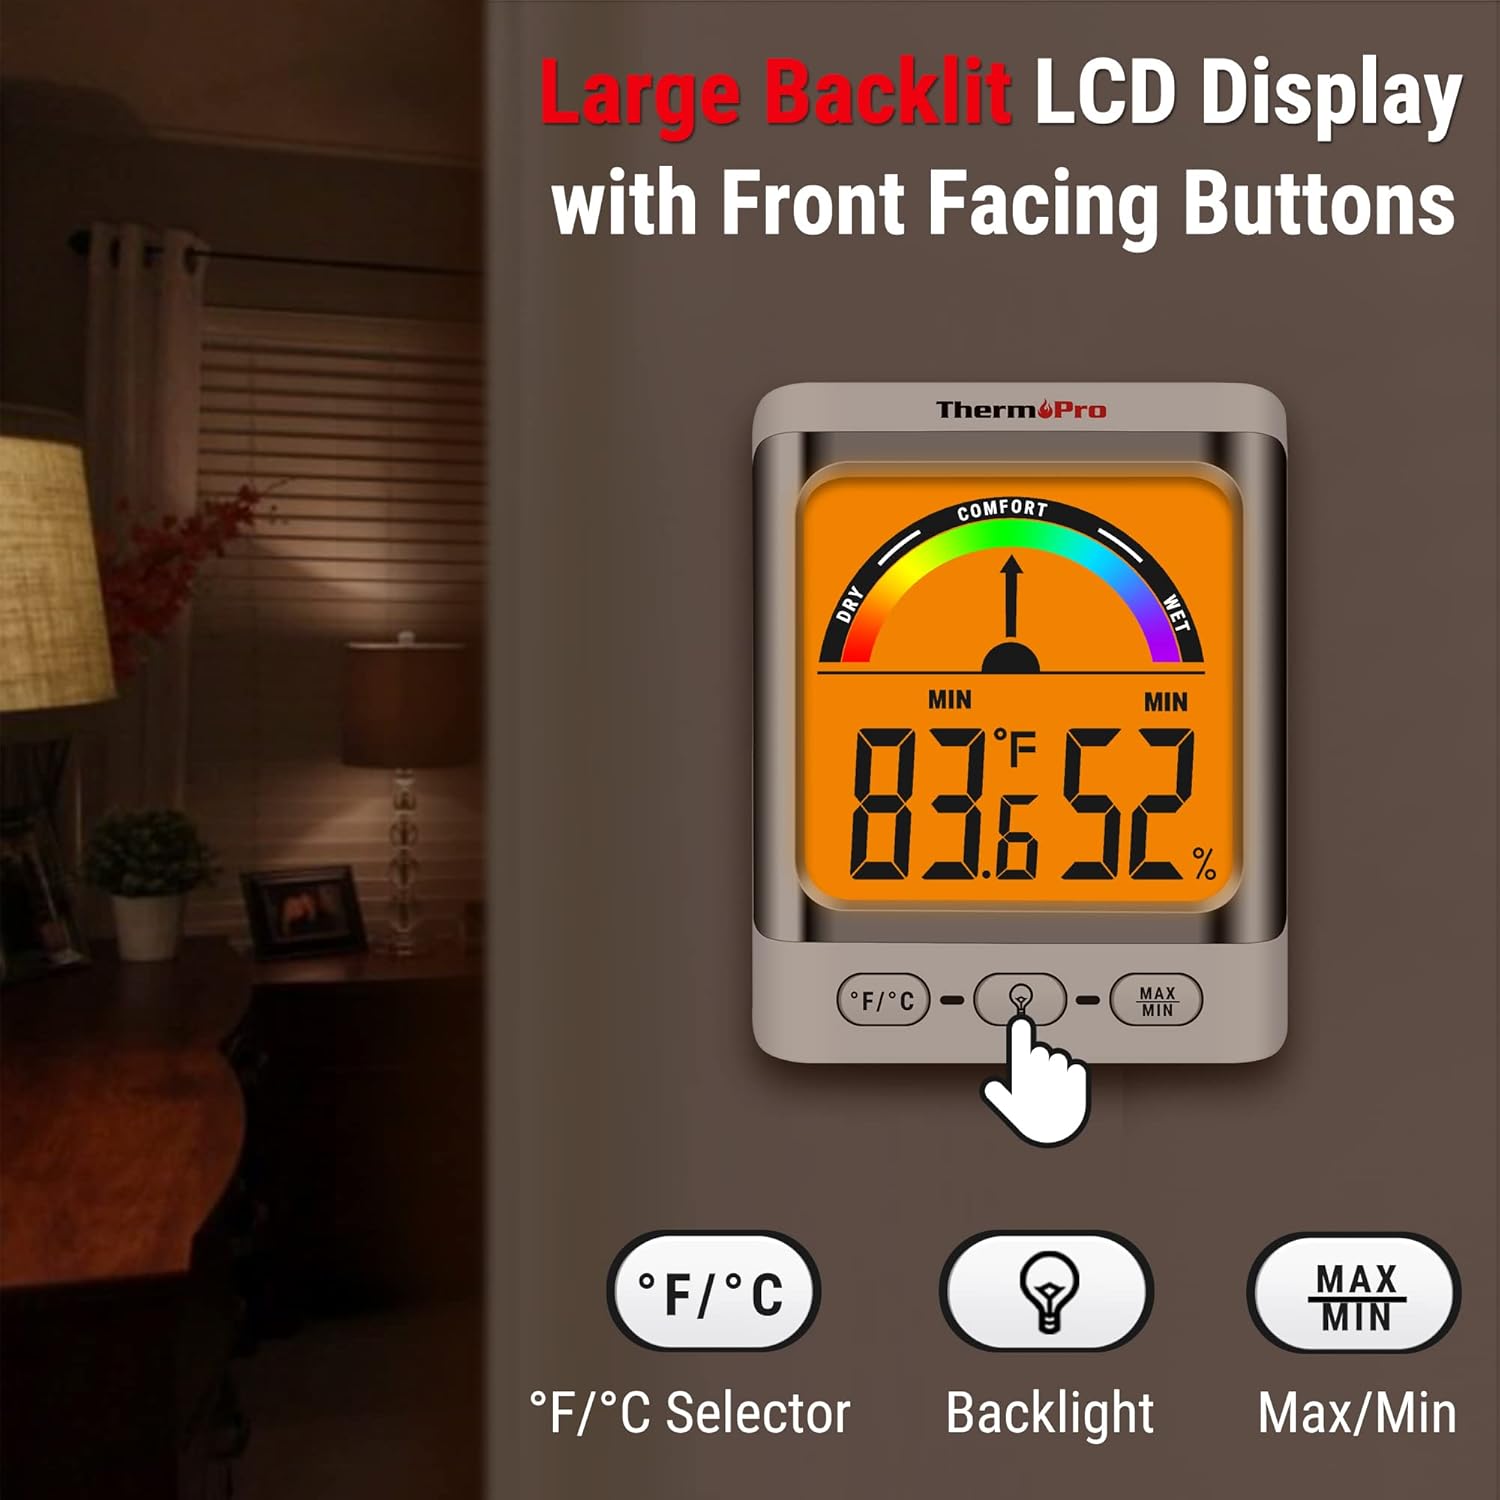
Image: The ThermoPro TP200B main unit display, highlighting the large digits, comfort indicator, and the three control buttons: °F/°C selector, Backlight, and Max/Min.
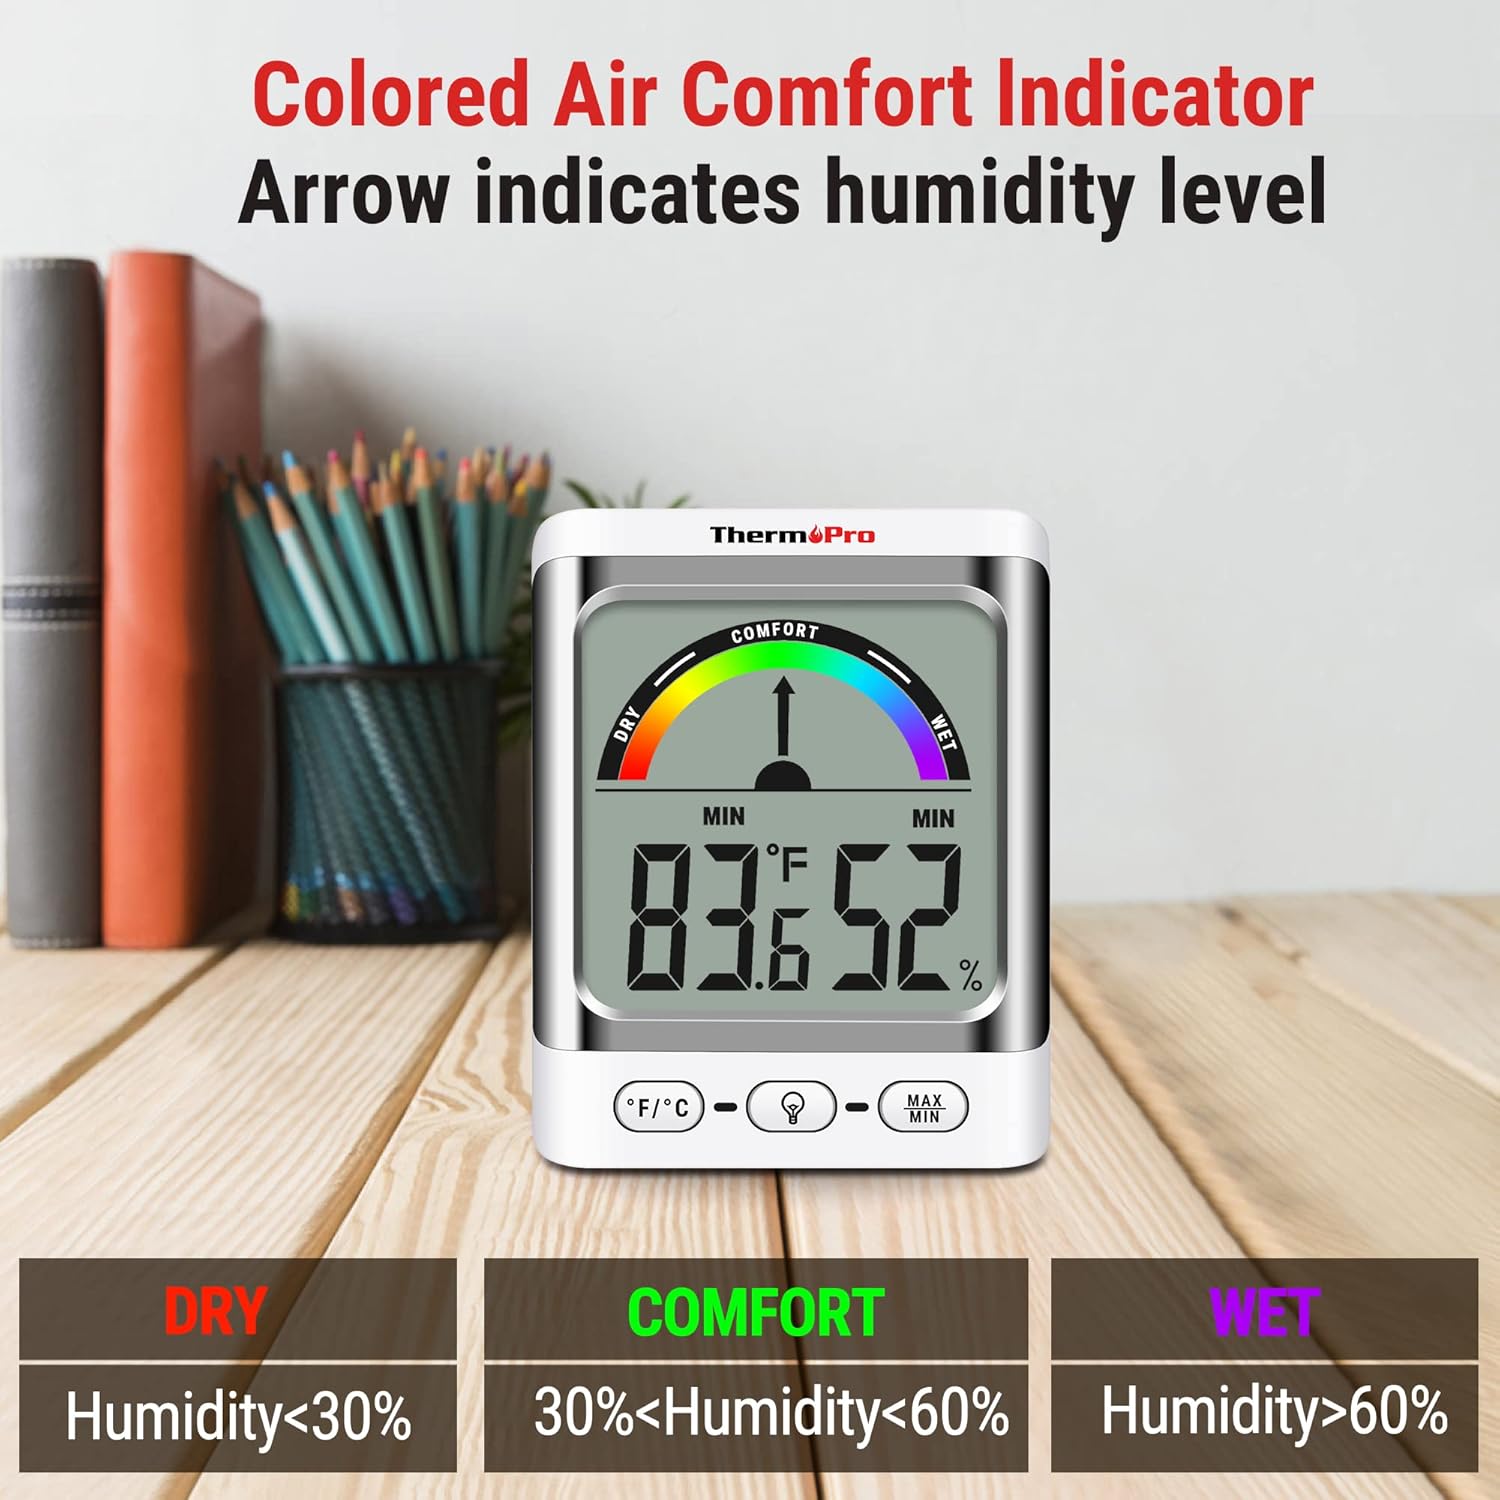
Image: A close-up of the ThermoPro TP200B display, illustrating the colored comfort indicator that visually represents dry (humidity <30%), comfort (30% < humidity < 60%), and wet (humidity >60%) conditions.
4. Konfiguracja
- Montaż baterii:
- Open the battery compartment on the back of both the main unit and the outdoor sensor.
- Włóż dołączone baterie AAA, zwracając uwagę na prawidłową biegunowość (+/-).
- Dokładnie zamknij komory baterii.
- Rozmieszczenie czujnika:
- Place the outdoor sensor in a location that is protected from direct sunlight and precipitation for accurate readings.
- Ensure the sensor is within the 500ft wireless range of the main unit.
- Rozmieszczenie jednostki głównej:
- The main unit can be placed on a tabletop using its integrated stand, mounted on a wall, or attached to a metallic surface via its magnetic back.
- Position the main unit in a central location indoors for optimal signal reception from the outdoor sensor.

Obraz: Byłyamples of flexible placement options for the ThermoPro TP200B, including wall mounting, magnetic attachment to a refrigerator, and freestanding on a countertop.
5. Instrukcja obsługi
5.1 Wyświetl ponadview
The large LCD display shows indoor temperature, humidity, and the comfort level indicator. The outdoor temperature is displayed from the wireless sensor.
5.2 Funkcje przycisków
- Przycisk °F/°C: Press to switch between Fahrenheit and Celsius temperature units.
- Przycisk podświetlenia: Press to activate the backlight for 15 seconds, improving visibility in dim conditions.
- Przycisk MAX/MIN: Naciśnij, aby view the maximum and minimum temperature and humidity recorded over the past 24 hours. Press again to cycle through current, MAX, and MIN readings. Hold to reset MAX/MIN records.

Image: The ThermoPro TP200B displaying maximum and minimum temperature and humidity values, accompanied by a conceptual graph showing how these values fluctuate over a 24-hour period.
6. Konserwacja
- Czyszczenie: Wytrzyj urządzenie i czujnik miękką ściereczką.amp płótno. Nie używaj ściernych środków czyszczących ani nie zanurzaj w wodzie.
- Wymiana baterii: Replace batteries when the low battery indicator appears on the display. Ensure to use fresh AAA batteries.
- Składowanie: Jeśli urządzenie będzie przechowywane przez dłuższy czas, należy wyjąć baterie, aby zapobiec wyciekowi.
7. Rozwiązywanie Problemów
- Brak wyświetlacza/wskaźnik niskiego poziomu baterii: Replace all batteries in both the main unit and the outdoor sensor.
- Niedokładne odczyty:
- Ensure the outdoor sensor is not in direct sunlight or exposed to extreme weather conditions.
- Verify the main unit and sensor are within effective range and not obstructed by thick walls or electronic interference.
- Allow both units to stabilize for 30 minutes after initial setup or battery replacement.
- No Signal from Outdoor Sensor:
- Relocate the main unit or sensor closer to each other.
- Check batteries in both units.
- Reset the connection by removing batteries from both units, waiting a few minutes, then reinserting them.
8. Specyfikacje
| Funkcja | Szczegół |
|---|---|
| Nazwa modelu | TP200B |
| Marka | ThermoPro |
| Funkcja specjalna | Wysoka dokładność |
| Kolor | Biały |
| Typ wyświetlacza | Cyfrowy |
| Źródło zasilania | Zasilanie bateryjne (w zestawie 5 baterie AAA) |
| Dokładność temperatury | ± 2 ° F (± 1.1 ° C) |
| Dokładność wilgotności | ±2% from 30% to 80% RH; ±3% outside this range |
| Czas reakcji | 0.5 sekund |
| Waga przedmiotu | 4.2 uncji |
| Długość elementu | 3.9 cali |

Image: Multiple ThermoPro TP200B units demonstrating consistent temperature and humidity readings, highlighting the specified accuracy tolerances of ±2°F (±1.1°C) for temperature and ±2% RH (30-80% range) for humidity.

Image: A visual comparison showcasing the large, compact display of the ThermoPro TP200B (3.3 inches) next to a smaller, generic thermometer (1.7 inches), emphasizing its enhanced readability.
9. Gwarancja i wsparcie
ThermoPro udziela gwarancji na ten produkt na wady materiałowe i wykonawcze. Aby uzyskać szczegółowe informacje o gwarancji, zarejestrować produkt lub uzyskać pomoc techniczną, odwiedź oficjalną stronę ThermoPro. webOdwiedź stronę internetową lub skontaktuj się z działem obsługi klienta. Zachowaj paragon jako dowód zakupu.
Oficjalny ThermoPro Webstrona: www.thermopro.com