1. Wprowadzenie
This manual provides detailed instructions for the assembly, operation, and maintenance of your Sky-Watcher StarTravel 120mm f/5 AZ3 Refractor Telescope. This instrument is designed for both astronomical and terrestrial observations, offering clear and wide-field views. Please read this manual thoroughly before using your telescope to ensure proper setup and optimal performance.
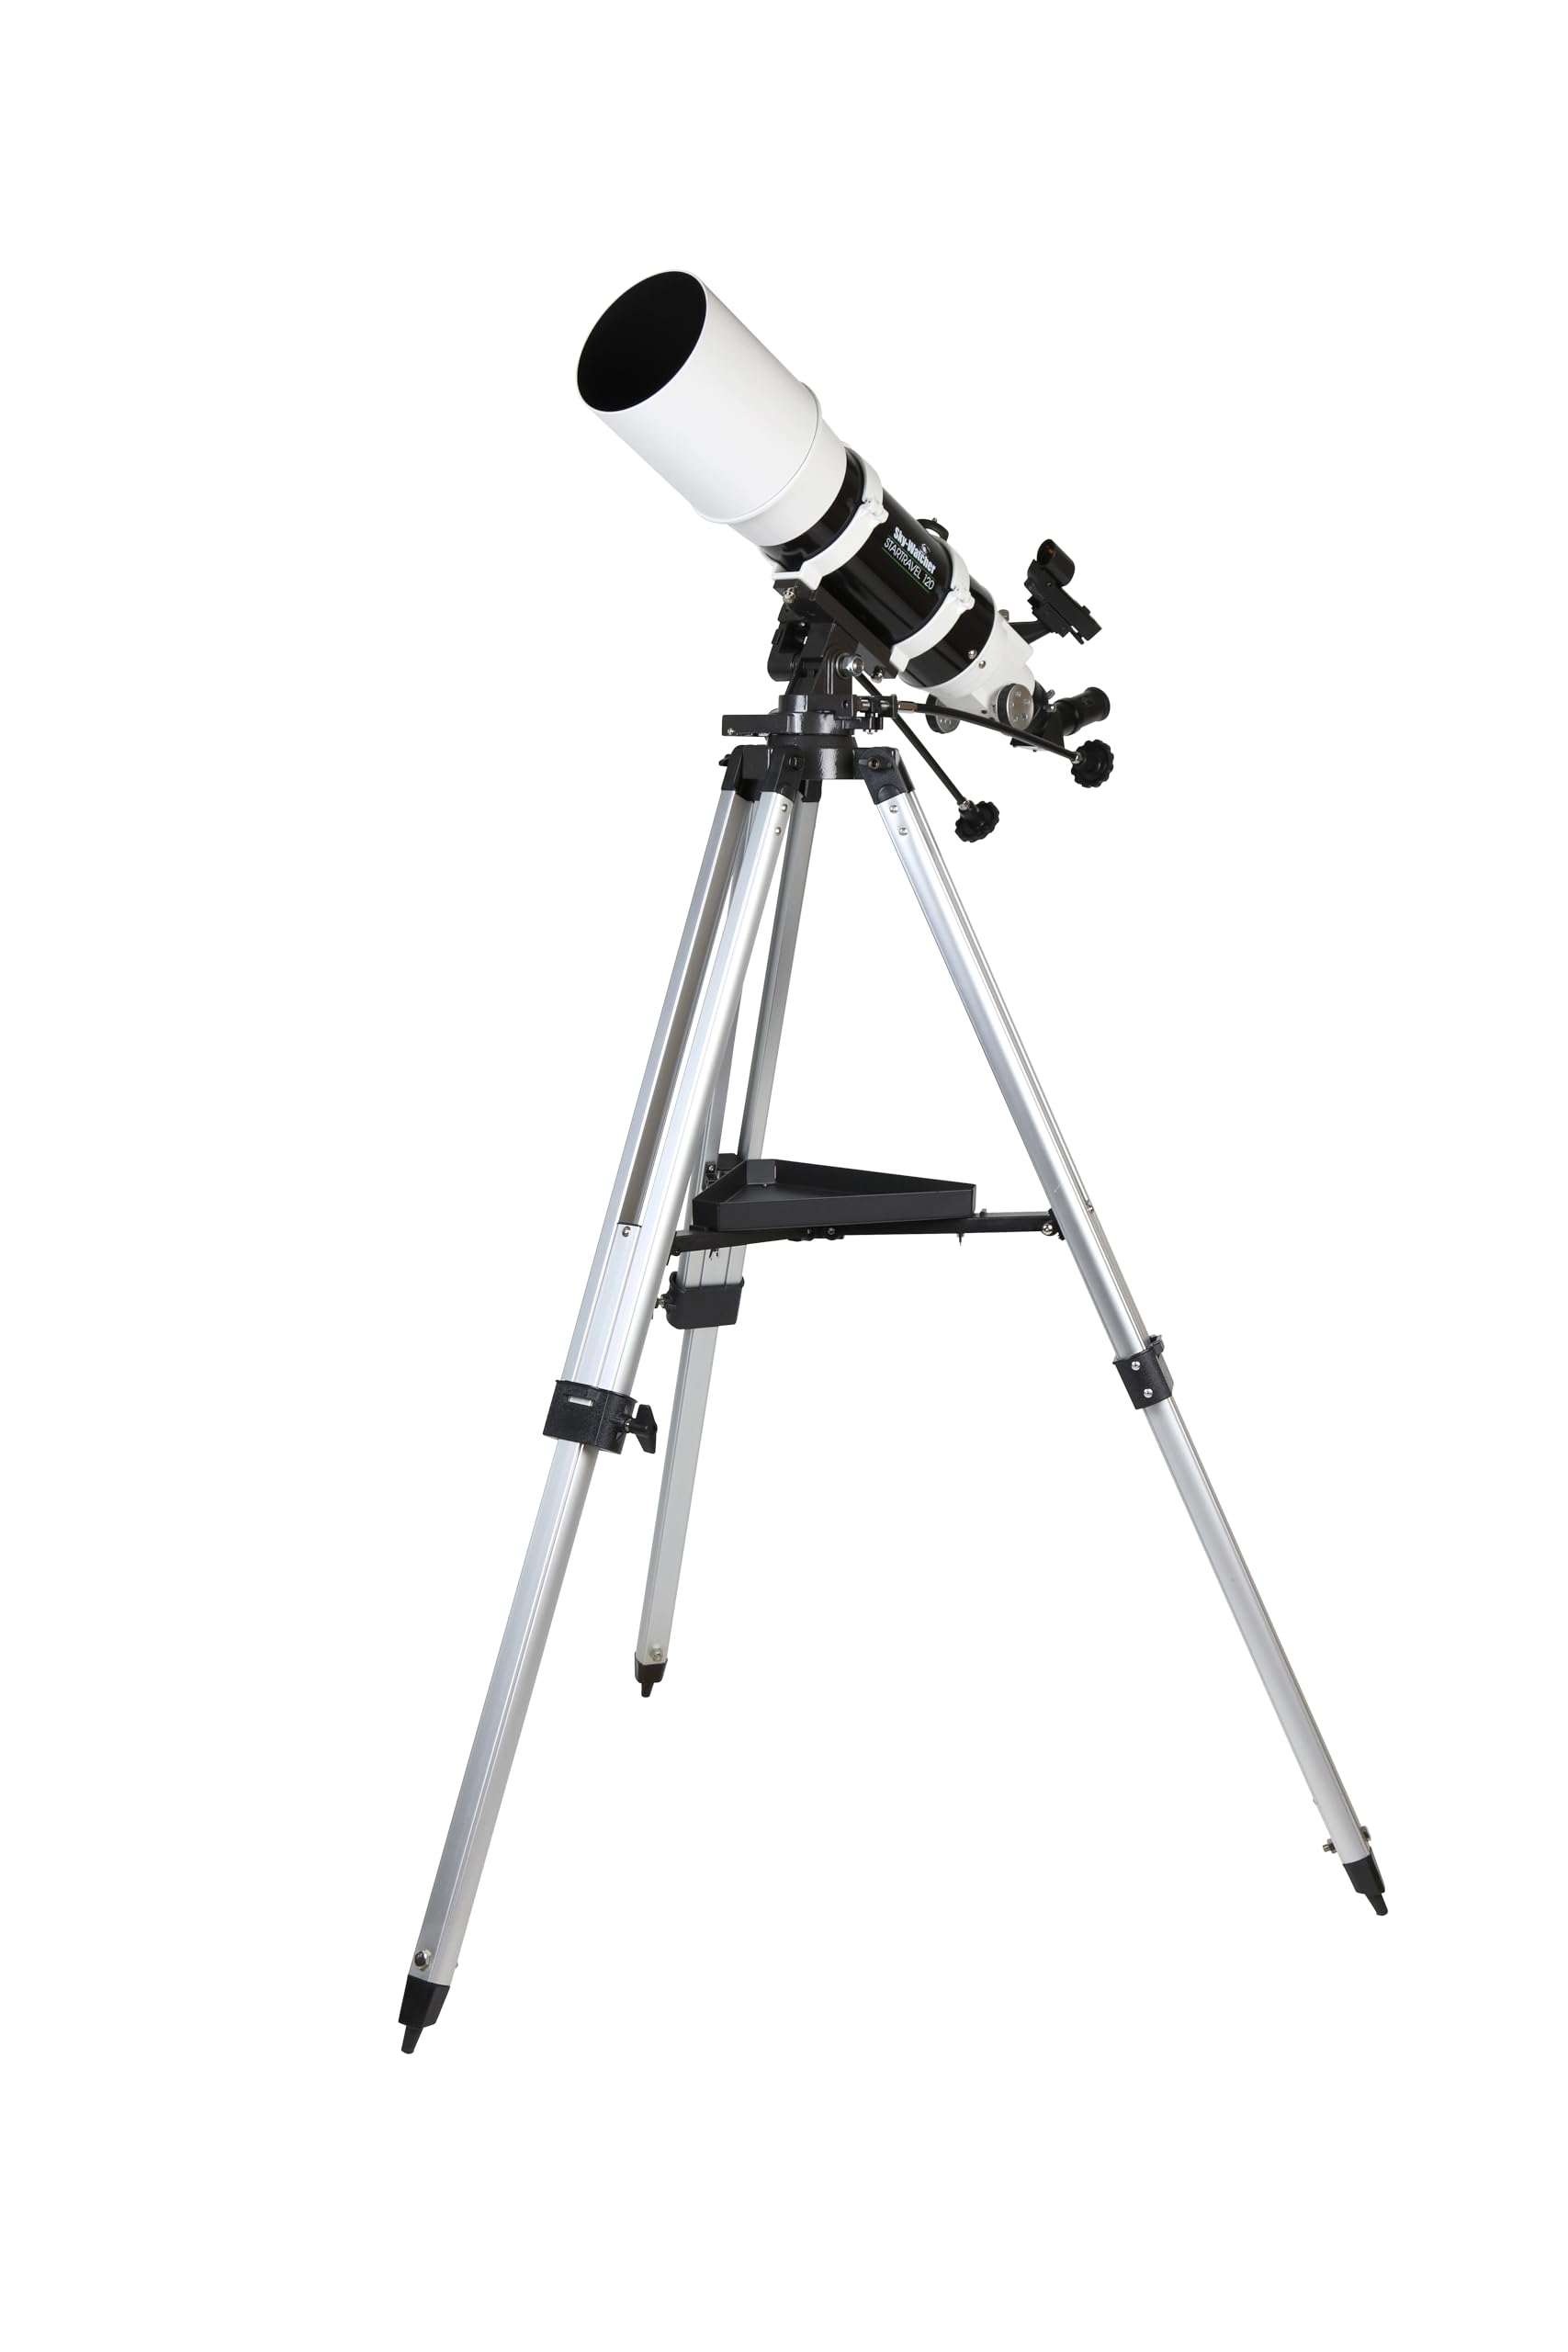
Figure 1: Fully assembled Sky-Watcher StarTravel 120mm f/5 AZ3 Refractor Telescope.
2. Informacje dotyczące bezpieczeństwa
- Nigdy nie patrz bezpośrednio na Słońce przez teleskop lub jego szukacz bez profesjonalnie wykonanego filtra słonecznego. Permanent eye damage or blindness can result.
- Nie pozostawiaj teleskopu bez nadzoru, zwłaszcza w obecności dzieci.
- Aby uniknąć zarysowań lub uszkodzeń, należy obchodzić się z elementami optycznymi ostrożnie.
- Ensure all knobs and screws are securely tightened during assembly and use to prevent accidental falls of components.
- Use caution when adjusting the tripod legs to maintain stability.
3. Zawartość opakowania
Sprawdź, czy w Twoim opakowaniu znajdują się wszystkie wymienione poniżej elementy:
- Optical Tube Assembly (OTA) - 120mm Refractor
- AZ3 Alt-Azimuth Mount
- Regulowany statyw aluminiowy
- Taca na akcesoria
- 25mm 1.25" Super Eyepiece
- 10mm 1.25" Super Eyepiece
- Wyszukiwarka czerwonych kropek
- 1.25" 45-degree Erecting Prism
- Tube Mounting Rings (pre-attached to OTA)
4. Konfiguracja
4.1. Montaż statywu i uchwytu
- Ostrożnie wyjąć wszystkie elementy z opakowania.
- Spread the tripod legs apart until they are fully extended. Tighten the leg brace knob to secure them.
- Extend the lower sections of the tripod legs to your desired height. Secure them with the leg lock clamps.
- Attach the accessory tray to the central leg brace using the provided screw.
- Place the AZ3 mount head onto the tripod's mounting platform. Secure it by tightening the large knob from underneath the tripod head.

Rysunek 2: Strona view of the telescope, illustrating the tripod and mount assembly.
4.2. Attaching the Optical Tube Assembly (OTA)
- Loosen the knobs on the tube mounting rings (pre-attached to the OTA) and open the rings.
- Place the OTA into the mounting rings, ensuring it is balanced. Close the rings and tighten the knobs securely.
- Attach the mounting rings to the AZ3 mount head using the dovetail clamp. Upewnij się, że klamp is fully tightened.

Figure 3: Detail of the optical tube assembly mounted on the AZ3 head.
4.3. Installing the Eyepiece and Erecting Prism
- Odkręć śrubę motylkową na tubusie wyciągu ogniskującego.
- Insert the 45-degree erecting prism into the focuser drawtube. Tighten the thumbscrew to secure it.
- Insert either the 25mm or 10mm eyepiece into the erecting prism. Tighten the thumbscrew on the prism to secure the eyepiece. The 25mm eyepiece provides lower magnification and a wider field of view, ideal for initial targeting.

Figure 4: Eyepiece and erecting prism installation on the focuser.
4.4. Installing the Red Dot Finder
- Slide the red dot finder into the dovetail base located on the optical tube.
- Tighten the small thumbscrew on the finder base to secure it.
- Remove the plastic battery tab from the red dot finder to activate the battery.

Figure 5: Red dot finder attached to the telescope.
5. Obsługa teleskopu
5.1. Aligning the Red Dot Finder
The red dot finder must be aligned with the main telescope for accurate targeting.
- Point the main telescope at a distant, easily identifiable object (e.g., a distant tree or street light) during daylight hours.
- Look through the 25mm eyepiece and center the object in the field of view.
- Turn on the red dot finder. Look through the finder and use the adjustment knobs to move the red dot until it is centered on the same object you see in the main telescope's eyepiece.
- Once aligned, the red dot finder will indicate where the main telescope is pointing.
5.2. Skupienie
To achieve a sharp image, rotate the focuser knobs until the object appears clear and crisp. For astronomical viewing, focus on a bright star or the Moon. For terrestrial viewing, focus on a distant land object.
5.3. Obserwowanie obiektów niebieskich
- Start with the 25mm eyepiece for a wide field of view, co ułatwia lokalizację obiektów.
- Use the red dot finder to point the telescope at your desired celestial object.
- Look through the 25mm eyepiece and center the object. Adjust focus as needed.
- For higher magnification, switch to the 10mm eyepiece. Refocus after changing eyepieces.
- Use the slow-motion controls on the AZ3 mount for fine adjustments to track objects as they move across the sky.
5.4. Naziemne Viewwchodzenie
The 45-degree erecting prism provides a correctly oriented image, making the telescope suitable for terrestrial observations. Follow the same steps as for celestial viewing, focusing on land objects. The AZ3 mount's alt-azimuth design is intuitive for tracking objects horizontally and vertically.
6. Konserwacja
- Czyszczenie optyki: Use a soft, clean brush or compressed air to remove loose dust. For smudges, use a specialized optical cleaning solution and a microfiber cloth. Apply solution to the cloth, not directly to the lens.
- Cleaning Mechanical Parts: Wipe down the telescope tube and mount with a soft, damp płótno. Unikaj ostrych środków chemicznych.
- Składowanie: Store the telescope in a dry, dust-free environment. Use dust caps for the objective lens and focuser opening when not in use.
- Kolimacja: The refractor telescope is factory-collimated and generally does not require user adjustment. If you suspect collimation issues, contact Sky-Watcher support.
7. Rozwiązywanie Problemów
| Problem | Możliwa przyczyna | Rozwiązanie |
|---|---|---|
| Obraz jest rozmazany/nieostry | Nieprawidłowe ustawienie ostrości | Adjust the focuser knobs until the image is sharp. |
| Cannot find objects | Red dot finder not aligned; using too high magnification | Align the red dot finder (Section 5.1). Start with the 25mm eyepiece. |
| Image appears upside down or reversed | Erecting prism not used (for terrestrial view(wchodzenie) | Ensure the 45-degree erecting prism is installed for terrestrial viewing. For astronomical viewing, an inverted image is normal. |
| Wobbly image | Tripod or mount not stable; loose connections | Ensure tripod legs are fully extended and locked. Tighten all mounting knobs and screws. |
8. Specyfikacje
| Funkcja | Szczegół |
|---|---|
| Projekt optyczny | Refraktor achromatyczny |
| Otwór | 120 mm |
| Długość ogniskowej | 600 mm |
| Współczynnik ogniskowej | f/5 |
| Powłoki optyczne | W pełni wielowarstwowe |
| Typ mocowania | AZ3 Alt-Azimuth Mount with Slow-Motion Controls |
| Statyw | Regulowany aluminiowy |
| W zestawie okulary | 25mm Super (1.25"), 10mm Super (1.25") |
| Zakres wyszukiwarki | Wyszukiwarka czerwonych kropek |
| Erecting Prism | 1.25" 45-degree |
| Długość tuby optycznej | 558 mm (22 cali) |
| Całkowita waga | Około 17 funta |
| Numer modelu | S10105 |
9. Gwarancja i wsparcie
9.1. Informacje o gwarancji
This Sky-Watcher telescope comes with a Two Year Limited Warranty. Please refer to the warranty card included in your package for full terms and conditions. Keep your proof of purchase for warranty claims.
9.2. Obsługa klienta
For technical assistance, troubleshooting, or warranty service, please contact Sky-Watcher customer support. Visit the official Sky-Watcher webstrona zawierająca dane kontaktowe i dodatkowe zasoby.
Online resources and support: Sky-Watcher Store on Amazon