vidaXL 45523
vidaXL Galvanized Steel Raised Garden Bed User Manual
Model: 45523
1. Wprowadzenie
Thank you for choosing the vidaXL Galvanized Steel Raised Garden Bed. This manual provides essential information for the safe assembly, operation, and maintenance of your new garden bed. Designed for durability and practicality, this raised bed offers ample space for cultivating a variety of plants, vegetables, herbs, and flowers in your garden, balcony, or patio.
The product features a simple yet functional design, constructed from weather-resistant galvanized steel, making it ideal for outdoor use. Please read this manual thoroughly before assembly and retain it for future reference.
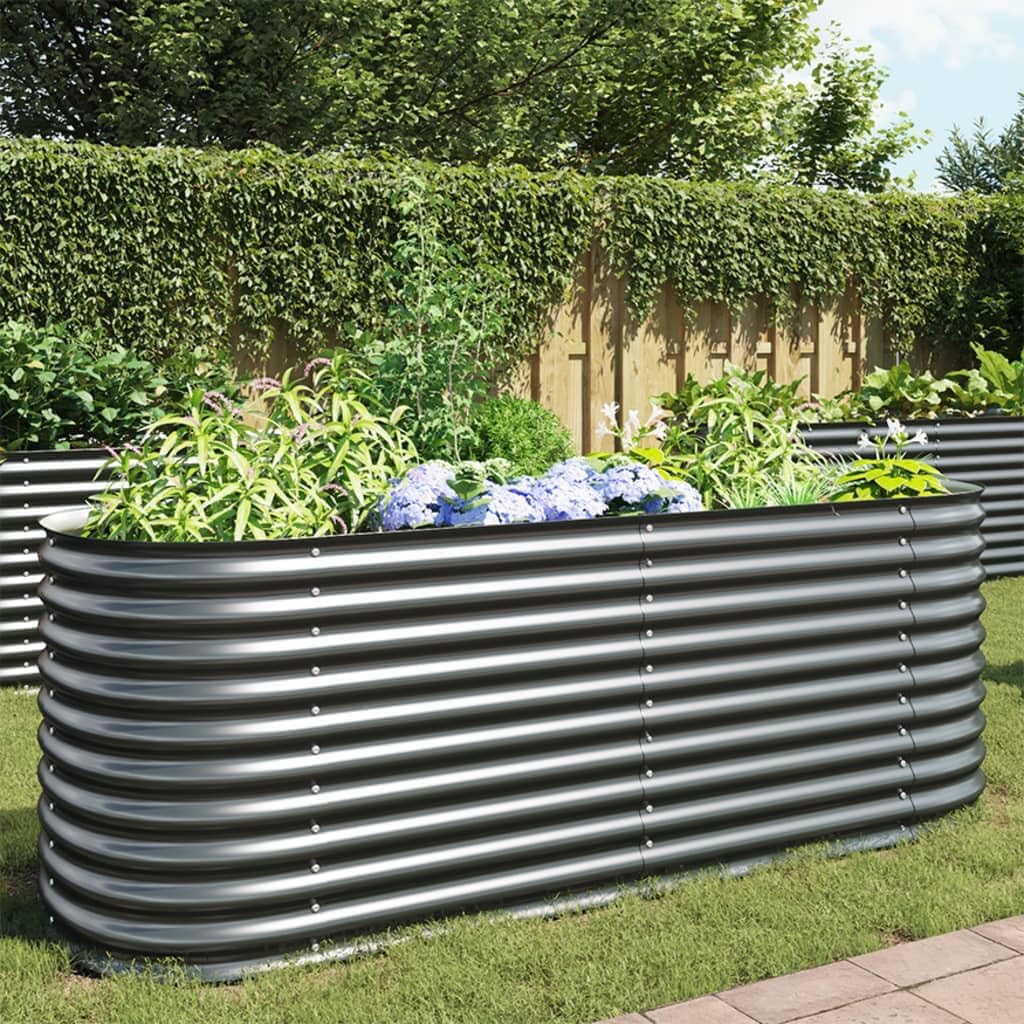
Image 1.1: The vidaXL Raised Garden Bed integrated into a garden landscape, showcasing its capacity for various plants.
2. Informacje dotyczące bezpieczeństwa
Podczas montażu i użytkowania należy przestrzegać następujących środków ostrożności:
- Always wear appropriate personal protective equipment, such as work gloves, during assembly to protect against sharp edges of the steel panels.
- Ensure all components are present and undamaged before beginning assembly. Do not attempt to assemble if parts are missing or damaged.
- Assemble the garden bed on a flat, stable surface to prevent tipping or instability during construction.
- Aby uniknąć ryzyka zadławienia, małe części i materiały opakowaniowe należy trzymać z dala od dzieci i zwierząt domowych.
- Do not overload the garden bed with excessive soil or materials, as this may compromise its structural integrity.
- Periodically inspect the garden bed for any signs of wear, corrosion, or loose fasteners, especially after extreme weather conditions.
3. Zawartość opakowania
Before starting assembly, verify that all parts are included in your package. While specific part counts may vary by model, a typical package includes:
- Galvanized steel side panels
- Galvanized steel end panels
- Corner brackets or connecting plates
- Support bars (for longer models)
- Elementy złączne (śruby, nakrętki, podkładki)
- Assembly tool (e.g., small wrench or hex key)
If any parts are missing or damaged, please contact vidaXL customer support for assistance.
4. Instalacja i montaż
Assembly is required for this product. It is recommended to have two people for easier and safer assembly. Approximate assembly time: 1-2 hours.
Wymagane narzędzia:
- Rękawice robocze (niezbędne dla bezpieczeństwa)
- Zestaw kluczy nastawnych lub nasadek
- Śrubokręt (jeśli dotyczy)
Kroki montażu:
- Rozpakuj i zidentyfikuj komponenty: Carefully unpack all parts and lay them out. Refer to the package contents list to ensure all pieces are present. Note the corrugated design of the panels.
- Connect Side and End Panels: Begin by connecting the side panels to the end panels using the provided screws, nuts, and washers. Align the pre-drilled holes carefully. Do not fully tighten all fasteners until the entire structure is assembled to allow for minor adjustments.
- Install Internal Support Bars: For longer models (like the 240 cm version), internal support bars are essential for stability. Attach these bars across the width of the garden bed, connecting them to the side panels at the designated points. These bars prevent bowing when the bed is filled with soil.
- Dokręć wszystkie elementy złączne: Once all panels and support bars are in place and the garden bed is correctly shaped, systematically tighten all screws and nuts. Ensure they are snug but do not overtighten, which could strip threads or deform the metal.
- Ustawienie grządki ogrodowej: Choose a level and well-drained location for your raised garden bed. Consider sunlight exposure requirements for the plants you intend to grow.
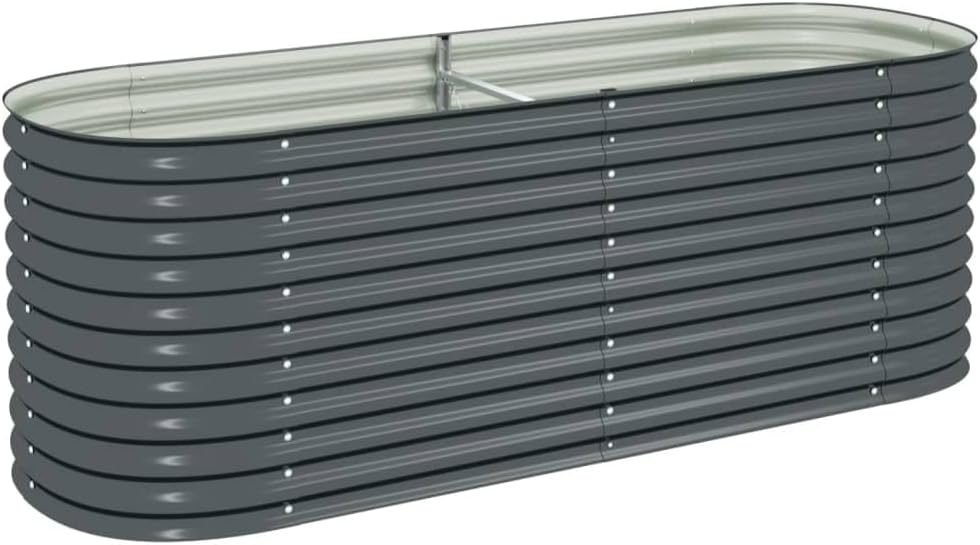
Obraz 4.1: Koniecview of the assembled garden bed, illustrating its structure.

Image 4.2: Detail of panel connection points, showing screws and corrugated design.

Obraz 4.3: Wewnętrzny view highlighting the support bars for structural integrity.

Rysunek 4.4: Szczegółowy view of a support bar attachment.
5. Instrukcja obsługi (użytkowanie)
Once assembled and positioned, your vidaXL Raised Garden Bed is ready for use:
- Przygotuj bazę: While not strictly necessary, you may choose to lay down a layer of cardboard or landscape fabric at the bottom of the bed to suppress weeds and retain soil.
- Wypełnij glebą: Fill the garden bed with a suitable soil mix. A common practice is to layer organic materials (e.g., logs, branches, leaves) at the bottom, followed by compost and then topsoil. This method, known as Hugelkultur, can improve drainage and nutrient availability.
- Sadzenie: Plant your desired vegetables, herbs, or flowers according to their specific spacing and depth requirements. The raised design allows for better control over soil quality and temperature.
- Podlewanie: Water your plants regularly. Raised beds tend to drain more quickly than in-ground gardens, so monitor soil moisture closely.
- Drenaż: The open bottom design ensures excellent drainage, preventing waterlogging and promoting healthy root development.
6. Konserwacja
To ensure the longevity and optimal performance of your galvanized steel raised garden bed, follow these maintenance guidelines:
- Czyszczenie: Okresowo przecieraj zewnętrzną część grządki wodą.amp Ściereczką usuń brud i zanieczyszczenia. Unikaj środków czyszczących o działaniu ściernym, które mogłyby uszkodzić powłokę ocynkowaną.
- Kontrola: Annually, or after severe weather, inspect all fasteners to ensure they remain tight. Check for any signs of rust or damage to the galvanized coating. While galvanized steel is weather-resistant, prolonged exposure to highly acidic soil or harsh chemicals can affect its surface.
- Zarządzanie glebą: Over time, soil in raised beds can compact and deplete nutrients. Amend the soil annually with compost or other organic matter to maintain fertility and structure.
- Zimowanie: In regions with harsh winters, consider covering the garden bed or removing excess soil to prevent extreme freeze-thaw cycles from potentially stressing the structure.
7. Rozwiązywanie Problemów
Oto rozwiązania typowych problemów, z którymi możesz się spotkać:
| Problem | Możliwa przyczyna | Rozwiązanie |
|---|---|---|
| Trudności z dopasowaniem otworów na śruby podczas montażu. | Panels are not perfectly aligned; fasteners were tightened too early. | Loosen all previously tightened fasteners. Gently adjust panels until holes align, then insert all screws before gradually tightening them. A rubber mallet can help with minor adjustments. |
| Sharp edges on panels. | Standard characteristic of cut metal sheets. | Always wear heavy-duty work gloves during handling and assembly. Once assembled, the top edge is typically rolled or covered, reducing exposure. |
| Garden bed appears unstable or bows when filled. | Support bars not installed or not properly tightened; uneven ground. | Ensure all internal support bars are correctly installed and securely fastened. Verify the garden bed is placed on a level surface. If necessary, empty the bed, level the ground, and refill. |
8. Specyfikacje
The following are the technical specifications for the vidaXL Galvanized Steel Raised Garden Bed (Model 45523):
| Atrybut | Wartość |
|---|---|
| Marka | vidaXL |
| Numer modelu | 45523 |
| Kolor | Szary |
| Tworzywo | Stal ocynkowana (stal stopowa) |
| Wymiary (dł. x szer. x wys.) | 240 x 80 x 81 cm (94.5 x 31.5 x 31.9 cala) |
| Waga produktu | 19.22 kg (42.37 funta) |
| Funkcja specjalna | Odporny na warunki atmosferyczne |
| Do użytku wewnątrz/na zewnątrz | Plenerowy |
| Plant Form | Podniesione łóżko |
| Kształt | Owalny |

Image 8.1: Dimensional diagram of the raised garden bed.
9. Gwarancja i wsparcie
vidaXL products are manufactured to high-quality standards. For information regarding warranty coverage, product support, or to order replacement parts, please refer to the warranty card included with your purchase or visit the official vidaXL website. You can also contact vidaXL customer service directly for assistance with any product-related inquiries.
Aby uzyskać dalszą pomoc, odwiedź stronę: vidaXL Official Store on Amazon
Powiązane dokumenty - 45523
 |
Instrukcja montażu i pielęgnacji podwyższonej grządki ogrodowej Sunnydaze Decor w kształcie koniczyny 4-listnej, ze stali ocynkowanej Kompleksowa instrukcja montażu, lista części i instrukcja pielęgnacji podwyższonej grządki ogrodowej Sunnydaze Decor w kształcie czterolistnej koniczyny, wykonanej ze stali ocynkowanej. Dowiedz się, jak złożyć i konserwować grządkę ogrodową. |
 |
Instrukcja montażu podwyższonej grządki ogrodowej Outsunny 845-040V01 Instrukcja montażu krok po kroku dla podwyższonej grządki ogrodowej Outsunny 845-040V01 ze stali ocynkowanej. Zawiera środki ostrożności, identyfikację części, proces montażu oraz dane kontaktowe działu obsługi klienta dla wielu regionów. |
 |
Instrukcja montażu metalowych podwyższonych grządek ogrodowych Arlmont & Co. (8'x4'x1') Instrukcja montażu krok po kroku metalowej podwyższonej grządki ogrodowej Arlmont & Co. o wymiarach 8'x4'x1'. Cechy: nierdzewna, ocynkowana stal, wysokiej jakości konstrukcja i łatwy montaż do ogrodu. |
 |
Sunnydaze Decor Square Galvanized Steel Raised Garden Bed Assembly and Care Guide This guide provides assembly instructions, use and care information, and safety warnings for the Sunnydaze Decor Square Galvanized Steel Raised Garden Bed (Model 73384_DE). |
 |
Lark Manor 78L/21Gal Raised Garden Bed with Trellis - Assembly Instructions Detailed assembly instructions for the Lark Manor 78L/21Gal Raised Garden Bed with Trellis. Includes parts list, step-by-step guide, care, safety, warranty, and warning information. |
 |
Instrukcja montażu podwyższonej grządki ogrodowej VEVOR Instrukcja krok po kroku montażu ocynkowanej podwyższonej grządki ogrodowej VEVOR. Dowiedz się, jak łączyć panele i kolumny, aby uzyskać trwałą donicę ogrodową. |
Ask a question about this manual
Ask about setup, troubleshooting, compatibility, parts, safety, or missing instructions. Manuals+ will review the question and use this page’s manual context to help answer it.