Produkt ponadview
The TOPVISION TOP402 security camera system is a comprehensive surveillance solution designed for both indoor and outdoor monitoring. This kit includes a 4-channel Digital Video Recorder (DVR) and two 1080p lite bullet cameras, providing clear video capture and reliable performance.
Główne cechy:
- Two 1080p 2MP Cameras: Plastic bullet cameras with 2.8mm lenses, suitable for indoor/outdoor use, equipped with infrared LEDs for night vision.
- 4-Channel 1080p Lite DVR: One digital video recorder supporting 4 video channels plus 1 IP channel.
- Możliwość rozbudowy pamięci masowej: DVR supports up to an 8TB hard drive (HDD not included). A WD Purple hard drive is recommended for recording.
- Plug-and-Play Cables: Two 18-meter pre-terminated cables with BNC connectors for easy installation.
- Akcesoria kompletne: Includes power adapters, power splitters, and a USB mouse.
- Versatile Video Output: Supports simultaneous HDMI and VGA video output (cables not included).

Image: The TOPVISION TOP402 kit, showing the 4-channel DVR unit and two 1080p bullet-style security cameras.
Zawartość opakowania
Sprawdź, czy w przesyłce znajdują się wszystkie wymienione poniżej elementy. Jeśli brakuje któregokolwiek z nich lub jest on uszkodzony, skontaktuj się z obsługą klienta.
- 1 x TOPVISION 4-Channel 1080p Lite DVR (Model: XDVR-1004)
- 2 x TOPVISION 1080p 2MP Bullet Cameras
- 2 x 18-meter BNC Video/Power Cables
- 1 x zasilacz do rejestratora DVR
- 1 x zasilacz do aparatów fotograficznych
- 1 x kabel rozdzielający zasilanie 1 do 2 dla kamer
- Mysz 1 x USB
- 1 x Instrukcja obsługi (ten dokument)

Image: All components of the TOPVISION TOP402 security system, including the DVR, two cameras, cables, power supplies, and a mouse.
Informacje dotyczące bezpieczeństwa
Please read and follow these safety guidelines to prevent damage to the product and ensure user safety.
- Należy używać wyłącznie zasilaczy dostarczonych wraz z systemem.
- Aby zapobiec przegrzaniu rejestratora DVR, należy zadbać o odpowiednią wentylację.
- Do not expose the DVR or cameras to extreme temperatures, humidity, or direct water.
- Avoid placing the DVR near strong magnetic fields or sources of electrical interference.
- Jeśli nie jesteś pewien, jaką czynność należy wykonać, instalację powinien wykonać wykwalifikowany personel.
- Przed przystąpieniem do czynności konserwacyjnych lub instalacyjnych należy odłączyć zasilanie.
Przewodnik po konfiguracji
1. Rozpakowanie i przygotowanie
- Ostrożnie wyjąć wszystkie elementy z opakowania.
- Inspect all items for any signs of damage.
- Choose a suitable location for the DVR, ensuring it is dry, well-ventilated, and away from direct sunlight.
- Plan the camera placement to cover desired areas, considering cable length and power access.
2. Połączenie z rejestratorem DVR
Connect the necessary peripherals to the DVR before powering it on.
- Połączenie monitora: Connect a monitor to the DVR's HDMI or VGA port using a compatible cable (not included).
- Połączenie myszy: Podłącz dołączoną mysz USB do jednego z portów USB w rejestratorze DVR.
- Połączenie sieciowe (opcjonalnie): Dla pilota viewPodłącz kabel Ethernet do portu LAN rejestratora DVR i routera.
- Instalacja dysku twardego (opcjonalnie): If you plan to record video, install a compatible 3.5-inch SATA hard drive (up to 8TB, WD Purple recommended) inside the DVR. Refer to the separate HDD installation guide if provided, or consult online resources.

Image: The DVR unit, showing the front panel and the rear panel with various ports including BNC video inputs, audio inputs/outputs, HDMI, VGA, LAN, and USB ports.
3. Instalacja kamery
Mount the cameras in desired locations and connect them to the DVR.
- Montowanie: Use screws and anchors (not included) to securely mount the cameras to a wall or ceiling. Adjust the camera angle as needed.
- Połączenie kablowe: Connect one end of the 18-meter BNC cable to the camera's video and power ports.
- Połączenie DVR: Connect the other end of the BNC cable's video connector to an available BNC input port on the DVR (e.g., Video In 1, Video In 2).
- Podłączenie zasilania: Connect the power end of the BNC cable to the 1-to-2 power splitter, then connect the splitter to the camera power adapter.

Image: Two TOPVISION 1080p bullet cameras, highlighting their night vision capability and compatibility with mobile viewaplikacji.
4. Pierwsze włączenie zasilania
- Once all connections are secure, plug the DVR power adapter into an electrical outlet.
- Plug the camera power adapter into an electrical outlet.
- The DVR will power on automatically. Follow the on-screen instructions for initial setup, which may include setting the language, date/time, and creating a password.
Instrukcja obsługi
1. Basic DVR Operation
- Na żywo View: After booting, the DVR will display the live feed from all connected cameras on the monitor.
- Nawigacja po menu: Use the USB mouse to navigate the DVR's on-screen menu. Right-click to access the main menu.
- Ustawienia systemowe: Access the 'System' or 'Configuration' menu to adjust video settings, network settings, user accounts, and other system parameters.
2. Zdalny ViewKonfiguracja
Do view your cameras remotely on a smartphone or tablet, follow these general steps:
- Podłącz DVR do sieci: Ensure the DVR is connected to your router via an Ethernet cable.
- Pobierz aplikację: Szukaj the official TOPVISION security app (often named 'XMeye' or similar for generic DVRs) on your smartphone's app store (iOS or Android).
- Zarejestruj Konto: Utwórz konto w aplikacji.
- Dodaj urządzenie: Use the app to scan the QR code displayed on the DVR's monitor (usually found in the 'Network' or 'P2P' settings) or manually enter the DVR's serial number to add it to your account.
- Na żywo View: Po dodaniu powinieneś móc view Twoja kamera przesyła sygnał zdalnie.
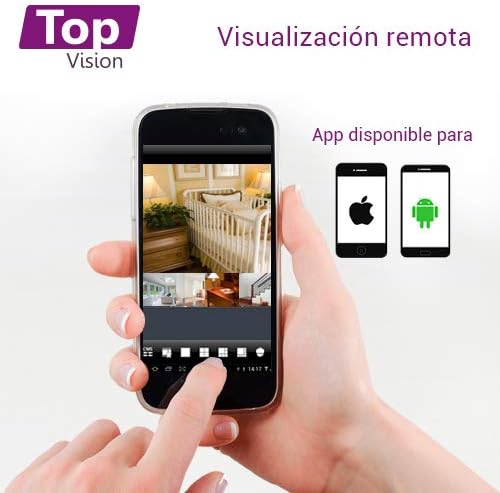
Image: A smartphone screen showing multiple live camera feeds, demonstrating the remote viewing capability of the security system.
3. Nagrywanie i odtwarzanie
- Ustawienia nagrywania: Access the 'Record' menu on the DVR to configure recording schedules, motion detection recording, and continuous recording options.
- Odtwarzanie nagranego dźwięku: Aby ponownie odtworzyć, z menu głównego wybierz opcję „Odtwarzanie”.view nagrano footage. You can search by date, time, and event type.
- Utworzyć kopię zapasową: Connect a USB flash drive to the DVR's USB port to back up recorded video files.
Konserwacja
Regularna konserwacja gwarantuje optymalną wydajność i długowieczność Twojego systemu bezpieczeństwa.
- Czyszczenie: Periodically clean the camera lenses with a soft, dry cloth to remove dust and smudges. Clean the DVR exterior with a soft, damp płótno. Nie używaj ostrych chemikaliów.
- Aktualizacje oprogramowania układowego: Sprawdź producenta website for available firmware updates for your DVR. Firmware updates can improve performance, add features, and fix bugs. Follow update instructions carefully.
- Stan dysku twardego: If a hard drive is installed, regularly check its health status through the DVR's system settings. Back up important footagi okresowo.
- Kontrola kabla: Periodically inspect all cables for wear, damage, or loose connections.
Rozwiązywanie problemów
This section addresses common issues you might encounter with your TOPVISION TOP402 system.
| Problem | Możliwa przyczyna | Rozwiązanie |
|---|---|---|
| Brak obrazu na monitorze | Luźny kabel wideo, wybrano nieprawidłowe wejście na monitorze, dekoder DVR nie został włączony. | Sprawdź połączenia kabli HDMI/VGA. Upewnij się, że monitor jest podłączony do prawidłowego wejścia. Sprawdź zasilanie dekodera. |
| Kamera nie wyświetla obrazu | Loose BNC cable, camera not receiving power, faulty camera/cable. | Check BNC video and power connections for the specific camera. Ensure power adapter and splitter are working. Test with a different cable or camera if possible. |
| Brak pilota viewwchodzenie | DVR not connected to network, incorrect network settings, app not configured correctly. | Verify Ethernet cable connection to router. Check DVR network settings (DHCP enabled). Ensure correct device ID/QR code is added to the mobile app. |
| Brak nagrywania | Brak zainstalowanego dysku twardego, dysk twardy jest pełny, harmonogram nagrywania nie został ustawiony. | Install a compatible hard drive. Check HDD status in DVR settings. Configure recording schedules. |
| Nie działa noktowizor | IR LEDs blocked, insufficient power to camera. | Ensure nothing is obstructing the camera's IR LEDs. Verify camera power supply. |
Specyfikacje
| Funkcja | Specyfikacja |
|---|---|
| Numer modelu | TOP402 |
| Marka | TOPVISION |
| Kanały DVR | 4 Video Channels + 1 IP Channel |
| Rozdzielczość przechwytywania wideo | 1080p Lite |
| Rozdzielczość kamery | 2 megapikseli (1080p) |
| Obiektyw aparatu | 2.8mm |
| Funkcja specjalna | Night Vision (Infrared LEDs) |
| Technologia łączności | Przewodowy |
| Obsługa dysków twardych | Up to 8TB (3.5-inch SATA, HDD not included) |
| Wyjście wideo | HDMI, VGA (jednoczesne) |
| Wymiary produktu (DVR) | Około 30 x 25 x 7 cm |
| Waga produktu | Approximately 3.6 kg (total kit) |
Gwarancja i wsparcie
TOPVISION products are designed for reliability and performance. For specific warranty details, please refer to the warranty card included with your product or visit the official TOPVISION webstrona.
If you encounter any issues or require technical assistance, please contact TOPVISION customer support through the contact information provided on the official website or your purchase platform. When contacting support, please have your product model number (TOP402) and purchase details ready.
For the latest drivers, software, and FAQs, please visit the TOPVISION support page online.