Wstęp
This manual provides essential instructions for the safe operation, installation, maintenance, and troubleshooting of your Farberware FW-WD211 Countertop Hot and Cold Water Dispenser. Please read this manual thoroughly before using the appliance and retain it for future reference.
The Farberware FW-WD211 is a compact, top-loading water dispenser designed for convenience in homes or offices with limited space. It provides both instant hot and cold water, featuring an energy-saving thermoelectric heating and cooling system and a child safety lock for hot water dispensing.
Ważne instrukcje bezpieczeństwa
Aby zmniejszyć ryzyko obrażeń ciała lub uszkodzenia mienia, podczas korzystania z urządzeń elektrycznych należy zawsze przestrzegać podstawowych zasad bezpieczeństwa. Przed użyciem urządzenia należy przeczytać wszystkie instrukcje.
- Always plug the dispenser into a grounded electrical outlet.
- Nie należy używać dozownika, jeśli przewód zasilający jest uszkodzony.
- Trzymaj dozownik z dala od bezpośredniego światła słonecznego i źródeł ciepła.
- Zapewnij odpowiednią wentylację wokół urządzenia.
- Nie zanurzaj dozownika, przewodu ani wtyczki w wodzie ani innych płynach.
- Supervise children when they are near the dispenser, especially when dispensing hot water. The hot water faucet has a child safety lock.
- Przed czyszczeniem lub jakąkolwiek konserwacją należy odłączyć dozownik od zasilania.
- To urządzenie jest przeznaczone wyłącznie do użytku domowego i podobnych zastosowań.
Zawartość opakowania
Po rozpakowaniu upewnij się, że wszystkie przedmioty są obecne i nieuszkodzone:
- Farberware FW-WD211 Water Dispenser Unit
- Tacka ociekowa i kratka
- Instrukcja obsługi (ten dokument)
Note: A 3 or 5-gallon water bottle is not included and must be purchased separately.
Organizować coś
- Rozpakowywanie: Carefully remove the dispenser from its packaging. Place it upright on a flat, stable, and level surface.
- Umieszczenie: Position the dispenser in a cool, dry place, away from direct sunlight and at least 10 cm (4 inches) from a wall to allow for proper ventilation. Ensure it is on a countertop or sturdy surface capable of supporting the unit's weight plus a full water bottle.
- Montaż tacki ociekowej: Slide the drip tray and grid into place at the base of the dispensing area.
- Montaż butelki z wodą:
- Wyczyść szyjkę nowej 3- lub 5-galonowej butelki na wodę.
- Zdejmij ochronną nakrętkę z butelki z wodą.
- Carefully invert the water bottle and place it firmly onto the water dispenser's bottle support. Ensure it is seated correctly to prevent leaks.
- Wstępne płukanie: Before plugging in the unit, dispense at least 1 liter (approximately 4 cups) of water from both the hot and cold faucets to ensure the internal tanks are filled and to flush out any air. This prevents dry heating of the hot tank.
- Podłączenie zasilania: Podłącz przewód zasilający do uziemionego gniazdka prądu zmiennego 120 V.

Image: The Farberware FW-WD211 water dispenser with a 5-gallon water bottle in place, ready for use. This illustrates the top-loading design.
Instrukcja obsługi
Once the dispenser is set up and plugged in, allow approximately 15-30 minutes for the water to reach optimal hot and cold temperatures.

Obraz: Przód view of the dispenser, highlighting the "HOT" and "COLD" indicator lights and the red (hot) and blue (cold) water spigots.
- Kontrolki:
- The "HOT" indicator light illuminates when the hot water heating element is active. It will turn off once the desired hot temperature is reached.
- The "COLD" indicator light illuminates when the cold water cooling system is active. It will turn off once the desired cold temperature is reached.
- Dozowanie zimnej wody: Place a cup under the blue (cold) faucet. Push the blue lever down to dispense cold water. Release the lever to stop.
- Dispensing Hot Water (Child Safety Lock): Place a cup under the red (hot) faucet. Push the red child safety lock button inward, then push the red lever down to dispense hot water. Release both the button and lever to stop. Always exercise caution when dispensing hot water.
- Oszczędność energii: The unit utilizes an energy-saving thermoelectric heating and cooling system. To further conserve energy, you may turn off the hot or cold functions using the switches located on the back of the unit if not needed for extended periods.
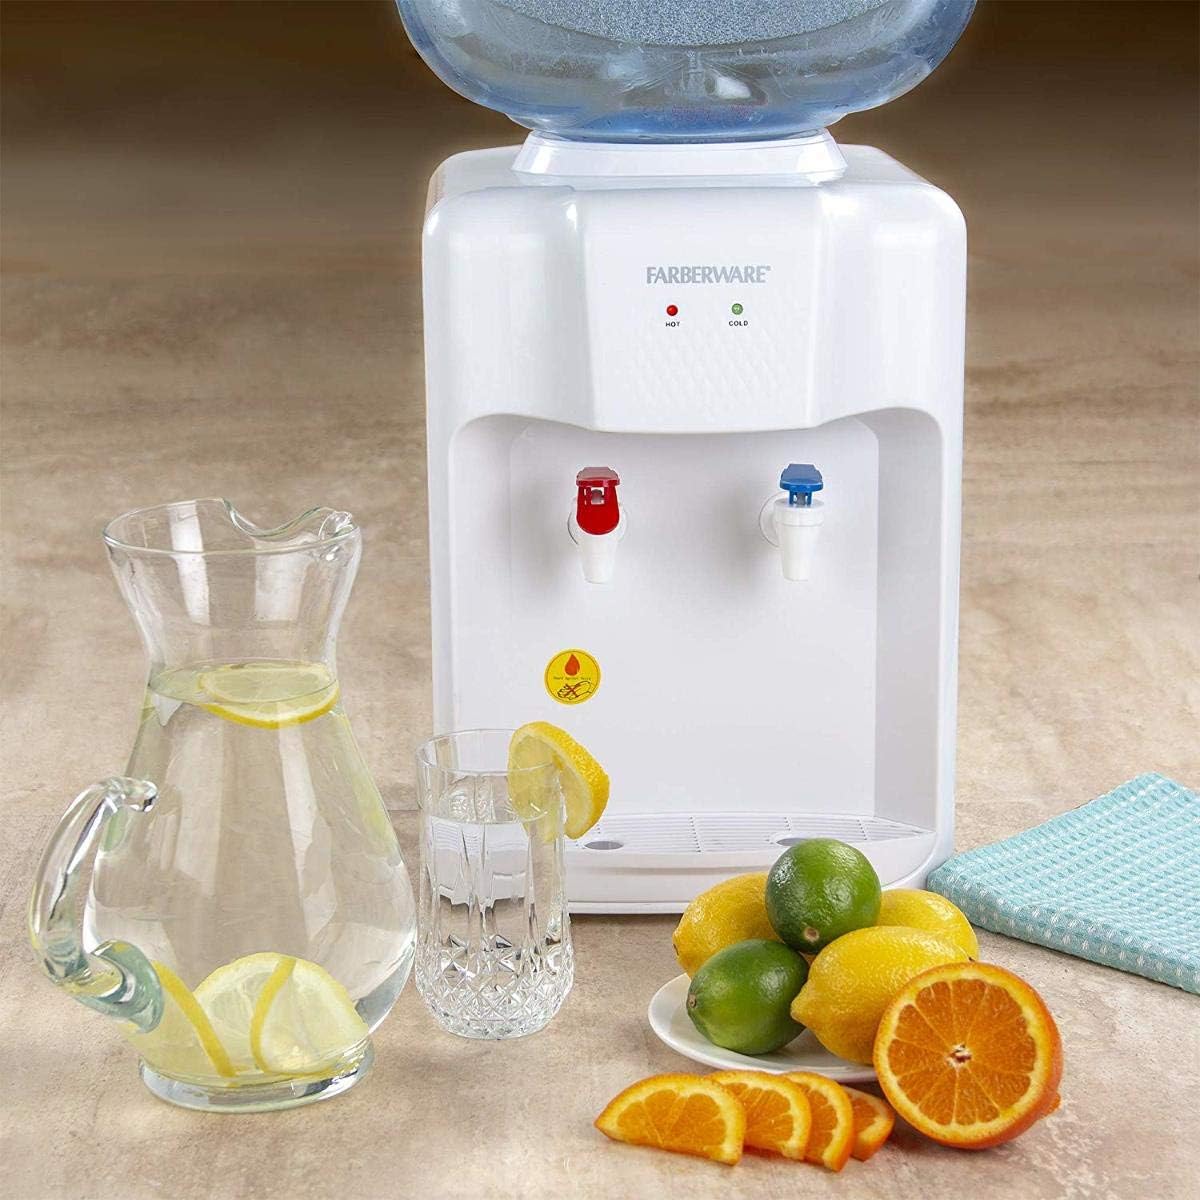
Image: The Farberware FW-WD211 water dispenser in a kitchen setting, demonstrating its use for refreshing beverages with a pitcher and glass.
Konserwacja
Regular cleaning and maintenance will ensure optimal performance and hygiene of your water dispenser.
- Odłącz przed czyszczeniem: Always unplug the dispenser from the power outlet before cleaning or performing any maintenance.
- Pusta woda: Drain all water from both hot and cold tanks by dispensing until no more water comes out.
- Clean Water Barrel Seat: The water barrel seat is removable for easy cleaning.
- Gently lift and remove the water barrel seat from the top of the dispenser.
- Wash it with mild soap and warm water. Rinse thoroughly and dry completely before reattaching.
- Wyczyść tackę ociekową: Remove the drip tray and grid. Wash them with mild soap and warm water, rinse, and dry.
- Czyszczenie zewnętrzne: Przetrzyj zewnętrzną część dozownika miękką,amp ściereczka. Nie należy używać środków czyszczących o właściwościach ściernych ani rozpuszczalników.
- Internal Cleaning (Recommended Quarterly): For thorough internal cleaning, a food-grade cleaning solution or a mixture of water and white vinegar can be used. Follow the instructions provided with the cleaning solution or use a 1:4 vinegar-to-water ratio. Flush thoroughly with clean water afterward.
Rozwiązywanie problemów
Review Przed skontaktowaniem się z obsługą klienta zapoznaj się z poniższymi typowymi problemami i ich rozwiązaniami.
| Problem | Możliwa przyczyna | Rozwiązanie |
|---|---|---|
| Brak dozowania wody | Water bottle empty or not properly seated; airlock in system. | Replace water bottle. Re-seat bottle firmly. Dispense from both faucets to release air. |
| Brak ciepłej wody | Wyłączenie ciepłej wody; awaria grzałki. | Check the hot water switch on the back of the unit. Ensure the unit is plugged in. Allow time for heating. |
| Brak zimnej wody | Cold water switch off; cooling system malfunction. | Check the cold water switch on the back of the unit. Ensure the unit is plugged in. Allow time for cooling. |
| Wyciek wody | Water bottle cracked or not seated correctly; internal leak. | Check water bottle for cracks. Re-seat bottle firmly. If leak persists, unplug and contact support. |
| Niezwykły hałas | Normal operation (cooling/heating cycles); unit not level. | Ensure the unit is on a level surface. Some noise during cooling/heating cycles is normal. |
Specyfikacje
| Funkcja | Szczegół |
|---|---|
| Marka | Farbowanie |
| Numer modelu | FW-WD211 |
| Kolor | Biały |
| Wymiary produktu (dł. x szer. x wys.) | 41.91 cm x 33.02 cm x 30.48 cm (16.5 x 13 x 12 cala) |
| Waga przedmiotu | 3.83 kg (8.44 funta) |
| Compatible Water Bottle Capacity | 3 lub 5 galonów |
| Typ instalacji | Blat, wolnostojący |
| UPC | 765167970909 |

Image: Product packaging illustrating the dimensions and weight of the Farberware FW-WD211 water dispenser.
Gwarancja i wsparcie
Aby uzyskać informacje dotyczące gwarancji i obsługi klienta, zapoznaj się z oficjalną instrukcją producenta webOdwiedź stronę internetową lub skontaktuj się z działem obsługi klienta. Zachowaj paragon jako dowód zakupu.
For assistance, please visit the Farberware webOdwiedź witrynę lub skontaktuj się z infolinią obsługi klienta. Dane kontaktowe mogą się różnić w zależności od regionu.