
1. Wprowadzenie
This manual provides essential information for the proper installation, maintenance, and troubleshooting of the Sun Joe SPX4000 and SPX4001 Replacement Hardware Pack. This kit is designed to restore the functionality of your compatible electric pressure washer by replacing worn or missing hardware components.
For optimal performance and safety, always use genuine Sun Joe replacement parts. Refer to your original pressure washer manual for specific component locations and detailed assembly diagrams.
2. Informacje dotyczące bezpieczeństwa
Podczas obsługi lub montażu części zamiennych należy zawsze przestrzegać następujących środków ostrożności:
- Odłącz zasilanie: Ensure the pressure washer is unplugged from its power source before attempting any installation or maintenance.
- Noś sprzęt ochronny: Aby zapobiec obrażeniom, należy stosować odpowiedni sprzęt ochrony osobistej, taki jak rękawice i okulary ochronne.
- Przeczytaj instrukcje: Familiarize yourself with both this hardware pack manual and your original Sun Joe SPX4000 or SPX4001 pressure washer manual.
- Bezpieczne komponenty: Ensure all replacement parts are securely fastened before operating the pressure washer.
- Trzymaj dzieci z daleka: Do not allow children or untrained individuals to handle or install parts.
3. Zawartość opakowania
The Sun Joe SPX4000 & SPX4001 Replacement Hardware Pack typically includes the following components:
- Wsporniki
- Clamps
- Kołnierze
- Various Metal Screws
Note: The exact quantity and type of hardware may vary slightly. Refer to the packaging for a precise list of included items.
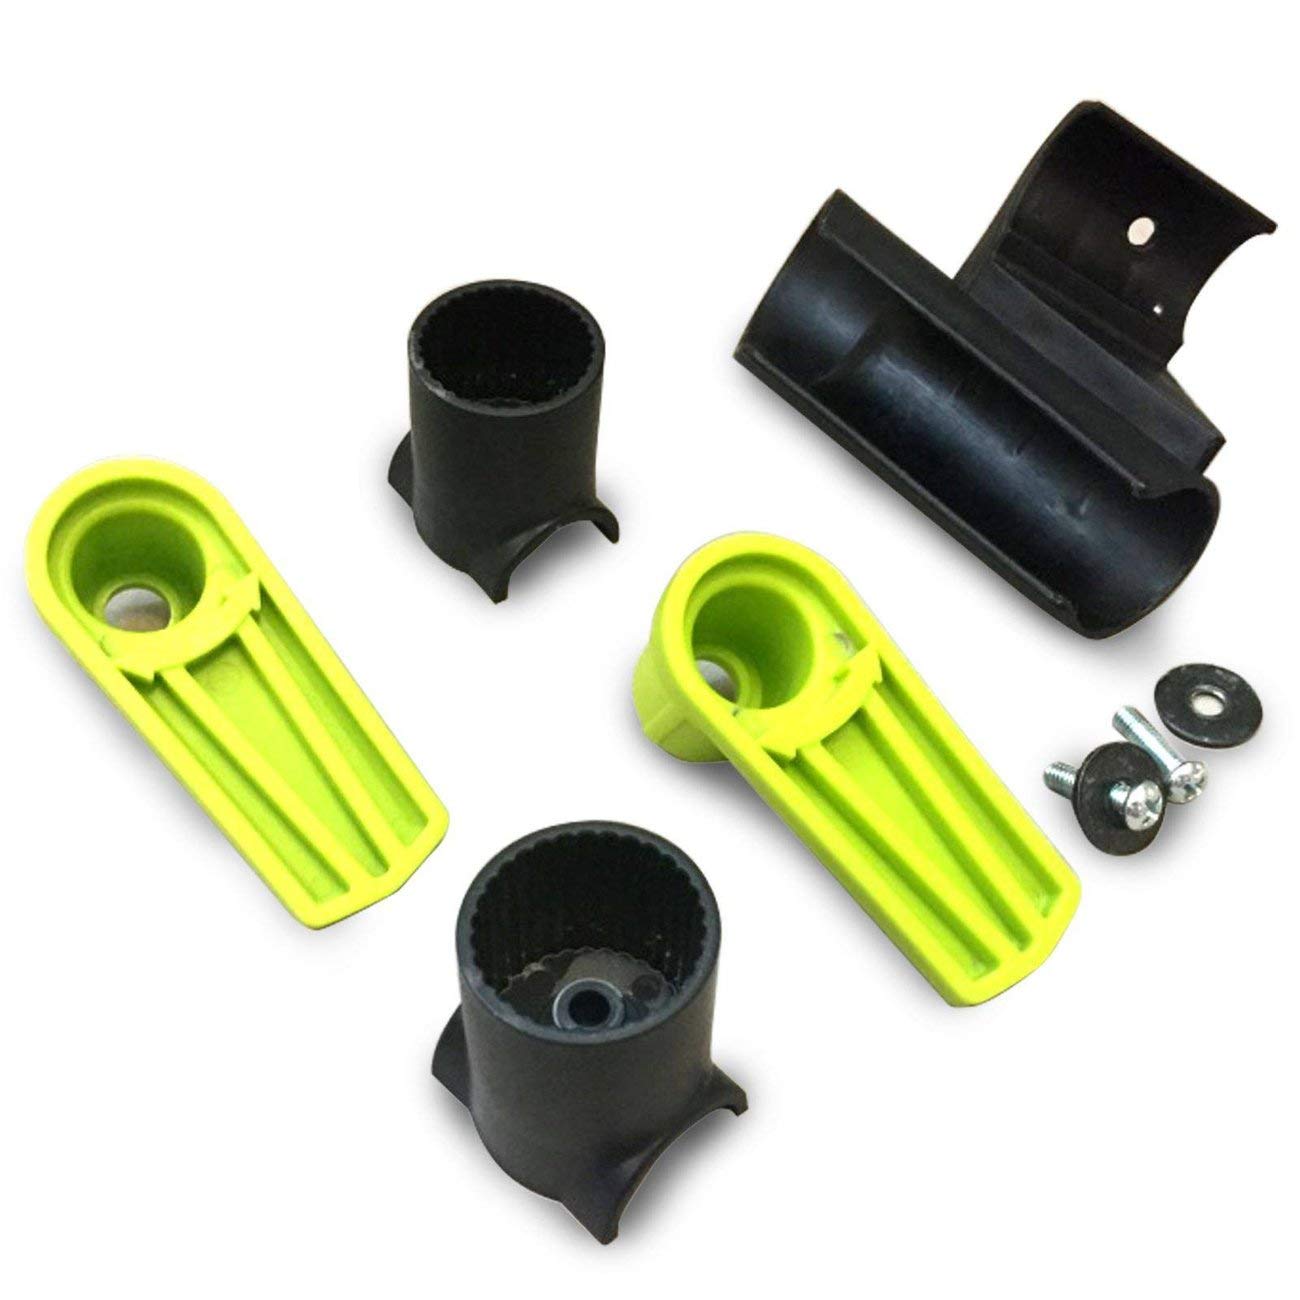
Image 1: Contents of the Sun Joe SPX4000 & SPX4001 Replacement Hardware Pack.
4. Instrukcje instalacji
Follow these general steps for replacing hardware components. Always refer to your specific pressure washer manual for detailed diagrams and instructions pertaining to the exact part you are replacing.
4.1 Przygotowanie
- Ensure the pressure washer is turned off and unplugged from the power outlet.
- Release any residual pressure in the system by squeezing the trigger gun.
- Gather necessary tools (e.g., screwdrivers, wrenches) for the specific hardware you are replacing.
4.2 Wymiana podzespołów
- Zidentyfikuj część: Locate the specific bracket, clamp, collar, or screw that needs replacement on your SPX4000 or SPX4001 pressure washer.
- Remove Old Hardware: Carefully remove the damaged or missing hardware. Keep track of any washers or nuts that may be associated with the fasteners.
- Zainstaluj nowy sprzęt: Position the new replacement part in its correct location.
- Bezpieczne elementy złączne: Insert the appropriate screws or fasteners and tighten them securely. Do not overtighten, as this can strip threads or damage components.
- Sprawdź dopasowanie: Ensure the new hardware is properly seated and does not interfere with other moving parts or connections.

Obraz 2: Example of a Sun Joe Electric Pressure Washer, similar to SPX4000/SPX4001, where hardware components are installed.
5. Konserwacja
Regular inspection and maintenance of your pressure washer's hardware can extend its lifespan and ensure safe operation.
- Przeglądy okresowe: Routinely check all brackets, clamps, collars, and screws for signs of wear, corrosion, or looseness.
- Dokręć elementy złączne: If any screws or bolts appear loose, gently tighten them. Avoid overtightening.
- Czyste komponenty: Keep hardware free from dirt, debris, and chemical residues that could cause corrosion or hinder function.
- Wymień w razie potrzeby: If any hardware shows significant wear, damage, or corrosion, replace it promptly with genuine Sun Joe parts.
6. Rozwiązywanie Problemów
This section addresses common issues related to the hardware pack components.
| Problem | Możliwa przyczyna | Rozwiązanie |
|---|---|---|
| Hardware feels loose after installation. | Elementy złączne nie zostały odpowiednio dokręcone. | Ensure all screws and bolts are tightened firmly, but do not overtighten. |
| Difficulty fitting a new part. | Incorrect part orientation or incompatible part. | Verify the part is oriented correctly. Double-check that you have the correct hardware pack for SPX4000/SPX4001 models. |
| Screws stripping during tightening. | Overtightening or using the wrong tool. | Use the correct size screwdriver/wrench. Tighten until snug, then a quarter turn more. Do not force. |
7. Specyfikacje
| Funkcja | Szczegół |
|---|---|
| Marka | Słońce Joe |
| Numer modelu | SPX4000-HP |
| Zgodność | Sun Joe SPX4000, Sun Joe SPX4001 Electric Pressure Washers |
| Nazwa typu przedmiotu | SPX4000/SPX4001 Hardware Pack |
| Wymiary produktu (dł. x szer. x wys.) | 8" x 6" x 1" |
| GTIN/UPC | 842470102675 |
8. Gwarancja i wsparcie
This hardware pack is an official Sun Joe replacement part. For information regarding warranty coverage for your Sun Joe SPX4000 or SPX4001 pressure washer, please refer to the original product manual or visit the official Sun Joe webstrona.
If you require further assistance with installation, troubleshooting, or have questions about your Sun Joe product, please contact Sun Joe Customer Service:
- Webstrona: www.snowjoe.com/pages/contact-us (Snow Joe + Sun Joe)
- Telefon: Refer to the contact information provided in your original pressure washer manual or on the Sun Joe webstrona.
When contacting support, please have your pressure washer model number (SPX4000 or SPX4001) and the hardware pack model number (SPX4000-HP) available.