1. Wprowadzenie i koniecview
The LiNKFOR Digital Optical Audio 3x1 Switch is designed to expand the optical audio input capabilities of your audio system. It allows you to connect up to three optical fiber signal sources (SPDIF/TosLink) to a single SPDIF/TosLink receiving device, such as a soundbar, amplifier, or headphones. This device is ideal for managing multiple digital audio sources without constantly plugging and unplugging cables.
It supports various audio formats including LPCM2.0, DTS, and Dolby-AC3 at 96Khz. Please note that it does not support 7.1CH Dolby Digital Plus or Dolby TrueHD, as these formats cannot be transmitted via fiber optic cable and require an HDMI cable for transmission.
The switch supports long-distance signal transmission up to 40 meters (130 feet) when using optical fiber cables with loss less than 0.2Db/m. Its high-grade aluminum alloy design ensures overall shielding without signal interference, contributing to high-quality audio signal transmission. Additionally, it features over-voltage protection to prevent damage from incompatible power adapters.
2. Zawartość opakowania
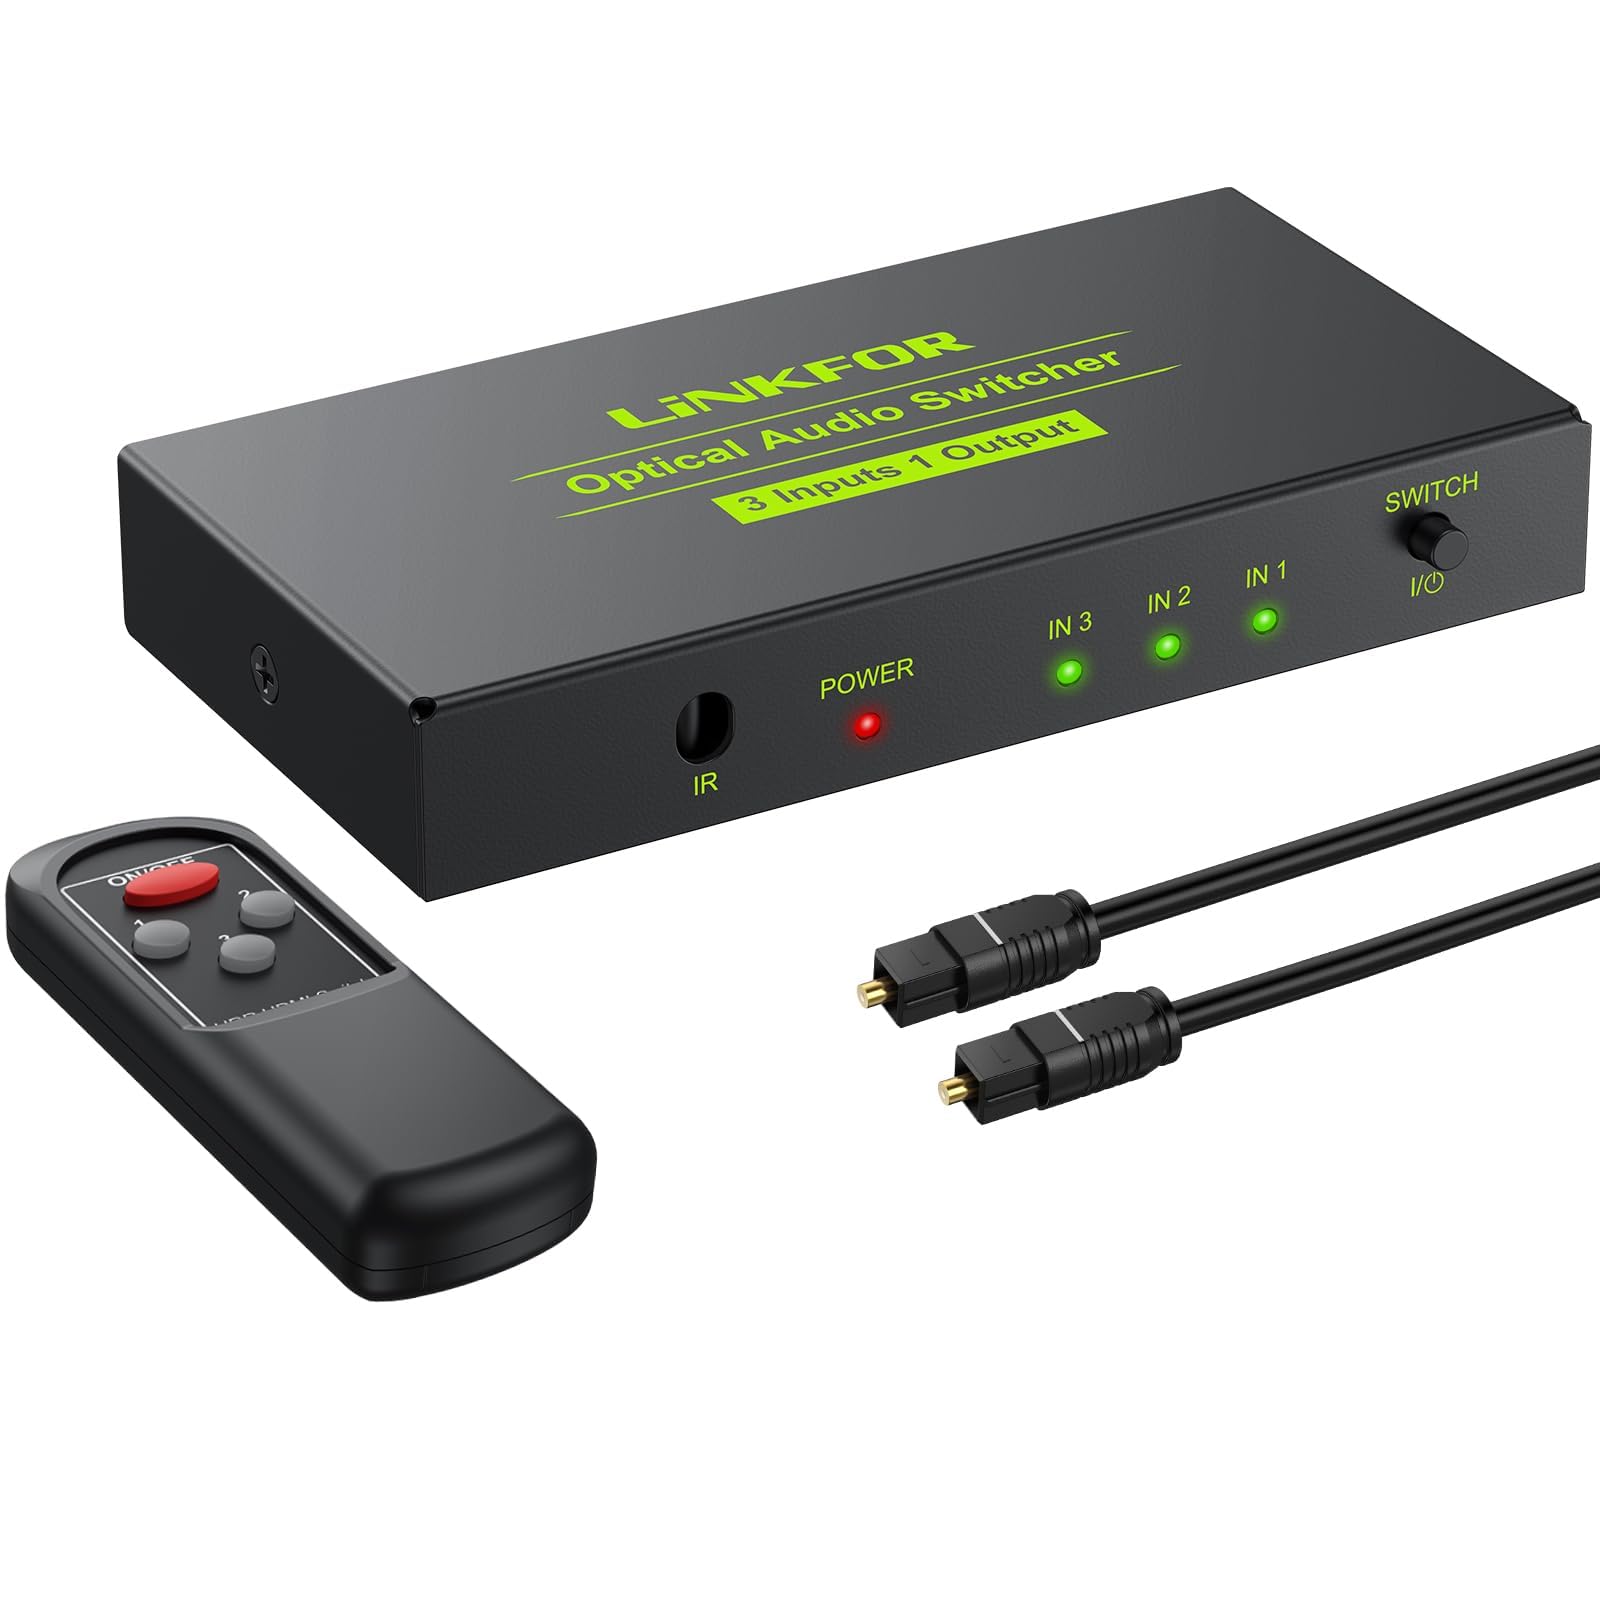
Sprawdź zawartość paczki, aby upewnić się, że znajdują się w niej wszystkie elementy:
- 1 x LiNKFOR Digital Optical Audio 3x1 Switch (Model ULKVC233c)
- 1 x Jednostka zdalnego sterowania
- 1 x 1m Optical Cable
- Kabel zasilający 1 x USB
- 2 baterie AAA (do pilota)
- 1 x Instrukcja obsługi

3. Cechy i diagramy produktu
The LiNKFOR Digital Optical Audio 3x1 Switch features a compact design with clearly labeled ports and indicators for ease of use.
3.1. Układ urządzenia
- Input Ports (IN 1, IN 2, IN 3): Connect your optical audio source devices here.
- Output Port (OUT): Connect your optical audio receiving device here.
- USB 5V Power Input: Connect the provided USB power cable to power the device.
- Odbiornik IR: Do odbioru sygnałów z pilota.
- Wybierz przełącznik: Button to manually cycle through input sources.
- Input Indicators (IN 1, IN 2, IN 3): Diody LED świecą się, wskazując aktualnie wybrane wejście.
- Wskaźnik zasilania: LED illuminates when the device is powered on.
3.2. Wymiary

3.3. Funkcje pilota

4. Konfiguracja i instalacja
Follow these steps to set up your LiNKFOR Digital Optical Audio 3x1 Switch:
- Podłącz źródła wejściowe: Use optical fiber cables to connect your source devices (e.g., PS3, Blue-Ray player, DVD, HDTV) to the IN 1, IN 2, and IN 3 ports on the switch.
- Podłącz urządzenie wyjściowe: Connect your optical audio receiving device (e.g., soundbar, amplifier, headphones) to the OUT port on the switch using an optical fiber cable.
- Podłącz zasilanie: Connect the provided USB power cable to the DC 5V input port on the switch. Plug the other end of the USB cable into a 5V USB power source (e.g., a USB wall adapter, TV USB port, or computer USB port). The Power indicator LED will light up.

4.1. Film demonstracyjny konfiguracji
5. Instrukcja obsługi
Once all connections are made and the device is powered on, you can select your desired audio input source:
- Ręczne przełączanie: Press the 'Select Switch' button on the front panel of the device to cycle through the input sources (IN 1, IN 2, IN 3). The corresponding input indicator LED will light up to show the active source.
- Przełączanie za pomocą pilota: Use the provided remote control to directly select an input source by pressing the corresponding number button (1, 2, or 3). Ensure the remote is pointed towards the IR Receiver on the switch.

6. Rozwiązywanie Problemów
If you encounter issues with your LiNKFOR Digital Optical Audio 3x1 Switch, please refer to the following common problems and solutions:
- Brak dźwięku:
- Ensure all optical cables are securely connected to both the source devices, the switch, and the receiving device.
- Verify that the switch is powered on and the Power indicator LED is lit.
- Check that the correct input source is selected on the switch (the corresponding IN LED should be lit).
- Confirm that your audio source device is outputting audio in a supported format (LPCM2.0, DTS, or Dolby-AC3).
- Ensure your receiving device (soundbar, amplifier) is set to the correct optical input and supports the incoming audio format.
- Zniekształcony lub przerywany dźwięk:
- Check optical cables for damage or kinks. Replace if necessary.
- Ensure the optical cable is not excessively long or of poor quality, which can lead to signal degradation.
- Verify that the audio format from the source is compatible and not an unsupported format like 7.1CH Dolby Digital Plus.
- Pilot nie działa:
- Check if the batteries in the remote control are correctly inserted and have sufficient power. Replace if needed.
- Ensure there are no obstructions between the remote control and the IR Receiver on the switch. Maintain a clear line of sight.
- Confirm the remote control is within its effective operating range (typically up to 5 meters).
- Problem z zasilaniem:
- Ensure the USB power cable is securely connected to both the switch and the power source.
- Try a different 5V USB power source or adapter.
- Urządzenie ma ponadobjętośćtage protection; ensure you are using a compatible 5V power supply.
7. Specyfikacje
| Funkcja | Opis |
|---|---|
| Wymiary produktu | 3.7 x 1.85 x 0.72 cala (95 x 47 x 15.5 mm) |
| Waga przedmiotu | 8.1 uncji |
| Numer modelu przedmiotu | ULKVC233c |
| Kolor | Czarny |
| Typ złącza | Optical (Toslink/SPDIF) |
| Typ kabla | Optyczny |
| Kompatybilne urządzenia | DVD Player, Personal Computer, Speaker, Television, Xbox |
| Obsługiwane formaty audio | LPCM2.0/DTS/Dolby-AC3 (96Khz) |
| Maksymalna odległość wyjściowa | 40m / 130ft (with <0.2Db/m optical cable loss) |
| Zasilacz | DC 5V (przez kabel USB) |
| Metoda kontroli | Manual button, IR Remote Control |
8. Gwarancja i wsparcie
This LiNKFOR product comes with a roczna gwarancja producenta. Additionally, customers are entitled to bezpłatne, dożywotnie wsparcie techniczne. For any questions, troubleshooting assistance, or warranty claims, please contact LiNKFOR customer service.