1. Instrukcje bezpieczeństwa
Read and understand all safety warnings and instructions before operating this hydraulic power unit. Failure to follow these instructions may result in serious injury or property damage.
- Bezpieczeństwo elektryczne: Ensure the power supply matches the unit's requirements (110V AC). Always disconnect power before performing any maintenance or repairs.
- Płyn hydrauliczny: Use only recommended hydraulic fluid. Avoid skin contact and wear appropriate personal protective equipment (PPE). Check fluid levels regularly.
- Zagrożenia związane z ciśnieniem: Hydraulic systems operate under high pressure. Never attempt to disconnect hydraulic lines or components while the system is pressurized.
- Instalacja: Mount the unit securely on a stable surface. Ensure all connections are tight and leak-free.
- Działanie: Do not overload the hydraulic system beyond its rated capacity. Keep hands and clothing clear of moving parts.
- Konserwacja: Only qualified personnel should perform maintenance and repairs. Use genuine replacement parts.
- Środowisko: Operate the unit in a well-ventilated area. Keep the work area clean and free of obstructions.
2. Koniec produktuview
The VEVOR 110V 10 Quart Single Acting Hydraulic Power Unit is designed for various lifting applications, including car lifts, dump trailers, and other hydraulic machinery. This unit provides reliable power for lifting operations and utilizes gravity for lowering.

Figure 2.1: VEVOR 10 Quart Single Acting Hydraulic Power Unit in an automotive shop setting.
Główne cechy:
- Silnik: 110V, 2.2kW motor for efficient operation.
- Zbiornik: 10-Liter (10 Quart) capacity.
- Typ pompy: Single-acting for power-up and gravity-down functionality.
- Przemieszczenie: Minimum 2.1 CC/Rev pump displacement.
- Szybki start: Designed for quick startup and oil output.
- Trwała konstrukcja: Sturdy metal oil tank for longevity.
- Bezpieczeństwo: Equipped with a relief valve for safer operation.

Rysunek 2.2: Koniecview of key features including overflow valve, powerful motor, and steel tank construction.
3. Specyfikacje
The following table details the technical specifications for the VEVOR 110V 10 Quart Single Acting Hydraulic Power Unit.
| Funkcja | Specyfikacja |
|---|---|
| Numer modelu przedmiotu | TDAC110V-2.2KW-D-10L |
| Masa netto | 48.5 funta / 22 kg |
| Wymiary produktu | 28 x 9.8 x 10.2 cala (710 x 250 x 260 mm) |
| Tomtage | Prąd zmienny 110 V |
| Pojemność zbiornika | 10 Quart / 2.5 Gallons |
| Moc | 2.2 kW |
| Traffic (Pump Displacement) | 2.1 mL/r (CC/Rev) |
| Przepływ | 1.7 GPM |
| Prędkość | 3400 obr./min (obr./min) |
| Max Relief Pressure | 3200 psi (20 MPa) |
| Tworzywo | Metal |

Rysunek 3.1: Wymiary produktu i szczegółowe specyfikacje.
4. Instrukcje konfiguracji
Follow these steps for proper installation and initial setup of your hydraulic power unit.
4.1 Rozpakowanie i kontrola
- Ostrożnie wyjmij urządzenie z opakowania.
- Inspect the unit for any signs of damage during transit. Contact customer support immediately if damage is found.
- Sprawdź, czy wszystkie elementy wymienione w liście przewozowym są obecne.
4.2 Montaż urządzenia
- Choose a stable, level surface for mounting the hydraulic power unit.
- Secure the unit using appropriate fasteners to prevent movement during operation.
4.3 Połączenia hydrauliczne
Connect the hydraulic lines from your equipment to the power unit. Ensure all connections are tight to prevent leaks.
- Identify the hydraulic oil inlet and outlet ports on the unit.
- Connect the oil hose from your equipment to the hydraulic oil inlet.
- Use the provided SAE#6 connector (M18x1.5) or a suitable replacement if your equipment requires a different interface.

Figure 4.1: Connection points for the hydraulic power unit.
4.4 Połączenia elektryczne
Connect the power unit to a suitable 110V AC power supply.
- Przed przystąpieniem do wykonywania jakichkolwiek podłączeń elektrycznych należy upewnić się, że zasilanie jest wyłączone.
- Connect the unit's power cable to a grounded 110V AC outlet.
- The unit comes with simple wiring; refer to the included wiring diagram if necessary.
4.5 Napełnianie zbiornika
- Locate the oil refill port on the reservoir.
- Fill the reservoir with hydraulic oil within the recommended viscosity range of 22-46 mm²/s. Do not overfill.
- Ensure the cap is securely tightened after filling.
5. Instrukcja obsługi
This section outlines the basic steps for operating your VEVOR hydraulic power unit.
5.1 Kontrole przedoperacyjne
- Verify all hydraulic connections are secure and free of leaks.
- Sprawdź poziom płynu hydraulicznego.
- Ensure the work area is clear of personnel and obstructions.
5.2 Lifting Operation (Power Up)
- Turn on the main power switch for the hydraulic unit.
- Activate the lift mechanism on your equipment (e.g., press the "Up" button or engage the lever). The hydraulic pump will engage, and the equipment will begin to lift.
- Monitor the lifting process and ensure it operates smoothly.
- Once the desired height is reached, release the lift control. The unit will maintain pressure.

Figure 5.1: Illustration of the unit's lifting capabilities.
5.3 Lowering Operation (Gravity Down)
- To lower the equipment, engage the lowering control (e.g., pull the lever or press the "Down" button).
- The equipment will lower due to gravity as hydraulic fluid returns to the reservoir.
- Control the lowering speed as needed.
- Once the equipment is fully lowered or at the desired position, release the lowering control.
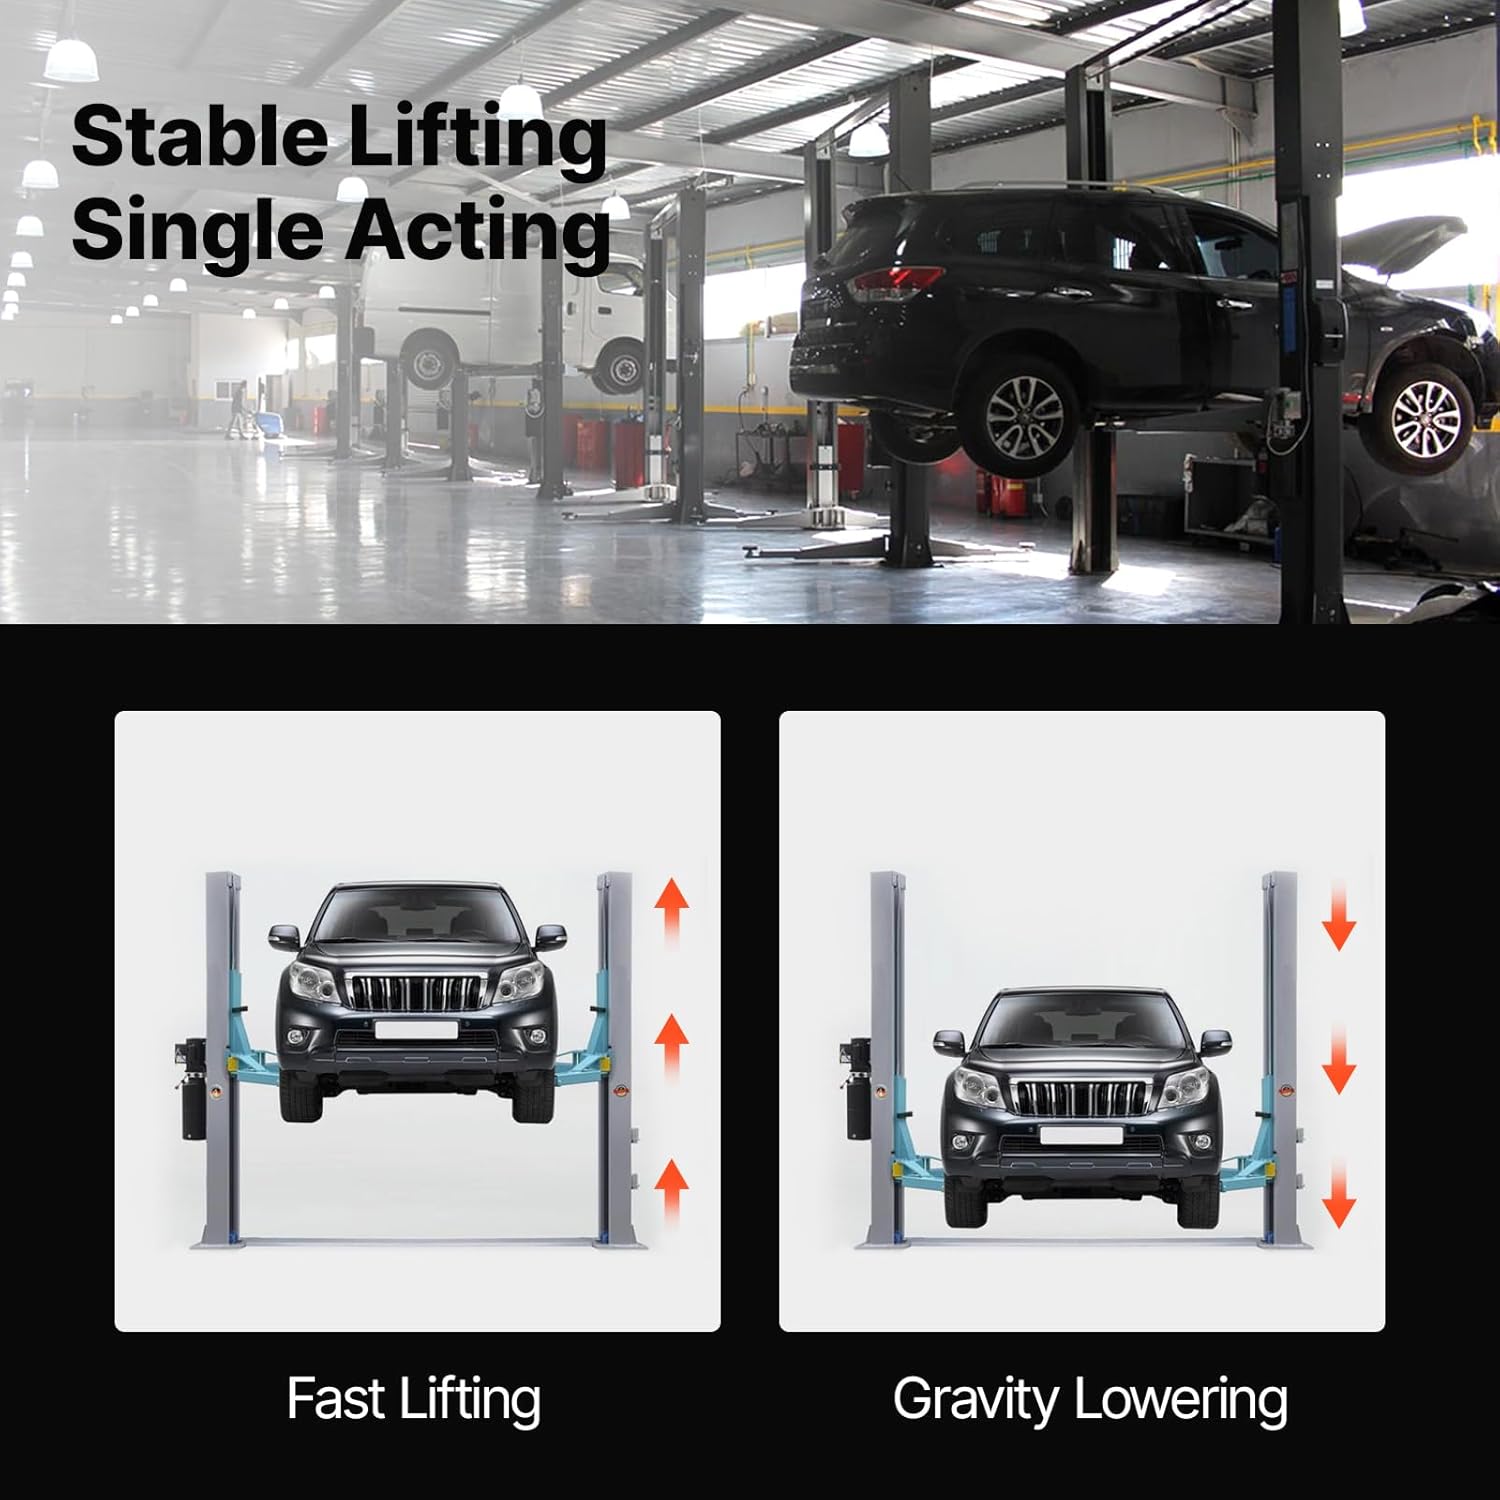
Figure 5.2: Stable lifting and gravity lowering mechanism.
5.4 Po operacji
- Turn off the main power switch after use.
- Regularnie sprawdzaj, czy na urządzeniu nie występują ślady zużycia lub uszkodzeń.
6. Konserwacja
Regular maintenance ensures the longevity and safe operation of your hydraulic power unit.
6.1 Codzienne kontrole
- Inspect for any visible leaks around connections and seals.
- Sprawdź poziom płynu hydraulicznego.
- Listen for unusual noises during operation.
6.2 Miesięczne kontrole
- Clean the exterior of the unit to prevent dirt buildup.
- Sprawdź, czy instalacja elektryczna nie nosi śladów zużycia lub uszkodzeń.
- Check mounting bolts for tightness.
6.3 Hydraulic Fluid Replacement
- Hydraulic fluid should be replaced periodically, typically annually or as recommended by the fluid manufacturer, depending on usage.
- Drain old fluid completely and dispose of it responsibly.
- Refill with new hydraulic oil of the recommended type and viscosity.
7. Rozwiązywanie Problemów
This section provides solutions to common issues you might encounter with your hydraulic power unit.
| Problem | Możliwa przyczyna | Rozwiązanie |
|---|---|---|
| Jednostka nie uruchamia się | No power supply, faulty switch, motor issue. | Check power connection, test switch, consult qualified electrician. |
| Niewystarczająca siła podnoszenia | Low hydraulic fluid, air in system, relief valve setting incorrect, pump wear. | Check fluid level and refill, bleed air from system, adjust relief valve (if qualified), inspect pump. |
| Wycieki płynu hydraulicznego | Loose connections, damaged seals, cracked hose/reservoir. | Tighten connections, replace damaged seals/hoses, repair/replace reservoir. |
| Unit operates loudly | Low fluid level, air in system, worn pump bearings. | Check fluid level, bleed air from system, inspect pump for wear. |
| Equipment lowers too quickly/slowly | Flow control valve (if present) misadjusted, internal leak. | Adjust flow control valve, inspect for internal leaks (requires professional service). |
If you encounter problems not listed here or if solutions do not resolve the issue, contact VEVOR customer support.
8. Gwarancja i pomoc techniczna
This VEVOR hydraulic power unit comes with a standard warranty. For specific warranty details, please refer to the documentation provided at the time of purchase or contact VEVOR customer service.
For technical assistance, parts, or warranty claims, please contact VEVOR customer support through their official website or the retailer where the product was purchased. Please have your model number (TDAC110V-2.2KW-D-10L) and purchase information ready when contacting support.
Producent: Mophorn (VEVOR)
Opis gwarancji: 1 (This typically refers to a 1-year warranty, but please confirm with VEVOR for exact terms.)