
1. Koniec produktuview
The TSL LTCMIP7863W-SZ is a 6MP high-definition Platinum Varifocal Motorized Dome IP Camera designed for advanced surveillance applications. It features a 2.8-12mm varifocal motorized lens with smart focus, providing clear images up to 3072x2048 resolution at 20 frames per second. Equipped with Matrix IR 2.0 technology, it offers an infrared range of up to 100 feet for effective night vision. The camera supports H.265, H.265+, H.264, and H.264+ compression standards, True WDR 120dB, and is rated IP67 for weather resistance and IK10 for vandal resistance. It includes a MicroSD slot for local storage up to 128GB, audio I/O, alarm I/O, and can be powered by DC 12V or Power over Ethernet (PoE). A built-in junction box simplifies installation.
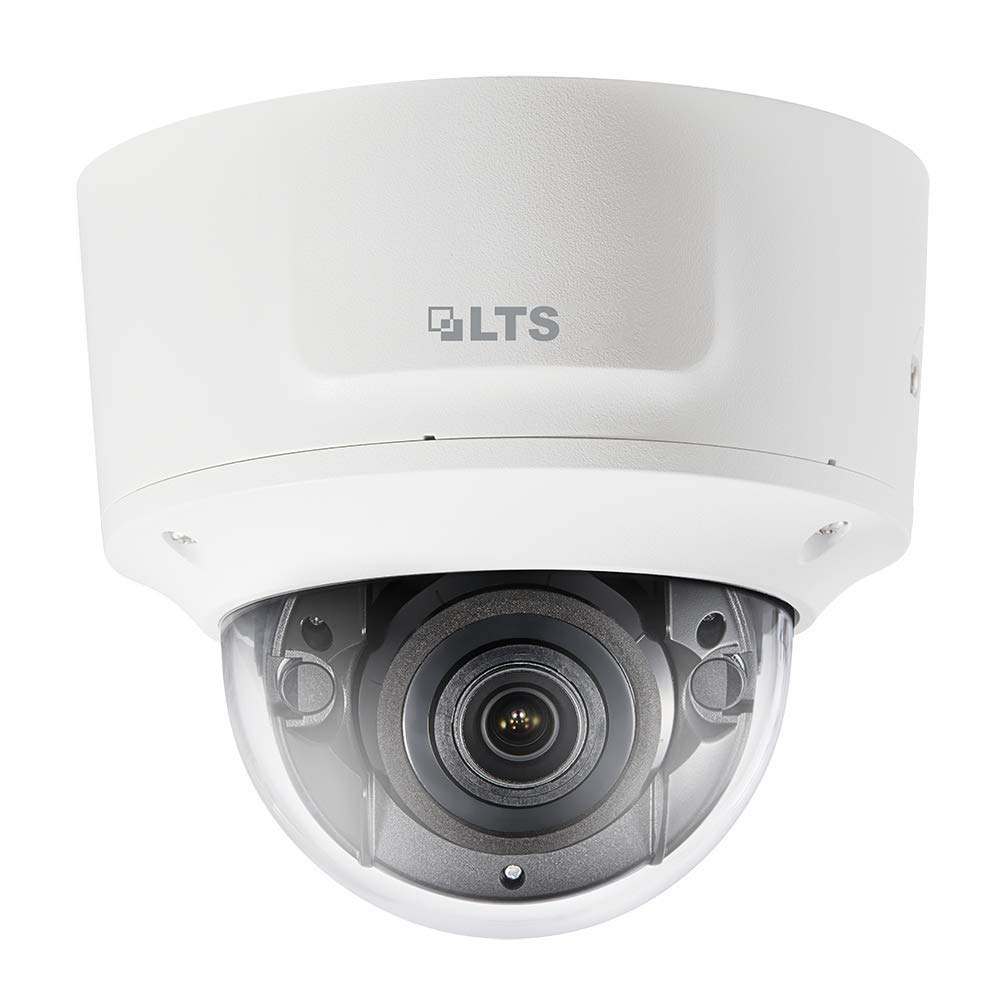
Rycina 1: Przód view of the TSL LTCMIP7863W-SZ Dome IP Camera. This image illustrates the compact dome design and the lens area.
2. Konfiguracja i instalacja
2.1 Zawartość opakowania
Przed instalacją należy sprawdzić, czy wszystkie komponenty są obecne:
- TSL LTCMIP7863W-SZ Dome IP Camera
- Szablon montażowy
- Śruby montażowe i kołki ścienne
- Zestaw złączy wodoodpornych
- Szybki przewodnik
2.2 Montaż kamery
The camera is designed for wall or ceiling mount. Ensure the mounting surface can support the camera's weight.
- Przygotuj powierzchnię montażową: Use the provided mounting template to mark the drill holes for the camera base.
- Wiercenie otworów: Drill pilot holes according to the template. Insert wall plugs if mounting on drywall or masonry.
- Zabezpiecz bazę: Przymocuj podstawę kamery do powierzchni montażowej za pomocą dołączonych śrub.
- Połączenie kablowe: Route the necessary cables (Ethernet, power if not using PoE, alarm I/O, audio I/O) through the cable entry point in the base. Utilize the built-in junction box for organized wiring.
- Zamontuj korpus aparatu: Secure the camera body to the mounted base. Ensure all connections are firm and waterproofed using the provided kit.
2.3 Zasilanie i połączenie sieciowe
The camera supports Power over Ethernet (PoE) or a 12V DC power supply.
- Połączenie PoE: Connect an Ethernet cable from a PoE-enabled switch or NVR to the camera's RJ45 port. This provides both power and data.
- Podłączenie DC 12V: If PoE is not available, connect a 12V DC power adapter (sold separately) to the camera's power input port. Then, connect an Ethernet cable for data transmission.
- Konfiguracja sieci: After physical connection, the camera will obtain an IP address via DHCP by default. Use the manufacturer's IP search tool to locate the camera on your network and configure its IP address if needed.
3. Instrukcja obsługi
3.1 Initial Access and Login
Uzyskaj dostęp do kamery web interfejs za pomocą web przeglądarka (np. Chrome, Firefox).
- Otwórz web browser and enter the camera's IP address in the address bar.
- Enter the default username (e.g., "admin") and password (refer to the Quick Start Guide or manufacturer's documentation for default credentials). Zdecydowanie zaleca się zmianę domyślnego hasła zaraz po pierwszym zalogowaniu ze względów bezpieczeństwa.
3.2 Na żywo View i odtwarzanie
Po zalogowaniu możesz view the live feed and access recorded footage.
- Na żywo View: The main interface typically displays the live video stream.
- Odtwarzanie nagranego dźwięku: Navigate to the "Playback" section to review recordings stored on the MicroSD card or connected NVR.
3.3 Varifocal Motorized Lens Adjustment
The camera features a motorized varifocal lens for remote adjustment of zoom and focus.
- Uzyskaj dostęp do kamery web interfejs lub oprogramowanie klienckie.
- Locate the "Lens" or "Image Adjustment" settings.
- Use the zoom controls to adjust the focal length (2.8-12mm) and the focus controls to achieve a clear image. The "Smart Focus" feature assists in optimizing clarity.
3.4 Rejestrowanie i przechowywanie
The camera supports local storage via a MicroSD card (up to 128GB) and network storage (NVR).
- Instalacja karty microSD: Power off the camera. Open the dome cover carefully. Insert a compatible MicroSD card into the slot. Close the cover securely.
- Harmonogram nagrywania: Configure recording schedules (continuous, motion-triggered, alarm-triggered) in the camera's settings.
- Zarządzanie pamięcią masową: Format the MicroSD card through the web interface before first use. Configure overwrite settings for continuous recording.
3.5 Detekcja ruchu i alerty
Configure motion detection zones and sensitivity to trigger recordings or alarms.
- Navigate to "Event" or "Alarm" settings in the web interfejs.
- Define motion detection areas and adjust sensitivity levels.
- Configure alarm actions, such as sending email notifications, uploading images to an FTP server, or triggering external alarm devices via the alarm I/O.
4. Konserwacja
4.1 Czyszczenie aparatu
Regular cleaning ensures optimal image quality.
- Obiektyw: Gently wipe the lens with a soft, clean, lint-free cloth. For stubborn dirt, use a lens cleaning solution specifically designed for optical surfaces. Avoid abrasive materials.
- Pokrywa kopuły: Clean the transparent dome cover with a soft cloth and mild soap solution if necessary. Rinse with clean water and dry thoroughly. Do not use strong chemical cleaners.
- Korpus aparatu: Wipe the exterior of the camera body with a damp płótno.
4.2 aktualizacji oprogramowania sprzętowego
Okresowo sprawdzaj producenta website for firmware updates. Firmware updates can provide new features, improve performance, and enhance security.
- Pobierz najnowsze oprogramowanie układowe file from the official TSL support webstrona.
- Uzyskaj dostęp do kamery web interfejs i przejdź do sekcji „System” lub „Konserwacja”.
- Follow the on-screen instructions to upload and install the firmware. Do not power off the camera during the update process.
4.3 Zarządzanie magazynem
Ensure the MicroSD card has sufficient space and is functioning correctly.
- Regularly check the status of the MicroSD card through the camera's web interfejs.
- If configured for overwrite, older recordings will be automatically deleted. If not, manually delete old footage aby zwolnić miejsce.
- Consider backing up important footage to an NVR or other storage device.
5. Rozwiązywanie Problemów
| Problem | Możliwa przyczyna | Rozwiązanie |
|---|---|---|
| Brak zasilania kamery |
|
|
| Brak źródła wideo |
|
|
| Niska jakość obrazu |
|
|
| Nie można uzyskać dostępu web interfejs |
|
|
6. Specyfikacje techniczne
| Funkcja | Szczegół |
|---|---|
| Model | LTCMIP7863W-SZ |
| Rozdzielczość przechwytywania wideo | 6 MP (3072x2048) |
| Szybkość klatek | 20 fps @ 3072x2048 |
| Obiektyw | 2.8-12mm Varifocal Motorized Lens with Smart Focus |
| Zakres noktowizora | Up to 100 Feet (Matrix IR 2.0) |
| Technologia słabego oświetlenia | 0.018 Lux @ F1.6 (Day/Night) |
| Szeroki zakres dynamiki (WDR) | Prawdziwy WDR 120dB |
| Kompresja wideo | H.265, H.265+, H.264, H.264+ |
| Składowanie | MicroSD Slot (up to 128GB) |
| Wejście/wyjście audio | Tak |
| Wejście/wyjście alarmu | Tak |
| Zasilacz | Prąd stały 12 V, PoE (802.3af) |
| Stopień ochrony przed wnikaniem | IP67 |
| Ocena odporności na akty wandalizmu | IK10 |
| Współczynnik kształtu | Kopuła |
| Protokół łączności | Wi-Fi |
| Producent | LTS |
| UPC | 745558709424 |
7. Gwarancja i wsparcie
7.1 Ograniczona gwarancja
TSL products are covered by a limited warranty from the date of purchase. The specific terms and duration of the warranty may vary by region and product. Please refer to the official TSL website or your purchase documentation for detailed warranty information. This warranty typically covers defects in materials and workmanship under normal use.
Notatka: The warranty does not cover damage caused by improper installation, misuse, unauthorized modification, natural disasters, or power surges.
7.2 Wsparcie techniczne
For technical assistance, product inquiries, or troubleshooting beyond the scope of this manual, please contact TSL customer support.
- Webstrona: Visit the official TSL support webStrona z odpowiedziami na często zadawane pytania, plikami do pobrania i informacjami kontaktowymi.
- E-mail: Refer to the support section of the TSL website for email contact details.
- Telefon: Contact numbers for technical support are usually available on the TSL webstrona.
When contacting support, please have your product model number (LTCMIP7863W-SZ) and purchase information readily available.