
Wstęp
This manual provides instructions for the Sharper Image Motion Activated Candy Dispenser. This device is designed to dispense small, hard-shelled candies, nuts, and snacks using a touchless motion sensor, promoting hygiene and convenience. It is suitable for use in various settings, including homes and offices.
Ważne informacje dotyczące bezpieczeństwa
- Ten produkt nie jest przeznaczony do użytku przez dzieci poniżej 12 roku życia.
- The dispenser is designed for small, dry food items only. Do not use with liquids or sticky substances.
- Store the dispenser in a cool, dry area to maintain optimal performance and food quality.
- Upewnij się, że baterie są włożone prawidłowo, zgodnie z oznaczeniami biegunowości. Nie mieszaj starych i nowych baterii ani różnych typów baterii.
- Remove batteries if the dispenser will not be used for an extended period to prevent leakage.
Zawartość opakowania
- 1x Sharper Image Motion Activated Candy Dispenser Unit
- Instrukcja obsługi
Note: 4 "AA" batteries are required and not included. An optional 6V DC 0.5A (300mA) AC power adapter is also not included.
Organizować coś
1. Instalacja baterii
- Locate the battery compartment on the underside of the dispenser base.
- Otwórz pokrywę komory baterii.
- Insert 4 "AA" batteries (not included), ensuring correct polarity (+/-) as indicated inside the compartment.
- Dokładnie zamknij pokrywę komory baterii.
Alternatively, an optional 6V DC 0.5A (300mA) AC power adapter can be used (not included).
2. Filling the Dispenser
- Before first use, clean the transparent container thoroughly.
- Remove the lid from the top of the dispenser.
- Carefully pour your desired treats into the container. Ensure the items are suitable for dispensing (see "Operating Instructions" for details).
- Dokładnie załóż pokrywę.

Figure 1: Filling the dispenser with treats.
Instrukcja obsługi
Korzystanie z czujnika ruchu
- Place your hand directly under the dispensing chute.
- The built-in motion sensor will detect your hand and activate the dispensing mechanism.
- Hold your hand under the chute for a moment to allow the treats to dispense. The amount dispensed may vary. If no treats dispense on the first attempt, briefly remove your hand and place it back under the sensor.
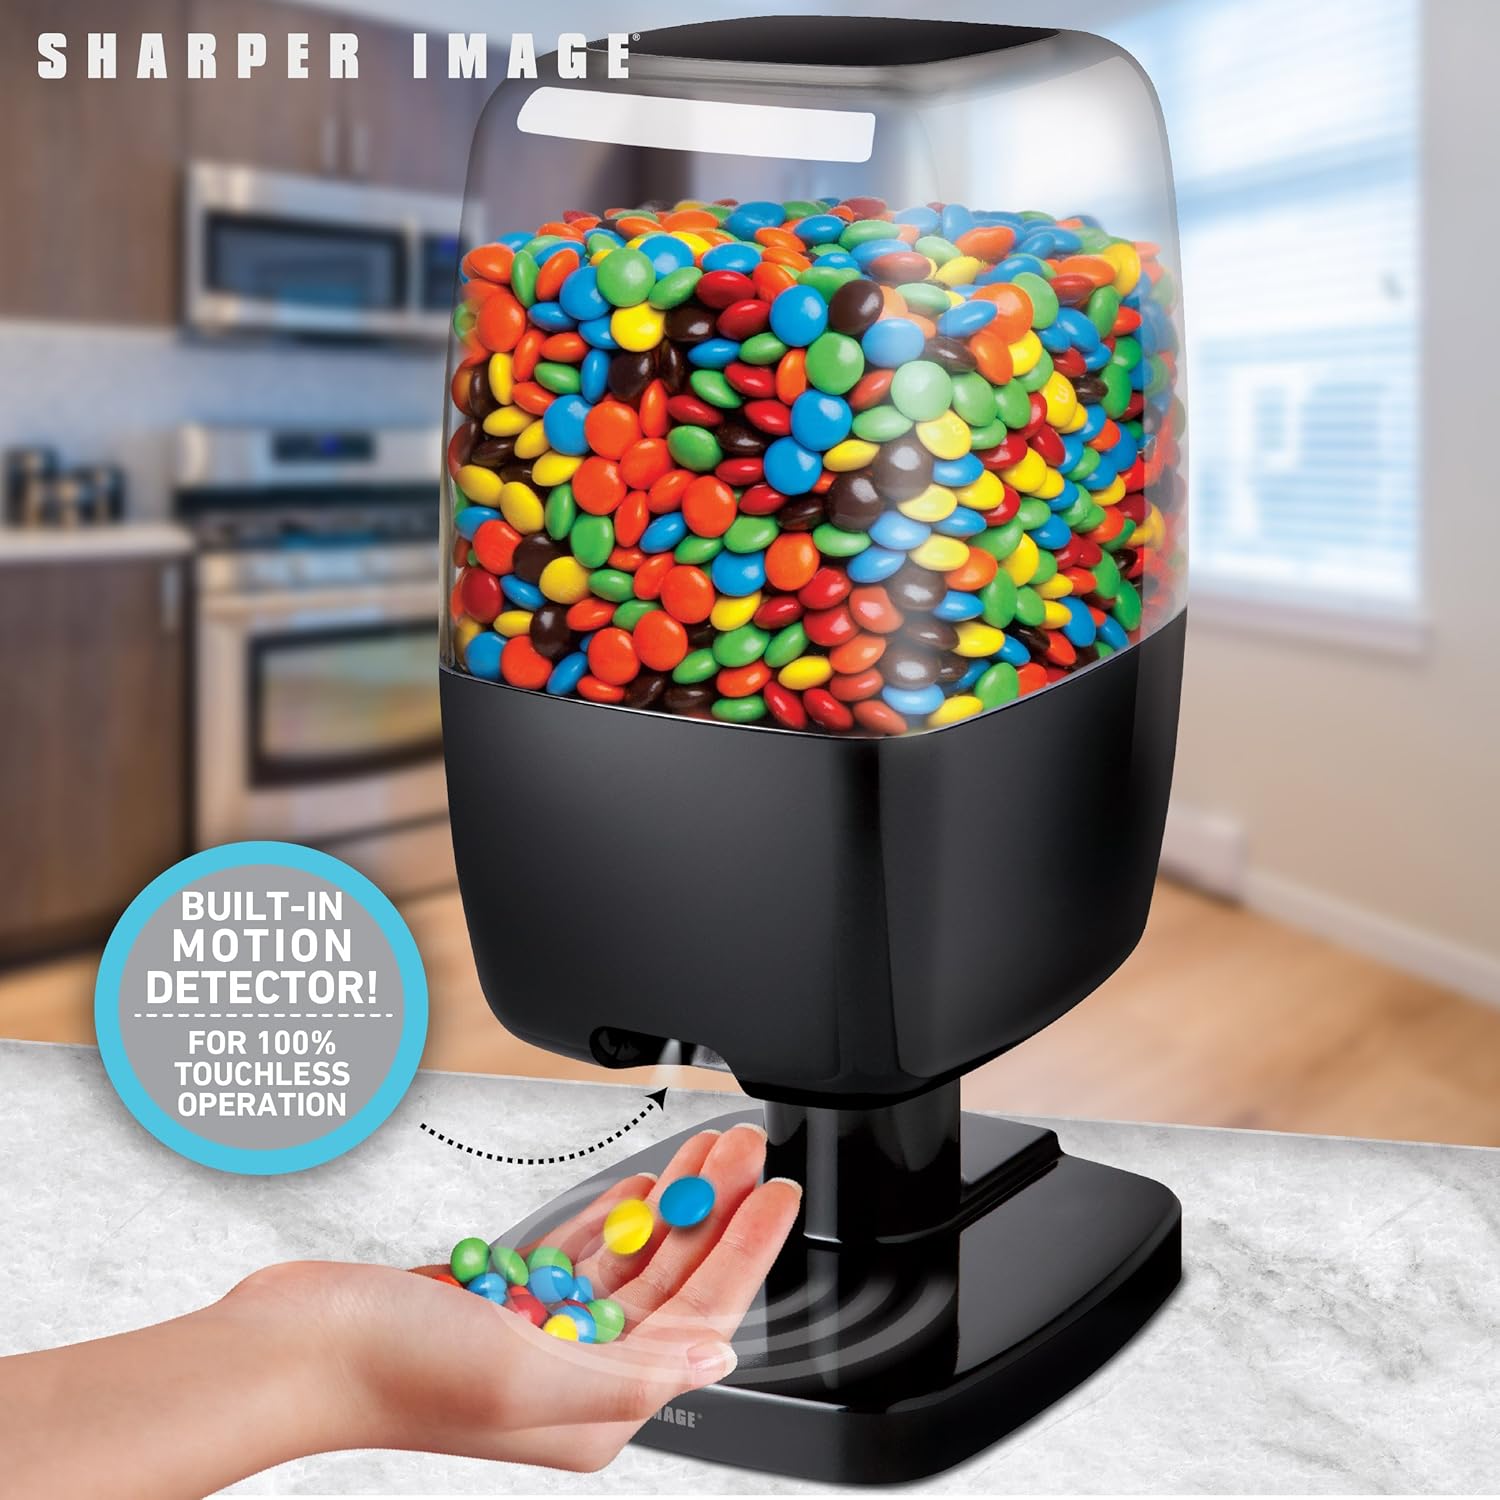
Figure 2: Hands-free dispensing in action.
Disabling Dispensing (Hidden Button)
A hidden button is located on the back of the dispenser. Pressing this button will temporarily disable the dispensing function, preventing treats from being dispensed even when the motion sensor is activated. Press it again to re-enable dispensing.
Recommended Items for Dispensing
For optimal performance, use items that are hard-shelled, dry, and approximately 0.75 inches (1.9 cm) or smaller in size. Exampobejmują:
- Small Gumballs
- Hard shell, chocolate coated candy (e.g., M&M's)
- Hard shell, fruit flavored candy
- Orzechy laskowe
- Fasolki żelkowe
- Small Jawbreakers
- Orzechy makadamia
- Orzeszki piniowe
- Shelled, unsalted peanuts
- Pistacje łuskane
- Small Jordan almonds
- Orzechy sojowe
- Nasiona słonecznika
- Całe migdały
- Orzeszki ziemne solone
Items NOT Recommended for Dispensing
Avoid using the following items to prevent blockages or damage to the dispenser:
- Candy that is wrapped
- Candy that has a soft chocolate coating
- Candy that is cylindrically or barrel-shaped
- Candy that is gummy
- Raisins or similar dried fruit
- Candy that is sticky
- Items larger than 0.75 inches (1.9 cm)
- Przedmioty metalowe

Figure 3: Guide for suitable and unsuitable items.
Konserwacja
Czyszczenie
- To clean the dispenser, first ensure it is empty of all treats and batteries are removed.
- Przetrzyj zewnętrzne powierzchnie miękką, damp płótno.
- The transparent container can be detached and washed with mild soap and water. Ensure it is completely dry before reassembling and refilling.
- Do not immerse the base unit in water or place it in a dishwasher.
Składowanie
When not in use, store the dispenser in a cool, dry place away from direct sunlight and moisture. Remove batteries if storing for an extended period.
Rozwiązywanie problemów
Dispenser Not Activating or Dispensing
- Sprawdź baterie: Ensure batteries are correctly installed and have sufficient charge. Replace with fresh "AA" batteries if necessary.
- Przeszkoda czujnika: Verify that the motion sensor area is clean and free from obstructions.
- Ułożenie dłoni: Ensure your hand is placed directly under the sensor and held steady for a moment.
- Hidden Button: Check if the hidden button on the back of the dispenser has been pressed, disabling the dispensing function. Press it again to re-enable.
Treats Not Dispensing Properly or Getting Stuck
- Item Suitability: Confirm that the items being dispensed are suitable for the dispenser (refer to "Recommended Items" section). Avoid sticky, wrapped, or oversized items.
- Przepełnienie: Do not overfill the dispenser, as this can impede the dispensing mechanism.
- Zablokowanie: Gently shake the dispenser or use a soft, non-abrasive tool to clear any blockages in the chute.
Krótki czas pracy baterii
- Jakość baterii: Use high-quality alkaline batteries for best performance and longevity.
- Częstotliwość użytkowania: Frequent use will naturally deplete batteries faster. Consider using an optional AC adapter for continuous power if available.
Specyfikacje
| Marka: | Ostrzejszy obraz |
| Model: | B07KGMDK96 |
| Tworzywo: | Plastikowy |
| Kolor: | Czarny |
| Wymiary (wys. x szer. x gł.): | Approximately 13.125 in. x 6.00 in. x 6.75 in. (33.3 cm x 15.2 cm x 17.1 cm) |
| Źródło zasilania: | 4 "AA" batteries (not included) or optional 6V DC 0.5A (300mA) AC adapter (not included) |
| Max Item Size: | Up to 0.5 inches (1.27 cm) in size (for optimal dispensing) |

Rysunek 4: Wymiary produktu.
Gwarancja i wsparcie
Aby uzyskać informacje o gwarancji lub pomocy technicznej, zapoznaj się z danymi kontaktowymi podanymi w opakowaniu produktu lub odwiedź oficjalną stronę internetową Sharper Image webZachowaj paragon jako dowód zakupu.