1. Wprowadzenie
This manual provides essential information for the correct installation, operation, and maintenance of the Dieffematic AUTUN2 control unit. The AUTUN2 is designed to manage one or two 230V motors for various automation systems, such as gates or doors. Please read this manual carefully before proceeding with installation or use to ensure safety and optimal performance.
Zachowaj tę instrukcję w bezpiecznym miejscu, aby móc z niej skorzystać w przyszłości.
2. Informacje dotyczące bezpieczeństwa
OSTRZEŻENIE: Incorrect installation or misuse can cause serious injury or damage. All electrical connections and programming must be performed by qualified personnel in compliance with local electrical codes and regulations.
- Disconnect power before performing any work on the control unit or connected motors.
- Ensure all wiring is correctly sized and insulated.
- Install appropriate safety devices (e.g., photocells, safety edges) as required by local regulations.
- Do not modify the control unit. Any modifications will void the warranty and may compromise safety.
- Keep children and unauthorized persons away from the automation system during operation.
3. Zawartość opakowania
Sprawdź, czy po rozpakowaniu wszystkie elementy są obecne i nieuszkodzone:
- Dieffematic AUTUN2 Control Unit
- Instrukcja obsługi (ten dokument)
- Sprzęt montażowy (śruby, kotwy) - może się różnić w zależności od pakietu
4. Koniec produktuview
The Dieffematic AUTUN2 is a robust control unit designed for reliable operation of 230V motors. It features inputs for various safety and command devices, as well as outputs for motor control and auxiliary functions.
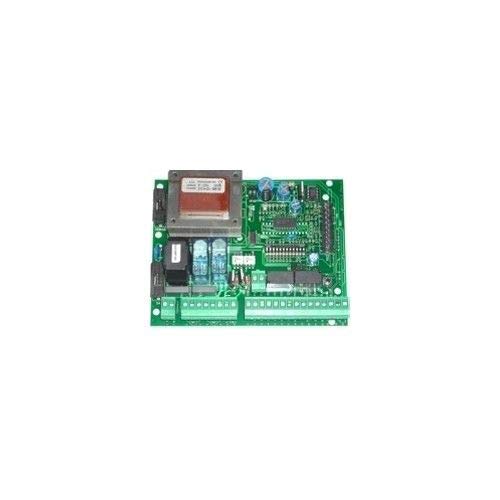
Rysunek 1: Dieffematic AUTUN2 Control Unit. This image displays the main housing of the control unit, showing various connection terminals for power, motors, and accessories. The internal components are visible, indicating the layout for wiring.
Główne cechy obejmują:
- Support for one or two 230V motors.
- Integrated receiver for remote controls.
- Adjustable operating parameters (e.g., force, pause time).
- Inputs for safety photocells, stop buttons, and other command devices.
5. Instalacja i konfiguracja
5.1 Montaż jednostki sterującej
- Choose a suitable location, protected from weather and easily accessible for maintenance.
- Upewnij się, że powierzchnia montażowa jest płaska i bezpieczna.
- Use the provided mounting hardware to securely fix the control unit to the wall or post.
5.2 Połączenia elektryczne
WAŻNY: All wiring must be performed with the main power supply disconnected.
- Main Power Supply (230V AC): Connect the main power supply to the designated terminals (L, N, PE). Ensure a proper earth connection.
- Połączenia silnika: Connect the motor(s) to the respective motor terminals (e.g., M1, M2 for two motors). Follow the motor manufacturer's wiring diagram for correct phase and direction.
- Safety Devices (Photocells, Safety Edges): Connect safety devices to their dedicated inputs. These devices are crucial for preventing accidents.
- Command Devices (Push Buttons, Key Switches): Connect command devices to the appropriate inputs (e.g., START, STOP).
- Accessories (Flashing Light, Courtesy Light): Connect auxiliary devices to the designated output terminals.
5.3 Programowanie początkowe
After all connections are made and verified, restore power to the unit. Refer to the specific programming section in the detailed manual (if provided separately) for:
- Motor direction learning.
- Force adjustment.
- Pause time setting.
- Parowanie pilota.
6. Działanie
Once installed and programmed, the automation system can be operated using remote controls or wired command devices.
- Otwarcie/zamknięcie: Press the assigned button on the remote control or wired push button to initiate the opening or closing cycle.
- Zatrzymać: Press the STOP button or the same command button during operation to halt the movement.
- Safety Intervention: If a safety device (e.g., photocell) detects an obstruction, the movement will stop or reverse, depending on the programming.
7. Konserwacja
Regular maintenance ensures the longevity and safe operation of your automation system. Perform these checks periodically:
- Kontrola wizualna: Check for any visible damage to the control unit, wiring, or motors.
- Czyszczenie: Keep the control unit and safety devices (e.g., photocell lenses) clean and free from dust, dirt, or spiderwebs.
- Test funkcjonalności: Periodically test the safety devices (e.g., block the photocell beam) to ensure they are working correctly.
- Elementy złączne: Ensure all mounting screws and terminal connections are tight.
For complex maintenance or repairs, contact a qualified technician.
8. Rozwiązywanie Problemów
This section addresses common issues. For problems not listed here, consult a qualified technician.
| Problem | Możliwa przyczyna | Rozwiązanie |
|---|---|---|
| System does not respond to commands. |
|
|
| Silnik pracuje w niewłaściwym kierunku. | Incorrect motor wiring or programming. | Reverse motor wiring or re-perform motor direction learning procedure. |
| System stops unexpectedly. |
|
|
9. Specyfikacje
- Marka: Dieffematic
- Model: AUTUN2
- Zasilanie: 230 V prądu zmiennego
- Kompatybilność silnika: 1 or 2 x 230V motors
- ASIN: B07JR7GMMX
- Data pierwszej dostępności: 20 września 2018 r.
10. Gwarancja i wsparcie
The Dieffematic AUTUN2 control unit is covered by a manufacturer's warranty against defects in materials and workmanship. The duration and terms of the warranty are subject to local regulations and the point of purchase.
For technical support, warranty claims, or service, please contact your authorized Dieffematic dealer or the manufacturer directly. Keep your proof of purchase for warranty purposes.