
1. Wprowadzenie
The WMF Lono Sous Vide Garer Pro is a versatile 2-in-1 appliance designed for both precise low-temperature sous vide cooking and traditional slow cooking. This manual provides essential information for safe operation, setup, usage, maintenance, and troubleshooting to ensure optimal performance and longevity of your appliance.

Image 1.1: The WMF Lono Sous Vide Garer Pro in use, showcasing both sous vide and slow cooking functions.
2. Instrukcje bezpieczeństwa
Przed użyciem urządzenia należy uważnie przeczytać wszystkie instrukcje bezpieczeństwa. Nieprzestrzeganie tych instrukcji może spowodować porażenie prądem, pożar lub poważne obrażenia.
- Zawsze należy upewnić się, że urządzenie jest umieszczone na stabilnej, odpornej na ciepło powierzchni.
- Do not immerse the base unit (containing electrical components) in water or other liquids.
- Przechowywać urządzenie w miejscu niedostępnym dla dzieci i zwierząt domowych.
- Odłączaj urządzenie od gniazdka elektrycznego, gdy nie jest używane, przed czyszczeniem oraz podczas montażu lub demontażu.
- Nie używaj urządzenia, jeśli przewód zasilający lub wtyczka są uszkodzone, jeśli urządzenie działa nieprawidłowo lub zostało upuszczone. Skontaktuj się z autoryzowanym serwisem w celu naprawy.
- Use only original WMF accessories and spare parts.
- Podczas pracy należy zapewnić odpowiednią wentylację wokół urządzenia.
- The water tank and stainless steel insert can become very hot during and after operation. Use caution and oven mitts when handling.
3. Koniec produktuview
Familiarize yourself with the components of your WMF Lono Sous Vide Garer Pro.

Obraz 3.1: Wybuch view showing all components of the WMF Lono Sous Vide Garer Pro.
Składniki:
- Jednostka podstawowa: Zawiera element grzewczy i panel sterowania.
- TRITAN Water Tank (6 Liters): Transparent, BPA-free tank for holding water. Features large transport handles.
- Pokrywa: Transparent lid for the water tank.
- Ruszt do gotowania metodą sous vide: Separator for vacuum-sealed bags to ensure even cooking.
- Stainless Steel Insert: For slow cooking functions.

Image 3.2: Detail of the transparent TRITAN water tank with integrated handles.
Panel sterowania:
The control panel features an LCD display and intuitive buttons for setting temperature and time.

Image 3.3: The digital control panel with LCD display, power button, start/pause, menu, and rotary dial.
- Przycisk zasilania (U): Włącza/wyłącza urządzenie.
- Przycisk Start/Pauza (||): Rozpoczyna lub wstrzymuje proces gotowania.
- Przycisk menu (≡): Przełącza pomiędzy ustawieniami temperatury i czasu.
- Pokrętło obrotowe: Used to adjust temperature and time values.
- Wyświetlacz LCD: Shows current temperature, target temperature, and remaining cooking time.
4. Konfiguracja
Before first use, ensure all packaging materials are removed and clean the water tank, lid, sous vide rack, and stainless steel insert with warm soapy water. Rinse thoroughly and dry.
Początkowe kroki konfiguracji:
- Place the base unit on a flat, stable, and heat-resistant surface.
- Position the TRITAN water tank securely on top of the base unit.
- Fill the water tank with water. For sous vide, ensure the water level is between the MIN and MAX marks, covering the food you intend to cook. For slow cooking, refer to the recipe for appropriate liquid levels.
- Podłącz przewód zasilający do uziemionego gniazdka elektrycznego. Wyświetlacz się podświetli.

Obraz 4.1: Przód view of the appliance showing water level indicators on the TRITAN tank.
5. Instrukcja obsługi
5.1. Sous Vide Cooking
Sous vide cooking involves precise temperature control for perfectly cooked food.
- Prepare your food (e.g., meat, fish, vegetables) and season as desired.
- Place the food in a vacuum-sealable bag and remove all air using a vacuum sealer.
- Place the sous vide rack into the water tank. This helps keep bags submerged and separated.
- Fill the water tank with water to the appropriate level.
- Wciśnij przycisk zasilania (U), aby włączyć urządzenie.
- Use the Menu button (≡) to select the temperature setting. Rotate the dial to set the desired temperature (range: 35°C to 90°C).
- Press the Menu button again to select the timer setting. Rotate the dial to set the desired cooking time (up to 72 hours).
- Once temperature and time are set, press the Start/Pause button (||) to begin heating the water.
- When the water reaches the target temperature, carefully place the vacuum-sealed food bags into the water bath, ensuring they are fully submerged.
- Załóż pokrywę na zbiornik na wodę.
- The timer will begin counting down once the target temperature is reached.
- After the cooking time expires, the appliance will alert you. Carefully remove the food bags.

Image 5.1: The sous vide rack placed inside the water tank, ready for food bags.

Image 5.2: A person carefully placing a vacuum-sealed bag of meat into the water bath with the sous vide rack.
5.2. Slow Cooking
The slow cooking function is ideal for tenderizing tougher cuts of meat and developing rich flavors.
- Ensure the TRITAN water tank is placed on the base unit.
- Insert the stainless steel insert into the water tank.
- Add your ingredients and liquids directly into the stainless steel insert.
- Fill the water tank with water around the stainless steel insert, ensuring the water level is appropriate for the slow cooking process (refer to recipe or ensure sufficient water for heat transfer).
- Wciśnij przycisk zasilania (U), aby włączyć urządzenie.
- Use the Menu button (≡) to select the temperature setting. Rotate the dial to set the desired temperature (maximum 90°C for slow cooking).
- Press the Menu button again to select the timer setting. Rotate the dial to set the desired cooking time.
- Naciśnij przycisk Start/Pauza (||) to begin the slow cooking process.
- Załóż pokrywę na zbiornik na wodę.
- Monitor the cooking process as needed.
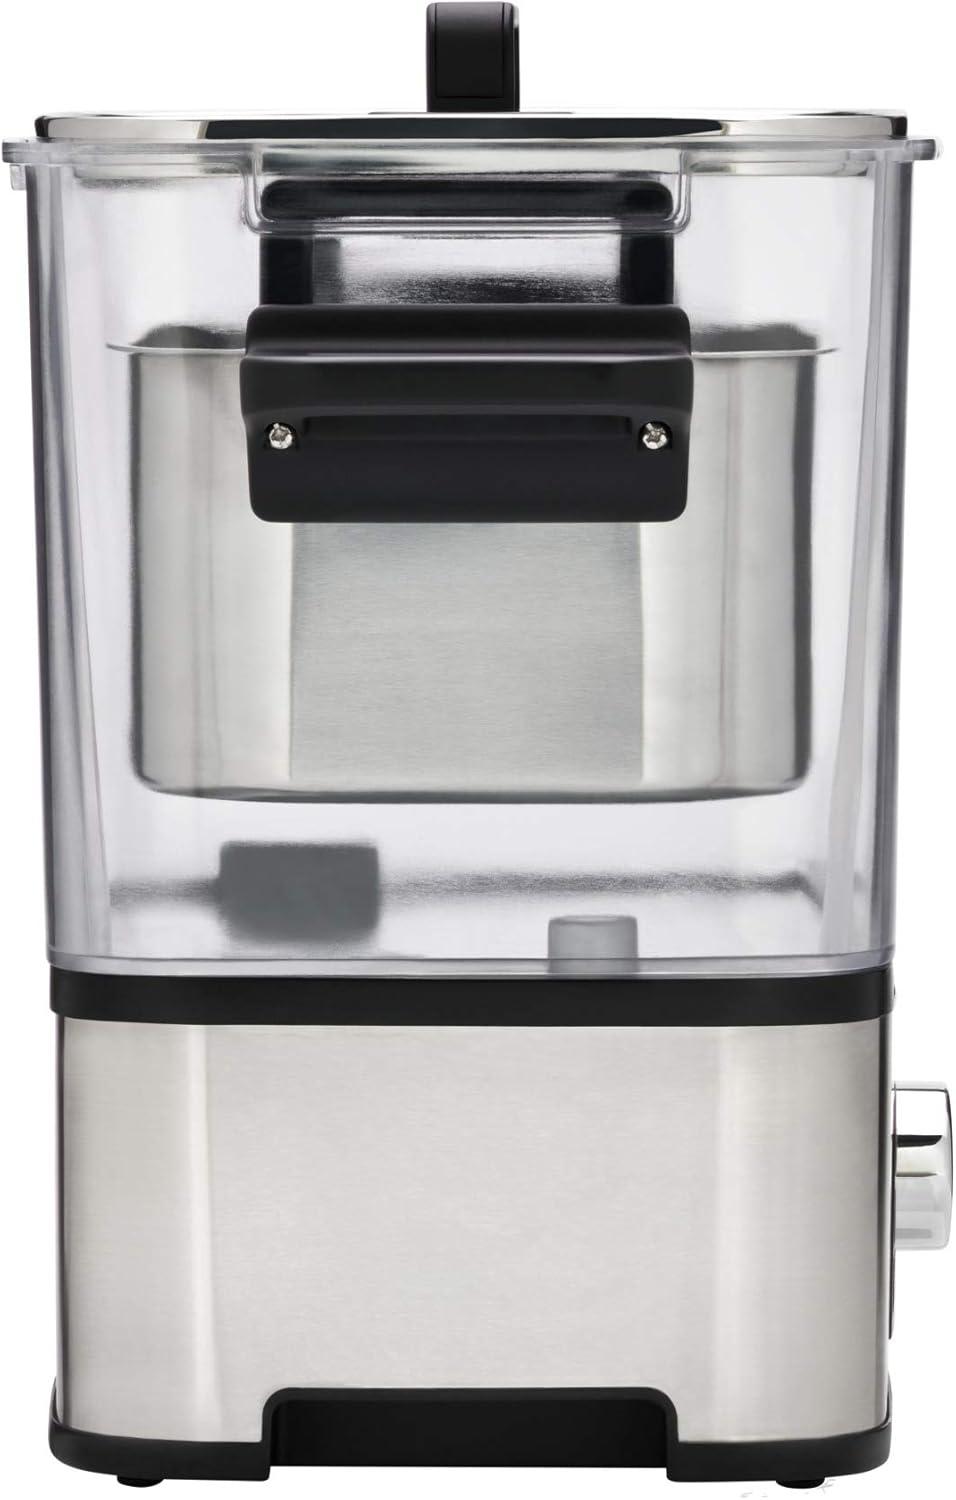
Image 5.3: The stainless steel insert positioned within the water tank for slow cooking.

Image 5.4: A meal prepared using the slow cooking function, served with pasta.
6. Konserwacja i czyszczenie
Regularne czyszczenie i konserwacja przedłużą żywotność Twojego urządzenia.
Kroki czyszczenia:
- Zawsze odłączaj urządzenie i pozwól mu całkowicie ostygnąć przed czyszczeniem.
- Remove the water tank, lid, sous vide rack, and stainless steel insert.
- Wash these removable parts with warm water and a mild dish soap. Rinse thoroughly and dry completely. These parts are generally dishwasher safe, but hand washing is recommended for longevity.
- Przetrzyj zewnętrzną część jednostki bazowej za pomocąamp cloth. Do not use abrasive cleaners or scourers. Never immerse the base unit in water.
- Ensure all parts are dry before reassembling or storing the appliance.
Odwapnianie:
Depending on water hardness, mineral deposits may accumulate in the water tank and on the heating element. Descale the appliance regularly (e.g., every 1-3 months) using a commercial descaling solution suitable for kitchen appliances or a mixture of water and white vinegar. Follow the descaling product's instructions or run the appliance with the descaling solution for a short period, then rinse thoroughly multiple times with clean water.
7. Rozwiązywanie Problemów
If you encounter issues with your WMF Lono Sous Vide Garer Pro, refer to the table below for common problems and solutions.
| Problem | Możliwa przyczyna | Rozwiązanie |
|---|---|---|
| Urządzenie nie włącza się. | Niepodłączony; zasilanie wyłączonetage; uszkodzony przewód zasilający/gniazdo. | Check power connection; test outlet with another appliance; inspect power cord for damage. |
| Woda się nie nagrzewa. | Start button not pressed; heating element malfunction. | Ensure the Start/Pause button is pressed; if problem persists, contact customer support. |
| Temperatura jest niestabilna. | Insufficient water; mineral buildup on heating element. | Ensure water level is adequate; descale the appliance. |
| Na wyświetlaczu pojawia się kod błędu. | Wewnętrzna awaria. | Odłącz urządzenie od zasilania, odczekaj kilka minut, a następnie podłącz je ponownie. Jeśli błąd będzie się powtarzał, skontaktuj się z obsługą klienta. |
8. Specyfikacje
- Marka: WMF
- Numer modelu: 0415360011
- Kolor: Cromargan Matte
- Wymiary produktu: 52.5 x 25.8 x 43 cm (ok. 20.7 x 10.2 x 16.9 cala)
- Pojemność: 6 litrów
- Moc: 1500 watów
- Tworzywo: Plastic (TRITAN, BPA-free) and Cromargan (Stainless Steel)
- Waga produktu: 2.59 kg (ok. 5.7 funta)
- Zakres temperatur: 35°C do 90°C (95°F do 194°F)
- Funkcja timera: Do 72 godzin
- Metoda sterowania: Touch and Rotary Dial
9. Gwarancja i wsparcie
WMF products are manufactured to high-quality standards and come with a manufacturer's warranty. Please refer to the warranty card included with your purchase for specific terms and conditions, including the warranty period and coverage details.
For technical support, spare parts, or warranty claims, please contact WMF customer service. Contact information can typically be found on the WMF official webstronie internetowej lub w dokumentacji dołączonej do urządzenia.
Kontaktując się z pomocą techniczną, przygotuj numer modelu (0415360011) i dowód zakupu.