
1. Wprowadzenie
Thank you for choosing the WMF Bueno Pro Coffee Maker Thermo. This manual provides essential information for the safe and efficient operation, maintenance, and troubleshooting of your new coffee maker. Please read these instructions carefully before first use and keep them for future reference.
Ważne instrukcje bezpieczeństwa
- Przed użyciem urządzenia należy przeczytać całą instrukcję.
- Nie dotykaj gorących powierzchni. Używaj uchwytów lub gałek.
- Aby zabezpieczyć się przed pożarem, porażeniem prądem elektrycznym i obrażeniami ciała, nie zanurzaj przewodu, wtyczek ani urządzenia w wodzie lub innym płynie.
- Należy zachować ścisły nadzór, jeżeli z urządzenia korzystają dzieci lub w ich pobliżu.
- Odłącz od gniazdka, gdy nie jest używane i przed czyszczeniem. Pozostaw do ostygnięcia przed założeniem lub zdjęciem części oraz przed czyszczeniem urządzenia.
- Nie używaj żadnego urządzenia, jeśli przewód lub wtyczka są uszkodzone, ani po wystąpieniu awarii urządzenia lub jeśli zostało ono w jakikolwiek sposób uszkodzone.
- Użycie akcesoriów niezalecanych przez producenta urządzenia może spowodować pożar, porażenie prądem lub obrażenia ciała.
- Nie stosować na zewnątrz.
- Nie pozwól, aby przewód zwisał z krawędzi stołu lub blatu i dotykał gorących powierzchni.
- Nie umieszczać na gorącym palniku gazowym lub elektrycznym ani w jego pobliżu, a także w nagrzanym piekarniku.
- Zawsze najpierw podłącz wtyczkę do urządzenia, a następnie podłącz przewód do gniazdka ściennego. Aby odłączyć, ustaw dowolny element sterujący w pozycji „wyłączone”, a następnie wyjmij wtyczkę z gniazdka ściennego.
- Nie używaj urządzenia niezgodnie z jego przeznaczeniem.
2. Koniec produktuview
The WMF Bueno Pro Coffee Maker Thermo is designed for ease of use and durability, featuring high-quality Cromargan: stainless steel 18/10.

Rysunek 2.1: Ogólnie view of the WMF Bueno Pro Coffee Maker Thermo, showcasing its sleek black and stainless steel design.

Rysunek 2.2: Przód view highlighting the external water level indicator on the side, allowing for easy monitoring of water quantity.
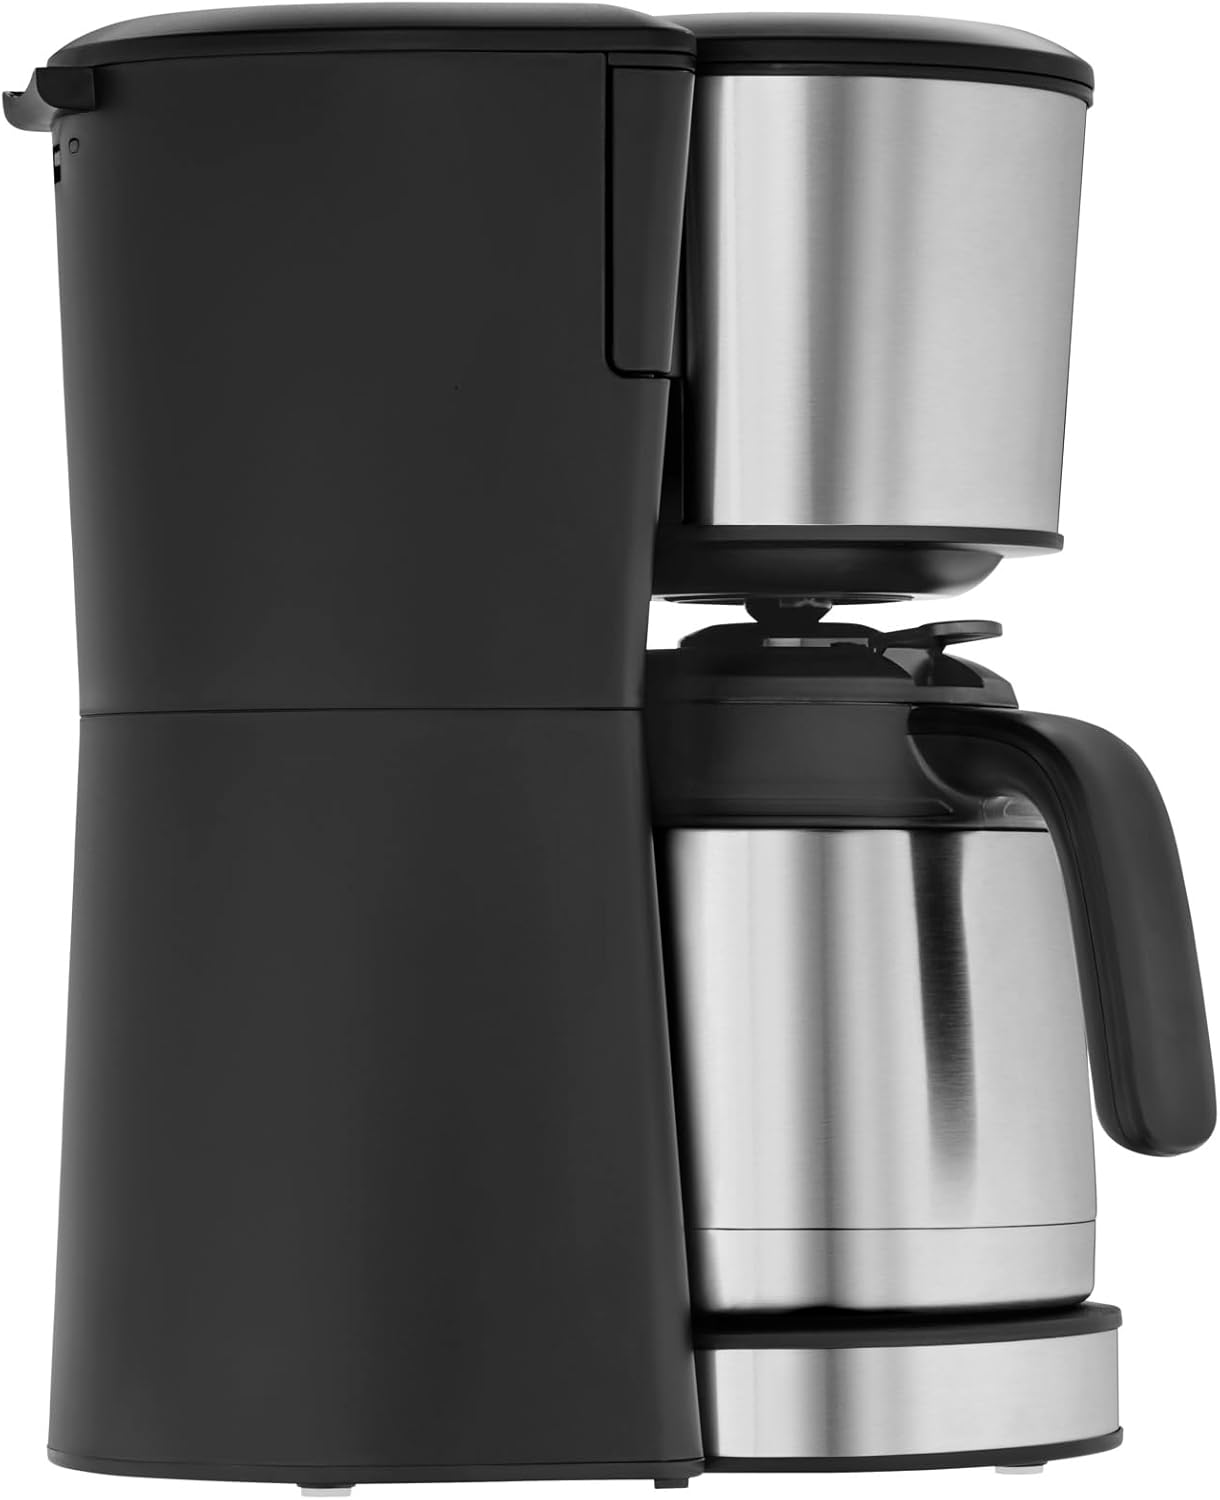
Rysunek 2.3: Szczyt view showing the swing filter compartment, which opens for easy access to insert or remove the filter.

Rysunek 2.4: Close-up of the high-quality thermal jug, designed to keep coffee warm for extended periods.

Rysunek 2.5: Detail of the illuminated on/off button, indicating the appliance's operational status.
Składniki:
- Jednostka główna ze zbiornikiem na wodę
- Zewnętrzny wskaźnik poziomu wody
- Swing Filter Holder with Removable Filter Insert (Size 1x4)
- Thermal Jug with Lid (1.25 L capacity for 10 cups)
- On/Off Button with Control Lamp
- Drip Stop Mechanism
3. Konfiguracja
Rozpakowanie i wstępne czyszczenie:
- Ostrożnie usuń wszystkie materiały opakowaniowe z ekspresu do kawy.
- Wash the thermal jug and its lid, and the removable filter insert with warm, soapy water. Rinse thoroughly and dry.
- Wytrzyj zewnętrzną część ekspresu do kawy z reklamąamp płótno. Nie zanurzaj jednostki głównej w wodzie.
Pierwsze użycie (cykl czyszczenia):
Before brewing coffee for the first time, it is recommended to run two full cycles with only water to clean the internal components.
- Fill the water tank with fresh, cold water up to the "10 cup" mark using the external water level indicator.
- Place the empty thermal jug with its lid on the warming plate.
- Ensure the swing filter holder is closed and no coffee filter or grounds are present.
- Podłącz przewód zasilający do odpowiedniego gniazdka elektrycznego 220 V.
- Press the On/Off button. The control lamp will illuminate, and the brewing process will begin.
- Allow the cycle to complete. Once finished, discard the hot water from the jug.
- Powtórz ten proces jeszcze raz.
- Your coffee maker is now ready for brewing.
4. Instrukcja obsługi
Parzenie kawy:
- Upewnij się, że ekspres do kawy jest odłączony od zasilania i ostygł.
- Fill the thermal jug with the desired amount of fresh, cold water (up to 1.25 L or 10 cups). Pour this water into the coffee maker's water tank. The external water level indicator will show the current fill level.
- Open the swing filter holder. Insert a size 1x4 paper coffee filter into the removable filter insert.
- Add the desired amount of ground coffee into the paper filter. A general guideline is one tablespoon of ground coffee per cup (150ml), but adjust to your taste.
- Close the swing filter holder securely.
- Place the thermal jug with its lid firmly on the warming plate. Ensure the lid is correctly positioned to allow coffee to flow into the jug.
- Podłącz przewód zasilający do odpowiedniego gniazdka elektrycznego 220 V.
- Press the On/Off button. The control lamp will illuminate, indicating that the brewing process has started.
- Once the brewing cycle is complete, the coffee maker will automatically turn off, and the control lamp will extinguish. The drip stop feature prevents dripping when the jug is removed.
- Carefully remove the thermal jug and serve your freshly brewed coffee. The thermal jug will keep the coffee warm for an extended period.
Notatka: For optimal temperature retention, pre-warm the thermal jug with hot water before brewing.
5. Konserwacja i czyszczenie
Regular cleaning ensures optimal performance and extends the lifespan of your WMF Bueno Pro Coffee Maker Thermo. Always unplug the appliance and allow it to cool completely before cleaning.
Codzienne sprzątanie:
- Thermal Jug and Lid: Wash the thermal jug and its lid with warm, soapy water after each use. Use a soft brush for the interior if needed. Rinse thoroughly and dry.
- Filter Insert: Remove the used paper filter and coffee grounds. Wash the removable filter insert with warm, soapy water. Rinse and dry.
- Zewnętrzny: Przetrzyj zewnętrzne powierzchnie ekspresu do kawy miękką,amp płótno. Nie używaj ściernych środków czyszczących ani szorstkich gąbek.
Descaling (Periodic Cleaning):
Mineral deposits from water can build up over time, affecting performance and taste. Descale your coffee maker regularly, depending on water hardness and frequency of use (e.g., every 2-4 months).
- Przygotuj roztwór odkamieniający zgodnie z instrukcją producenta środka do odkamieniania (np. biały ocet rozcieńczony wodą lub komercyjny środek odkamieniający).
- Wlać roztwór odkamieniający do zbiornika na wodę.
- Place the empty thermal jug with its lid on the warming plate.
- Start a brewing cycle without coffee grounds. Allow about half of the solution to brew through, then turn off the coffee maker and let it sit for 15-20 minutes to allow the solution to work.
- Włącz ponownie ekspres do kawy i poczekaj, aż reszta roztworu się zaparzy.
- Discard the descaling solution from the jug.
- Rinse the coffee maker by running two full cycles with fresh, clean water only to remove any residual descaler.
Ostrożność: Nigdy nie zanurzaj głównej części ekspresu do kawy w wodzie ani innym płynie.
6. Rozwiązywanie Problemów
If you encounter issues with your WMF Bueno Pro Coffee Maker Thermo, please consult the table below before contacting customer support.
| Problem | Możliwa przyczyna | Rozwiązanie |
|---|---|---|
| Ekspres do kawy nie włącza się. |
|
|
| Kawa nie parzy. |
|
|
| Kawa ma słaby lub zbyt mocny smak. |
|
|
| Z ekspresu do kawy wycieka woda. |
|
|
7. Specyfikacje
| Funkcja | Szczegół |
|---|---|
| Marka | WMF |
| Nazwa modelu | Bueno Pro |
| Numer modelu przedmiotu | 0412290011 |
| Moc | 900 W |
| Tomtage | 220 wolty |
| Pojemność dzbanka | 1.25 litra (ok. 10 szklanek) |
| Tworzywo | Cromargan: Stainless Steel 18/10, Plastic |
| Kolor | Czarny |
| Wymiary produktu (Gł. x Szer. x Wys.) | 7.09" gł. x 0.39" szer. x 13.78" wys. (ok. 18 x 1 x 35 cm) |
| Waga przedmiotu | 6.03 funta |
| Rozmiar filtra | 1x4 |
| Cechy specjalne | Thermal Jug, External Water Level Indicator, Drip Stop, Keep Warm Function |
8. Gwarancja i wsparcie
WMF products are manufactured with high-quality materials and undergo strict quality control. For detailed information regarding the warranty period and terms for your WMF Bueno Pro Coffee Maker Thermo, please refer to the warranty card included with your product or visit the official WMF webstrona.
If you require technical assistance, spare parts, or have questions not covered in this manual, please contact WMF customer support.
- WMF Official Webstrona: www.wmf.com (Sprawdź dane kontaktowe regionalnego działu pomocy technicznej)
- Obsługa klienta: Refer to your product packaging or the WMF website for local contact numbers and email addresses.
Kontaktując się z pomocą techniczną, przygotuj numer modelu (0412290011) i datę zakupu.