
1. Wprowadzenie
Thank you for choosing the Petlibro Automatic Pet Feeder. This device is designed to provide consistent and timely meals for your pet, ensuring they are fed according to a set schedule, even when you are away. Please read this manual thoroughly before use to ensure proper operation and maintenance of your feeder.
2. Ważne informacje dotyczące bezpieczeństwa
Aby zapobiec obrażeniom ciała lub uszkodzeniu produktu, należy przestrzegać następujących środków ostrożności:
- Read all instructions carefully before operating the feeder.
- Przechowywać karmnik poza zasięgiem dzieci i zwierząt domowych, gdy nie jest używany lub w trakcie montażu.
- Nie zanurzaj jednostki głównej w wodzie ani innych płynach.
- Używaj wyłącznie suchej karmy dla zwierząt o średnicy 5–15 mm. Nie używaj karmy mokrej, konserwowej ani wilgotnej.
- Upewnij się, że karmnik jest umieszczony na stabilnej i równej powierzchni.
- Przed czyszczeniem lub jakąkolwiek konserwacją należy odłączyć podajnik od zasilania.
- Nie próbuj samodzielnie naprawiać ani modyfikować podajnika. Skontaktuj się z obsługą klienta, aby uzyskać pomoc.
- Baterie należy utylizować zgodnie z lokalnymi przepisami.
3. Zawartość opakowania
Sprawdź zawartość paczki, aby upewnić się, że znajdują się w niej wszystkie elementy:
- Petlibro Automatic Pet Feeder Main Unit
- Miska na jedzenie
- USB-C Power Adapter and Cable
- Worek pochłaniający wilgoć (wstępnie zainstalowany lub osobno)
- Instrukcja obsługi
4. Koniec produktuview
Familiarize yourself with the different parts of your Petlibro Automatic Pet Feeder:
- Zbiornik na żywność: Przechowuje suchą karmę dla zwierząt.
- Pokrywa: Covers the food tank to keep food fresh.
- Panel sterowania: Buttons and display for setting schedules and manual feeding.
- Punkt gastronomiczny: Where food dispenses into the bowl.
- Miska na jedzenie: Odłączana miska, z której Twój pupil może jeść.
- Port zasilania (USB-C): Łączy się z zasilaczem.
- Komora baterii: Holds backup batteries (not included).
5. Konfiguracja
Follow these steps to set up your Petlibro Automatic Pet Feeder:
5.1 Montaż
- Rozpakować: Ostrożnie wyjąć wszystkie elementy z opakowania.
- Install Food Bowl: Place the food bowl securely at the base of the feeder.
- Install Food Tank: Align the food tank with the base and twist to lock it into place.
- Włóż woreczek pochłaniający wilgoć: If not pre-installed, open the desiccant compartment (usually under the lid) and insert the desiccant bag to keep food fresh. Replace every 15-30 days.

Image: Step-by-step assembly guide for the Petlibro Automatic Pet Feeder. It shows how to twist open the lid, take out the food bowl, put the desiccant bag into its compartment, install the food tank, put the lid back on, and finally install the food bowl.
5.2 Zasilanie
The feeder can be powered by a USB-C adapter or backup batteries.
- Moc podstawowa: Connect the USB-C power adapter to the feeder's power port and plug it into a wall outlet.
- Zasilanie bateryjne (opcjonalnie): Dla mocytages, install 3 D-cell batteries (not included) into the battery compartment at the bottom of the feeder. This ensures continuous operation.
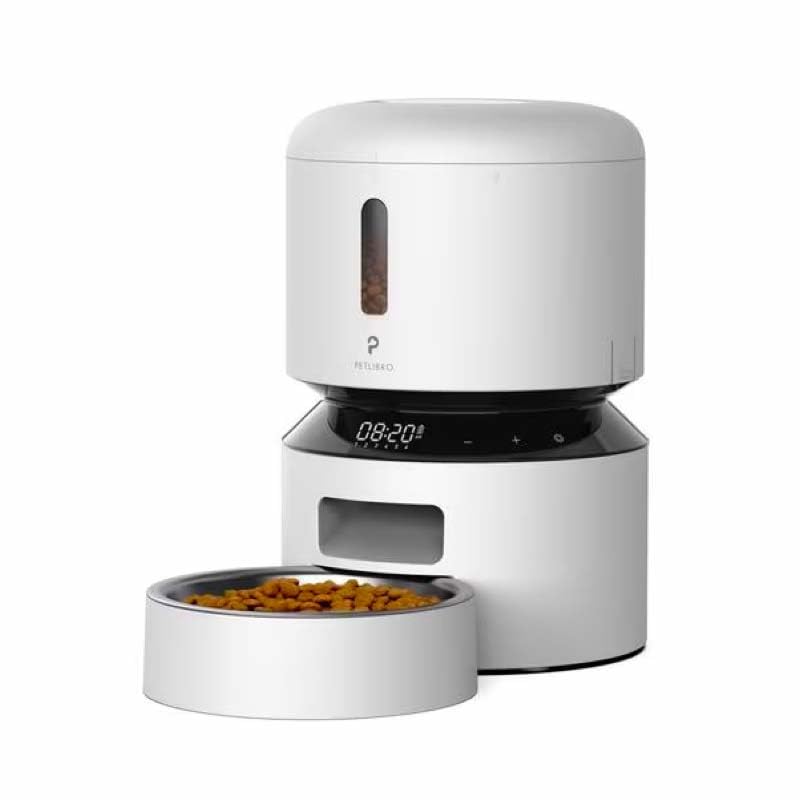
Image: Diagram illustrating the dual power supply system of the Petlibro Automatic Pet Feeder. It shows the USB-C adapter connected for primary power and the battery compartment for backup power. A note indicates that batteries are not included.
6. Instrukcja obsługi
Once assembled and powered, you can begin programming your feeder.
6.1 Napełnianie zbiornika na żywność
- Otwórz pokrywę zbiornika na żywność.
- Pour dry pet food into the tank. Ensure the food is within the recommended size (5-15mm diameter).
- Close the lid securely to maintain freshness.
6.2 Setting Meal Schedules and Portions
The feeder allows you to schedule up to 6 meals per day, with 1 to 50 portions per meal.

Image: A cat eating from the Petlibro Automatic Pet Feeder, illustrating the feeder's function. Text overlays indicate "Portion: 1-50" and "Meals: 1-6", highlighting the customizable feeding schedule.
- Ustaw aktualny czas: Use the control panel buttons (e.g., "SET", "UP", "DOWN") to set the current time.
- Program Meal Times: Press the "MEAL" button to enter meal programming mode. Select the desired meal number (e.g., Meal 1) and set the feeding time.
- Set Portions: For each programmed meal, set the number of portions (1-50) using the "PORTION" or "UP/DOWN" buttons.
- Repeat for all meals: Program up to 6 meals as needed.
- Zapisz ustawienia: Ensure all settings are saved according to the feeder's specific interface (usually by pressing "SET" or waiting for auto-save).
6.3 Karmienie ręczne
To dispense food instantly, press the manual feed button (often labeled "FEED" or a paw icon) on the control panel. Each press typically dispenses one portion.
7. Konserwacja i czyszczenie
Regularne czyszczenie zapewnia higienę i wydłuża żywotność karmnika.
- Wyjąć wtyczkę: Przed czyszczeniem należy zawsze odłączyć zasilacz od gniazdka elektrycznego.
- Demontować: Remove the food bowl and food tank.
- Czyste komponenty: Wash the food bowl and food tank with mild soap and water. Rinse thoroughly and dry completely before reassembling.
- Wyczyść jednostkę główną: Przetrzyj jednostkę główną miękką, damp płótno. Nie zanurzaj jednostki głównej w wodzie.
- Wymień środek pochłaniający wilgoć: Replace the desiccant bag every 15-30 days to maintain food freshness.
- Ponowny montaż: Przed ponownym złożeniem podajnika należy upewnić się, że wszystkie części są suche.
8. Rozwiązywanie Problemów
Jeśli masz problemy z podajnikiem, zapoznaj się z poniższymi typowymi problemami i ich rozwiązaniami:
| Problem | Możliwa przyczyna | Rozwiązanie |
|---|---|---|
| Podajnik nie włącza się. | No power connection; batteries depleted or incorrectly installed. | Sprawdź podłączenie zasilacza, wymień baterie lub upewnij się, że biegunowość jest prawidłowa. |
| Żywność nie jest wydawana. | Food tank empty; food jammed; dispenser blocked; incorrect schedule settings. | Refill food tank; clear any food jams; check dispenser for blockages; verify meal schedule and portion settings. |
| Food dispenses too much/too little. | Nieprawidłowe ustawienia porcji. | Adjust portion settings for each meal. |
| Wyświetlacz nie działa. | Problem z zasilaniem; usterka wyświetlacza. | Sprawdź zasilanie. Jeśli problem będzie się powtarzał, skontaktuj się z obsługą klienta. |
9. Specyfikacje
| Funkcja | Szczegół |
|---|---|
| Nazwa produktu | Petlibro Automatic Pet Feeder |
| Model | Automatyczny podajnik karmy 3L |
| Pojemność | 3 litrów |
| Tworzywo | Tworzywo sztuczne ABS dopuszczone do kontaktu z żywnością |
| Zasilacz | USB-C adapter (5V/1A); 3 x D-cell batteries (backup, not included) |
| Posiłki na dzień | Do 6 posiłków |
| Porcje na posiłek | 1-50 portions (approx. 5-10g per portion, depending on food density) |
| Zalecany rozmiar żywności | 5-15mm dry kibble |
| Kolor | Biały |
10. Gwarancja i wsparcie
Your Petlibro Automatic Pet Feeder comes with a standard manufacturer's warranty. For detailed warranty information, please refer to the warranty card included in your package or visit the official Petlibro webstrona.
If you have any questions, require technical support, or need assistance with your product, please contact Petlibro customer service. Contact details can typically be found on the product packaging, the official website, or by searching for "Petlibro customer support" online.