Wstęp
Dziękujemy za zakupasing the iTOMA White Noise Machine and Alarm Clock Model 301. This device combines a sound machine with 20 soothing sounds and a digital alarm clock with vibration and buzzer options, designed to enhance your sleep and waking experience. Please read this manual thoroughly before use to ensure proper operation and to maximize the product's features.

Rysunek 1: iTOMA White Noise Machine and Alarm Clock Model 301. This image shows the front view of the device with its digital display showing "12:38" and control buttons on top.
Zawartość opakowania
Sprawdź, czy w opakowaniu znajdują się wszystkie elementy:
- 1 x iTOMA White Noise Machine and Alarm Clock
- 1 x Instrukcja obsługi
- 1 x kabel ładujący typu C
- 1 x przejściówka z USB na USB C

Rysunek 2: Package Contents. This image displays the white noise machine, user manual, Type-C charging cable, and a USB to USB-C adapter, laid out on a surface.
Organizować coś
Włączanie urządzenia
The iTOMA White Noise Machine and Alarm Clock is powered via a USB Type-C connection. An AC adapter is not included, but you can use any standard USB power adapter (e.g., from a smartphone) or a USB port on a computer or power bank.
- Connect the provided Type-C charging cable to the Type-C port on the back of the device.
- Podłącz drugi koniec kabla do źródła zasilania USB (np. zasilacza sieciowego, portu USB komputera).
- The device will power on, and the display will illuminate.
Battery Installation (for backup)
The device requires 1 CR2032 battery (not included) for time and alarm settings backup during power outages. This battery does not power the main functions of the device.
- Znajdź komorę baterii na spodzie urządzenia.
- Otwórz pokrywę komory.
- Insert one CR2032 battery, ensuring the correct polarity (+/-).
- Dokładnie zamknij pokrywę komory baterii.
Instrukcja obsługi
Ustawianie czasu
- Naciśnij i przytrzymaj USTAWIENIE CZASU button located on the top of the device. The hour display will begin to flash.
- Użyj UP (▲) Lub W DÓŁ (▼) aby ustawić godzinę.
- Naciśnij USTAWIENIE CZASU Naciśnij przycisk ponownie. Wyświetlacz minut zacznie migać.
- Użyj UP (▲) Lub W DÓŁ (▼) buttons to adjust the minutes.
- Naciskać USTAWIENIE CZASU jeszcze raz, aby potwierdzić i wyjść z trybu ustawiania czasu.
Sound Machine Operation
The device offers 20 natural soothing sounds to aid relaxation and sleep.

Rysunek 3: Soothing Sounds Selection. This image highlights the "WHITE NOISE", "FANS SOUNDS", and "NATURE SOUNDS" buttons on the device, indicating the variety of available sounds.
- White Noise Sounds (5 types): Naciśnij BIAŁY SZUM button to cycle through 5 different white noise options.
- Fan Sounds (5 types): Naciśnij FANS SOUNDS button to cycle through 5 different fan sound options.
- Nature Sounds (10 types): Naciśnij DŹWIĘKI NATURY button to cycle through 10 different nature sounds (e.g., bird, clock, forest, ocean, rain, thunder).
- Regulacja głośności: Użyj UP (▲) Lub W DÓŁ (▼) buttons to adjust the sound volume (16 levels).
- Sound Timer: Naciśnij REGULATOR CZASOWY button to set an automatic shut-off timer for the sounds. Options include 30, 60, 90, or 120 minutes, or continuous play. The device will remember your last sound and volume settings.

Rysunek 4: Timer Options. This image illustrates the available timer settings: Continuous, 30 minutes, 60 minutes, 90 minutes, and 120 minutes, shown above the device on a bedside table.
Funkcja budzika
The device features a digital alarm clock with multiple wake-up options.

Rysunek 5: Digital Alarm Clock Features. This image highlights the wake-up options (buzzer or vibration), 16-level volume control, and snooze function, with the device shown on a wooden surface.
- Ustawianie alarmu:
- Naciśnij i przytrzymaj ZESTAW ALARMU button. The alarm hour will flash.
- Użyj UP (▲) Lub W DÓŁ (▼) buttons to set the desired alarm hour.
- Naciskać ZESTAW ALARMU again. The alarm minute will flash.
- Użyj UP (▲) Lub W DÓŁ (▼) buttons to set the desired alarm minutes.
- Naciskać ZESTAW ALARMU a third time to select the alarm mode:
- Codziennie: Alarm rozbrzmiewa każdego dnia.
- Dni powszednie: Alarm włącza się od poniedziałku do piątku.
- Weekendy: Alarm rozbrzmiewa w sobotę i niedzielę.
- Naciskać ZESTAW ALARMU a fourth time to select the wake-up method:
- Brzęczyk: Standardowy alarm dźwiękowy.
- Wibracja: Silent vibration alarm (requires device to be placed on a surface where vibration can be felt, e.g., under a pillow).
- Naciskać ZESTAW ALARMU one last time to confirm and exit alarm setting mode.
- Aktywacja/Dezaktywacja alarmu: Naciśnij krótko ZESTAW ALARMU Przycisk włączania i wyłączania alarmu. Po aktywacji na wyświetlaczu pojawi się ikona alarmu.
- Funkcja drzemki: Gdy zabrzmi alarm, naciśnij DRZEMKA/ŚCIEMNIACZ button to activate snooze. The alarm will pause for 9 minutes and then sound again. This can be repeated up to 6 times.
- Zatrzymywanie alarmu: Aby całkowicie wyłączyć alarm, naciśnij dowolny przycisk inny niż DRZEMKA/ŚCIEMNIACZ. The alarm will reset for the next scheduled time.
Wyświetl sterowanie ściemniaczem
The display brightness can be adjusted to suit your preference, especially for nighttime use.
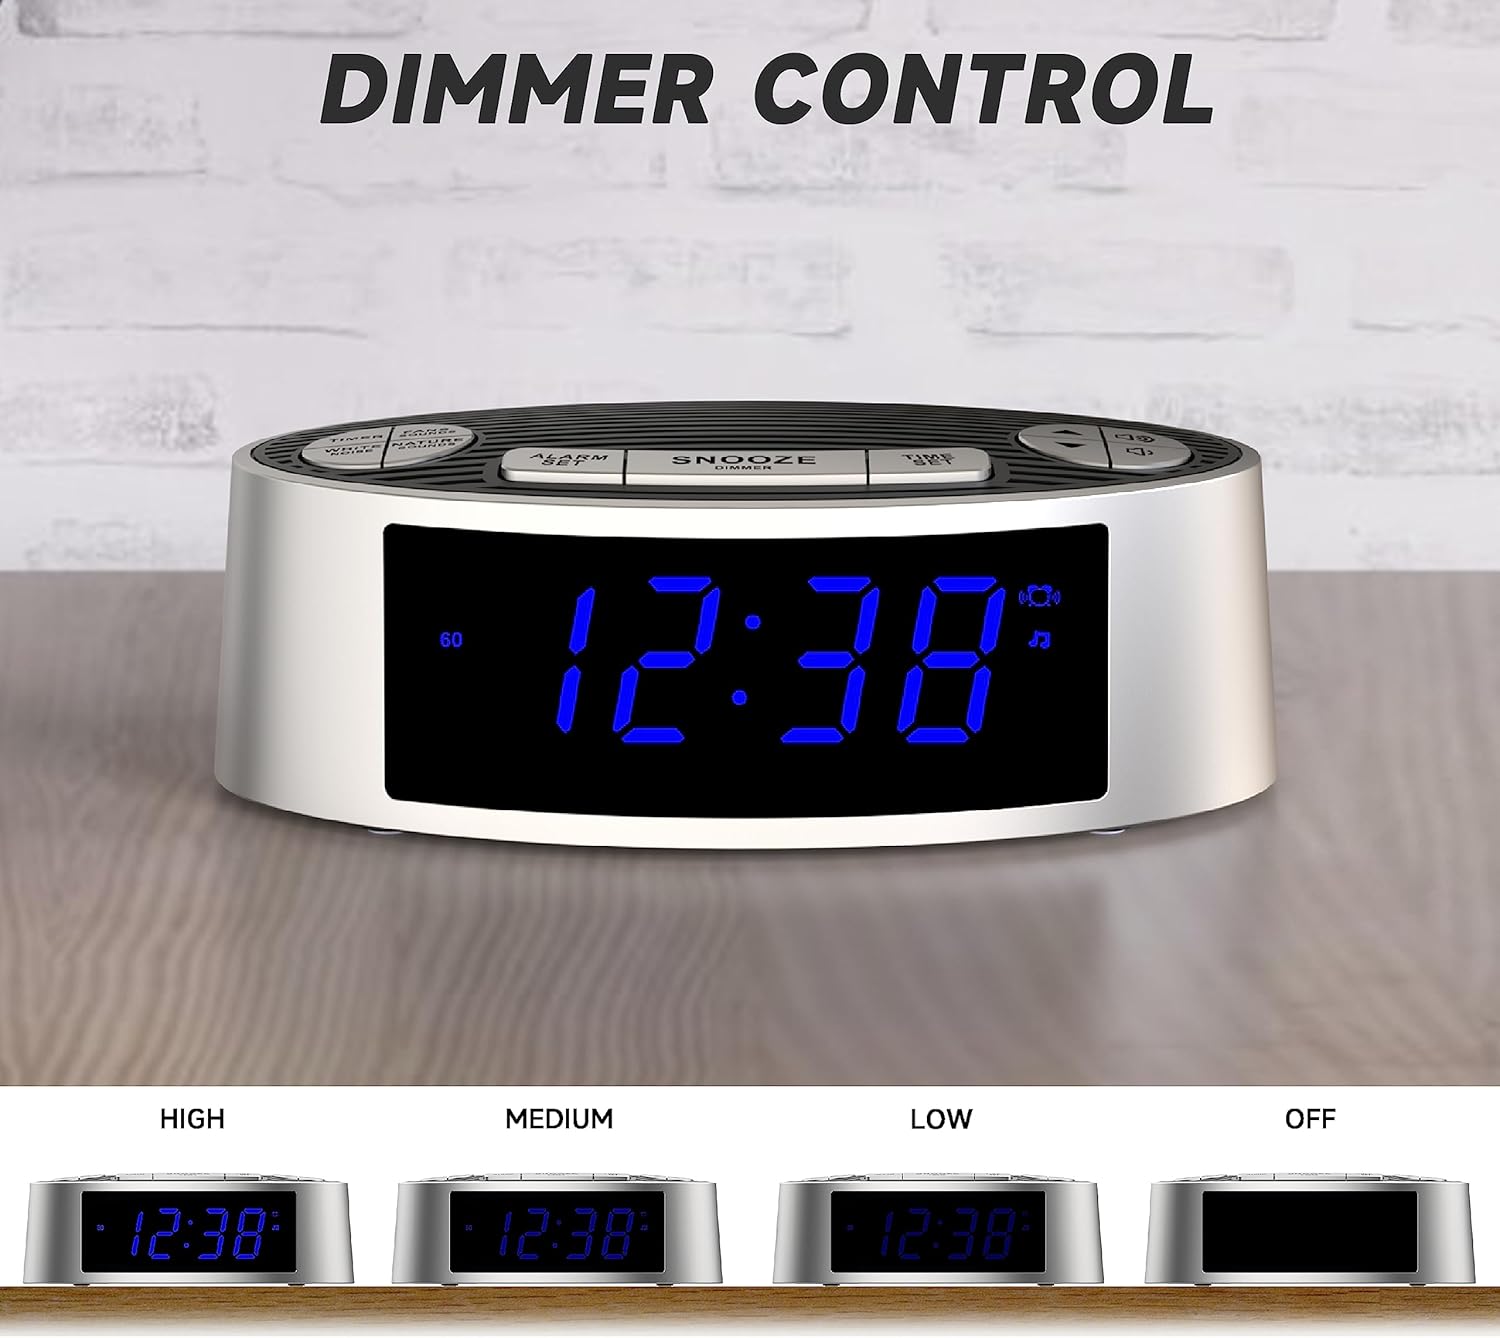
Rysunek 6: Dimmer Control. This image shows the device's display at four different brightness levels: High, Medium, Low, and Off, demonstrating the adjustable dimmer function.
- Naciśnij krótko DRZEMKA/ŚCIEMNIACZ button (when the alarm is not sounding) to cycle through the 4 brightness levels: High, Medium, Low, and Off.
Konserwacja
Czyszczenie
- Przed czyszczeniem należy odłączyć urządzenie od źródła zasilania.
- Do przecierania zewnętrznej części urządzenia należy używać miękkiej, suchej ściereczki.
- Nie należy używać płynnych, ściernych środków czyszczących ani sprayów, gdyż mogą one uszkodzić wykończenie lub wewnętrzne elementy.
Wymiana baterii
If the time and alarm settings are lost after a power outage, the CR2032 backup battery may need to be replaced. Follow the battery installation steps in the "Setup" section.
Rozwiązywanie problemów
| Problem | Możliwa przyczyna | Rozwiązanie |
|---|---|---|
| Urządzenie nie włącza się. | No power connection or faulty cable/adapter. | Ensure the USB-C cable is securely connected to both the device and a working USB power source. Try a different USB cable or power adapter. |
| Alarm nie wydaje dźwięku/nie wibruje. | Alarm not activated, incorrect time, or volume too low. | Verify the alarm is set and activated (alarm icon visible). Check alarm time. Increase alarm volume. Ensure vibration mode is selected if desired. |
| Czas/ustawienia resetują się po zaniku zasilania. | Brak lub rozładowanie zapasowej baterii CR2032. | Wymień baterię zapasową CR2032. |
| Wyświetlacz jest zbyt jasny/ciemny. | Należy dostosować ustawienia ściemniacza. | Naciśnij DRZEMKA/ŚCIEMNIACZ przycisk, aby przełączać poziomy jasności. |
Specyfikacje
| Funkcja | Szczegół |
|---|---|
| Numer modelu | 301 (CKS703) |
| Marka | iTOMA |
| Wymiary (dł. x szer. x wys.) | 15 x 9 x 5.2 cm (5.9 x 3.5 x 2.0 cala) |
| Waga | 240 gramów (0.53 funta) |
| Źródło zasilania | USB Type-C (AC adapter not included) |
| Bateria zapasowa | 1 x CR2032 (brak w zestawie) |
| Rodzaje dźwięków | 20 (5 White Noise, 5 Fan, 10 Nature) |
| Poziomy głośności | 16 |
| Sound Timers | Continuous, 30, 60, 90, 120 minutes |
| Alarm Wake-up Options | Buzzer, Vibration |
| Długość drzemki | 9 minutes (up to 6 times) |
| Wyświetlacz ściemniacza | 4 levels (High, Medium, Low, Off) |
| Tworzywo | Akrylonitryl-butadien-styren (ABS) |
Gwarancja i wsparcie
For warranty information or technical support, please refer to the contact details provided on the product packaging or the official iTOMA webZachowaj paragon jako dowód zakupu.
Aby uzyskać dalszą pomoc, odwiedź stronę: www.itoma.com