1. Wprowadzenie
Thank you for choosing the SUPER DEAL 5-in-1 Heat Press Machine. This versatile digital heat transfer machine is designed for professional-quality heat pressing on various materials, including T-shirts, caps, ceramic plates, mugs, and more. This manual provides essential information for safe and efficient operation, setup, maintenance, and troubleshooting.

Figure 1.1: The SUPER DEAL 5-in-1 Heat Press Machine with the 12"x15" platen press.
2. Instrukcje bezpieczeństwa
Przed przystąpieniem do obsługi urządzenia należy uważnie przeczytać wszystkie instrukcje dotyczące bezpieczeństwa, aby zapobiec obrażeniom ciała lub uszkodzeniom.
- Zawsze należy obsługiwać prasę termiczną na stabilnej, odpornej na ciepło powierzchni.
- Keep hands and body clear of the heating element during operation. The platen reaches high temperatures and can cause severe burns.
- Ensure proper ventilation in your workspace to dissipate any fumes from materials.
- Nie pozostawiaj urządzenia bez nadzoru, gdy jest włączone lub się nagrzewa.
- Odłączaj urządzenie od gniazdka elektrycznego, gdy nie jest używane, a także przed czyszczeniem i konserwacją.
- Trzymaj dzieci i zwierzęta z dala od maszyny.
- Nie zanurzaj urządzenia ani jego podzespołów elektrycznych w wodzie ani innych cieczach.
- Use only the accessories and attachments provided or approved by SUPER DEAL.
- If you notice any unusual smells, smoke, or malfunctions, immediately unplug the machine and contact support.
3. Komponenty i akcesoria
The SUPER DEAL 5-in-1 Heat Press Machine includes the following:
- 1x Fully-assembled machine with 12"x15" Platen Press (Teflon Coated)
- 1x Hat press attachment
- 1x Mug press attachment
- 2x Plate press attachments (various sizes)
- 1x 12mm Silicone composite pad
- 1x Cotton pad
- 1x Kabel zasilający
- 1x Instrukcja obsługi
- Basic tools for assembly (e.g., wrench, screwdriver)
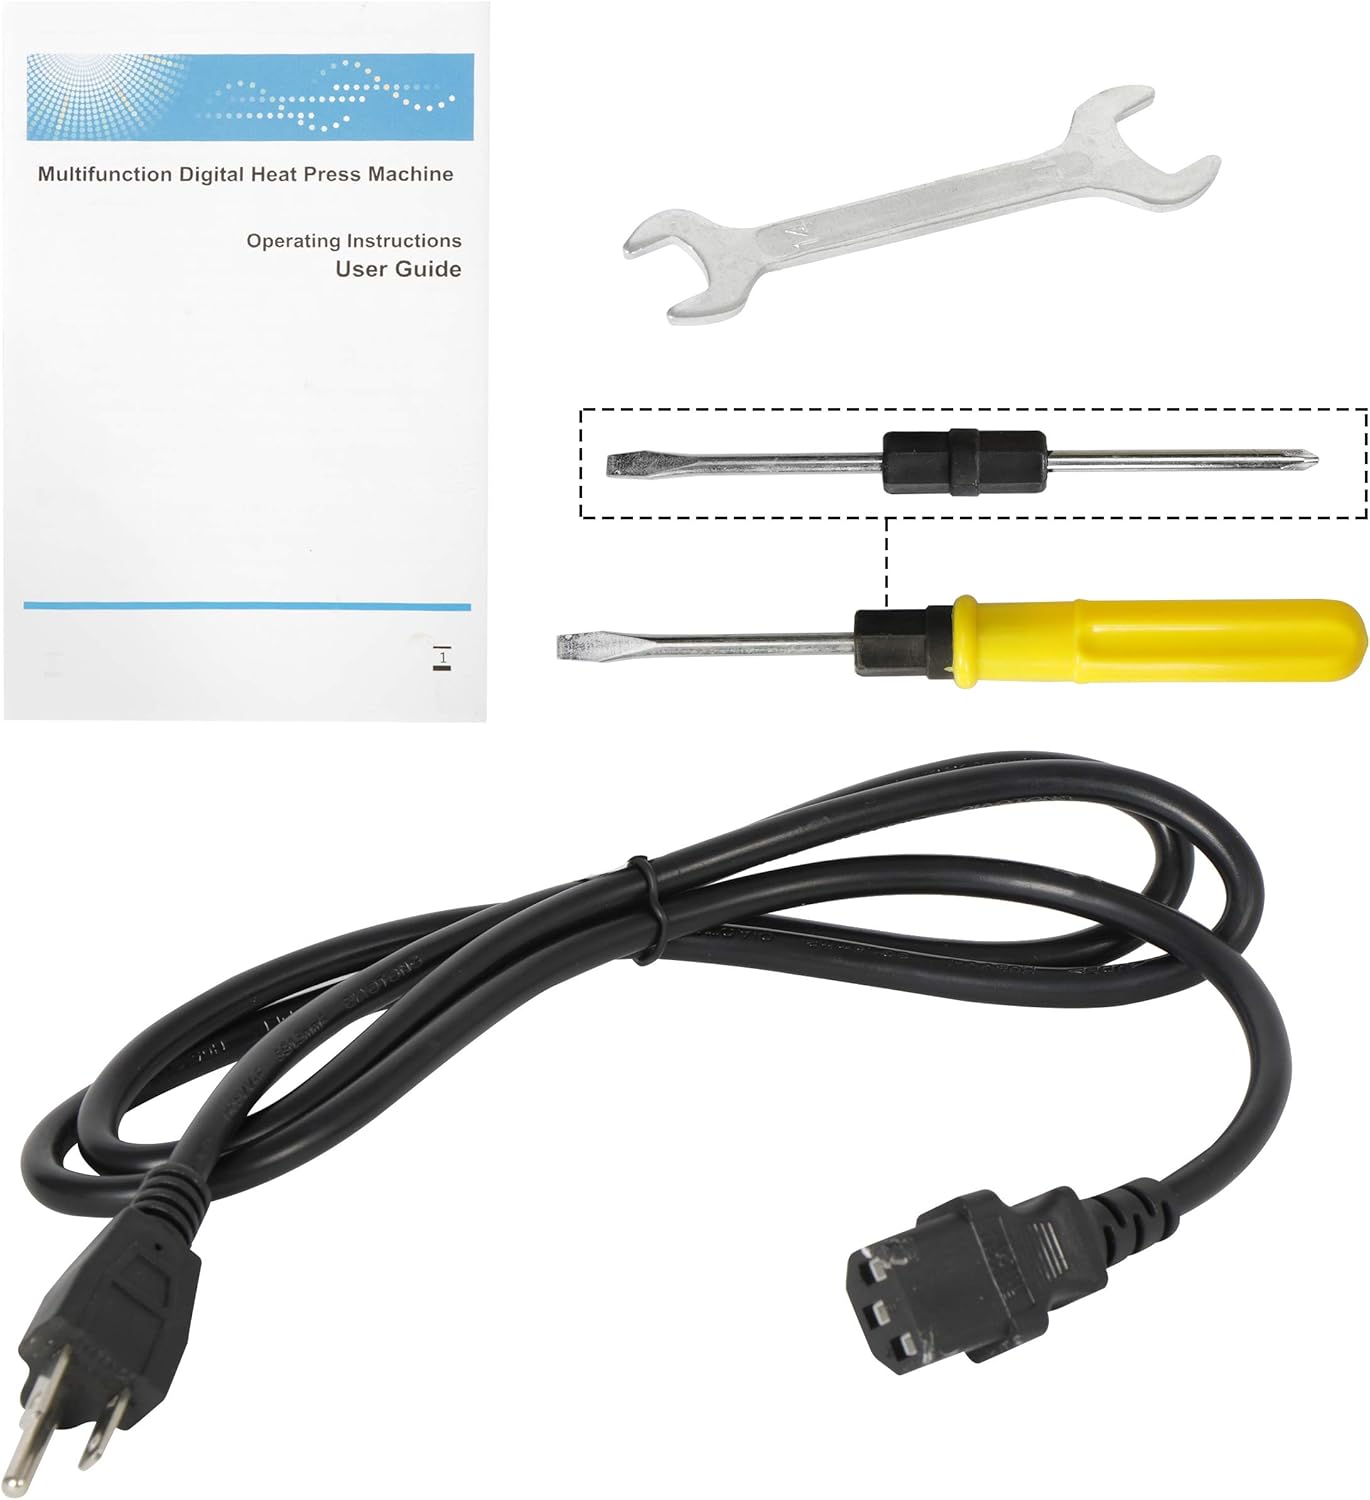
Rysunek 3.1: Koniecview of the main unit, various attachments, and included tools.

Figure 3.2: Visual representation of the different attachments and their applications.
4. Konfiguracja i pierwsze użycie
4.1 Rozpakowanie i montaż
- Ostrożnie wyjąć wszystkie elementy z opakowania.
- Place the main heat press unit on a sturdy, flat, and heat-resistant surface.
- Ensure all connections are secure. The machine comes largely pre-assembled.
4.2 Attaching Different Platens/Elements
The machine features a 360-degree rotation design for easy access and interchangeability of heating elements.

Figure 4.1: The 360-degree swing-away design allows for easy placement of items and attachment changes.
- To change an attachment (e.g., from platen press to mug press), first ensure the machine is unplugged and cool.
- Loosen the screws securing the current attachment.
- Carefully remove the attachment.
- Align the desired attachment with the mounting points and secure it with the screws. Ensure it is firmly attached before use.
4.3 Regulacja ciśnienia
The pressure can be adjusted to suit different material thicknesses. This is crucial for achieving optimal transfer results.

Figure 4.2: The pressure adjustment knob is located on top of the heating element arm.
- Turn the pressure adjustment knob clockwise to increase pressure and counter-clockwise to decrease pressure.
- Test the pressure by closing the platen without material. It should require moderate effort to close and open.
5. Instrukcja obsługi
This section outlines the general steps for operating your heat press. Specific temperature and time settings will vary based on the material and transfer type.
5.1 General Heat Pressing Steps
- Włączanie: Plug the machine into a grounded 110V outlet and turn on the power switch.
- Ustaw temperaturę i czas: Use the digital controller to set the desired temperature and time (refer to Section 6 for details).
- Podgrzewanie wstępne: Allow the machine to reach the set temperature. The 'HEATING-UP' indicator will turn off, and an alarm may sound when ready.
- Przygotuj przedmiot: Place your item (e.g., T-shirt) on the lower platen. For garments, a pre-press for 5-10 seconds can remove moisture and wrinkles.
- Przeniesienie stanowiska: Place your transfer material onto the item. Use heat-resistant tape if necessary to secure it.
- Naciskać: Swing the upper platen over the item and press down the handle firmly until it locks into place. The timer will begin counting down.
- Uwolnienie: Once the timer alarm sounds, lift the handle to release the pressure and swing the upper platen away.
- Remove Transfer: Carefully remove the transfer paper according to its specific instructions (hot peel or cold peel).
- Wyłączone: When finished, turn off the power switch and unplug the machine.
5.2 Zastosowanie Examples
The 5-in-1 machine allows for various applications:
- T-shirts/Flat Items: Use the 12"x15" platen. Ensure the garment is flat and free of obstructions.
- Kubki: Attach the mug press. Insert the mug and adjust pressure so it's snug but not overly tight.
- Hats/Caps: Attach the cap press. Position the cap securely on the curved platen.
- Talerze: Attach the appropriate plate press. Ensure the plate is centered and stable.

Figure 5.1: Demonstrating the heat pressing process for a T-shirt.
Video 5.1: A user demonstrates the basic operation of the heat press, including swiveling the platen, placing a shirt, pressing, and peeling the transfer. This video highlights the ease of use for simple heat transfer projects.
6. Digital Temperature and Time Control
The machine is equipped with a digital controller for precise temperature and time settings.

Figure 6.1: The digital control panel for setting temperature and time.
- Ustawienie temperatury: Press the 'SET' button once. The 'TEMP' indicator will flash. Use the up/down arrows to adjust the temperature. Press 'SET' again to confirm.
- Czas wiązania: Press the 'SET' button twice. The 'TIME' indicator will flash. Use the up/down arrows to adjust the time in seconds. Press 'SET' again to confirm.
- Jednostka temperatury: The unit is typically in Fahrenheit.
Note: Always refer to the specific instructions provided with your heat transfer material for recommended temperature and time settings.
7. Konserwacja
Regular maintenance ensures the longevity and optimal performance of your heat press.
- Cleaning the Platen: Allow the platen to cool completely. Use a soft, damp cloth to wipe down the Teflon-coated heating element. For stubborn residue, use a specialized platen cleaner. Avoid abrasive cleaners or sharp objects that could damage the coating.
- Czyszczenie podstawy: Wipe the base and other non-heating surfaces with a damp płótno.
- Składowanie: Gdy urządzenie nie jest używane, przechowuj je w suchym i wolnym od kurzu pomieszczeniu.
- Kontrola kabli: Periodically check the power cord and other cables for any signs of wear or damage. Replace immediately if damaged.
8. Rozwiązywanie Problemów
W tej sekcji omówiono typowe problemy, na które możesz natrafić.
| Problem | Możliwa przyczyna | Rozwiązanie |
|---|---|---|
| Maszyna nie włącza się. | Power cord not plugged in; power switch off; faulty outlet. | Ensure power cord is securely plugged in. Turn on the power switch. Test the outlet with another device. Check the fuse if accessible. |
| Temperature not reaching set value or inconsistent. | Incorrect temperature setting; faulty heating element or sensor. | Verify temperature settings. Allow sufficient time for heating. If issues persist, contact customer support. (Note: Some users have reported discrepancies between displayed temperature and actual platen temperature; an external thermometer can verify.) |
| Timer does not start when pressed down. | Sensor issue; mechanical fault in the pressing mechanism. | Ensure the handle is fully pressed down and locked. Check for any obstructions. If the timer mechanism is not engaging, contact customer support. (Some users have reported this issue, indicating a potential internal sensor problem.) |
| Poor transfer quality (e.g., peeling, incomplete transfer). | Incorrect temperature/time/pressure; wrong transfer material type; material not pre-pressed. | Adjust temperature, time, and pressure according to transfer material instructions. Ensure even pressure distribution. Pre-press garments to remove moisture. |
| Attachments (e.g., hat press) do not fit or work correctly. | Incorrect assembly; incompatible material size. | Review assembly instructions for the specific attachment. Ensure the item being pressed fits the attachment size. (Some users have noted difficulty with hat press accommodation.) |
Video 8.1: A user demonstrates a potential issue where the heat press displays 300 degrees, but an external thermometer reads 318-322 degrees, indicating a calibration discrepancy. The video also shows the timer not engaging when the press is closed.
9. Specyfikacje
| Funkcja | Szczegół |
|---|---|
| Marka | SUPER OFERTA |
| Model | 5-in-1 Heat Press Machine |
| Tworzywo | Aluminium, silikon |
| Kolor | Czarny |
| Wymiary produktu (dł. x szer. x wys.) | 16.54" x 15.35" x 17.99" |
| Waga przedmiotu | 26.8 funtów |
| Górna ocena temperatury | 350 stopni Fahrenheita |
| Tomtage | 110 wolty |
| Cotage | 900 watów |
| Rozmiar płyty | 12" x 15" |
| Obrót | 360-degree Swing-Away |
10. Gwarancja i wsparcie
For warranty information, technical support, or to purchase replacement parts, please refer to the official SUPER DEAL webOdwiedź stronę internetową lub skontaktuj się bezpośrednio z obsługą klienta. Szczegóły zazwyczaj znajdują się w dokumentacji zakupu.
Zawsze zachowaj dowód zakupu na wypadek roszczeń gwarancyjnych.