Amazon Basics DLB111-US290
Amazon Basics Single Computer Monitor Stand User Manual
Model: DLB111-US290 | Brand: Amazon Basics
Wstęp
This user manual provides comprehensive instructions for the assembly, operation, and maintenance of your Amazon Basics Single Computer Monitor Stand. This desk-mounted arm is designed to enhance your workspace ergonomics and free up valuable desk space by securely holding a single computer monitor.
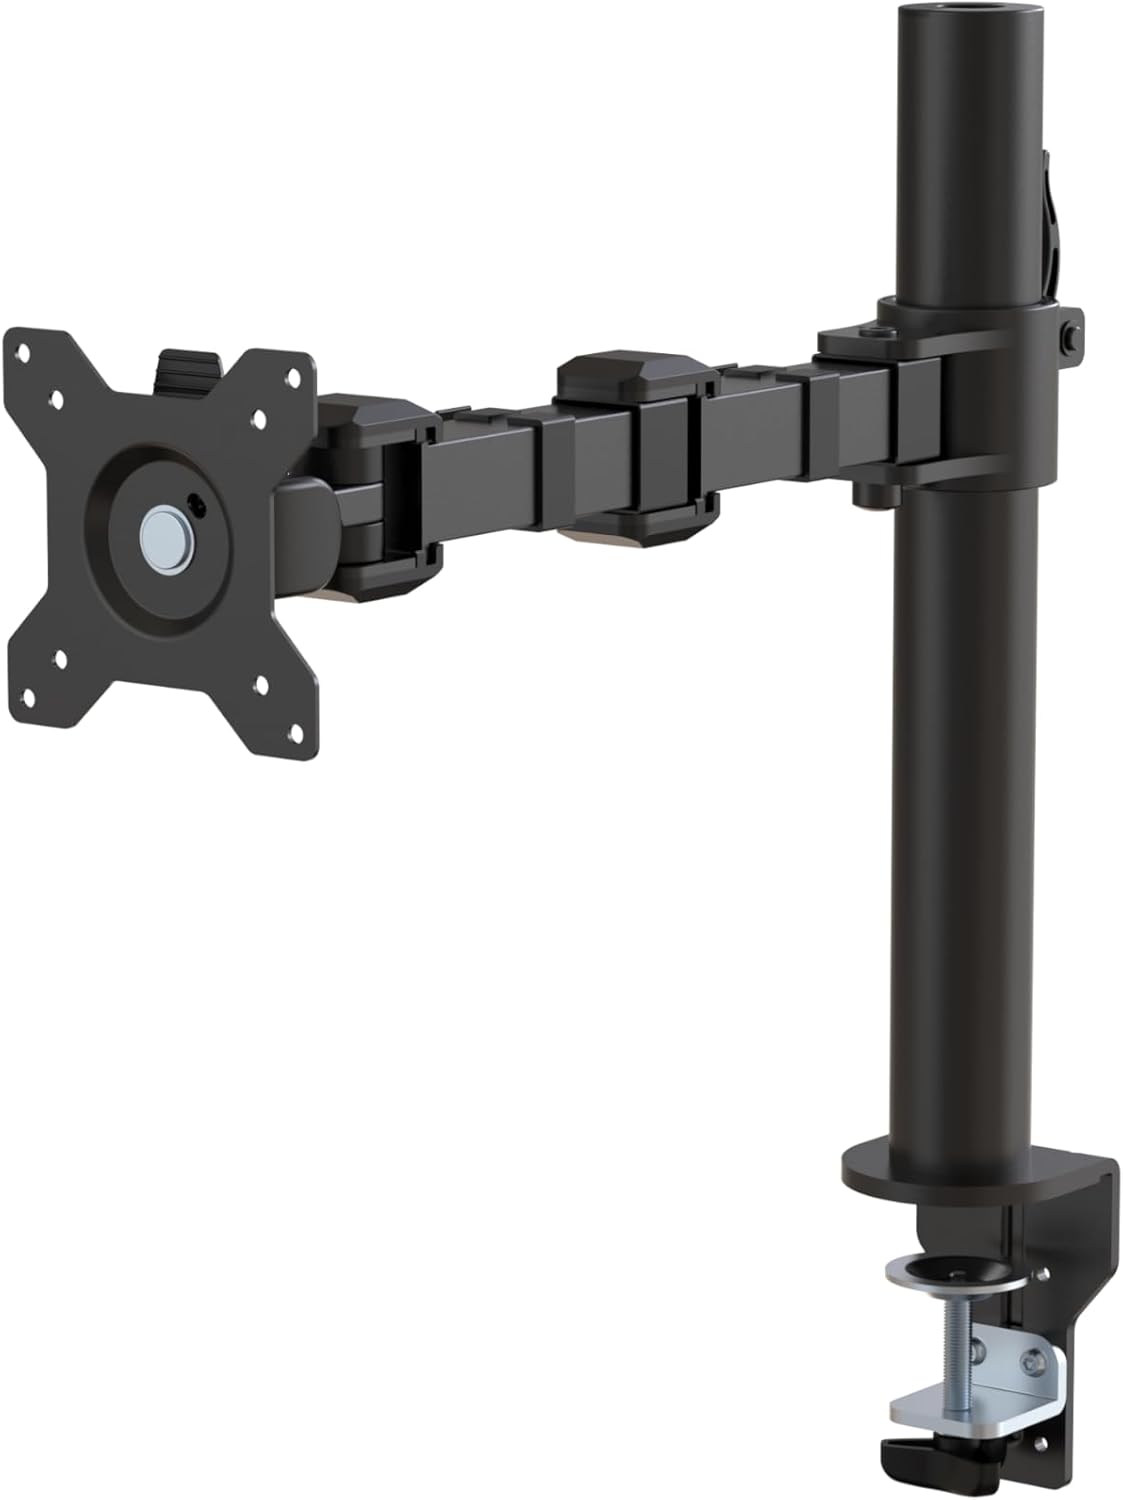
Rysunek 1: Koniecview of the Amazon Basics Single Computer Monitor Stand.
Ważne informacje dotyczące bezpieczeństwa
- Przed montażem i użyciem należy uważnie przeczytać wszystkie instrukcje.
- Nie przekraczać maksymalnego udźwigu wynoszącego 22 funtów (10 kg).
- Ensure your desk surface is stable and can support the combined weight of the monitor arm and your monitor.
- Verify that the desk thickness is between 0.8 to 3.9 inches (2 cm to 10 cm) for proper clamp instalacja.
- Używaj wyłącznie dostarczonego sprzętu. Jeśli brakuje którejkolwiek części lub jest ona uszkodzona, skontaktuj się z obsługą klienta.
- Trzymaj dzieci i zwierzęta z daleka podczas montażu.
- Okresowo sprawdzaj wszystkie śruby i połączenia, aby mieć pewność, że są dobrze dokręcone i bezpieczne.
Zawartość opakowania
Przed rozpoczęciem montażu należy sprawdzić, czy wszystkie elementy są obecne:
- Monitor Arm Assembly (Pre-assembled arm and VESA plate)
- Biurko Clamp Opierać
- Słup montażowy
- Hardware Kit (Screws for VESA mounting, Allen keys)
- Klipsy do zarządzania kablami
- Instrukcja obsługi
Instrukcje konfiguracji
Step 1: Attach Desk Clamp Opierać
Ustaw biurko klamp base on your desk edge. Ensure the desk thickness is compatible (0.8 to 3.9 inches). Tighten the clamp screw securely until the base is firmly attached to the desk. Do not overtighten.

Figure 2: Securely attaching the desk clamp base to your desk.
Step 2: Install Mounting Pole
Insert the mounting pole into the hole on the desk clamp base. Secure it by tightening the set screw on the side of the clamp base using the provided Allen key.
Krok 3: Zamontuj ramię monitora na słupku
Slide the monitor arm assembly onto the mounting pole. Adjust the height to your desired position and tighten the height adjustment screw on the arm collar to secure it.
Krok 4: Zamontuj płytkę VESA do monitora
The monitor arm features a detachable VESA plate. Remove the VESA plate from the arm by lifting it up. Align the VESA plate with the mounting holes on the back of your monitor (compatible with 100x100mm and 75x75mm VESA patterns). Use the appropriate screws from the hardware kit to secure the plate to your monitor. Ensure the screws are tightened firmly but do not overtighten.

Figure 3: The detachable VESA plate for easy monitor attachment.
Krok 5: Zamontuj monitor na ramieniu
Carefully slide the monitor (with the attached VESA plate) onto the monitor arm. Ensure it clicks securely into place. You may need to adjust the tension screws on the arm joints to support the monitor's weight and allow for smooth movement.

Figure 4: Monitor securely mounted on the arm, viewz przodu.

Figure 5: Top-down perspective of the monitor mounted, showcasing desk space optimization.
Krok 6: Zarządzanie kablami
Utilize the integrated cable management system to route your monitor cables (power, video, etc.) along the arm and down the pole. This helps maintain a tidy workspace and prevents cable clutter.
Instrukcja obsługi
The monitor arm offers a full range of motion to customize your viewdoświadczenie:
- Regulacja wysokości: The horizontal arm can be adjusted from 7.9 to 14.2 inches high along the pole. Loosen the height adjustment screw on the arm collar, slide the arm to the desired height, and re-tighten.
- Przechylenie: Adjust the screen tilt from -15 to +85 degrees to reduce glare and optimize viewkąty.
- Obracać: Swivel the monitor left or right up to 180 degrees at various joints for collaborative viewing or screen sharing.
- Obrót: Rotate the monitor 360 degrees to switch between landscape and portrait modes without removing the monitor.

Figure 6: Visual representation of the flexible screen adjustment capabilities: Tilt (-85/+15 degrees), Swivel (±180 degrees), and Rotation (360 degrees).
Pozycjonowanie ergonomiczne
Proper monitor positioning is crucial for ergonomic comfort and reducing strain. Adjust the monitor arm so that the top of your monitor screen is at or slightly below eye level when you are sitting upright. Your eyes should be approximately an arm's length away from the screen. Ensure your wrists are straight and your forearms are parallel to the floor when typing.

Figure 7: Comparison of correct and incorrect sitting postures, highlighting the importance of proper monitor height.
Konserwacja
- Czyszczenie: Przetrzyj ramię monitora miękką ściereczką.amp szmatką. Unikaj środków czyszczących o działaniu ściernym i rozpuszczalników, które mogą uszkodzić wykończenie.
- Kontrola szczelności: Periodically check all screws and connections, especially the desk clamp and VESA plate screws, to ensure they are tight and secure. Re-tighten if necessary.
- Smarowanie: Części ruchome nie wymagają smarowania.
Rozwiązywanie problemów
| Problem | Możliwa przyczyna | Rozwiązanie |
|---|---|---|
| Monitor arm sags or does not hold position. | Tension screws are too loose. | Tighten the tension screws on the arm joints using the provided Allen key until the arm holds the monitor's weight. |
| Monitor wobbles on the arm. | VESA plate screws are loose or desk clamp is not secure. | Ensure the VESA plate screws attaching the monitor are tight. Re-tighten the desk clamp wkręt. |
| Cannot adjust monitor height. | Height adjustment screw is too tight. | Loosen the height adjustment screw on the arm collar, adjust height, then re-tighten. |
Specyfikacje
| Funkcja | Szczegół |
|---|---|
| Numer modelu | DLB111-US290 |
| Wymiary produktu | 20 x 18.13 x 4.5 cala |
| Waga przedmiotu | 5.59 funta |
| Tworzywo | Stal stopowa |
| Kolor | Czarny |
| Typ montażu | Cl blat stołuamp Uchwyt |
| Kompatybilny rozmiar ekranu | 13 do 30 cala |
| Maksymalna nośność | 22 funtów (10 kg) |
| Desk Thickness Compatibility | 0.8 do 3.9 cala |
| Zgodność ze standardem VESA | 75x75mm, 100x100mm |
| Zakres regulacji wysokości | 7.9 to 14.2 inches (horizontal arm) |
| Kąt nachylenia | -15 do + 85 stopni |
| Obrót | 360 stopnia |
Gwarancja i wsparcie
This product is backed by an Amazon Basics limited 1-year warranty.
For detailed warranty information or technical support, please refer to the official documentation or contact Amazon Basics customer service.
- Instrukcja obsługi (PDF): Pobierz instrukcję obsługi
- Gwarancja (PDF): Pobierz informacje o gwarancji