
1. Wprowadzenie
This manual provides detailed instructions for the installation, operation, and maintenance of your Anlapus 8CH Full HD 720P HD-TVI Security Camera System. Please read this manual thoroughly before using the product to ensure proper setup and functionality. Keep this manual for future reference.
2. Zawartość opakowania
Sprawdź, czy wszystkie wymienione poniżej elementy znajdują się w Twojej paczce. Jeśli brakuje któregokolwiek z nich lub jest on uszkodzony, skontaktuj się z obsługą klienta.

Image showing the contents included in the Anlapus 8CH Security Camera System package.
- 1 x 8CH DVR (Digital Video Recorder)
- 2 x HD-TVI Bullet Cameras
- Mysz 1 x USB
- 2 x 60ft BNC Cables (for camera connection)
- 1 x 1 to 4 Power Splitter Cable
- 2 x 12V Power Supplies (for DVR and cameras)
- 2 x torebki na śruby montażowe
- 1 x Quick Start Guide (Instruction Manual)
- 2 x naklejek ostrzegawczych
3. Konfiguracja
3.1 Połączenia DVR
Before powering on the DVR, connect all necessary peripherals as described below.

Diagram illustrating the rear panel connections of the Anlapus 8CH DVR, including video input, monitor/TV, audio input, network, USB, and power supply ports.
- Wejście wideo (BNC): Connect the BNC cables from your cameras to these ports. The DVR supports up to 8 cameras.
- Monitor/TV (VGA/HDMI): Connect a monitor or TV using either the VGA or HDMI port for local viewing.
- Wejście/wyjście audio (RCA): Connect external audio devices if required.
- Sieć (RJ45): Connect an Ethernet cable from your router to this port for remote access and network features.
- USB (USB 2.0): Connect the included USB mouse for system navigation. Additional USB ports can be used for USB backup devices.
- Power Supply (DC 12V): Connect the DVR power adapter to this port and then to a power outlet.
3.2 Instalacja kamery
The bullet cameras are designed for both indoor and outdoor use. Choose strategic locations that provide optimal coverage and are within reach of the provided BNC cables.

Image demonstrating various indoor and outdoor installation possibilities for the Anlapus bullet cameras, highlighting their suitability for different environments and conditions.
- Wybierz lokalizację: Identify areas requiring surveillance, considering factors like viewing angle, lighting, and proximity to power outlets.
- Montowanie: Use the provided mounting screws and anchors to securely attach the camera base to a wall or ceiling.
- Dostosuj kąt: Odkręć śruby regulacyjne na uchwycie kamery, aby ustawić kamerę pod żądanym kątem. viewing angle, then tighten to secure.
- Prowadzenie kabli: Route the BNC cable from the camera to the DVR, ensuring cables are protected from damage and weather.
3.3 Okablowanie systemu
Follow these steps to connect your entire security system:
- Connect each camera's BNC connector to a Video Input port on the DVR.
- Connect the camera power cables to the 1-to-4 power splitter, then connect the splitter to one of the 12V power supplies.
- Connect the second 12V power supply to the DVR's DC 12V input.
- Connect your monitor/TV to the DVR via HDMI or VGA.
- Connect the USB mouse to a USB port on the DVR.
- For remote access, connect an Ethernet cable from your router to the DVR's Network port.
- Plug both 12V power supplies into electrical outlets. The system will power on.
4. Obsługa Systemu
4.1 Initial Setup and First-Time Wizard
Upon first power-on, the DVR will guide you through an initial setup wizard. This typically includes setting the language, date/time, creating an administrator password, and configuring network settings. Follow the on-screen prompts using the USB mouse.
4.2 Dostęp zdalny (aplikacja mobilna)
Access your security system remotely using the 365SECU mobile application.
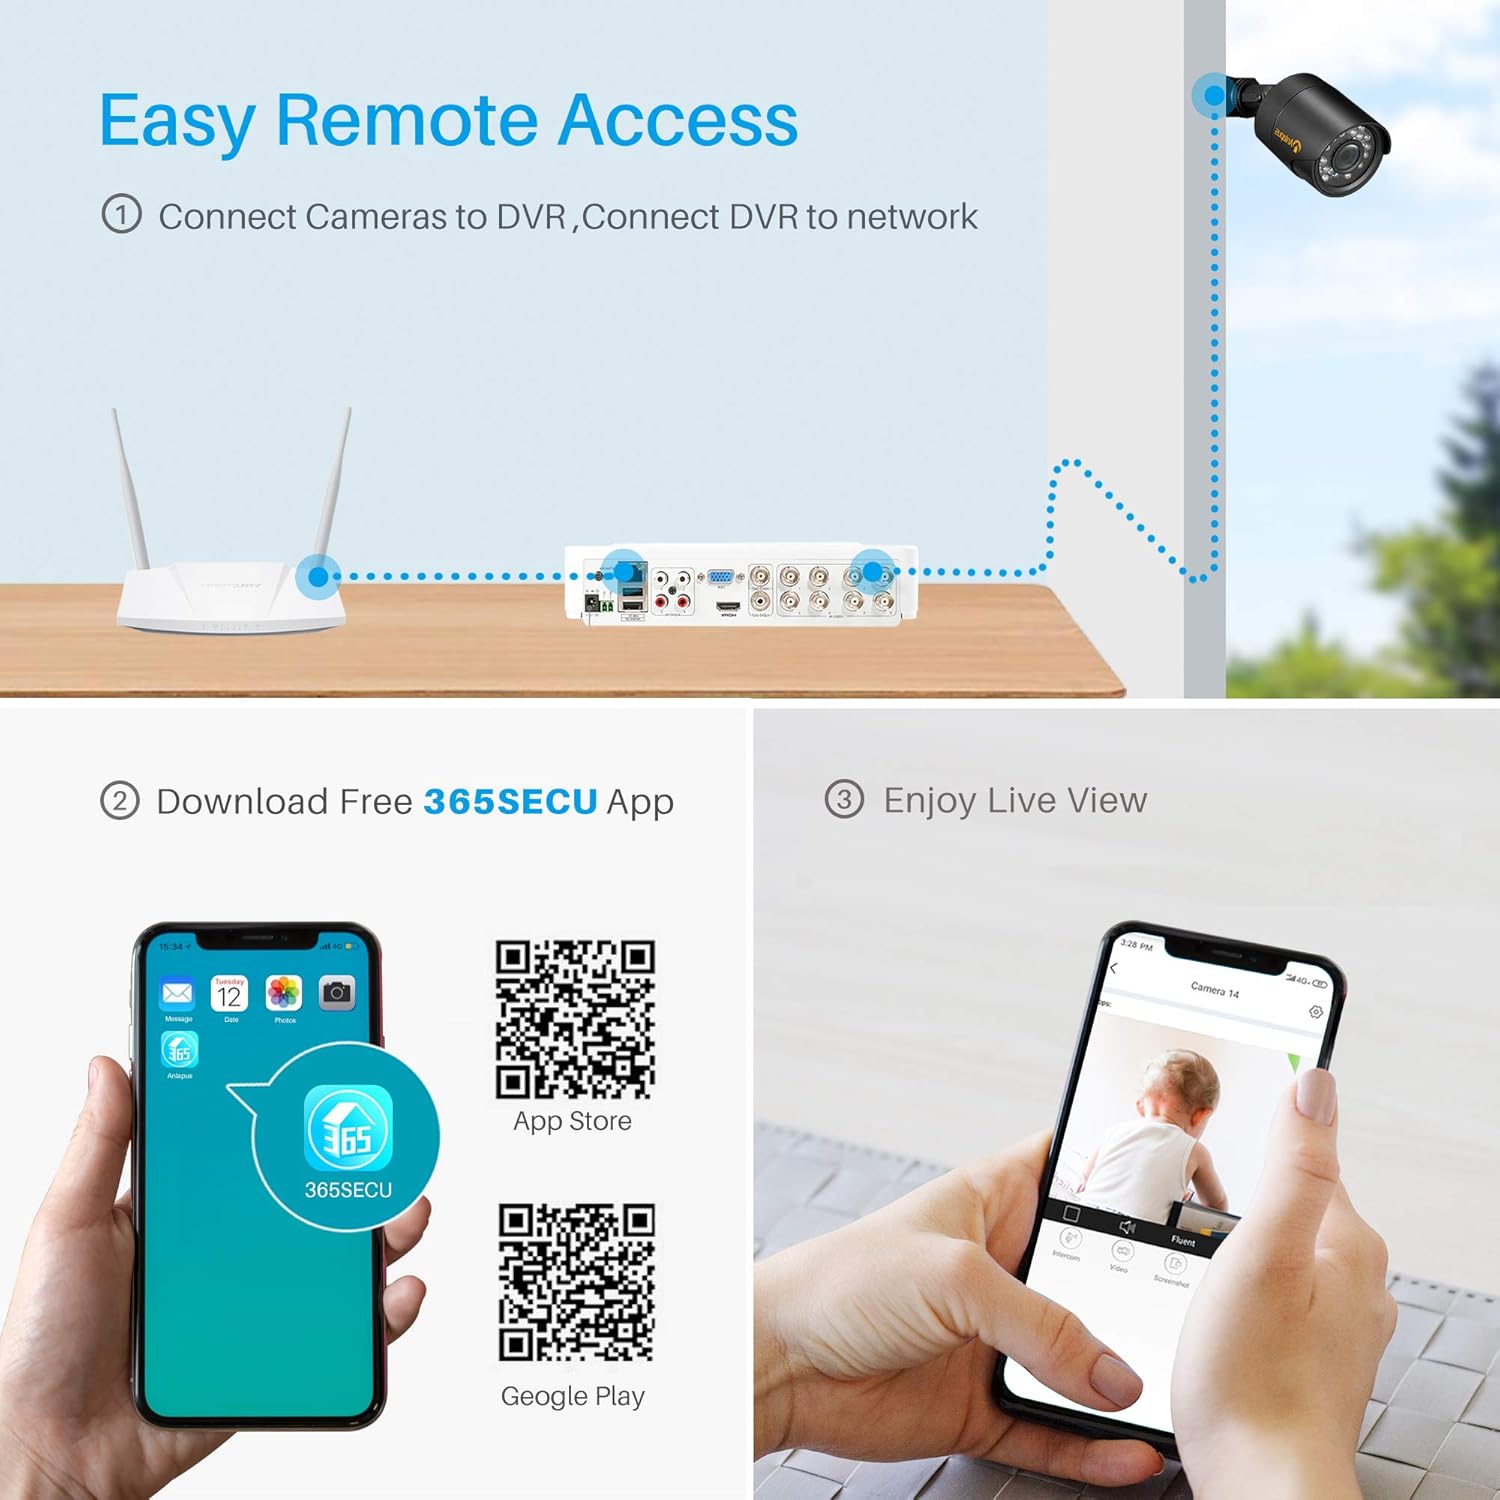
Diagram showing the process for remote access, including connecting cameras to DVR, DVR to network, downloading the 365SECU app, and viewna żywotage on a smartphone.
- Pobierz aplikację: Szukaj "365SECU" in your smartphone's app store or scan the QR codes below.

Image displaying QR codes for downloading the 365SECU app from the App Store and Google Play, along with a smartphone screen showing the app interface.
- Dla Androida: Sklep Google Play
- Dla systemu iOS: Sklep z aplikacjami Apple
- Zarejestruj się/Zaloguj: Create an account or log in to the 365SECU app.
- Dodaj urządzenie: Follow the in-app instructions to add your DVR. This usually involves scanning a QR code displayed on the DVR's monitor or manually entering the device ID.
- Na żywo View: Po dodaniu możesz view transmisje na żywo z kamer, dostęp do nagranych zdjęćtage, and configure settings directly from your smartphone.
4.3 Motion Detection & Email Alert
Configure your system to detect motion and send alerts.

Image illustrating the motion detection and email alert feature, showing a camera detecting an intruder and the alert being displayed on a smartphone.
- Ustawienia dostępu: Navigate to the DVR's main menu, then to 'Alarm' or 'Motion Detection' settings.
- Włącz wykrywanie ruchu: Activate motion detection for desired cameras.
- Define Area: Customize the detection area to reduce false triggers.
- Configure Email Alert: Enter your email server details and recipient email addresses to receive instant alerts when motion is detected.
4.4 Smart Playback Function
Review nagrano footage efficiently with the smart playback feature.

Image demonstrating the smart playback function, showing a monitor displaying recorded video timeline and individual snapshots for quick review.
- Dostęp do odtwarzania: From the DVR's main menu, select 'Playback'.
- Wybierz datę/godzinę: Wybierz zakres dat i godzin dla footage you wish to review.
- Szukaj: The system will display a timeline with recorded events. You can quickly navigate through the timeline or use event markers to find specific moments.
4.5 Widzenie nocne
Kamery wyposażone są w diody LED na podczerwień (IR), które zapewniają wyraźną widoczność w nocy i automatycznie aktywują się w warunkach słabego oświetlenia.

Comparison image showing the same outdoor scene during daytime (color) and nighttime (black and white with night vision active), illustrating the camera's night vision capability.
- Aktywacja automatyczna: The cameras automatically switch to black and white night vision mode when ambient light levels are insufficient.
- Zasięg IR: Ensure no obstructions block the IR LEDs for optimal night vision performance.
4.6 3D Digital Noise Reduction (3D DNR)
The cameras feature 3D Digital Noise Reduction technology to enhance image clarity in challenging lighting conditions.

Comparison image showing video quality without and with 3D Digital Noise Reduction, highlighting the reduction of noise interference in weak signal images.
- Poprawiona jakość obrazu: 3D DNR reduces visual noise, especially in low-light environments, resulting in a cleaner and more detailed image.
- Efektywne przechowywanie: By reducing noise, the system can compress video more efficiently, saving storage space.
5. Konserwacja
- Obiektywy do aparatów: Regularly clean camera lenses with a soft, dry cloth to remove dust and smudges. Avoid abrasive cleaners.
- Połączenia kablowe: Periodically check all BNC and power connections for tightness and signs of wear or corrosion.
- Wentylacja DVR: Ensure the DVR is placed in a well-ventilated area to prevent overheating. Keep vents clear of dust.
- Aktualizacje oprogramowania układowego: Sprawdź producenta webodwiedź naszą witrynę, aby uzyskać dostęp do aktualizacji oprogramowania sprzętowego Twojego rejestratora DVR, dzięki czemu zapewnisz sobie optymalną wydajność i bezpieczeństwo.
- Stan dysku twardego: If a hard drive is installed, monitor its health through the DVR's system settings to prevent data loss.
6. Rozwiązywanie Problemów
| Problem | Możliwa przyczyna | Rozwiązanie |
|---|---|---|
| Brak obrazu na monitorze | Loose video cable; Incorrect input selected on monitor; DVR not powered on. | Check HDMI/VGA cable connections; Select correct input source on monitor; Ensure DVR power adapter is connected and power light is on. |
| Brak obrazu z kamery | Loose BNC cable; Camera not powered; Damaged cable/camera. | Check BNC cable connection at both camera and DVR; Verify camera power supply connection; Test with a known working cable/camera if possible. |
| Zdalny dostęp nie działa | No network connection; Incorrect network settings; App not configured correctly. | Ensure Ethernet cable is connected to DVR and router; Check DVR network settings (DHCP enabled or static IP configured); Verify app device ID and network permissions. |
| Wykrywanie ruchu nie jest wyzwalane | Motion detection disabled; Sensitivity too low; Detection area not set. | Enable motion detection for the specific camera; Increase sensitivity; Define the detection area in DVR settings. |
| Brak nagrywania | No hard drive installed; Hard drive full; Recording schedule not set. | Install a compatible hard drive (not included); Format or replace hard drive; Configure recording schedule in DVR settings. |
7. Specyfikacje
| Funkcja | Szczegół |
|---|---|
| Marka | Anlapus |
| Numer modelu | 8KS-124W4-00-US |
| Technologia łączności | Przewodowy |
| Rozdzielczość przechwytywania wideo | 1080p, 720p |
| Cechy specjalne | Motion Sensor, Night Vision, Waterproof |
| Liczba kanałów | 8 |
| Pojemność pamięci masowej | 2 TB (Hard Drive Not Included) |
| Źródło zasilania | Elektryczny przewodowy |
| Operating System (DVR) | Android (for mobile app compatibility) |
| Kompatybilne urządzenia | Cameras, Personal Computers, Smartphones, Tablets |
| Technologia słabego oświetlenia | Night color (refers to general night vision capability) |
| Tryb nagrywania | Motion detection, Continuous, Schedule |
| Waga przedmiotu | 7.19 funta |
| Wymiary opakowania | 11.4 x 11.4 x 8.2 cala |
| UPC | 615068923699 |
8. Gwarancja i wsparcie
Anlapus products typically come with a limited warranty. For specific warranty terms, technical support, or service inquiries, please refer to the warranty card included in your package or visit the official Anlapus webZachowaj paragon jako dowód zakupu na wypadek reklamacji.