
HERTZ ML-Power-5
Hertz Mille Legend Series ML-Power-5 AmpInstrukcja obsługi lifier
Model: ML-Power-5
1. Wprowadzenie
Thank you for choosing the Hertz Mille Legend Series ML-Power-5 D-Class 5-Channel Ampliyfikator. Ta wysoka wydajność amplifier is designed to deliver exceptional sound quality and power for your car audio system. This manual will guide you through the proper installation, setup, and operation to ensure you get the best possible experience from your new amplifier. Please read this manual thoroughly before installation and use, and keep it for future reference.
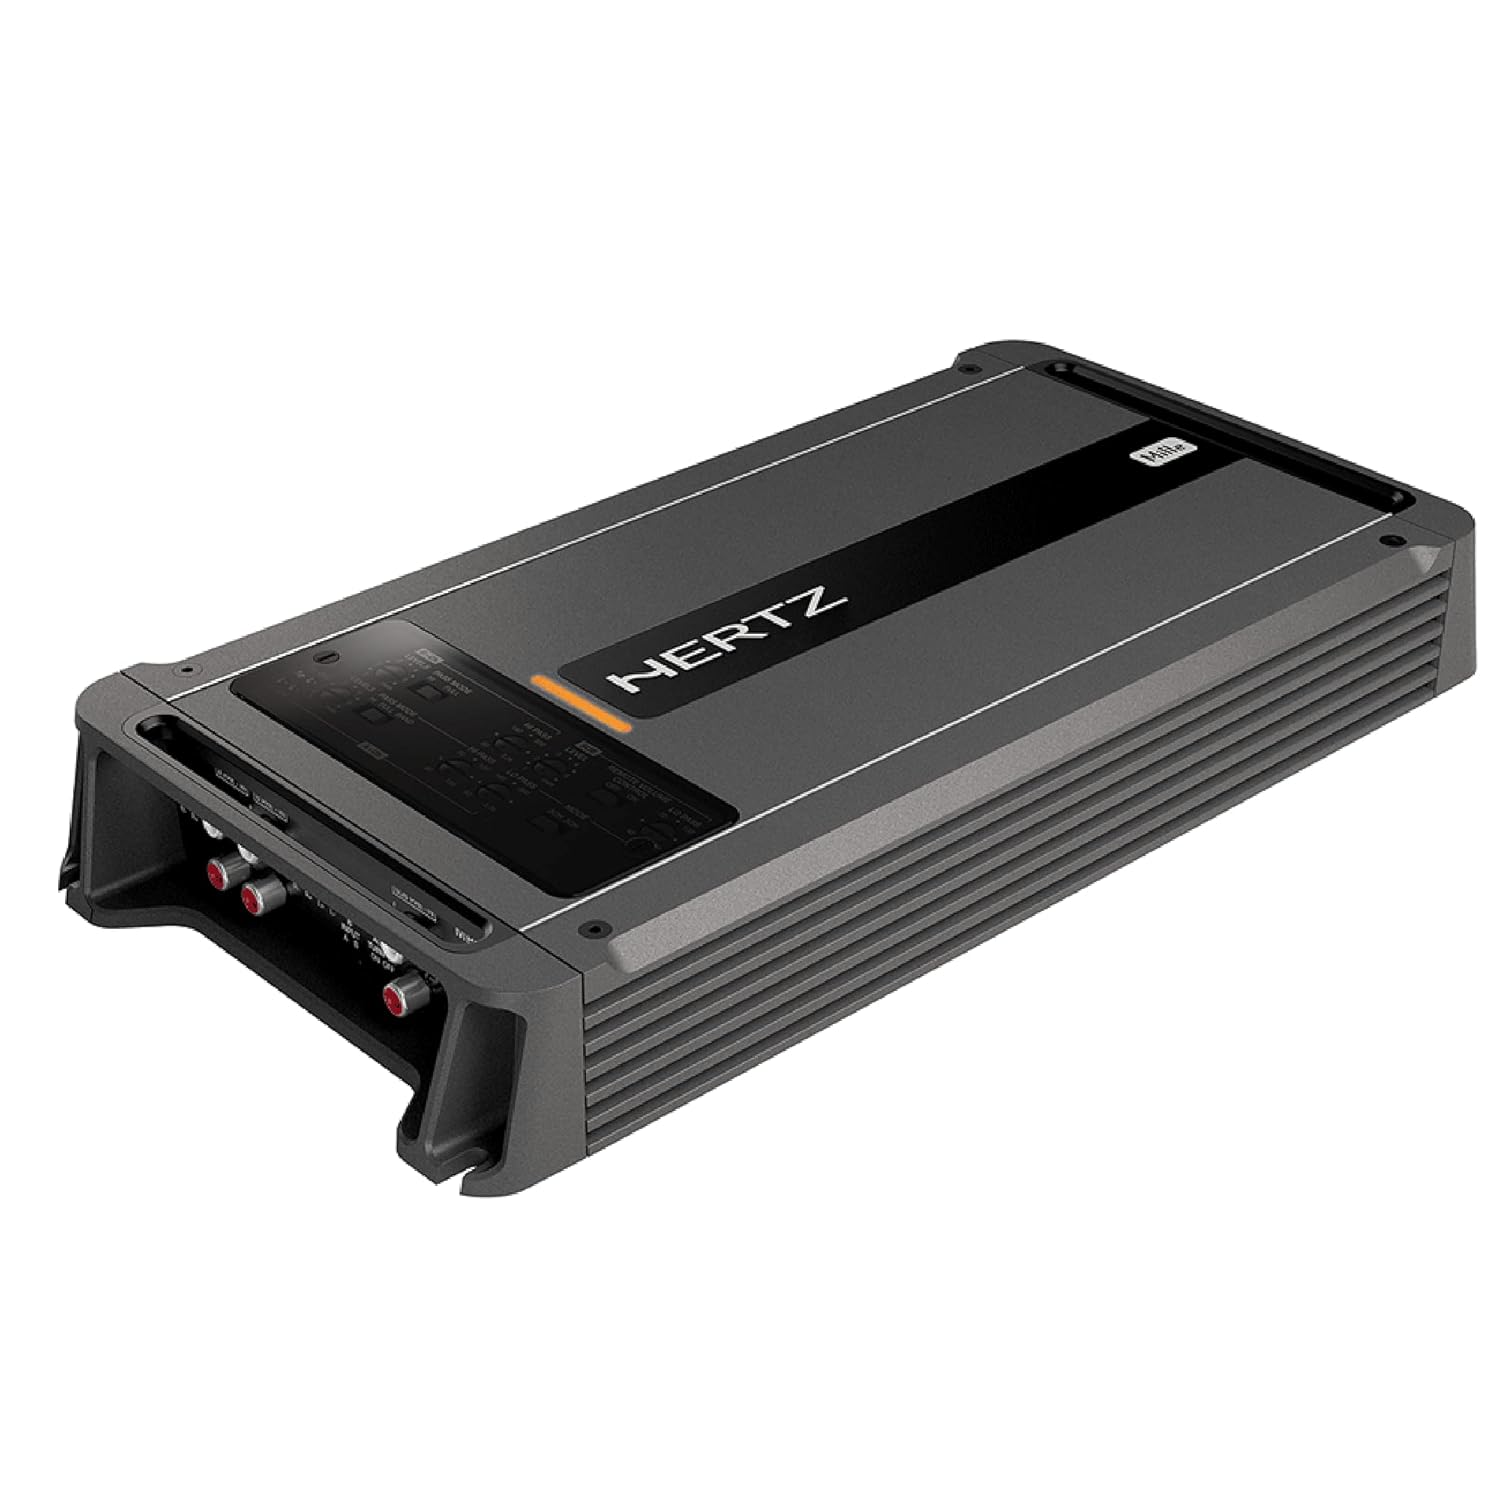
Rycina 1.1: Przód view of the Hertz ML-Power-5 Amplifier, showcasing its sleek design and top panel.
2. Informacje dotyczące bezpieczeństwa
Podczas instalacji i obsługi należy zawsze przestrzegać następujących środków ostrożności:
- Zalecana profesjonalna instalacja: Installation should be performed by a qualified professional to prevent damage to the amplifier lub pojazd.
- Odłącz akumulator: Przed rozpoczęciem jakichkolwiek prac elektrycznych należy zawsze odłączyć ujemny zacisk akumulatora pojazdu.
- Prawidłowe okablowanie: Do podłączenia zasilania, uziemienia i głośników należy używać przewodów o odpowiednim przekroju, zgodnie z niniejszą instrukcją. Nieprawidłowe podłączenie może prowadzić do przegrzania, pożaru lub uszkodzenia podzespołów.
- Wentylacja: Zapewnij amplifier is mounted in a location with adequate ventilation to prevent overheating. Do not cover the ampschłodzić lub zablokować jego żebra chłodzące.
- Unikaj wilgoci: Nie wystawiaj na działanie amprozpuszczać w wilgoci lub wodzie.
- Bezpieczne mocowanie: Zamontuj ampbezpiecznie zamocować, aby zapobiec jego przekształceniu się w pocisk w przypadku nagłego zatrzymania lub zderzenia.
- Zabezpieczenie bezpiecznika: Ten amplifier is equipped with internal fuses. Do not bypass or replace them with fuses of a different rating. The amplifier uses 2 x 40 A fuses.
3. Zawartość opakowania
Sprawdź, czy w opakowaniu znajdują się wszystkie elementy:
- Hertz ML-Power-5 D-Class 5-Channel Ampżywsze
- Instrukcja obsługi (ten dokument)
- Sprzęt montażowy (śruby, podkładki)
- Remote Bass Control (if included with your specific model)
- Connection Terminals/Adapters (if applicable)
4. Instalacja
4.1 Miejsce montażu
Wybierz miejsce montażu, które:
- Provides adequate ventilation for heat dissipation.
- Is protected from moisture and direct sunlight.
- Allows for secure fastening to a solid surface.
- Is easily accessible for wiring and adjustments.
Common mounting locations include under seats, in the trunk, or behind trim panels.
4.2 Połączenia zasilania
Proper power connections are crucial for amplifier performance and safety.
- Battery (BATT+) Connection: Run a power cable directly from the vehicle's positive battery terminal to the amplifier's BATT+ terminal. Install an in-line fuse holder within 18 inches (45 cm) of the battery. The fuse rating should match the amplifier's total fuse rating (80A for ML-Power-5).
- Połączenie uziemienia (GND): Connect a ground cable of the same gauge as the power cable from the ampPodłącz zacisk GND (masy) prostownika do czystej, niemalowanej metalowej powierzchni podwozia pojazdu. Upewnij się, że połączenie elektryczne jest stabilne.
- Zdalne (REM) włączanie połączenia: Podłącz przewód zdalnego włączania do wyjścia zdalnego jednostki głównej ampZacisk REM filtru. Ten przewód sygnalizuje amplifier to turn on when the head unit is active. The ML-Power-5 features Automatic Remote Turn-Off.
4.3 Połączenia wejściowe audio
Podłącz wyjścia RCA jednostki głównej do amplifier's RCA inputs. The ML-Power-5 is a 5-channel amplifier, typically requiring front, rear, and subwoofer RCA inputs from your head unit.
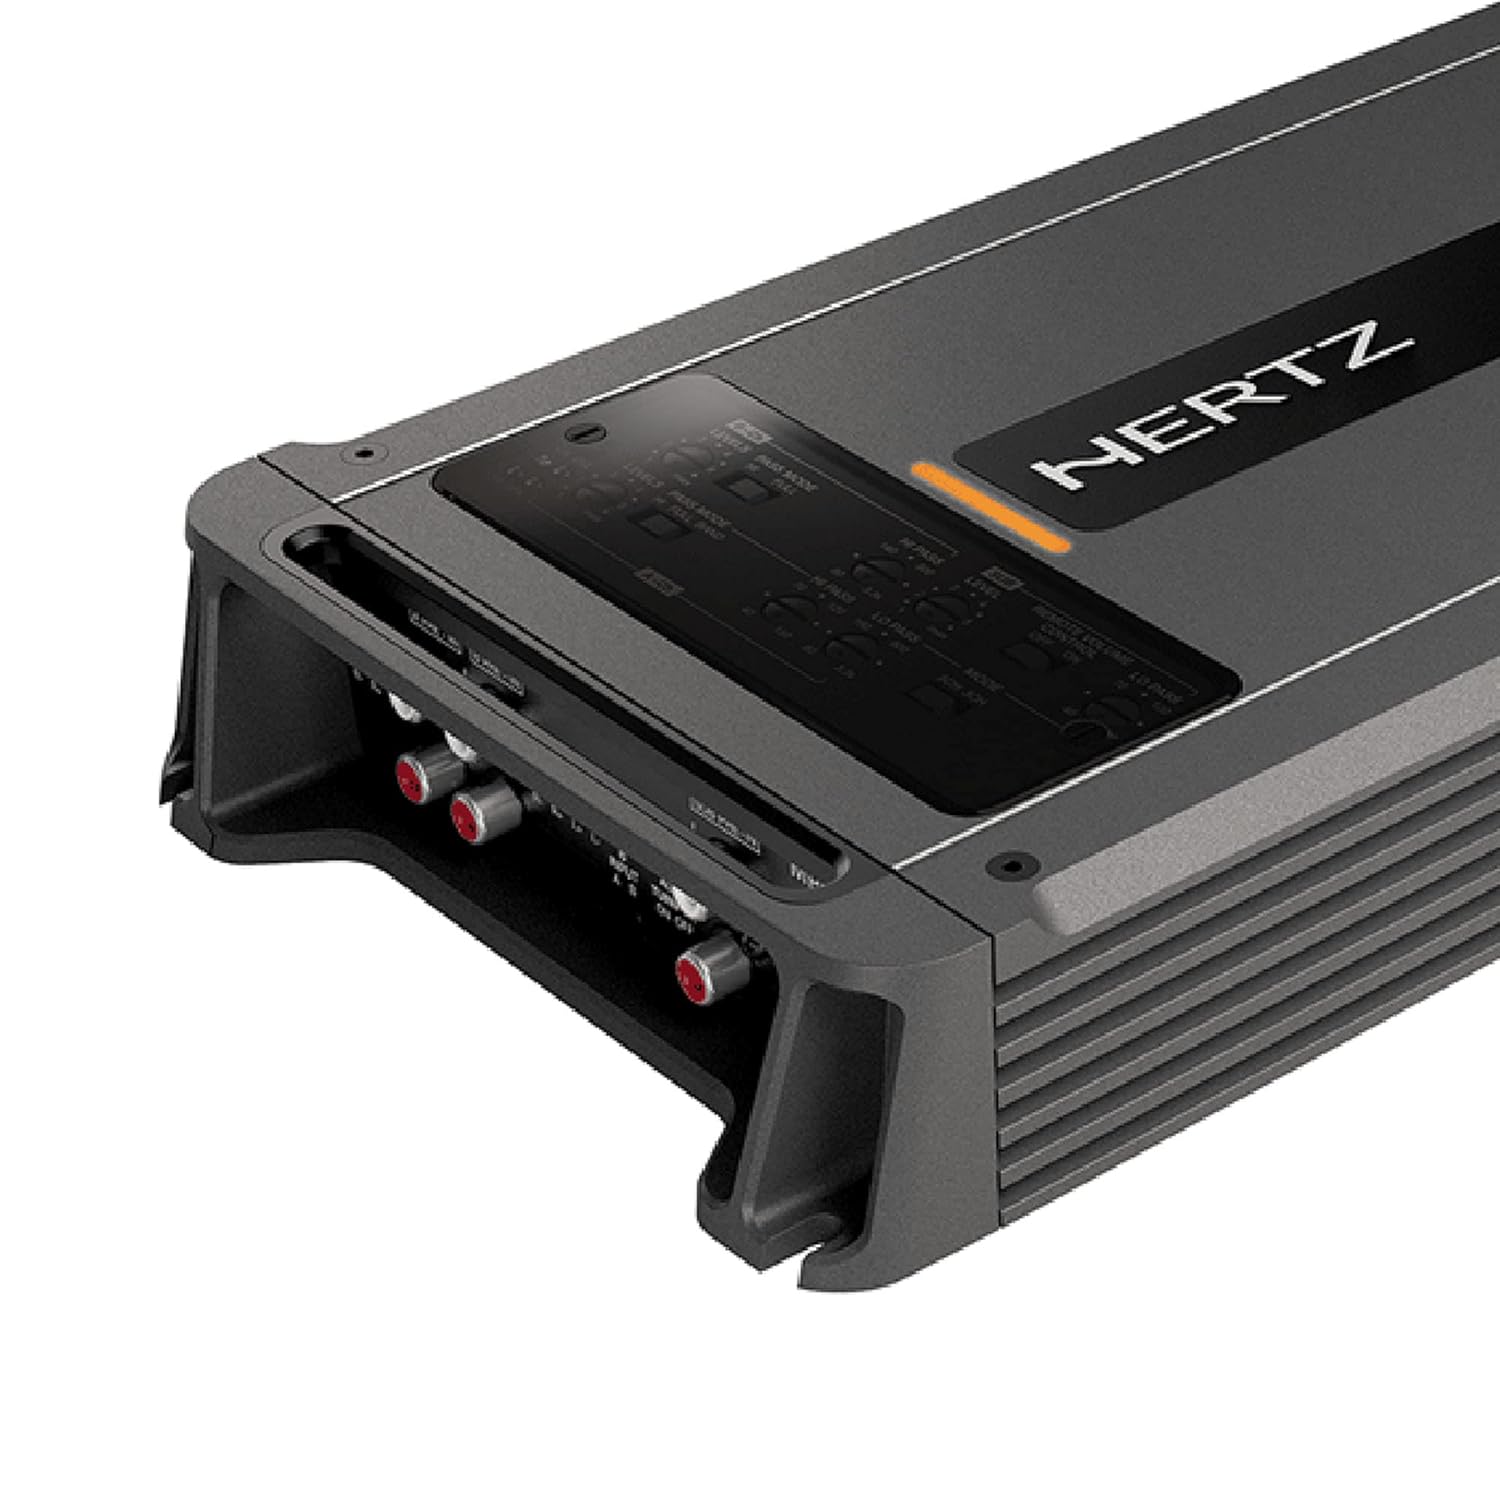
Rysunek 4.1: Szczegółowy view of the input and output connections on the Hertz ML-Power-5 Amplifier, including RCA inputs and power terminals.
4.4 Połączenia głośników
Podłącz głośniki do amplifier's speaker output terminals. Pay close attention to polarity (+ and -) for each speaker. The ML-Power-5 supports various speaker configurations for its 5 channels (4 full-range channels + 1 subwoofer channel).
5. Obsługa
5.1 Początkowe włączenie zasilania
Po wykonaniu i sprawdzeniu wszystkich połączeń, podłącz ponownie ujemny zacisk akumulatora pojazdu. Włącz radioodtwarzacz. ampUrządzenie powinno się włączyć, o czym poinformuje dioda LED.
5.2 Regulacja wzmocnienia
Regulacja wzmocnienia jest dopasowana do ampczułość wejściowa przetwornika na objętość wyjściowątage jednostki głównej. To nie jest regulator głośności. Aby ustawić wzmocnienie:
- Włącz amplifier's gain controls to their minimum (fully counter-clockwise) setting.
- Play a familiar piece of music with a strong signal.
- Zwiększ głośność jednostki głównej do około 75–80% jej maksymalnej głośności.
- Powoli zwiększaj ampZwiększaj wzmocnienie lifiera, aż usłyszysz lekkie zniekształcenie, a następnie lekko je zmniejsz, aż dźwięk stanie się czysty.
5.3 Ustawienia zwrotnicy
The ML-Power-5 features built-in crossovers (High-Pass Filter - HPF, Low-Pass Filter - LPF) to direct specific frequency ranges to your speakers and subwoofer. Adjust these settings to optimize sound quality and protect your speakers.
- HPF (filtr górnoprzepustowy): Stosowany w głośnikach pełnozakresowych w celu blokowania niskich częstotliwości, których głośniki te nie są w stanie skutecznie odtworzyć.
- LPF (filtr dolnoprzepustowy): Used for subwoofers to block high frequencies, allowing only bass to pass through.
5.4 Zdalna kontrola basu
Jeśli twój amplifier came with a remote bass control, connect it to the designated port on the amplifier. Pozwala to na wygodną regulację poziomu subwoofera z fotela kierowcy.

Figure 5.1: The optional remote bass control knob, providing convenient subwoofer level adjustment.
6. Konserwacja
Aby zapewnić długowieczność i optymalną wydajność Twojego ampLiyfikator:
- Czyszczenie: Okresowo czyść ampZewnętrzną powierzchnię filtra czyścić miękką, suchą ściereczką. Nie używać silnych środków chemicznych ani ściernych środków czyszczących.
- Wentylacja: Ensure that the cooling fins remain free of dust and debris. Use compressed air to clear any blockages if necessary.
- Kontrola kabla: Regularly inspect all power, ground, and speaker cables for any signs of wear, fraying, or loose connections. Tighten any loose terminals.
- Ochrona środowiska: Unikaj narażania amplifier to extreme temperatures, humidity, or direct sunlight for extended periods.
7. Rozwiązywanie Problemów
Jeśli napotkasz problemy z urządzeniem amplifier, zapoznaj się z poniższymi typowymi problemami i rozwiązaniami:
| Problem | Możliwa przyczyna | Rozwiązanie |
|---|---|---|
| Brak zasilania / Amplifier nie włącza się | Przepalony bezpiecznik, luźny przewód zasilania/uziemienia/zdalnego, uszkodzone zdalne wyjście jednostki głównej. | Sprawdzać amplifier fuses (2 x 40 A). Verify all power, ground, and remote connections are secure. Test remote wire for 12V when head unit is on. |
| Brak wyjścia dźwięku | Luźne kable RCA, nieprawidłowe ustawienie wzmocnienia, odłączone przewody głośnikowe, amplifier w trybie ochrony. | Ensure RCA cables are securely connected. Re-adjust gain. Check speaker wire connections and polarity. If protection light is on, check for short circuits or overheating. |
| Zniekształcony dźwięk | Gain set too high, incorrect crossover settings, poor ground connection, speaker impedance mismatch. | Reduce gain setting. Adjust crossover frequencies. Verify ground connection is solid. Ensure speaker impedance matches ampmożliwości lifiera. |
| Amplifier przegrzewa się | Niewystarczająca wentylacja, niskie obciążenie impedancyjne, długotrwałe użytkowanie przy dużej głośności. | Zapewnij odpowiedni przepływ powietrza wokół amplifier. Sprawdź impedancję głośnika. Zmniejsz głośność lub pozwól amplifier to cool down. The amplifier has Thermal Protection. |
8. Specyfikacje
Key technical specifications for the Hertz ML-Power-5 AmpLiyfikator:
| Funkcja | Szczegół |
|---|---|
| Numer modelu | ML-Power-5 |
| RMS Power Output (Channels 1-4) | 100 WRMS x 4 at 2-Ohm |
| RMS Power Output (Channel 5) | 550 WRMS x 1 at 2-Ohm |
| AmpKlasa lifier | Klasa D |
| Ocena bezpiecznika | 2 x 40 A |
| Waga | 6.8 funtów |
| Wymiary produktu (dł. x szer. x wys.) | 5.91 x 3.94 x 3.94 cala |
| Tomtage | 14.4 woltów (nominalne) |
| Maksymalna objętość dostawtage | 14.4 V (prąd stały) |
| Minimalna podaż objtage | 11 V (prąd stały) |
| Ochrona termiczna | Tak |
| Automatic Remote Turn-Off | Tak |
| CEA Compliant | Tak |

Figure 8.1: Technical drawing illustrating the top-down dimensions of the ML-Power-5 Ampliyfikator.

Figure 8.2: Technical drawing illustrating the side dimensions of the ML-Power-5 Ampliyfikator.
9. Gwarancja i wsparcie
Produkty Hertz są projektowane i produkowane zgodnie z najwyższymi standardami jakości. Informacje dotyczące zakresu gwarancji, jej warunków i postanowień można znaleźć w karcie gwarancyjnej dołączonej do produktu lub na oficjalnej stronie Hertz. website. For technical support, service, or replacement parts, please contact your authorized Hertz dealer or the customer support department listed on the official webstrona.
Proszę zachować dowód zakupu na potrzeby roszczeń gwarancyjnych.
Ask a question about this manual
Ask about setup, troubleshooting, compatibility, parts, safety, or missing instructions. Manuals+ will review the question and use this page’s manual context to help answer it.