
1. Wprowadzenie
Thank you for choosing the Pureline Pure Pro XL PL1502 Above Ground Pool Pump. This manual provides essential information for the safe installation, operation, and maintenance of your new pool pump. Please read all instructions carefully before installation and use to ensure proper function and longevity of the product.

Image: The Pureline Pure Pro XL PL1502 pump, showing its compact design and key components.
2. Informacje dotyczące bezpieczeństwa
OSTRZEŻENIE: Nieprzestrzeganie tych instrukcji może spowodować poważne obrażenia lub śmierć.
- Bezpieczeństwo elektryczne: All electrical work must be performed by a qualified electrician and comply with local and national electrical codes.
- Ryzyko porażenia prądem: Do not run the pump dry. Do not use an extension cord.
- Umieszczenie: Install the pump at least 10 feet from the inside walls of a pool.
- Typ basenu: This pump is designed for use with permanently-installed pools only. Do not use with storable pools.
- Typ obudowy: Enclosure Type 3.
- Przed przystąpieniem do serwisowania pompy należy zawsze odłączyć zasilanie.
- Trzymaj dzieci z dala od pompy i przyłączy elektrycznych.
- Zapewnij właściwe uziemienie, aby zapobiec zagrożeniom elektrycznym.
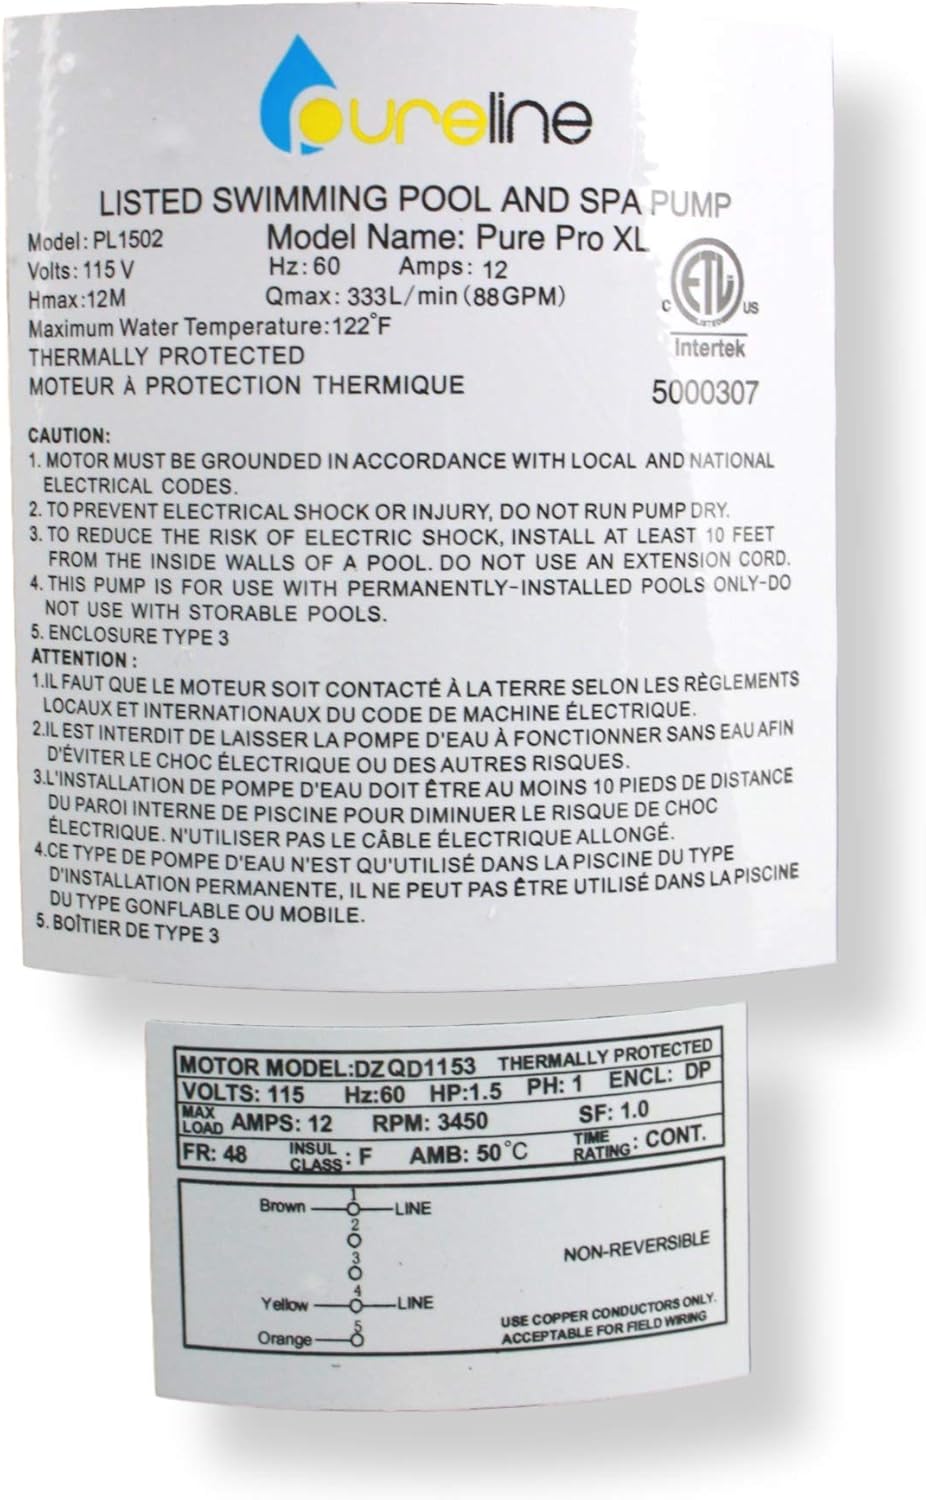
Image: Product label displaying electrical specifications and critical safety warnings in English and French.
3. Funkcje produktu
- Corrosion-Proof Construction: All components are molded from reinforced thermoplastic for durability and long life.
- Łatwa konserwacja: Features a transparent strainer basket cover for easy monitoring and a drain plug for simple winterization.
- Integrated Cord: Includes a 115V, 6-foot cord with a 3-prong plug.
- Cicha praca: Zaprojektowane dla cichej i wydajnej pracy.
- Wszechstronne zastosowanie: Suitable for above-ground pools of all types, including those with in-floor cleaning systems, solar heating systems, and water features.

Obraz: Szczegółowy view of the pump highlighting the extra-large clear lid, 1.5" ports, and 6' cord.
4. Specyfikacje
| Funkcja | Specyfikacja |
|---|---|
| Numer modelu | PL1502 |
| Moc (KM) | 1.5 KM |
| Prędkość | Pojedyncza prędkość |
| Tomtage | 115 wolty |
| Ampwymazać | 12 Amps |
| Rozmiar portu | 1-1/2 cala |
| Rodzaj przewodu | Wtyczka 3-bolcowa |
| Długość przewodu | 6 stóp |
| Maksymalna szybkość przepływu | 65 galona na minutę (GPM) |
| Maksymalna wysokość podnoszenia | 6 stóp |
| Wymiary produktu (dł. x szer. x wys.) | 9.5" x 6.5" x 6.7" |
| Waga przedmiotu | 26 funtów |
| Tworzywo | Wzmocniony termoplast |

Image: Diagram showing the dimensions of the Pureline Pure Pro XL PL1502 pump.
5. Konfiguracja i instalacja
Proper installation is crucial for the pump's performance and safety. Refer to local and national electrical and plumbing codes.
- Lokalizacja: Place the pump on a firm, level surface, at least 10 feet from the pool's edge. Ensure adequate ventilation and protection from direct sunlight and harsh weather.
- Montowanie: Secure the pump to the mounting surface to prevent movement and vibration.
- Połączenia hydrauliczne: Connect the pump to your pool's filtration system using 1-1/2 inch plumbing. Ensure all connections are tight to prevent leaks. The top discharge design is compatible with most filters.
- Podłączenie elektryczne: Connect the 3-prong plug to a properly grounded 115V electrical outlet. Nie używaj przedłużaczy. Ensure the circuit is protected by a Ground Fault Circuit Interrupter (GFCI).
- Zalewanie pompy: Before starting, ensure the pump is filled with water. Remove the transparent strainer basket cover, fill the basket with water, and replace the cover securely.
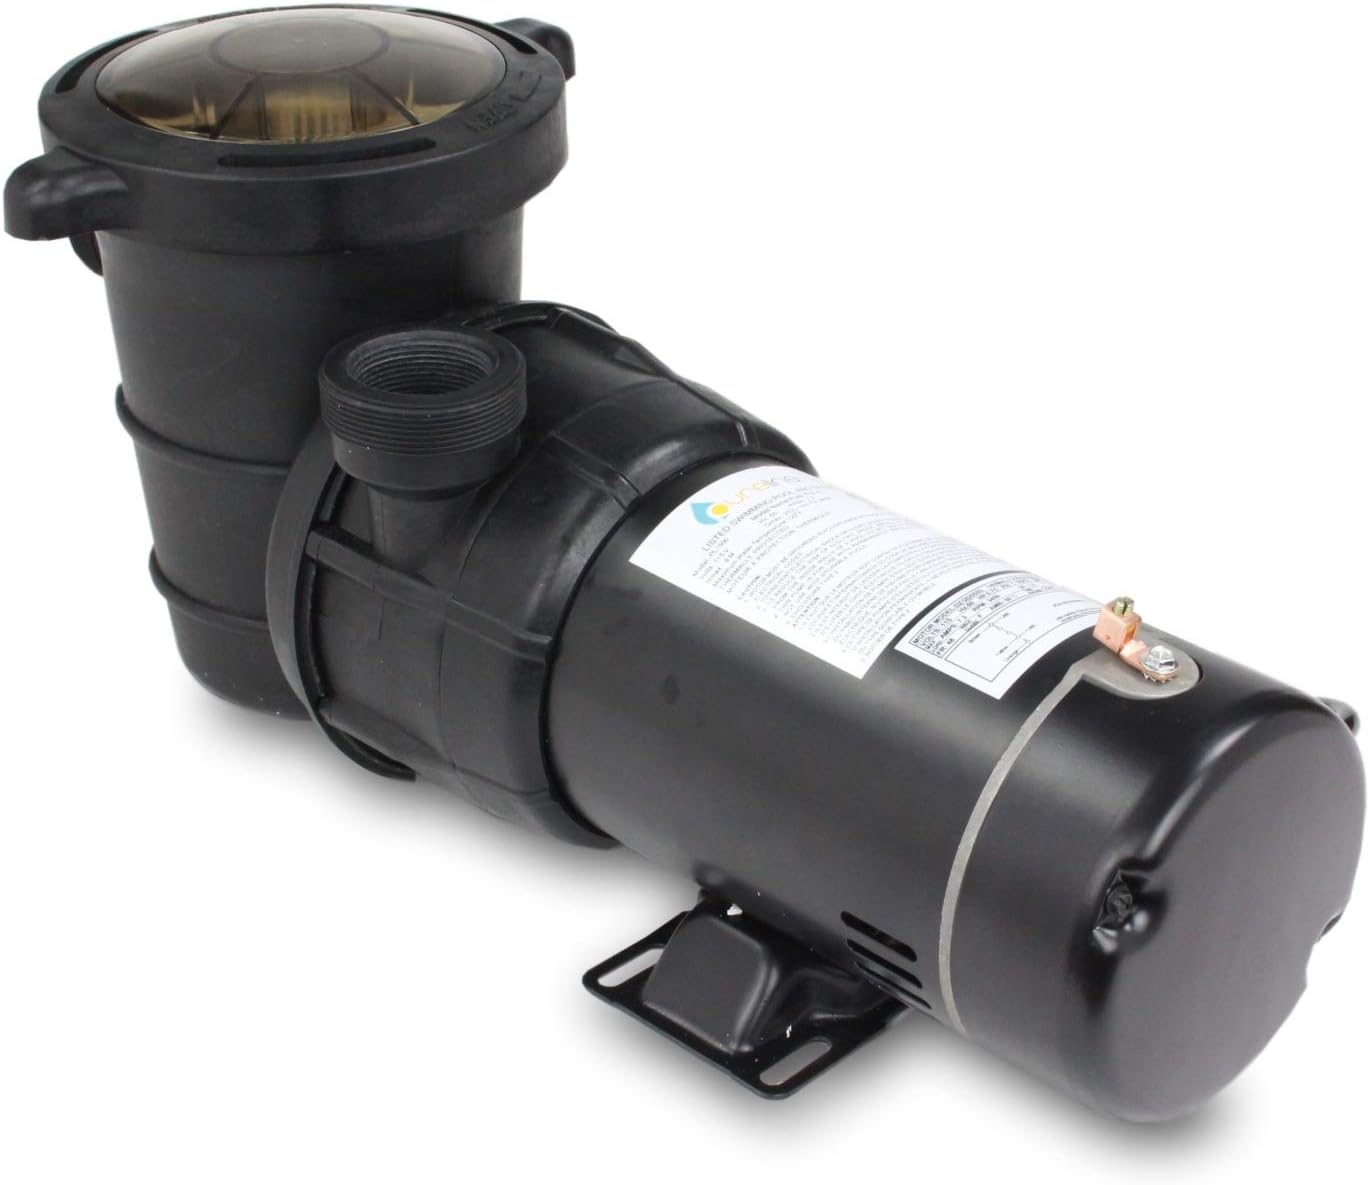
Obraz: Bok view of the Pureline Pure Pro XL PL1502 pump, showing the motor and wet end assembly.
6. Instrukcja obsługi
Po zainstalowaniu i zalaniu wodą, obsługa pompy jest prosta.
- Pierwsze uruchomienie: After priming, turn on the power to the pump. The pump should start drawing water and circulating it through the filter system.
- Monitorowanie: Observe the transparent strainer basket cover to ensure water flow and check for air bubbles, which may indicate a leak in the suction line.
- Czas trwania: The optimal run time for your pool pump depends on pool size, usage, and environmental factors. Consult your pool professional or local guidelines for recommended daily run times to ensure proper filtration.
- Wyłączanie: To turn off the pump, simply disconnect power at the switch or circuit breaker.
7. Konserwacja
Regular maintenance ensures efficient operation and extends the life of your pump.
- Czyszczenie kosza sitowego: The transparent strainer basket cover allows you to see when the basket needs cleaning. Turn off the pump, remove the cover, empty debris from the basket, and rinse it. Replace the basket and cover securely, ensuring the O-ring is properly seated.
- Zimowanie: Before freezing temperatures arrive, drain the pump completely. Use the drain plug for easy water removal. Store the pump in a dry, protected area if possible, or ensure it is fully drained and protected from freezing.
- Kontrola pieczęci: Periodically inspect the pump seals for any signs of wear or leaks. Replace worn seals promptly to prevent damage to the motor.
- Ogólne sprzątanie: Keep the exterior of the pump clean and free of debris to ensure proper ventilation.
8. Rozwiązywanie Problemów
Jeśli napotkasz problemy z pompą, zapoznaj się z poniższymi typowymi procedurami rozwiązywania problemów:
| Problem | Możliwa przyczyna | Rozwiązanie |
|---|---|---|
| Pompa nie uruchamia się | No power, tripped breaker/GFCI, motor issue | Check power supply, reset breaker/GFCI. If motor hums but doesn't start, consult a technician. |
| Pompa działa, ale nie ma przepływu wody | Pump not primed, clogged strainer basket, air leak in suction line | Re-prime the pump. Clean strainer basket. Check all suction line connections for leaks. |
| Niski przepływ wody | Clogged basket, dirty filter, partially closed valve | Clean strainer basket. Backwash or clean filter. Ensure all valves are fully open. |
| Pompa jest głośna | Air leak, cavitation, worn bearings | Check for air leaks in suction line. Ensure pump is adequately primed. If noise persists, motor bearings may be worn; consult a professional. |
| Wyciek wody z pompy | Loose connections, worn shaft seal, cracked housing | Tighten plumbing connections. Inspect and replace shaft seal if worn. If housing is cracked, pump replacement may be necessary. |
9. Gwarancja i wsparcie
For warranty information or technical support, please contact Pureline customer service. Keep your purchase receipt and model number (PL1502) handy when contacting support.
Producent: Czysta linia
For further assistance, visit the official Pureline webodwiedź witrynę lub skontaktuj się z ich kanałami obsługi klienta.