1. Wprowadzenie
This user manual provides detailed instructions for the safe and effective operation of your Huepar 2-Line Green Laser Level, Model 9211GA. This precision instrument is designed for various leveling and alignment tasks in construction, renovation, and DIY projects, offering high visibility green laser lines for accurate measurements.
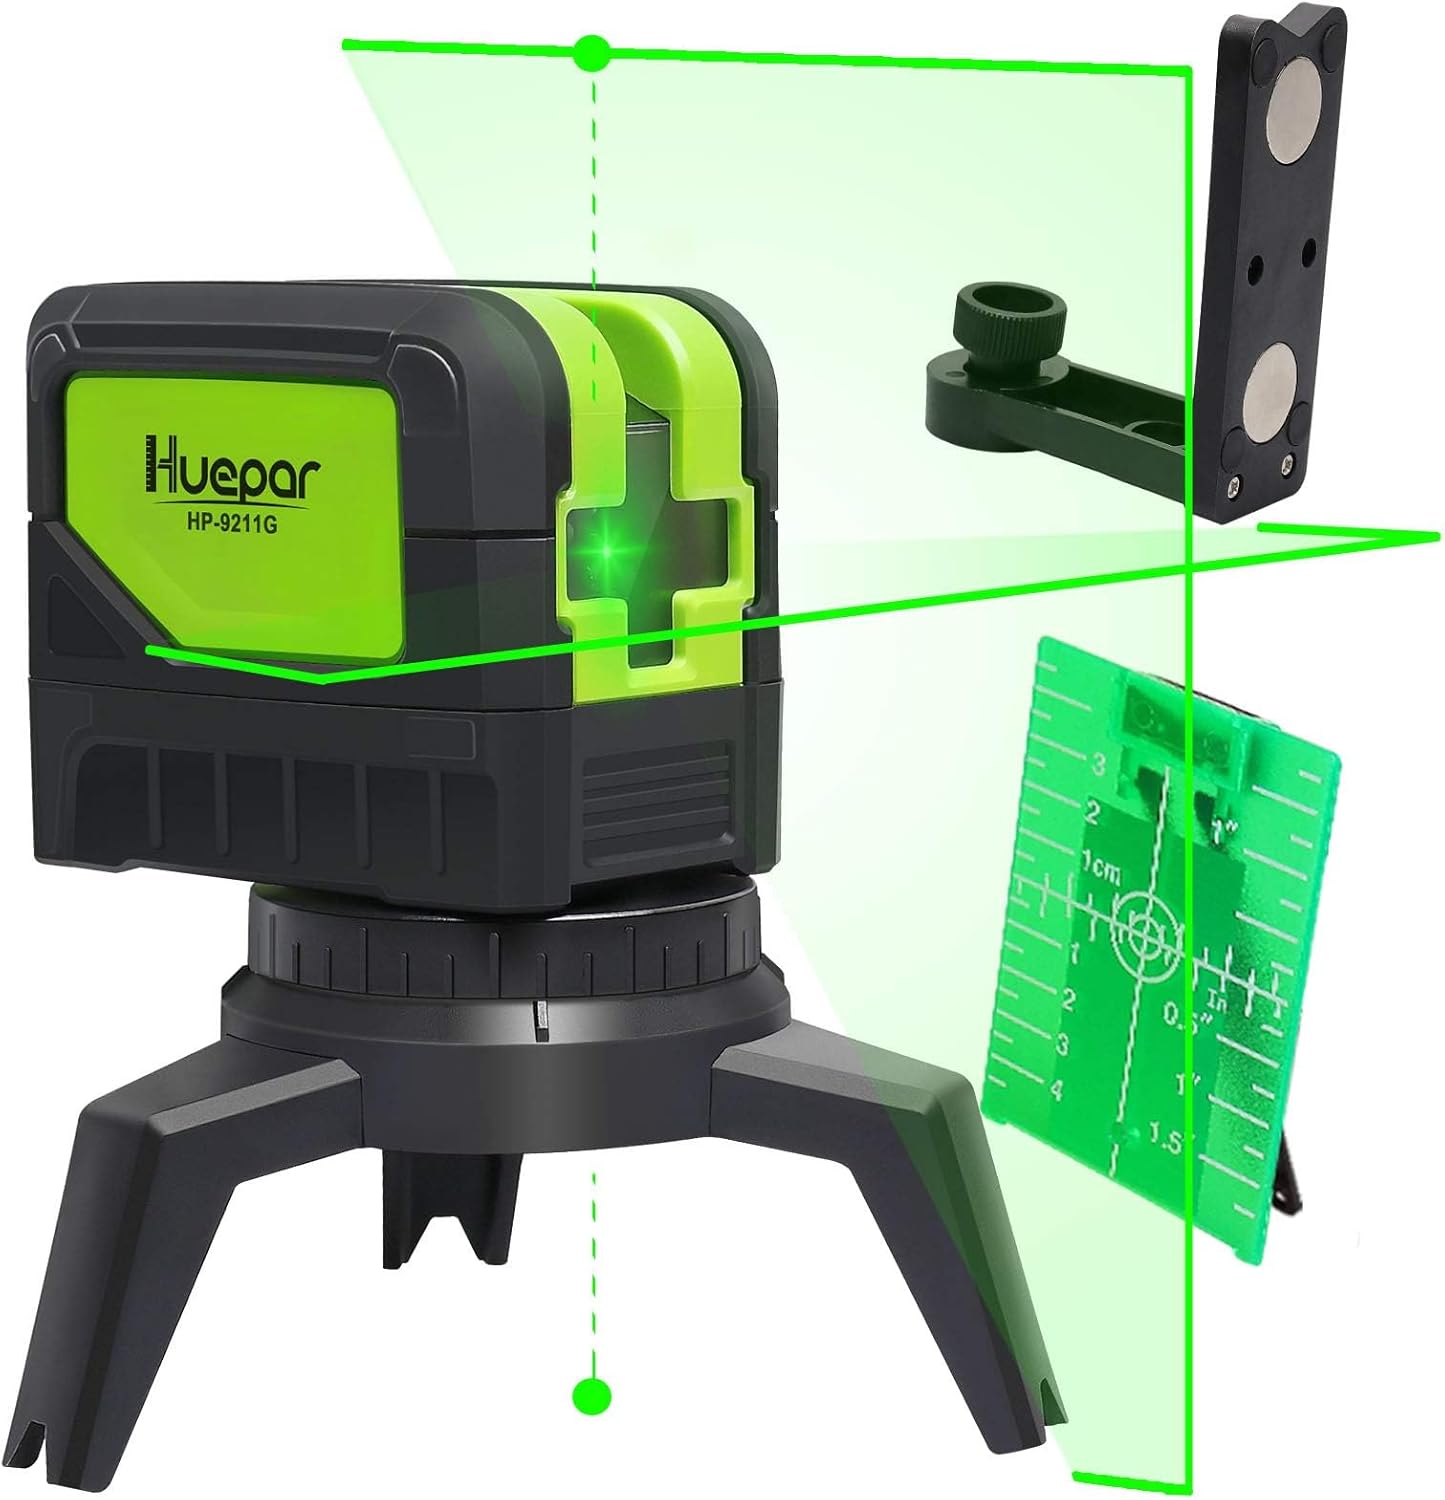
Figure 1: Huepar 2-Line Green Laser Level and included accessories.
2. Informacje dotyczące bezpieczeństwa
2.1 Bezpieczeństwo laserowe
WARNING: This product contains a Class 2 laser. Avoid direct eye exposure to the laser beam. Do not stare into the beam or view bezpośrednio za pomocą przyrządów optycznych.
- Nie należy celowo kierować wiązki laserowej w stronę ludzi lub zwierząt.
- Nie używaj urządzenia w środowiskach zagrożonych wybuchem.
- Przechowywać urządzenie w miejscu niedostępnym dla dzieci.
2.2 Ogólne środki ostrożności
- Always use the device in a stable and secure position.
- Nie należy podejmować prób modyfikacji ani demontażu poziomnicy laserowej.
- Protect the device from extreme temperatures and moisture.
3. Zawartość opakowania
Sprawdź, czy w przesyłce znajdują się wszystkie elementy wymienione poniżej:
- Huepar 2-Line Green Laser Level (Model 9211GA)
- User Manual (Japanese, but English content provided here)
- Pakowanie walizki
- Torba do przechowywania
- Laserowa tarcza celownicza
- AA Alkaline Batteries (x2) - for testing purposes, 1500mAh or higher capacity recommended for regular use.
- Magnetic Pivoting Base / Mount Base
- Connection Adapters (5/8-11 thread, 1/4-20 thread)

Rysunek 2: Wszystkie elementy zawarte w opakowaniu produktu.
4. Koniec produktuview
Familiarize yourself with the components and controls of your laser level:

Rysunek 3: Wymiary produktu i jego główne komponenty.
- Przycisk zasilania: Turns the device on/off and cycles through laser modes.
- Okno laserowe: Emituje zielone promienie laserowe.
- Przycisk blokady/odblokowania: Włącza/wyłącza wahadło w celu samopoziomowania lub przejścia w tryb ręczny.
- Obudowa baterii: Przechowuje baterie AA.
- Thread Mounts (1/4-20 & 5/8-11): For attaching to tripods or other mounting accessories.
4.1 Opcje montażu
The laser level comes with versatile mounting options:
- Integrated Tripod Base: For stable placement on flat surfaces.
- Magnetyczna podstawa obrotowa: Allows attachment to metal surfaces and provides 360° rotation for precise alignment.
- Kompatybilność ze statywem: Equipped with 1/4-20 and 5/8-11 thread mounts for standard tripods.

Figure 4: Various mounting and connection options.
5. Konfiguracja
5.1 Instalacja baterii
- Otwórz pokrywę komory baterii znajdującą się z boku urządzenia.
- Włóż dwie baterie alkaliczne AA, zwracając uwagę na prawidłową biegunowość (+/-).
- Dokładnie zamknij pokrywę komory baterii.
5.2 Początkowe umiejscowienie
Place the laser level on a stable surface or mount it using a tripod or the magnetic bracket. Ensure the surface is as level as possible for optimal performance in self-leveling mode.
6. Instrukcja obsługi
6.1 Włączanie/wyłączanie
- To power on, slide the lock/unlock button to the unlocked position. The laser lines will activate.
- To power off, slide the lock/unlock button to the locked position. This also protects the pendulum during transport.
6.2 tryby pracy
The Huepar 9211GA offers two primary operating modes:
6.2.1 Tryb samopoziomowania
- Slide the lock/unlock button to the unlocked position.
- The pendulum will self-level within a range of ±4°. If the device is outside this range, the laser lines will flash rapidly to indicate an out-of-level condition.
- Press the power button to cycle through laser configurations: horizontal line, vertical line, or both.
6.2.2 Manual/Tilt Mode
- With the device powered off (lock/unlock button in locked position), press and hold the power button for 3 seconds to enter manual mode.
- In this mode, the laser lines can be projected at any angle, and the self-leveling function is disabled. The laser lines will flash slowly to indicate manual mode.
- This mode is useful for tasks like installing handrails on stairs or angled decorations.

Figure 5: Manual Tilt Mode (left) and Automatic Leveling Mode (right).
6.3 Understanding Laser Lines and Plumb Points
The 9211GA projects two lines and two plumb points:
- Linia pozioma: Provides a level reference across a surface.
- Linia pionowa: Provides a plumb reference from floor to ceiling, with an emission angle of up to 180°.
- Up/Down Plumb Points: Projects a point directly above and below the device, useful for transferring points or aligning objects vertically.

Figure 6: Illustration of 2-line, 2-point projection.
6.4 Tryb pulsacyjny (do użytku na zewnątrz)
To extend the working range outdoors or in bright conditions, activate pulse mode. This mode allows the laser level to be used with a Huepar Line Laser Receiver (sold separately). Press and hold the power button briefly to activate pulse mode. The laser lines will appear slightly dimmer but will be detectable by the receiver.
6.5 Zastosowania
The Huepar 9211GA is suitable for a wide range of applications, including:
- Painting and wallpapering
- Tile installation
- Stair layout and installation
- Furniture assembly and installation
- Projekty stolarskie
- Wall decoration and picture hanging

Figure 7: Common applications for the laser level.
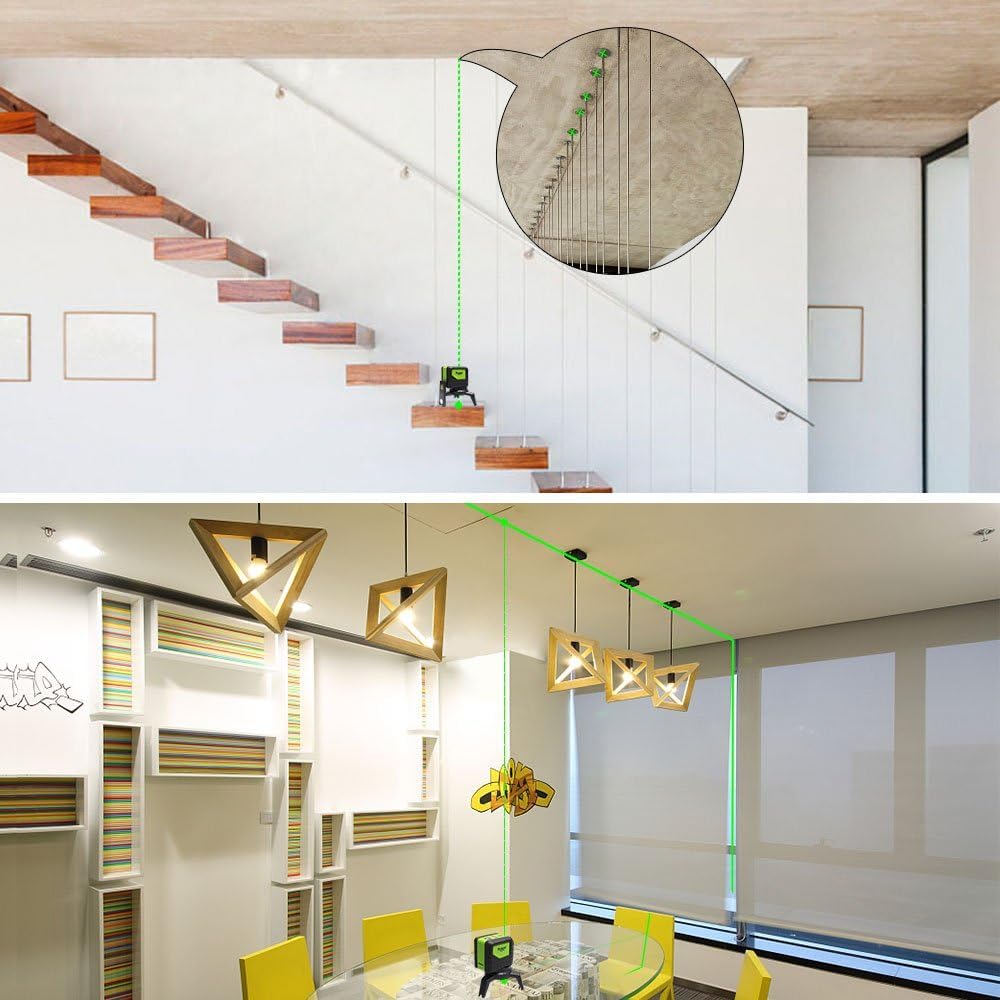
Rysunek 8: Examples of laser level use for stairs and ceiling work.
7. Konserwacja
7.1 Czyszczenie
- Przetrzyj urządzenie miękką, damp ściereczka. Nie należy używać środków czyszczących o właściwościach ściernych ani rozpuszczalników.
- Keep the laser windows clean to ensure clear and accurate laser projection.
7.2 Pielęgnacja baterii
- Aby zapobiec wyciekowi baterii, wyjmij je, jeśli urządzenie nie będzie używane przez dłuższy czas.
- Replace batteries when the laser lines become dim or the device does not power on.
7.3 Przechowywanie
- Store the device in its original packing case or storage bag to protect it from dust and impact.
- Przechowywać w chłodnym, suchym miejscu, z dala od bezpośredniego światła słonecznego i ekstremalnych temperatur.
7.4 Cechy trwałości
The Huepar 9211GA is designed with durability in mind:
- Rubber Overmolding: Provides shock resistance, capable of withstanding drops from 1 meter.
- Stopień ochrony IP54: Offers protection against dust and splashing water, making it suitable for various job site conditions.

Figure 9: Dustproof and Splashproof design.
8. Rozwiązywanie Problemów
| Problem | Możliwa przyczyna | Rozwiązanie |
|---|---|---|
| Linie laserowe migają szybko. | Urządzenie znajduje się poza zakresem samopoziomowania (±4°). | Place the device on a more level surface or adjust its position until the lines stabilize. |
| Linie laserowe migają powoli. | Device is in Manual/Tilt Mode. | If self-leveling is desired, turn off the device and then slide the lock/unlock button to the unlocked position to power on in self-leveling mode. |
| Linie laserowe są słabe lub niewidoczne. | Low battery or bright ambient light. | Replace batteries. For outdoor use or bright conditions, activate Pulse Mode and use a laser receiver. |
| Urządzenie nie włącza się. | Baterie są rozładowane lub nieprawidłowo zainstalowane. | Check battery polarity and replace with fresh batteries. Ensure the lock/unlock button is in the unlocked position. |
9. Specyfikacje
| Funkcja | Specyfikacja |
|---|---|
| Kolor laserowy | Zielony |
| Klasa laserowa | Klasa 2 (IEC/EN60825-1/2014) |
| Długość fali lasera | 505-520nm |
| Dokładność poziomowania | ±3 mm w odległości 10 metrów |
| Zakres samopoziomowania | ±4° |
| Zakres roboczy | Up to 20 meters (65 feet) indoors; Up to 50 meters (165 feet) with Huepar Laser Receiver |
| Vertical Line Emission Angle | 180° |
| Horizontal Line Emission Angle | 110° |
| Stopień ochrony IP | IP54 (pyłoszczelność i odporność na zachlapanie) |
| Źródło zasilania | 2 x baterie alkaliczne AA |
| Temperatura pracy | -10°C do 50°C (14°F do 122°F) |
| Temperatura przechowywania | -20°C do 70°C (-4°F do 158°F) |
| Wymiary produktu | 8cm (L) x 9.3cm (W) x 6.4cm (H) (approx.) |
| Waga produktu | 710 g (w przybliżeniu) |
10. Gwarancja i wsparcie
10.1 Polityka gwarancyjna
Huepar offers the following warranty and support for this product:
- 30-Day Free Exchange or Refund: If the product arrives damaged or faulty within 30 days of purchase, you are eligible for a free exchange or full refund.
- 1-letnia gwarancja: A standard 1-year warranty period is provided from the date of purchase.
- 2-roczna rozszerzona gwarancja: Register your product account to extend the warranty period to 2 years.
- Dożywotnie wsparcie techniczne: Enjoy free technical support for the lifetime of the product.
10.2 Obsługa klienta
Should you encounter any issues with your product, such as damage or malfunction, please contact us directly. Our support team is committed to responding within 24 hours.
To contact support, please click on the 'Contact Seller' option on the product page or through your order history.
Sprzedający: Huepar JP