1. Wprowadzenie
This manual provides detailed instructions for the safe and proper installation, operation, and maintenance of your Sanus Premium Series Tilting TV Wall Mount, model BLT2-B1. This mount is designed to securely hold most 42" to 90" flat-panel televisions, offering a tilting feature for optimal viewing angles. Please read all instructions carefully before beginning installation.
2. Informacje dotyczące bezpieczeństwa
OSTRZEŻENIE: Niezapoznanie się z treścią niniejszej instrukcji i nieprzestrzeganie jej może spowodować poważne obrażenia ciała, uszkodzenie mienia lub unieważnienie gwarancji.
- Upewnij się, że powierzchnia montażowa może bezpiecznie utrzymać łączny ciężar uchwytu i telewizora.
- Always use a stud finder to locate the center of wall studs for secure mounting.
- Do not exceed the maximum weight capacity of the mount. Refer to the Specifications section for details.
- Professional installation is recommended for complex installations or if you are unsure about your wall structure.
- Trzymaj wszystkie małe części i materiały opakowaniowe poza zasięgiem dzieci.
3. Zawartość opakowania
Verify that all components are present and undamaged before installation. The package typically includes:
- Wall plate assembly
- TV brackets (left and right)
- Mounting hardware kit (various screws, washers, spacers for TV and wall attachment)
- Installation template (may be included)

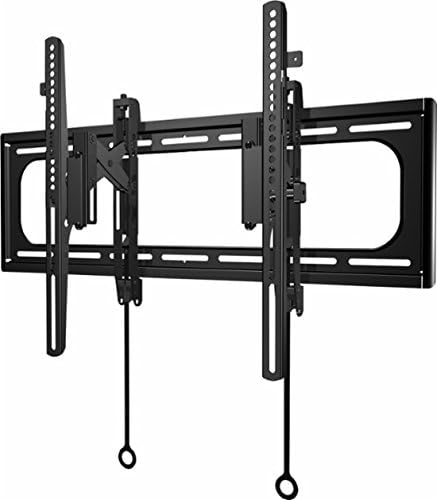
Image: The Sanus BLT2-B1 Tilting TV Wall Mount showing its main components including the wall plate and TV brackets.
4. Konfiguracja i instalacja
Follow these steps for a secure installation. It is recommended to have a second person assist during the installation process.
- Przygotuj telewizor: Attach the TV brackets to the back of your television using the appropriate screws and spacers from the hardware kit. Ensure the brackets are securely fastened and level.
- Zlokalizuj kołki ścienne: Use a reliable stud finder to locate the center of two adjacent wall studs where you intend to mount the TV. Mark these locations precisely.
- Pozycja płyty ściennej: Hold the wall plate against the wall, aligning its mounting holes with the marked stud centers. Use a level to ensure the wall plate is perfectly horizontal. Mark the drill points.
- Wywierć otwory pilotażowe: Drill pilot holes at the marked locations. The size of the drill bit will depend on the lag bolts provided; refer to the hardware instructions for exact specifications.
- Zamontuj płytę ścienną: Secure the wall plate to the wall using the lag bolts and washers. Tighten them firmly, but do not overtighten.
- Zawieś telewizor: With assistance, carefully lift the television and hook the TV brackets onto the top edge of the installed wall plate. Gently lower the TV until the brackets engage with the wall plate.
- Zabezpiecz telewizor, aby go zamontować: Locate the safety screws or locking mechanisms on the bottom of the TV brackets. Tighten these to secure the TV to the wall plate, preventing accidental dislodgement.
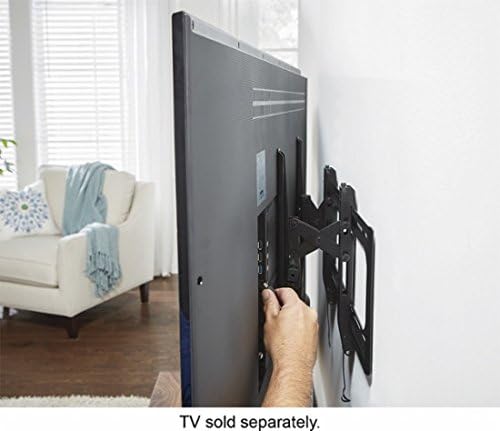
Obraz: strona A view of a television mounted on the wall, illustrating the space created by the mount for easy access to cables and ports.
5. Instrukcja obsługi
The Sanus BLT2-B1 mount allows for easy tilting of your television to achieve the best viewkąt nachylenia i redukcja olśnienia.
- Tilting the TV: Gently grasp the top or bottom edge of your television and push or pull to adjust the tilt angle. The mount is designed for smooth, friction-based tilting.
- Leveling Adjustment: Some models may include a post-installation leveling feature. If your TV appears slightly unlevel after installation, consult the specific instructions provided with your hardware kit for minor rotational adjustments.
- Przesunięcie boczne: Once mounted, the TV can often be shifted horizontally along the wall plate to center it precisely. Gently slide the TV left or right as needed.
Obraz: strona A view of a television mounted on the wall, demonstrating the downward tilt capability of the mount.
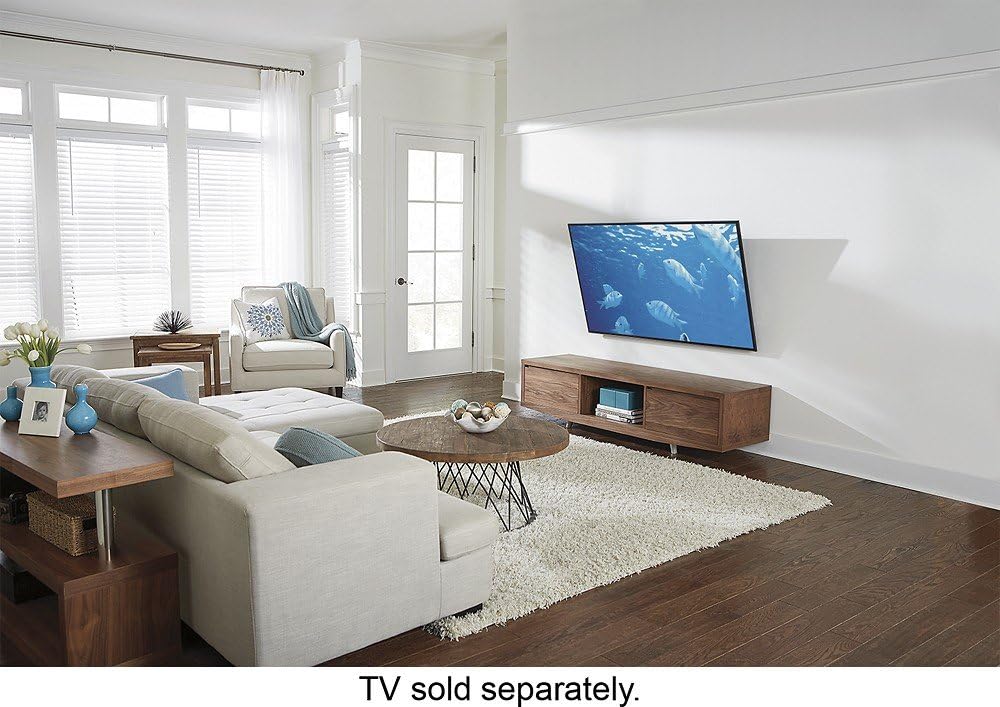
Image: A diagram showing the range of motion for the TV mount, including vertical tilt and horizontal lateral shift capabilities.
6. Konserwacja
Regularna konserwacja zapewnia długowieczność i bezpieczne działanie uchwytu ściennego do telewizora.
- Przeglądy okresowe: Annually, inspect all mounting hardware and connections to ensure they remain tight and secure.
- Czyszczenie: Czyść uchwyt miękką, suchą ściereczką. Unikaj środków czyszczących o działaniu ściernym i rozpuszczalników, które mogłyby uszkodzić wykończenie.
- Smarowanie: The tilting mechanism is generally maintenance-free. Do not apply lubricants unless specifically instructed by Sanus support.
7. Rozwiązywanie Problemów
If you encounter issues with your Sanus TV wall mount, consider the following:
- Telewizor nie jest wypoziomowany: Check the wall plate installation for levelness. If your mount has a post-installation leveling feature, adjust it as per instructions.
- TV feels loose: Ensure all TV bracket screws and wall plate lag bolts are securely tightened. Verify the safety screws/locking mechanisms are engaged.
- Trudności z przechylaniem: Ensure no cables are obstructing the tilting mechanism. If the mount is new, the mechanism may require a few adjustments to loosen slightly.
For further assistance, contact Sanus customer support.
8. Specyfikacje
| Marka | Sanus |
| Numer modelu | BLT2-B1 |
| Typ montażu | Montaż ścienny |
| Typ ruchu | Nachylenie |
| Kompatybilne rozmiary telewizorów | Most 42" - 90" Flat-Panel TVs |
| Tworzywo | Akrylonitryl-butadien-styren (ABS) |
| Kolor | Czarny |
| Waga przedmiotu | 5 funta |
| Wymiary produktu | 42 x 11 x 4 cala |
| Maksymalny kąt pochylenia | 1 arc sec (typical range for tilting mounts) |
| UPC | 793795530950 |
9. Gwarancja i wsparcie
Sanus products are designed for durability and reliability. For specific warranty information, please refer to the warranty card included with your product or visit the official Sanus website. For technical support, installation assistance, or to inquire about replacement parts, please contact Sanus customer service through their official channels.