Bendix BPR6005
Bendix Premium Drum and Rotor BPR6005 Front Euro Brake Rotor - Instruction Manual
Model: BPR6005
1. Wprowadzenie
This instruction manual provides essential information for the Bendix Premium Drum and Rotor BPR6005 Front Euro Brake Rotor. These rotors are engineered and manufactured in Europe to meet specific vehicle requirements, utilizing platform-specific casting configurations and advanced machine specifications. Understanding the product's features, proper installation, and maintenance will ensure optimal performance and longevity.
2. Koniec produktuview
The Bendix Premium Euro Brake Rotor is designed for superior braking performance and durability. Key features include:
- Surface-Lok Silver Coating: This protective coating guards against corrosion, maintaining the rotor's appearance, especially through open wheel designs.
- Factory Mill Balancing: Ensures smooth rotor-to-pad contact and quiet operation, contributing to improved pedal response.
- OEM Style Vane Configurations: Engineered to efficiently dissipate heat away from the inner wheel and caliper, accelerating the cooling process for enhanced performance and extended life.

Rysunek 2.1: Kątowy view of the Bendix Premium Euro Brake Rotor, showcasing its silver coating and vane design.
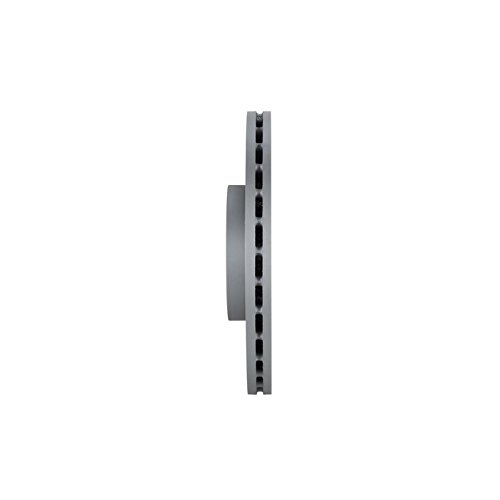
Rysunek 2.2: Profesjonalizm bocznyfile view of the brake rotor, highlighting its thickness and ventilation channels.
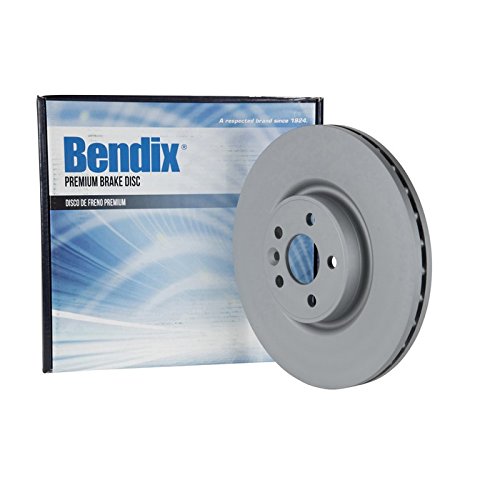
Figure 2.3: The Bendix Premium Euro Brake Rotor displayed alongside its official product packaging.
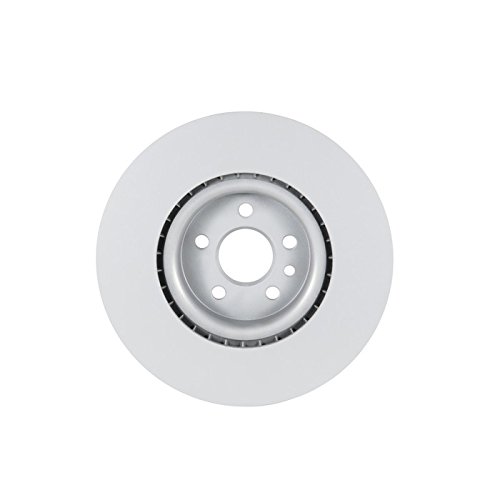
Rysunek 2.4: Góra view of the brake rotor, showing the hub mounting holes and central bore.
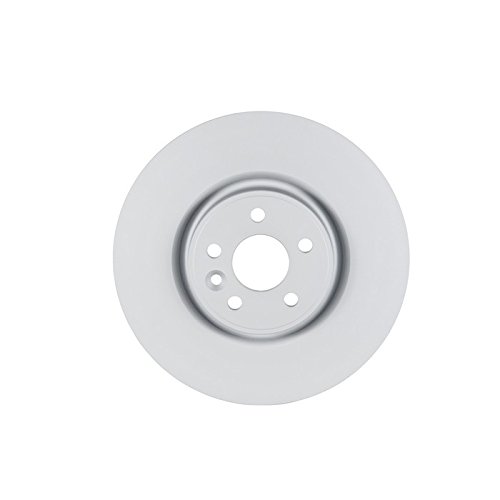
Figure 2.5: Another perspective of the brake rotor, emphasizing its precision-machined surfaces.
3. Informacje dotyczące bezpieczeństwa
Always prioritize safety when working with vehicle components. Improper installation or handling can lead to serious injury or vehicle damage. It is highly recommended that installation be performed by a qualified automotive professional.
- Należy nosić odpowiedni sprzęt ochrony osobistej (PPE), w tym okulary ochronne i rękawice.
- Przed rozpoczęciem jakichkolwiek prac należy upewnić się, że pojazd jest stabilnie podparty na podstawkach podnośnikowych.
- Używaj wyłącznie odpowiednich narzędzi do danej pracy.
- Nigdy nie pracuj pod pojazdem podpartym jedynie podnośnikiem.
- Trzymaj ręce i ubranie z dala od ruchomych części.
- Dispose of old parts and fluids responsibly according to local regulations.
4. Konfiguracja i instalacja
Installation of brake rotors requires mechanical expertise and specialized tools. The following steps are a general guide and should be supplemented with vehicle-specific service manual instructions.
- Przygotowanie pojazdu: Park the vehicle on a level surface, engage the parking brake, and block the wheels. Loosen the lug nuts on the wheel(s) to be serviced.
- Podnieś pojazd: Podnieś bezpiecznie pojazd i podeprzyj go podstawkami. Zdejmij koło/koła.
- Zdejmij zacisk: Carefully remove the brake caliper assembly from its mounting bracket. Do not let the caliper hang by the brake hose; support it with a wire or hook.
- Zdejmij wspornik zacisku: Unbolt and remove the caliper mounting bracket.
- Zdejmij stary wirnik: Remove any retaining screws or clips holding the old rotor in place. The rotor may be seized to the hub and require gentle persuasion with a rubber mallet.
- Czyszczenie powierzchni piasty: Thoroughly clean the hub mounting surface to remove any rust, dirt, or debris. A clean, flat surface is critical for proper rotor seating and to prevent runout.
- Zamontuj nowy wirnik: Place the new Bendix Premium Euro Brake Rotor onto the hub, ensuring it sits flush. Secure it with any retaining screws or clips if applicable.
- Ponowna instalacja wspornika zacisku: Reattach the caliper mounting bracket and torque bolts to manufacturer specifications.
- Install New Pads (Recommended): It is highly recommended to install new brake pads when replacing rotors for optimal performance and wear.
- Ponowna instalacja zacisku: Carefully slide the caliper over the new pads and rotor. Reattach the caliper mounting bolts and torque to specifications.
- Odpowietrzenie hamulców (w razie potrzeby): If brake lines were opened, or if air entered the system, bleed the brake system according to vehicle manufacturer procedures.
- Ponowna instalacja koła: Mount the wheel, hand-tighten lug nuts, lower the vehicle, and then torque lug nuts to specifications.
5. Zagadnienia operacyjne
After installation, a proper break-in procedure is crucial for new brake rotors and pads to ensure optimal performance and longevity. Consult your brake pad manufacturer's recommendations for specific break-in procedures. Generally, this involves a series of moderate stops from varying speeds to properly bed the pads to the rotor surface.
During normal operation, the Bendix Premium Euro Brake Rotors are designed to provide consistent and reliable braking. Avoid prolonged heavy braking immediately after installation until the break-in process is complete.
6. Konserwacja
Regular inspection of your brake rotors is essential for safety and performance. While brake rotors are wear items, proper maintenance can help extend their lifespan.
- Rutynowa kontrola: Inspect rotors for signs of wear, cracks, deep grooves, or discoloration during tire rotations or other vehicle servicing.
- Czystość: Keep the brake area clean from excessive dirt, dust, and road grime.
- Wymiana podkładki: Always replace brake pads when they reach their minimum thickness. Worn pads can damage rotors.
- Kontrola płynów: Ensure brake fluid levels are correct and the fluid is clean.
7. Rozwiązywanie problemów i kontrola
Recognizing signs of brake rotor issues can prevent further damage and ensure safety. If you experience any of the following symptoms, have your brake system inspected by a qualified technician immediately.
- Wibracje lub pulsacje: A common sign of rotor runout or warping, often felt through the brake pedal or steering wheel during braking.
- Hałas: Squealing, grinding, or clunking noises can indicate worn pads, worn rotors, or loose components.
- Zmniejszona skuteczność hamowania: A spongy pedal, increased stopping distance, or a need for more pedal effort can signal brake system issues, including rotor wear.
- Widoczne uszkodzenia: Look for deep grooves, cracks, excessive rust, or blue spots (indicating overheating) on the rotor surface.
- Minimalna grubość: Rotors have a minimum thickness specification. If the rotor is worn below this, it must be replaced. This measurement requires a micrometer.
8. Specyfikacje
| Atrybut | Wartość |
|---|---|
| Producent | Bendix |
| Marka | Bendix |
| Wymiary produktu | Wymiary 33.6 x 33.6 x 5.21 cm |
| Numer modelu przedmiotu | BPR6005 |
| Numer części producenta | BPR6005 |
| Pozycja | Przód |
| Wymagany montaż | NIE |
| Waga przedmiotu | 11 kg 900 gram |
| ASIN | B075JDYGXR |
| Data pierwszej dostępności | 26 grudnia 2017 |
| Nazwa ogólna | Front Premium Euro Brake Rotor |
| UPC | 887243243629 |
| Globalny numer identyfikacyjny handlu | 00887243243629 |
9. Co znajduje się w pudełku
The product package for the Bendix Premium Drum and Rotor BPR6005 Front Euro Brake Rotor typically includes:
- 1 Brake Rotor
10. Gwarancja i wsparcie
For warranty information and customer support regarding your Bendix Premium Drum and Rotor BPR6005, please refer to the official Bendix webOdwiedź stronę internetową lub skontaktuj się bezpośrednio z działem obsługi klienta. Warunki gwarancji mogą się różnić w zależności od regionu i miejsca zakupu.
Zaleca się zachowanie dowodu zakupu na wypadek ewentualnych roszczeń gwarancyjnych.