TP-Link Archer MR400
TP-Link Archer MR400 AC1350 Wireless Dual Band 4G LTE Router User Manual
Model: Archer MR400
1. Wprowadzenie
This manual provides instructions for setting up, operating, and maintaining your TP-Link Archer MR400 AC1350 Wireless Dual Band 4G LTE Router. Please read this manual carefully before using the device to ensure proper functionality and safety.
1.1 Zawartość opakowania
- TP-Link Archer MR400 Router
- Zasilacz
- Kabel Ethernet
- Szybki przewodnik instalacji
1.2 Produkt powyżejview
The Archer MR400 is a 4G LTE router designed to provide high-speed internet access by utilizing a 4G LTE SIM card. It also supports dual-band Wi-Fi (2.4 GHz and 5 GHz) for connecting multiple devices.
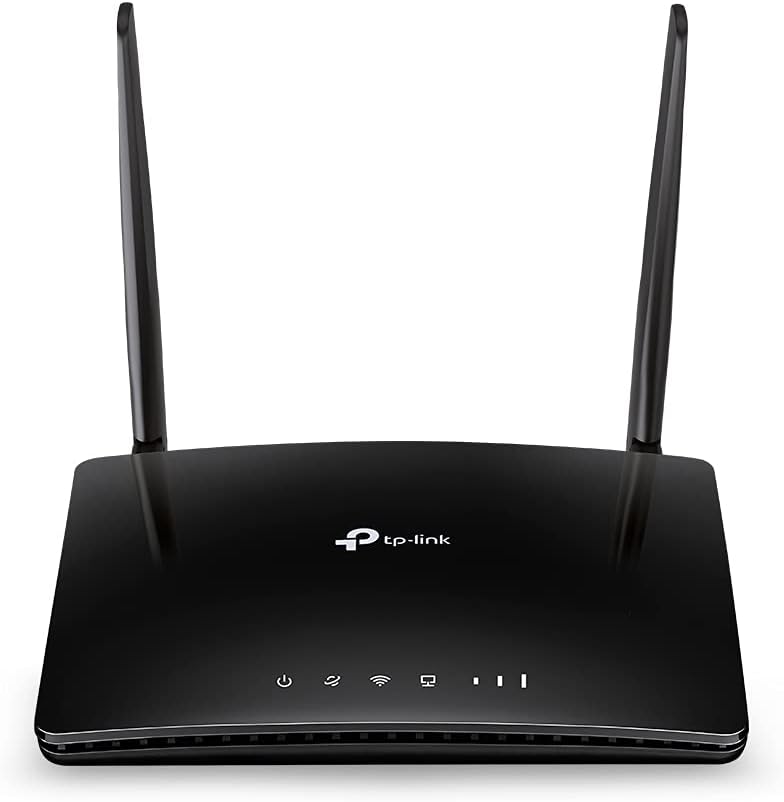
Obraz 1.2.1: Przód view of the TP-Link Archer MR400 AC1350 Wireless Dual Band 4G LTE Router. The router is black with two external antennas and LED indicators on the front panel.
1.2.1 Wskaźniki na panelu przednim
- Dioda LED zasilania: Wskazuje stan zasilania.
- Dioda internetowa: Wskazuje stan połączenia internetowego.
- Dioda Wi-Fi: Indicates Wi-Fi functionality status.
- Diody LED sieci LAN: Wskazuje status połączenia dla portów LAN.
- Diody LED siły sygnału: Wskaż siłę sygnału 4G LTE.

Obraz 1.2.2: Tył view of the TP-Link Archer MR400 router. From left to right, it shows the power input, three yellow LAN ports (LAN1, LAN2, LAN3), one yellow LAN/WAN port, a WiFi ON/OFF button, a WPS/RESET button, and a Nano SIM Card slot.
1.2.2 Porty i przyciski na panelu tylnym
- Port zasilania: Podłączany do dostarczonego zasilacza.
- LAN1, LAN2, LAN3 Ports: Ethernet ports for connecting wired devices.
- Port LAN4/WAN: Can function as an additional LAN port or as a WAN port for connecting to a cable/fiber modem.
- WiFi ON/OFF Button: Toggles the wireless function on or off.
- Przycisk WPS/RESET: Press briefly for WPS function; press and hold for 5 seconds to reset the router to factory defaults.
- Gniazdo karty Nano SIM: Insert your 4G LTE Nano SIM card here.
2. Konfiguracja
2.1 Instalacja karty SIM
Before powering on the router, install your Nano SIM card. Ensure the router is powered off during this process.
- Locate the Nano SIM card slot on the rear panel of the router.
- Insert the Nano SIM card into the slot with the gold contacts facing down until it clicks into place.
- If you need to remove the SIM card, gently push it in until it springs out.

Obraz 2.1.1: Illustration demonstrating the correct method for inserting a Nano SIM card into the dedicated slot on the TP-Link Archer MR400 router's rear panel. The SIM card is shown being pushed into the slot.
2.2 Połączenie sprzętowe
- Connect the provided power adapter to the POWER port on the router and plug the other end into a power outlet.
- Wait for the router to power on. The Power LED should become solid.
- If you wish to use a wired connection, connect one end of an Ethernet cable to a LAN port on the router and the other end to your computer's Ethernet port.
2.3 Konfiguracja początkowa (Web Management Interface)
- Connect your computer or mobile device to the router via Wi-Fi (using the default SSID and password printed on the router's label) or an Ethernet cable.
- Otwórz web przeglądarka i typ
http://tplinkmodem.netorhttp://192.168.1.1do paska adresu. - Gdy zostaniesz o to poproszony, utwórz nowe hasło logowania.
- Follow the on-screen Quick Setup wizard to configure your internet connection and wireless settings. This typically involves selecting your region, confirming APN settings (if required by your ISP), and setting up your Wi-Fi network name (SSID) and password.
- Once the setup is complete, the Internet LED should turn solid, indicating a successful connection.
3. Obsługa
3.1 Podłączanie urządzeń
3.1.1 Połączenie Wi-Fi
Aby połączyć urządzenia bezprzewodowo:
- Włącz Wi-Fi na swoim urządzeniu (smartfonie, tablecie, laptopie).
- Szukaj available Wi-Fi networks and select the SSID (network name) you configured during setup.
- Po wyświetleniu monitu wprowadź hasło Wi-Fi.
3.1.2 Połączenie Ethernet
Aby podłączyć urządzenia przez Ethernet:
- Podłącz jeden koniec kabla Ethernet do portu LAN w routerze.
- Connect the other end of the Ethernet cable to the Ethernet port on your device (e.g., desktop computer, game console).

Obraz 3.1.1: The TP-Link Archer MR400 router centrally located, providing wireless internet connectivity to various devices including a tablet, e-reader, laptop, and smartphone, illustrating its role in a connected home environment.
3.2 4G LTE Internet Access
The Archer MR400 primarily uses its inserted 4G LTE SIM card for internet access. Once the SIM card is installed and the router is powered on, it will automatically attempt to establish a 4G LTE connection. The signal strength LEDs on the front panel will indicate the quality of the cellular signal.

Obraz 3.2.1: A visual representation of the TP-Link Archer MR400's network capabilities. It shows 4G LTE download speeds up to 150 Mbps and upload speeds up to 50 Mbps. It also highlights dual-band Wi-Fi, with 2.4 GHz offering up to 300 Mbps and 5 GHz offering up to 433 Mbps, connecting to various devices like a smartphone, tablet, and game controller.
3.3 Kopia zapasowa połączenia WAN
The Archer MR400 supports a WAN connection backup feature. If your 4G LTE internet connection fails, the router can automatically switch to a wired WAN connection (e.g., from a DSL/Cable/Fiber modem) connected to the LAN4/WAN port.
- Connect your primary modem (e.g., cable modem) to the LAN4/WAN port of the Archer MR400 using an Ethernet cable.
- Uzyskaj dostęp do web interfejs zarządzania (
http://tplinkmodem.net). - Navigate to the 'Network' > 'Internet' settings and configure the WAN connection type (e.g., Dynamic IP, Static IP, PPPoE) according to your ISP's requirements.
- Enable the 'WAN Backup' feature, setting 4G LTE as the primary connection and WAN as the backup.

Obraz 3.3.1: This image illustrates the WAN connection backup feature of the TP-Link Archer MR400. The router is shown connected to a separate modem via its LAN4/WAN port, which is then connected to the internet, providing an alternative internet source if the 4G LTE connection is unavailable.
3.4 Ustawienia bezprzewodowe
You can modify your Wi-Fi network name (SSID) and password through the web management interface. Navigate to 'Wireless' > 'Wireless Settings' to adjust these parameters for both 2.4 GHz and 5 GHz bands.
3.5 Funkcjonalność WPS
The Wi-Fi Protected Setup (WPS) button allows you to quickly connect WPS-compatible devices to your Wi-Fi network without entering the password. Press the WPS/RESET button on the router, then activate WPS on your client device within two minutes.
4. Konserwacja
4.1 Aktualizacja oprogramowania
Regularly check for firmware updates to ensure optimal performance and security. Download the latest firmware from the TP-Link official website for your specific model (Archer MR400). Navigate to 'System Tools' > 'Firmware Upgrade' in the web management interface to perform the upgrade.
4.2 Konfiguracja kopii zapasowej i przywracania
Możesz wykonać kopię zapasową ustawień konfiguracji routera na file on your computer. This allows you to restore the settings later if needed, for example, after a factory reset or firmware upgrade. This option is typically found under 'System Tools' > 'Backup & Restore'.
4.3 Dziennik systemu
The system log records various events and activities of the router, which can be useful for troubleshooting. Access the system log via 'System Tools' > 'System Log' in the web interfejs zarządzania.
4.4 Reboot/Reset
- Ponowne uruchomienie: You can reboot the router from the web management interface ('System Tools' > 'Reboot') or by simply unplugging and replugging the power adapter. A reboot can resolve minor issues.
- Przywrócenie ustawień fabrycznych: To restore the router to its factory default settings, press and hold the WPS/RESET button on the rear panel for approximately 5 seconds until the LEDs flash. Alternatively, you can perform a factory reset from the web management interface ('System Tools' > 'Backup & Restore' > 'Factory Restore'). Uwaga: przywrócenie ustawień fabrycznych spowoduje usunięcie wszystkich ustawień niestandardowych.
5. Rozwiązywanie Problemów
5.1 Brak dostępu do Internetu
- Ensure the SIM card is correctly inserted and activated with your mobile network provider.
- Check the signal strength LEDs on the front panel. If they are off or show low signal, try relocating the router to an area with better cellular reception.
- Verify the APN settings in the web management interface ('Network' > 'Internet'). These settings are usually provided by your mobile network operator.
- If using WAN backup, ensure the external modem is working correctly and connected to the LAN4/WAN port.
- Uruchom ponownie router.
5.2 Problemy z połączeniem Wi-Fi
- Ensure the Wi-Fi LED on the front panel is on. If not, press the WiFi ON/OFF button on the rear panel.
- Sprawdź, czy wpisujesz prawidłowe hasło Wi-Fi.
- Check your device's Wi-Fi settings and ensure it is connecting to the correct SSID.
- Aby poprawić siłę sygnału, spróbuj zbliżyć się do routera.
- If many devices are connected, consider reducing the number of active connections or optimizing Wi-Fi channels.
5.3 Brak dostępu Web Interfejs zarządzania
- Ensure your device is correctly connected to the router via Wi-Fi or Ethernet.
- Sprawdź, czy wpisujesz poprawny adres:
http://tplinkmodem.netorhttp://192.168.1.1. - Wyczyść pamięć podręczną i pliki cookie przeglądarki lub spróbuj innej web przeglądarka.
- Tymczasowo wyłącz zaporę sieciową i oprogramowanie antywirusowe na swoim komputerze.
- If you forgot your login password, you may need to perform a factory reset.
6. Specyfikacje
| Funkcja | Szczegół |
|---|---|
| Nazwa modelu | TP-link AC1350 (Archer MR400) |
| standard bezprzewodowy | 802.11 akrów |
| Klasa pasma częstotliwości | Dwuzakresowy (2.4 GHz i 5 GHz) |
| Prędkość Wi-Fi 2.4 GHz | Do 300 Mb/s |
| Prędkość Wi-Fi 5 GHz | Do 433 Mb/s |
| Prędkość pobierania 4G LTE | Do 150 Mb/s |
| Prędkość wysyłania 4G LTE | Do 50 Mb/s |
| Technologia łączności | Wi-Fi, 4G LTE |
| Porty Ethernet | 3x LAN, 1x LAN/WAN |
| Gniazdo karty SIM | Karta nano-SIM |
| Funkcja specjalna | WPS |
| Wymiary produktu | 5.51 x 1.34 x 7.87 cala |
| Waga przedmiotu | 11.6 uncji |
| Kolor | Czarny |
| Producent | TP-LINK |
7. Gwarancja i wsparcie
7.1 Informacje o gwarancji
TP-Link products typically come with a limited warranty. For specific warranty terms and conditions applicable to your region and product, please refer to the warranty card included with your product or visit the official TP-Link webstrona.
7.2 Wsparcie techniczne
Aby uzyskać pomoc techniczną, aktualizacje oprogramowania sprzętowego i dodatkowe zasoby, odwiedź oficjalną stronę pomocy technicznej TP-Link webstrona:
Często zadawane pytania, poradniki rozwiązywania problemów i dane kontaktowe do działu obsługi klienta znajdziesz na ich stronie. webstrona.