
1. Koniec produktuview
The LaiPuDuo 11-Key RF Mini Wireless Remote LED Controller is designed for controlling single-color LED strip lights operating on DC5-24V. This compact and lightweight controller utilizes 433MHz radio frequency (RF) signals, allowing for control without direct line-of-sight. It features 8 dynamic modes, 10-level speed adjustment, and 10-level static brightness adjustment, making it a versatile solution for various lighting applications.
Co jest zawarte
- Sterownik LED
- Zdalne sterowanie
2. Funkcje
- Prąd wyjściowy: <6A (each circuit), DC5-24V.
- Sterowanie bezprzewodowe: 11-button RF wireless remote control operating at 433MHz.
- Funkcja pamięci: Features automatic shutdown memory, retaining the last setting.
- Wszechstronne zastosowanie: Compatible with various LED lights including LED source, LED strips (3528, 5050, COB), wall washer lights, and glass curtain wall lights.
- Tryby dynamiczne: Includes 8 kinds of monochrome dynamic models (e.g., flash blasting, breathing, strobe, flicker).
- Regulacja prędkości: 10 levels of dynamic speed adjustment.
- Regulacja jasności: Single-channel static 10-level brightness adjustment.
- Łatwość użytkowania: Compact, lightweight, intuitive button design, easy to wire and operate.
- Zdalny zasięg: Offers control from a long distance, with signal penetration through walls and doors.
3. Specyfikacje
| Specyfikacja | Wartość |
|---|---|
| Wymiary produktu | 4.96 x 3.31 x 0.39 cala |
| Waga przedmiotu | 1.23 uncji |
| Numer modelu przedmiotu | 11key RF Mini |
| Marka | LaiPuDuo |
| Funkcja specjalna | Zdalne sterowanie |
| Kolor | Biały/Czarny |
| Maksymalna liczba obsługiwanych urządzeń | 1 |
| Kompatybilne urządzenia | dioda LEDamps, LED strips (3528, 5050, COB) |
| Producent | Shenzhen LPD Co.,Ltd |
4. Instrukcje konfiguracji
4.1 Podłączanie kontrolera
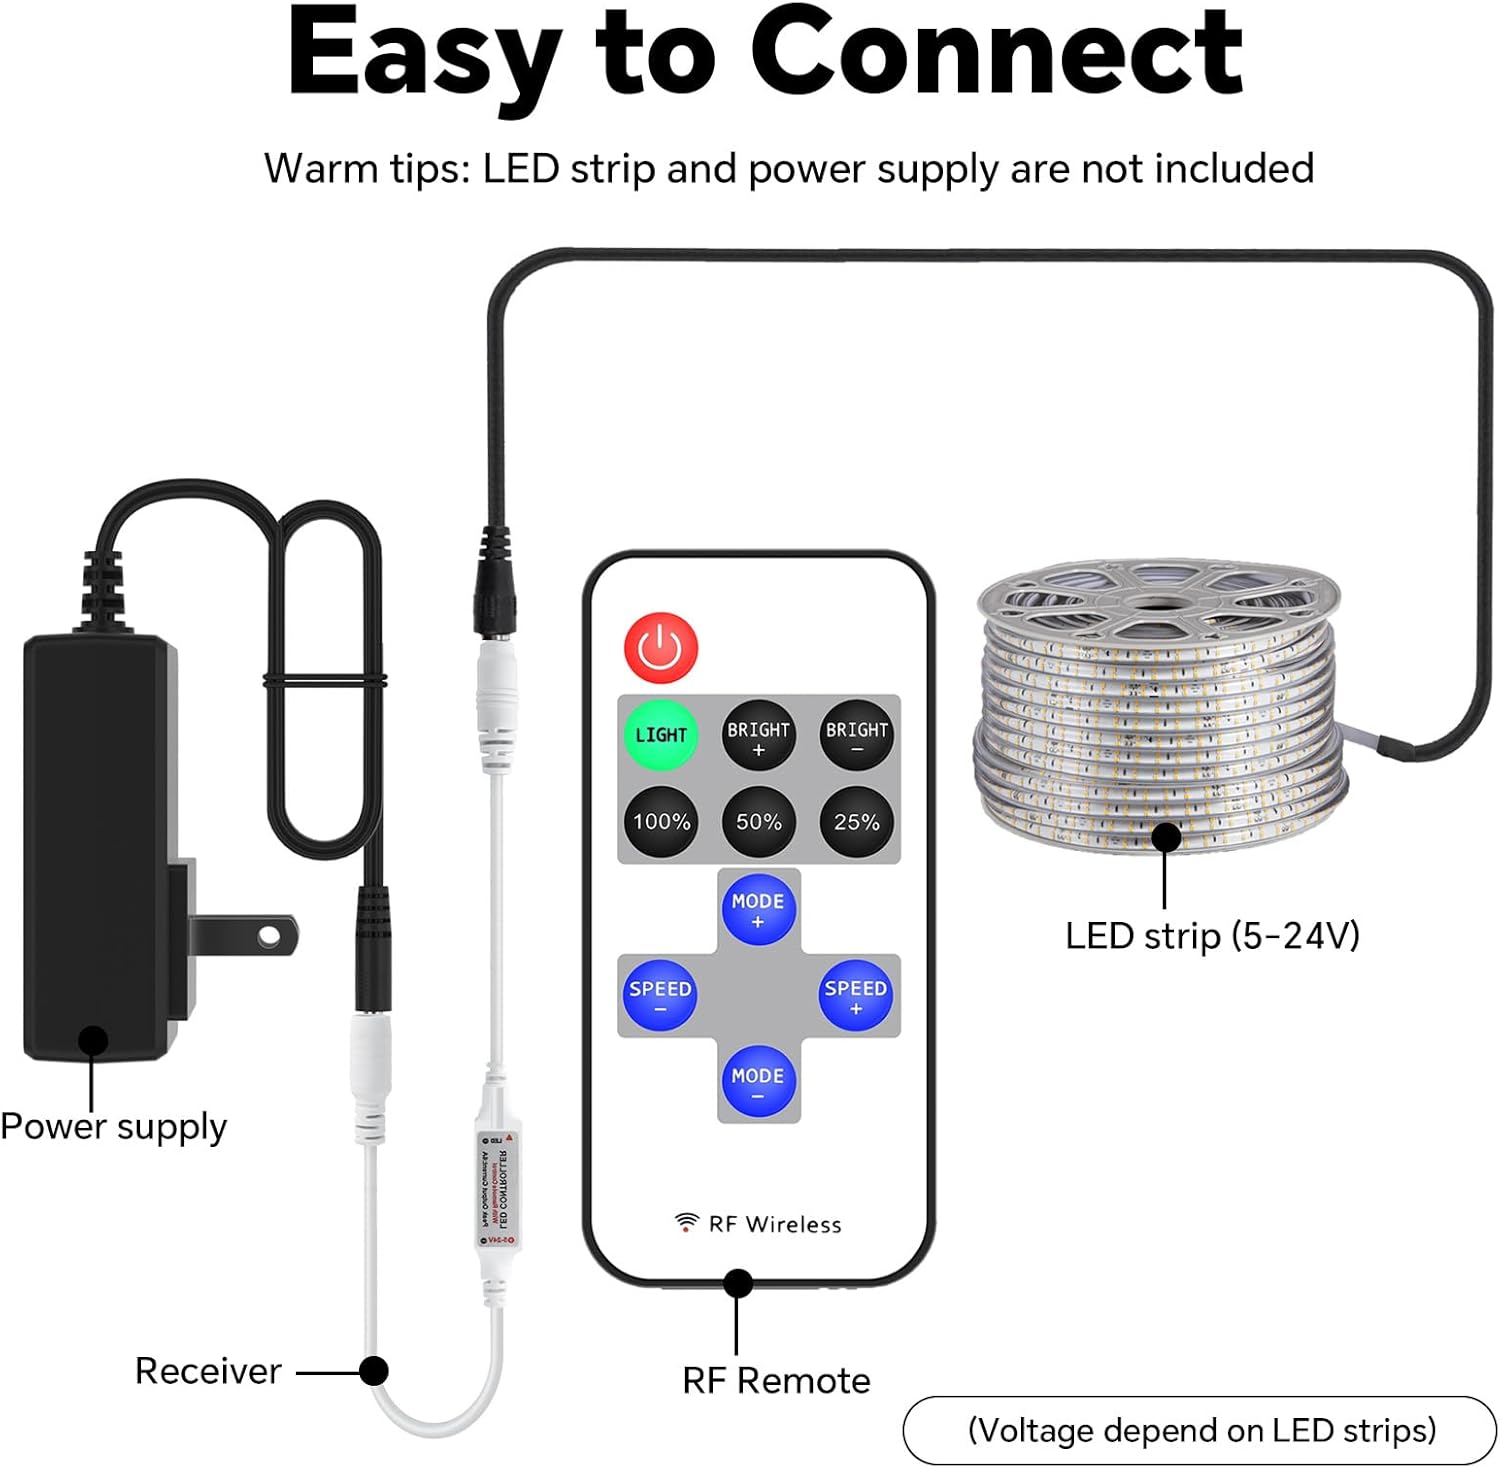
Follow these steps to connect your LED controller system. Ensure all components are compatible with DC5-24V power. The LED strip and power supply are not included with this controller.
- Connect your DC5-24V power supply to the input side of the LED controller receiver.
- Connect your single-color LED strip light to the output side of the LED controller receiver.
- Przed włączeniem zasilania upewnij się, że wszystkie połączenia są bezpieczne.
4.2 Parowanie pilota
The remote control is typically pre-paired with the receiver. If re-pairing is necessary or if the remote is unresponsive, follow the instructions in the video below.
5. Instrukcja obsługi
5.1 Funkcje zdalnego sterowania
The 11-key RF Mini Remote provides intuitive control over your LED strip lights. Refer to the diagram below for button identification and their respective functions.

- Przycisk zasilania (czerwony): Turns the LED lights On or Off.
- LIGHT Button (Green): Activates the static lighting function.
- BRIGHT + / BRIGHT - Buttons: Adjusts the brightness level of the static light.
- 100% / 50% / 25% Buttons: Sets the static brightness to predefined levels.
- MODE + / MODE - Buttons: Cycles through the 8 dynamic lighting modes.
- SPEED + / SPEED - Buttons: Adjusts the speed of the active dynamic lighting mode (10 levels).
5.2 Regulacja jasności
You can precisely control the brightness of your LED lights using the dedicated brightness buttons or the '+' and '-' controls. The remote offers 10 levels of brightness adjustment for static light.

5.3 Dynamic Modes and Speed
The controller features 8 distinct dynamic modes, such as flashing, breathing, and strobing effects. Use the 'MODE +' and 'MODE -' buttons to switch between these modes. The 'SPEED +' and 'SPEED -' buttons allow you to adjust the speed of the selected dynamic mode across 10 different levels.

6. Konserwacja
6.1 Wymiana baterii
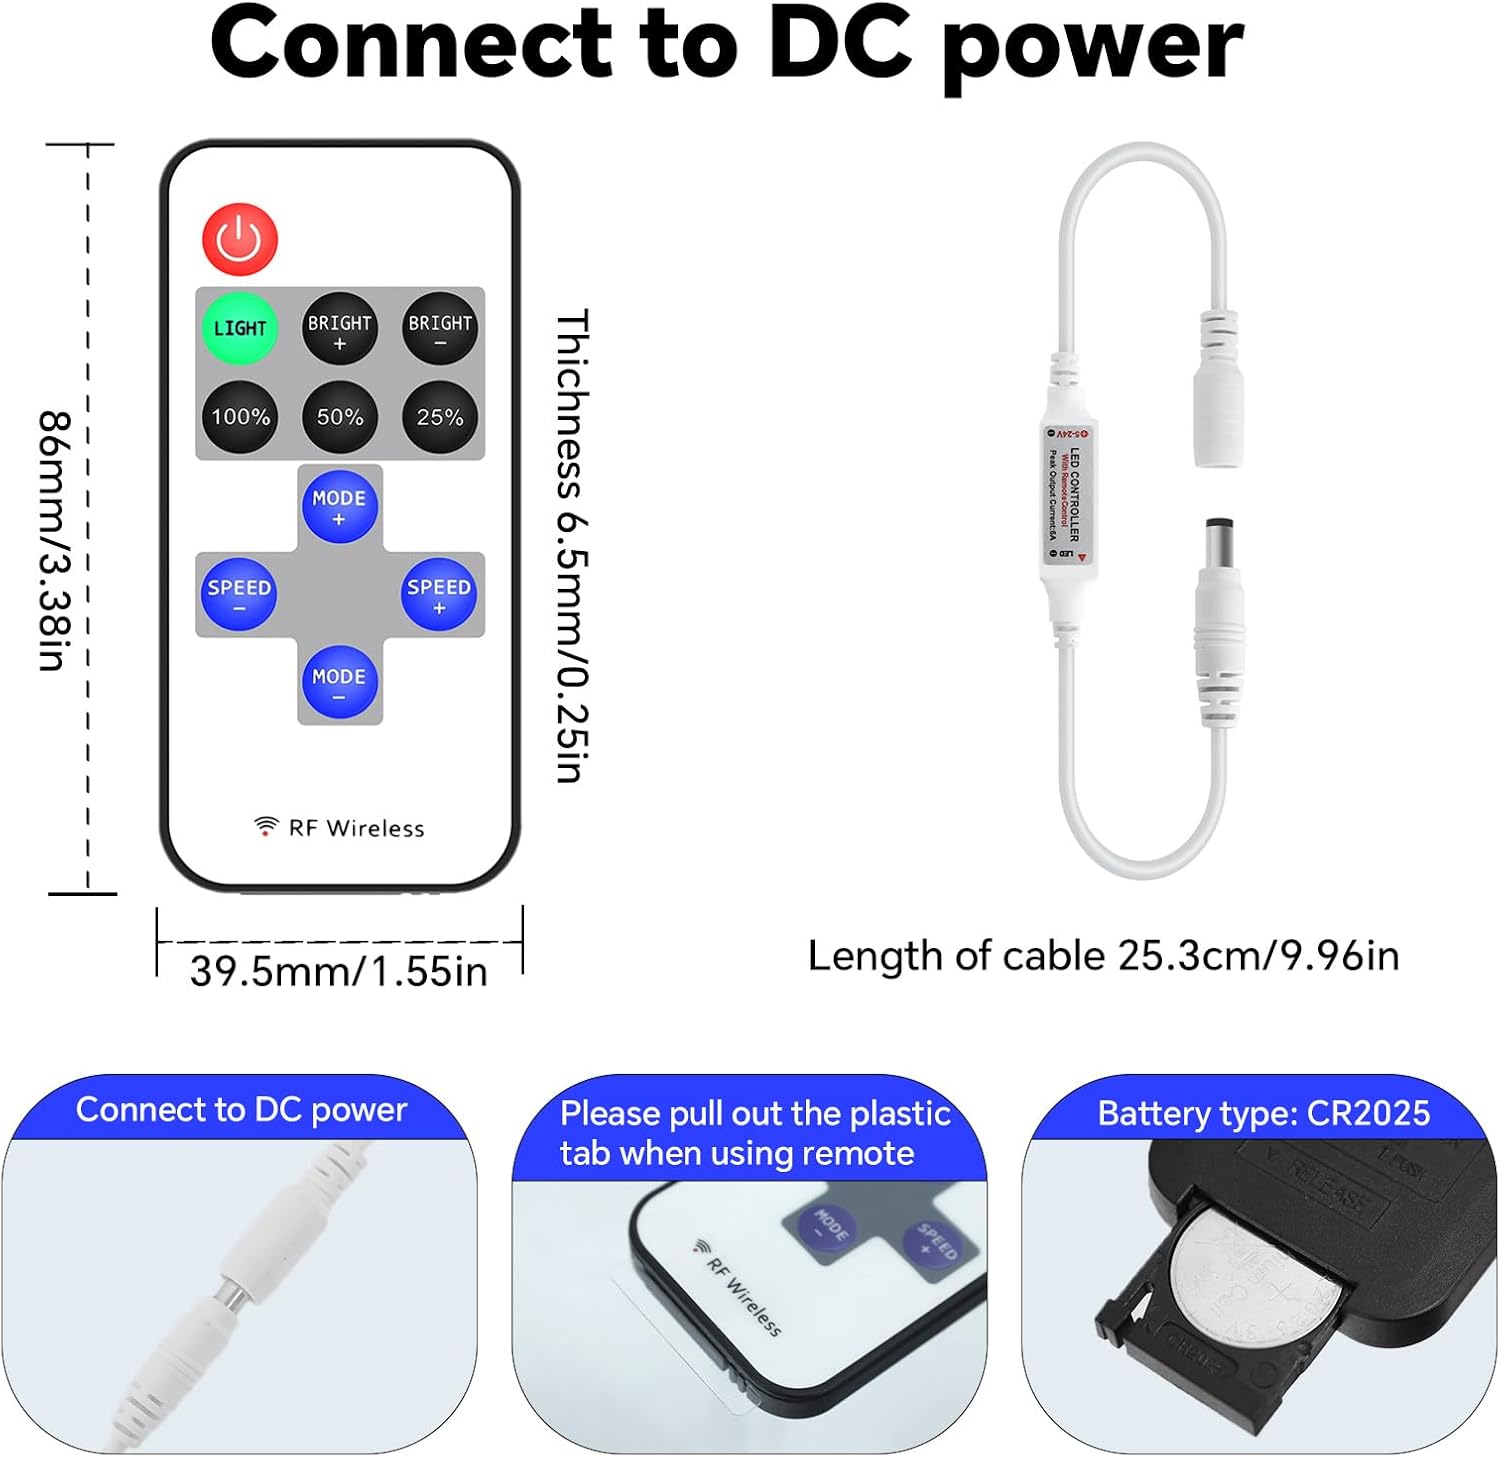
The remote control is powered by a CR2025 coin cell battery. If the remote's range decreases or it becomes unresponsive, the battery may need replacement.
- Znajdź komorę baterii z tyłu pilota.
- Slide open the battery tray or use a small tool to gently pry it open.
- Wyjmij starą baterię CR2025.
- Włóż nową baterię CR2025 biegunem dodatnim (+) skierowanym do góry.
- Dokładnie zamknij komorę baterii.
7. Rozwiązywanie Problemów
- Światła nie reagują: Check if the remote control battery needs replacement. Ensure the plastic tab has been removed from the battery compartment. Verify all power and LED strip connections are secure.
- Kontrola przerywana: Ensure the remote is within effective range. While RF technology allows for signal penetration, extreme distances or dense obstacles may affect performance.
- Światła się nie włączają: Confirm the power supply is functioning correctly and providing the appropriate voltage (DC5-24V). Check the LED strip for any damage.
- Incorrect light behavior: If the lights are not behaving as expected, try re-pairing the remote control as shown in the setup video.
8. Ważne informacje
8.1 Wytyczne dotyczące bezpieczeństwa
- Do not expose the controller or remote to moisture or extreme temperatures.
- Upewnij się, że napięcie zasilaniatage odpowiada wymaganiom sterownika (DC5-24V).
- Avoid short-circuiting the connections.
- Przechowywać w miejscu niedostępnym dla dzieci.
- Baterie należy utylizować zgodnie z lokalnymi przepisami.
8.2 Gwarancja i wsparcie
For warranty information, technical support, or further assistance, please refer to the product packaging or contact the manufacturer directly through their official webwitrynę lub kanały obsługi klienta.