mójTouchSmart 26745
myTouchSmart Digital Bar Outlet Timer (Model 26745) Instruction Manual
Model: 26745
Wstęp
This manual provides instructions for the setup, operation, and maintenance of your myTouchSmart Digital Bar Outlet Timer, Model 26745. Please read these instructions carefully before use and retain them for future reference.
The myTouchSmart Digital Bar Outlet Timer is designed to automate the ON/OFF cycles of indoor lights, lamps, small appliances, and electronics. It features a space-saving design, a digital display, and two programmable custom ON/OFF times.
Ważne instrukcje bezpieczeństwa
- Tylko do użytku wewnątrz pomieszczeń.
- Do not exceed electrical ratings: 125V AC, 60Hz, 15A (1875W) General Purpose/Resistive, 5A (625W) Tungsten, 1/2 HP.
- Do not use with appliances that have heating elements, such as coffee makers, toasters, or heaters, as this may create a fire hazard.
- Sprawdź, czy wyłącznik czasowy jest całkowicie włożony do gniazdka.
- Do not immerse in water or use in wet locations.
- Keep children away from the timer.
- Nie rozmontowuj urządzenia. Wewnątrz nie ma żadnych części, które mogłyby zostać naprawione przez użytkownika.
Cechy produktu
- Space-saving slim bar design.
- One (1) polarized outlet.
- Digital display for easy programming.
- Two custom daily ON/OFF times.
- Backup battery to save settings during power outagt.j.
- Compatible with CFL, LED, incandescent, and halogen light sources.
Opis obrazu: A detailed diagram of the myTouchSmart Digital Bar Outlet Timer, highlighting its components such as the custom ON/OFF time buttons, clock/set mode indicator, active program indicator, AM/PM indicator, and scroll buttons. This image helps users identify the different parts of the timer for programming.
Instalacja i konfiguracja początkowa
1. Charging the Backup Battery
Before initial use, plug the timer into a live electrical outlet for at least 30 minutes to charge the internal backup battery. This battery retains your settings during power outages or when the timer is unplugged.
2. Ustawianie aktualnego czasu
- Naciśnij i przytrzymaj ZEGAR przycisk.
- Podczas trzymania ZEGAR, naciśnij ▲ (w górę) lub ▼ (down) button to adjust the hour. The AM/PM indicator will change accordingly.
- Uwolnij ZEGAR button when the correct hour is set.
- Naciśnij i przytrzymaj ZEGAR naciśnij przycisk ponownie.
- Podczas trzymania ZEGAR, naciśnij ▲ (w górę) lub ▼ (down) button to adjust the minutes.
- Uwolnij ZEGAR button when the correct minute is set.

Opis obrazu: This image illustrates the "Simple Setup" process for the timer. It shows the digital display and buttons, with arrows pointing to the scroll buttons for setting the current time and the "my on time" and "my off time" buttons for custom programming. The image emphasizes the ease of setting up the device.
Instrukcja obsługi
Programowanie niestandardowych czasów włączania/wyłączania
The timer allows for two custom daily ON/OFF programs. Follow these steps to set your desired schedules:
Program 1:
- Naciśnij MÓJ NA CZAS button (left side) once. The display will show "1 ON".
- Naciśnij ▲ (w górę) lub ▼ (down) button to adjust the desired ON hour for Program 1.
- Naciśnij MÓJ NA CZAS naciśnij przycisk ponownie, aby zatwierdzić godzinę i przejść do minut.
- Naciśnij ▲ (w górę) lub ▼ (down) button to adjust the desired ON minutes for Program 1.
- Naciśnij MÓJ NA CZAS button again to save the ON time.
- Naciśnij MÓJ CZAS WOLNY button (left side) once. The display will show "1 OFF".
- Naciśnij ▲ (w górę) lub ▼ (down) button to adjust the desired OFF hour for Program 1.
- Naciśnij MÓJ CZAS WOLNY naciśnij przycisk ponownie, aby zatwierdzić godzinę i przejść do minut.
- Naciśnij ▲ (w górę) lub ▼ (down) button to adjust the desired OFF minutes for Program 1.
- Naciśnij MÓJ CZAS WOLNY button again to save the OFF time.
Program 2:
Repeat the steps above using the MÓJ NA CZAS I MÓJ CZAS WOLNY przyciski na prawa strona of the timer. The display will show "2 ON" and "2 OFF" respectively.

Opis obrazu: This image displays two examples of how to program the timer. Program 1 is set to turn ON at 6:00 A.M. and OFF at 9:00 A.M. Program 2 is set to turn ON at 4:00 P.M. and OFF at 10:00 P.M. This visual guide helps users understand how to set their own custom schedules.
Connecting an Appliance
Once programmed, plug the appliance or light you wish to control into the polarized outlet on the side of the timer. Ensure the appliance's power switch is in the ON position for the timer to control its power cycle.

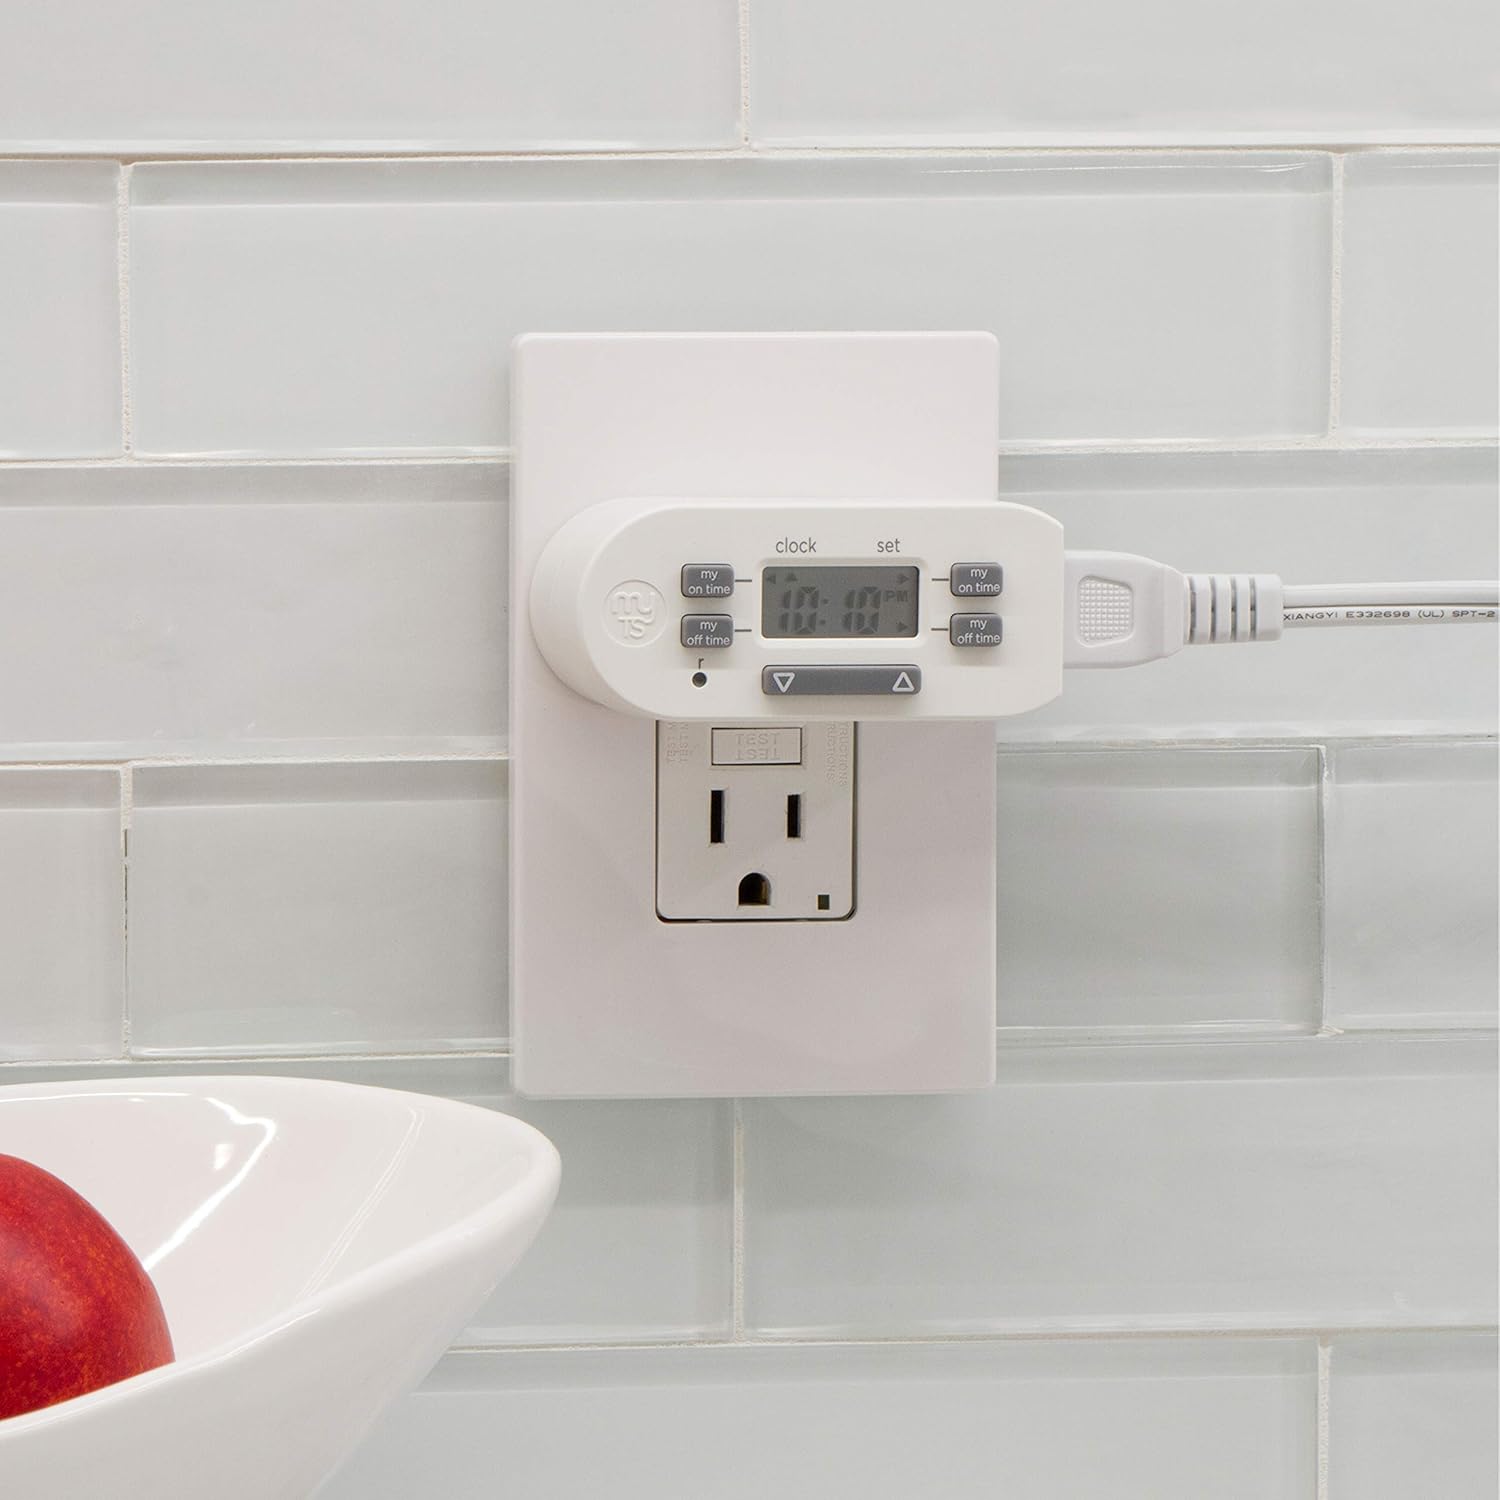
Opis obrazu: The image shows the myTouchSmart Digital Bar Outlet Timer plugged into a standard wall outlet. A lamp's power cord is then plugged into the polarized outlet on the side of the timer, demonstrating how to connect a device for timed operation. The slim design of the timer is visible, not obstructing the second wall outlet.
Konserwacja
- Czyszczenie: Disconnect the timer from the power outlet before cleaning. Wipe with a dry, soft cloth. Do not use liquid or abrasive cleaners.
- Bateria: The internal backup battery is not user-replaceable. If the display becomes dim or settings are not retained after charging, the unit may need replacement.
- Składowanie: Jeśli nie używasz timera, przechowuj go w chłodnym i suchym miejscu.
Rozwiązywanie problemów
| Problem | Możliwa przyczyna | Rozwiązanie |
|---|---|---|
| Urządzenie nie włącza się i nie wyłącza o zaprogramowanych porach. |
|
|
| Wyświetlacz jest ciemny lub pusty. |
|
|
| Ustawienia zostaną utracone po wyłączeniu zasilaniatage or unplugging. | Backup battery is not sufficiently charged or has reached end of life. | Plug the timer into a live outlet for at least 30 minutes. If the issue persists, the internal battery may need replacement (unit replacement). |
Specyfikacje
- Model: 26745
- Ocena elektryczna: 125V AC 60Hz
- Maksymalne obciążenie: 15A (1875W) General Purpose/Resistive
- Obciążenie wolframem: 5 A (625 W)
- Obciążenie silnika: 1 / 2 HP
- Punkty sprzedaży: 1 Polarized
- Wymiary: Około 2 x 2.5 x 1.25 cala
- Orzecznictwo: CSA
Gwarancja i wsparcie
This product is backed by a one-year limited warranty. For warranty claims or technical support, please contact myTouchSmart customer service. Refer to the product packaging or the manufacturer's webwitryna do informacji kontaktowych.
Producent: Firma Jasco Products, LLC
Ask a question about this manual
Ask about setup, troubleshooting, compatibility, parts, safety, or missing instructions. Manuals+ will review the question and use this page’s manual context to help answer it.