1. Wprowadzenie
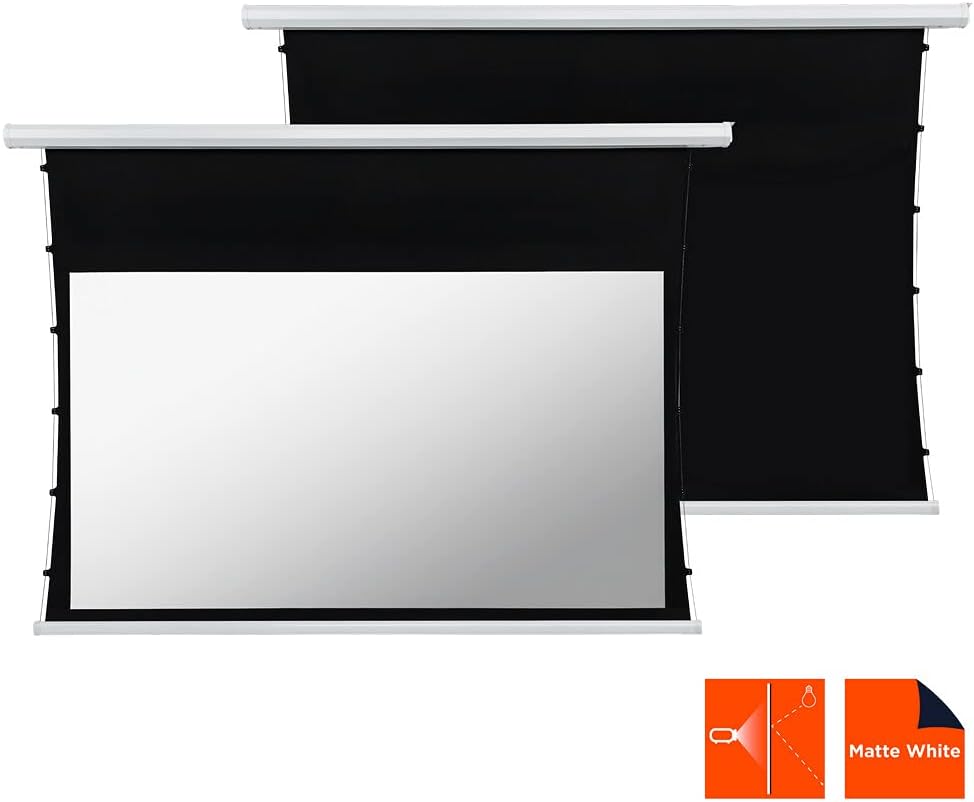
This manual provides comprehensive instructions for the installation, operation, and maintenance of your celexon Basic Motorized and Tensioned Projection Screen. Designed for optimal visual performance, this screen features a unique cord tension system that ensures a consistently flat and smooth projection surface, even after extended use. It is compatible with both 3D and 4K content, offering a superior viewing experience for home cinema, presentations, and more. The screen's black backing and black drop enhance contrast, delivering vibrant and sharp images.
2. Informacje dotyczące bezpieczeństwa
- Przeczytaj uważnie wszystkie instrukcje przed instalacją i obsługą.
- Upewnij się, że zasilanie jest zgodne z objtage wymagania określone na etykiecie produktu.
- Do not attempt to disassemble or repair the screen yourself. Refer all servicing to qualified personnel.
- Keep the screen away from direct sunlight, heat sources, and moisture.
- Ensure the mounting surface is strong enough to support the weight of the screen.
- Keep children and pets away from the screen during operation to prevent accidents.
- Avoid touching the screen surface with sharp objects or abrasive materials.
3. Zawartość opakowania
Proszę sprawdzić, czy w paczce znajdują się następujące elementy:
- celexon Basic Motorized and Tensioned Projection Screen
- Zdalne sterowanie
- Sprzęt montażowy (śruby, kotwy, wsporniki)
- Kabel zasilający
- Instrukcja obsługi (ten dokument)
If any items are missing or damaged, please contact celexon customer support.
4. Konfiguracja i instalacja
The celexon Basic Motorized and Tensioned Projection Screen is designed for both wall and ceiling mounting. Follow these steps for a secure installation.
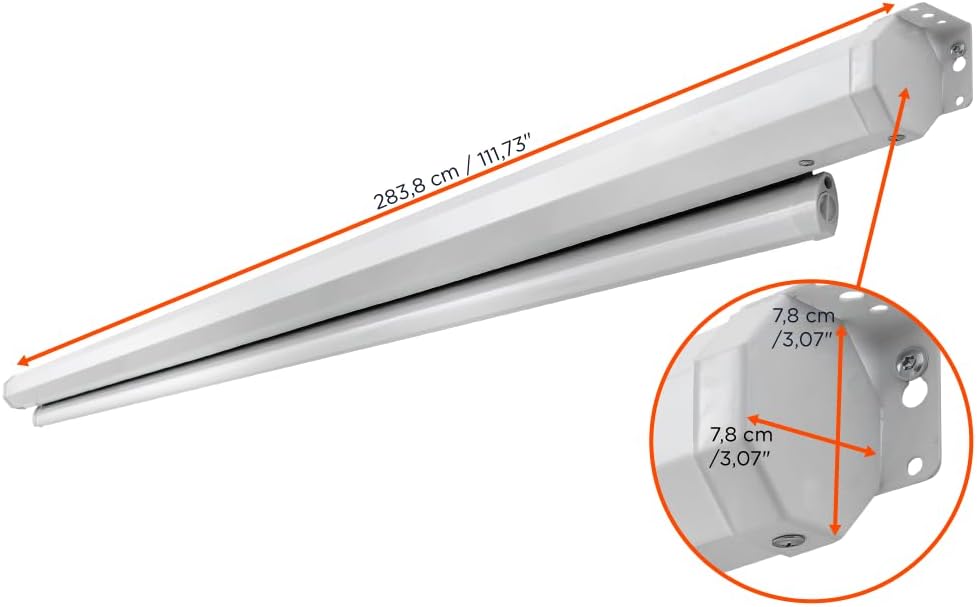
4.1 Wymiary ekranu
The screen features a usable surface area of 240 x 135 cm (108 inches diagonal) with a 16:9 aspect ratio. The overall casing dimensions are approximately 275.9 cm (length) x 8 cm (height) x 11 cm (depth).


4.2 Instrukcje montażu
- Wybierz lokacje: Select a suitable location on a wall or ceiling that can safely support the screen's weight (approximately 12.8 kg / 28.21 lbs). Ensure there are no electrical wires or pipes behind the drilling points.
- Zaznacz punkty wiercenia: Using the provided mounting brackets as a template, mark the drilling points on the wall or ceiling. Ensure the points are level and correctly spaced.
- Wiercenie otworów: Drill holes at the marked points using an appropriate drill bit for your wall/ceiling material. Insert wall anchors if necessary.
- Zamontuj wsporniki: Securely fasten the mounting brackets to the wall or ceiling using the provided screws.
- Zamontuj ekran: Carefully lift the screen and attach it to the installed mounting brackets. Ensure it clicks securely into place.
- Podłącz zasilanie: Plug the power cable into the screen's power input and then into a suitable power outlet.
5. Instrukcja obsługi
Your celexon motorized screen is operated via the included remote control.

- Extend Screen: Naciśnij W DÓŁ button on the remote control to lower the screen. The screen will automatically stop when fully extended.
- Retract Screen: Naciśnij UP button on the remote control to raise the screen. The screen will automatically stop when fully retracted.
- Stop Screen: Naciśnij ZATRZYMYWAĆ SIĘ button on the remote control to halt the screen at any desired position.
The integrated cord tension system ensures that the screen surface remains optimally flat and balanced during extension and retraction, providing a consistently smooth projection area.
6. Konserwacja
- Czyszczenie powierzchni ekranu: Użyj miękkiego, damp cloth with mild soap and water to gently clean the screen surface. Do not use abrasive cleaners, solvents, or harsh chemicals, as these can damage the screen material. Allow the screen to air dry completely before retracting.
- Czyszczenie Casing: Wytrzyj ekran casing z suchym lub lekko damp ściereczką, aby usunąć kurz.
- Pielęgnacja silnika: The motor is maintenance-free. Avoid obstructing the screen's movement or forcing it manually.
- Składowanie: When not in use for extended periods, ensure the screen is fully retracted and stored in a dry, dust-free environment.
7. Rozwiązywanie Problemów
| Problem | Możliwa przyczyna | Rozwiązanie |
|---|---|---|
| Screen does not respond to remote control. |
|
|
| Screen stops midway or moves erratically. |
|
|
| Screen surface appears wrinkled or uneven. |
|
|
8. Specyfikacje
| Funkcja | Szczegół |
|---|---|
| Marka | celexon |
| Model | Basic Motorized and Tensioned Screen |
| Wymiary ekranu (szer. x wys.) | Wymiary: 240x135 cm |
| Rozmiar przekątnej | 108 cali |
| Proporcje obrazu | 16:9 |
| Wymiary produktu (dł. x wys.) | 2.76m x 0.08m (casing) |
| Tworzywo | Polyester (screen surface) |
| Opis powierzchni ekranu | Matowa biel |
| Osiągać | 0.9 |
| Viewing kąt | 150° |
| Typ montażu | Montaż na ścianie lub suficie |
| Zgodność | 3D and 4K UHD |

9. Gwarancja i wsparcie
celexon products are manufactured to high quality standards. For information regarding warranty coverage and terms, please refer to the warranty card included with your product or visit the official celexon website. If you encounter any issues or require technical assistance, please contact celexon customer support through their official channels. Please have your product model and purchase details ready when contacting support.