
1. Ważne instrukcje bezpieczeństwa
Prosimy o uważne przeczytanie niniejszej instrukcji przed użyciem urządzenia i zachowanie jej do wykorzystania w przyszłości. Nieprzestrzeganie tych instrukcji bezpieczeństwa może spowodować pożar, porażenie prądem lub obrażenia ciała.
- Przed czyszczeniem lub konserwacją należy zawsze upewnić się, że urządzenie jest odłączone od zasilania.
- Do not immerse the main body of the appliance (above the minimum water level mark) in water or other liquids.
- Urządzenie to nie jest przeznaczone do użytku przez osoby (w tym dzieci) o ograniczonej sprawności fizycznej, sensorycznej lub umysłowej, a także osoby nieposiadające odpowiedniego doświadczenia lub wiedzy, chyba że znajdują się one pod nadzorem osoby odpowiedzialnej za ich bezpieczeństwo lub otrzymały od niej instrukcje dotyczące korzystania z urządzenia.
- Dzieci powinny znajdować się pod nadzorem, aby mieć pewność, że nie bawią się urządzeniem.
- Use the appliance only for its intended purpose, which is sous vide cooking.
- Do not operate the appliance if it has a damaged cord or plug, or if it malfunctions or has been damaged in any manner. Contact customer support for assistance.
- Always place the appliance in a suitable pot or container on a stable, heat-resistant surface.
- Ensure the water level is always between the 'MIN' and 'MAX' marks on the immersion circulator.
- Nie dotykaj gorących powierzchni. Używaj uchwytów lub gałek.
2. Koniec produktuview
The ProfiCook PC-SV 1126 is a high-quality sous vide cooker designed for precise temperature control, ensuring perfectly cooked food every time. It features an LED multifunction display, a touch control panel, and an integrated fastening clamp for easy use with various pots.
Komponenty
- Cyrkulator zanurzeniowy Sous Vide
- Integrated Fastening Clamp
- LED Multifunction Display
- Dotknij Panelu sterowania

Image: The ProfiCook PC-SV 1126 Sous Vide Cooker, a sleek black and stainless steel device with an LED display.

Image: Close-up of the LED multifunction display showing current temperature, selected temperature, and timer settings.

Image: The integrated fastening clamp securely attaching the sous vide cooker to the side of a cooking pot.
3. Konfiguracja
Przed pierwszym użyciem należy upewnić się, że usunięto wszystkie materiały opakowaniowe i urządzenie jest czyste.
3.1 Rozpakowanie i wstępna kontrola
- Carefully remove the sous vide cooker from its packaging.
- Check for any visible damage. If damaged, do not use and contact customer support.
- Wipe the stainless steel part of the circulator with a damp płótno.
3.2 Placement and Water Filling
- Place a suitable cooking pot or heat-resistant container on a stable, level, and heat-resistant surface.
- Attach the sous vide cooker to the side of the pot using the integrated fastening clamp. Ensure it is securely fixed.
- Fill the pot with water. The water level must be between the 'MIN' and 'MAX' marks indicated on the sous vide cooker. Do not overfill or underfill.
- Podłącz urządzenie do uziemionego gniazdka elektrycznego. Wyświetlacz się podświetli.

Image: The sous vide cooker immersed in a pot of water, illustrating the water circulation for even temperature distribution.
4. Instrukcja obsługi
The PC-SV 1126 allows for precise temperature control for various cooking methods.
4.1 Basic Sous Vide Cooking
- Przygotuj jedzenie: Season your food and place it in a vacuum-sealable bag. Remove as much air as possible and seal the bag.
- Ustaw temperaturę: With the appliance plugged in, use the touch control panel to set your desired cooking temperature. The temperature can be set between 20°C and 100°C in 0.5°C increments.
- Ustaw minutnik: Set the desired cooking time using the touch control panel. The timer can be set up to 99 hours.
- Rozpoczęcie ogrzewania: Press the start button. The appliance will begin heating the water to the set temperature. The LED display will show the current water temperature.
- Dodaj jedzenie: Gdy woda osiągnie docelową temperaturę, ostrożnie umieść szczelnie zamkniętą torebkę z żywnością w kąpieli wodnej. Upewnij się, że torebka jest całkowicie zanurzona i nie blokuje przepływu wody.
- Proces gotowania: The timer will begin counting down once the target temperature is reached. The appliance will maintain the precise temperature throughout the cooking process.
- Zakończenie gotowania: When the timer expires, the appliance will alert you. Carefully remove the food bag from the water bath.
- Przypraw (opcjonalnie): For many foods, especially meats, a quick sear in a hot pan after sous vide cooking will create a desirable crust.
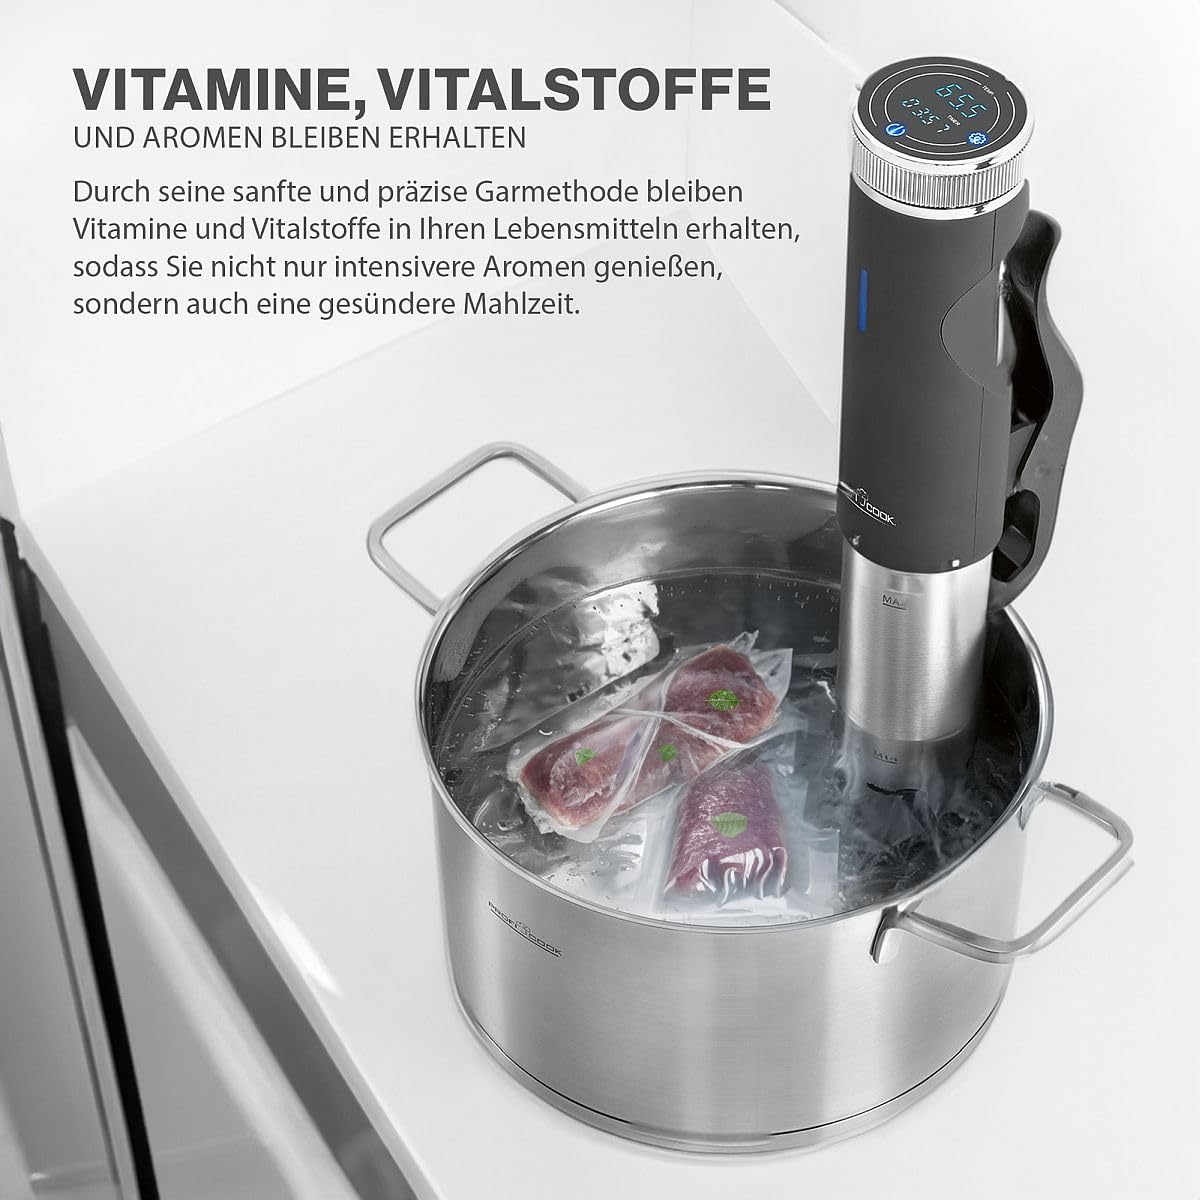
Image: A vacuum-sealed bag of meat being carefully placed into the water bath with the sous vide cooker.
4.2 Funkcje specjalne
The PC-SV 1126 also offers additional functions for versatility:
- Producent jogurtu: This function allows you to maintain the ideal temperature for making homemade yogurt. Refer to specific yogurt recipes for temperature and time settings.
- Utrzymaj ciepło: Use this function to keep cooked food warm at a safe temperature.
- Rozmrażać: The appliance can be used to gently defrost food at a controlled temperature.

Image: The sous vide cooker operating in a pot, demonstrating its use for making yogurt.
5. Czyszczenie i konserwacja
Regular cleaning and maintenance will ensure the longevity and optimal performance of your sous vide cooker.
5.1 Ogólne czyszczenie
- Zawsze odłączaj urządzenie i pozwól mu całkowicie ostygnąć przed czyszczeniem.
- Przetrzyj zewnętrzną część urządzenia miękką ściereczką.amp płótno. Nie używaj ściernych środków czyszczących ani szorstkich gąbek.
- The stainless steel part of the immersion circulator can be cleaned with a mild detergent and water. Rinse thoroughly.
- Do not immerse the top part of the appliance (where the display and controls are located) in water.
5.2 Odkamienianie
Over time, mineral deposits (limescale) may build up on the heating element, especially in areas with hard water. Descaling is recommended periodically.
- Fill a pot with water and add white vinegar (approximately 1 part vinegar to 4 parts water).
- Attach the sous vide cooker and set the temperature to 60°C (140°F).
- Run the appliance for 30 minutes to 1 hour, or until the limescale deposits are dissolved.
- Unplug the appliance, let it cool, and rinse the stainless steel part thoroughly with clean water.
5.3 Przechowywanie
Gdy urządzenie nie jest używane, przechowuj je w czystym i suchym miejscu.
6. Rozwiązywanie Problemów
If you encounter issues with your PC-SV 1126, refer to the following table:
| Problem | Możliwa przyczyna | Rozwiązanie |
|---|---|---|
| Urządzenie nie włącza się. | Niepodłączony; gniazdko elektryczne uszkodzone. | Ensure the plug is securely inserted into a working outlet. Check the circuit breaker. |
| Woda się nie nagrzewa. | Temperatura nie została ustawiona; element grzejny nie działa. | Verify the desired temperature is set and the start button is pressed. If the problem persists, contact support. |
| Na wyświetlaczu pojawia się komunikat o błędzie. | Niski poziom wody; błąd wewnętrzny. | Check water level and add water if below 'MIN' mark. If error persists, unplug and replug the device. Contact support if the issue continues. |
| Niedokładny odczyt temperatury. | Limescale buildup on sensor. | Perform descaling as described in the maintenance section. |
7. Specyfikacje techniczne
| Funkcja | Specyfikacja |
|---|---|
| Numer modelu | PC-SV 1126 (501126) |
| Moc | 800 watów |
| Tomtage | 220 V |
| Zakres temperatur | 20°C - 100°C (co 0.5°C) |
| Regulator czasowy | Do 99 godzin |
| Cyrkulacja wody | 7-8 Liters/minute |
| Wymiary (dł. x szer. x wys.) | 11 x 44.5 x 13 cm (Product) / 12P x 46l x 14H cm (Item) |
| Waga | 1.45 kilograma |
| Tworzywo | Stal nierdzewna |
| Metoda kontroli | Sterowanie dotykowe |

Image: Diagram showing the dimensions of the ProfiCook PC-SV 1126 Sous Vide Cooker.
8. Gwarancja i wsparcie
The ProfiCook PC-SV 1126 Sous Vide Cooker comes with a 2-year availability for spare parts, ensuring long-term usability and support for your appliance.
For technical assistance, warranty claims, or to inquire about spare parts, please refer to the contact information provided with your purchase documentation or visit the official ProfiCook webstrona.