
1. Wprowadzenie
This user manual provides detailed instructions for the safe and efficient operation of your Xerox VersaLink B405/DN Monochrome Multifunction Printer. It covers initial setup, daily use, routine maintenance, and troubleshooting common issues. Please read this manual thoroughly before using the device to ensure optimal performance and longevity.

Rycina 1.1: Przód view of the Xerox VersaLink B405/DN Multifunction Printer.
2. Informacje dotyczące bezpieczeństwa
Aby zapobiec obrażeniom ciała i uszkodzeniu drukarki, należy przestrzegać następujących środków ostrożności:
- Zawsze podłączaj drukarkę do uziemionego gniazdka elektrycznego.
- Nie blokuj otworów wentylacyjnych.
- Chroń drukarkę przed wodą i nadmierną wilgocią.
- Use only specified power cords and accessories.
- Do not attempt to service the printer yourself; refer all servicing to qualified personnel.
3. Zawartość opakowania
Sprawdź, czy w opakowaniu znajdują się wszystkie elementy:
- Xerox VersaLink B405 Multifunction Printer
- Standard Capacity Toner Cartridge (5900 capacity)
- Płyta CD z oprogramowaniem i dokumentacją
- Instrukcja instalacji
- Skrócony przewodnik użytkowania
- Przewód zasilający
- Przewód faksowy
4. Konfiguracja
4.1 Rozpakowywanie i umieszczanie
Carefully remove the printer from its packaging. Place the printer on a stable, level surface with adequate ventilation. Ensure sufficient space around the device for operation and maintenance.
4.2 Połączenie zasilania
Connect the provided power cord to the printer's power inlet and then to a grounded electrical outlet.
4.3 Połączenie sieciowe
Connect an Ethernet cable from your network router or switch to the Ethernet port on the rear of the printer. This printer uses an Ethernet hardware interface for network connectivity.
4.4 Instalacja oprogramowania
Insert the software and documentation CD into your computer's CD-ROM drive. Follow the on-screen instructions to install the printer drivers and utility software. Alternatively, visit the official Xerox support webwitryna umożliwiająca pobranie najnowszych sterowników.
4.5 Ładowanie papieru
Open the paper tray located at the front of the printer. Adjust the paper guides to fit the size of your paper. Load the paper stack, ensuring it does not exceed the maximum fill line. The printer supports various print media including plain paper, envelopes, and labels, with a maximum media size of 8.5 x 14 inches.

Rycina 4.1: Przód view showing the paper trays for loading media.
4.6 Instalacja wkładu z tonerem
If the toner cartridge is not pre-installed, open the front access panel of the printer. Carefully insert the standard capacity toner cartridge into its designated slot until it clicks into place. Close the access panel.
5. Instrukcja obsługi
The VersaLink B405/DN features an intuitive control panel for managing various functions.
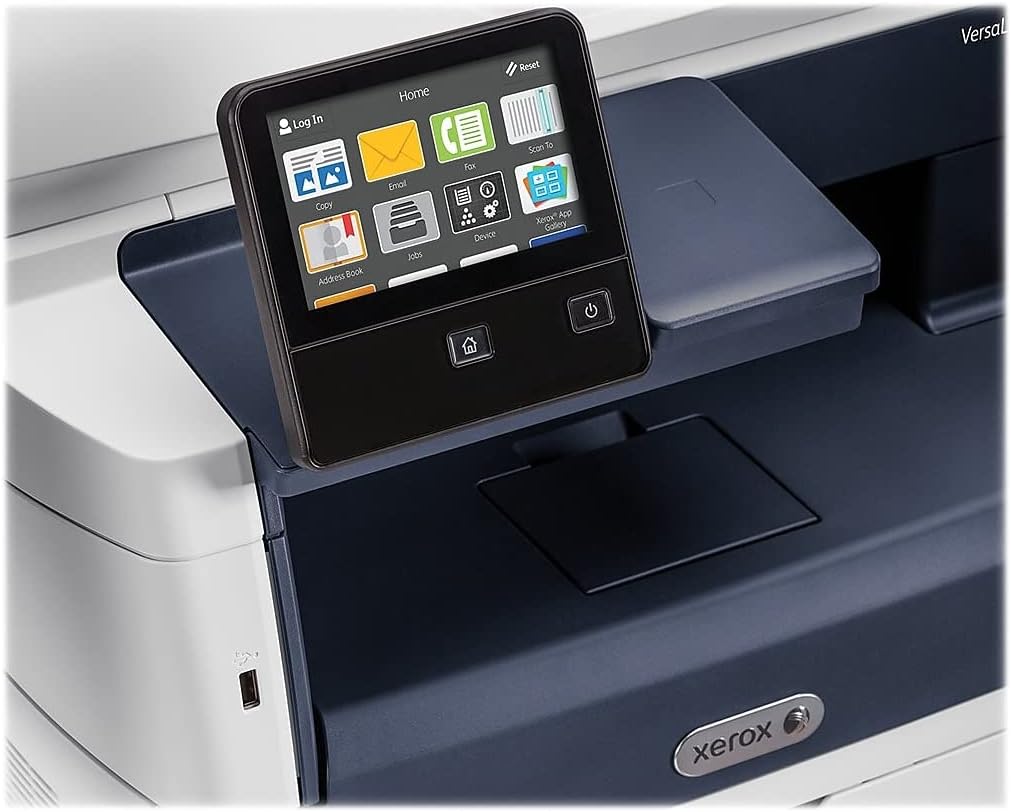
Figure 5.1: The touch-screen control panel for printer operation.
5.1 Drukowanie
To print a document from your computer, select the Xerox VersaLink B405/DN from your printer list. Adjust print settings such as paper size, orientation, and duplex printing (automatic dual-sided printing is supported) as needed. Confirm the print job.
5.2 Kopiowanie
Place your document face-up in the Automatic Document Feeder (ADF) or face-down on the scanner glass. On the control panel, select the 'Copy' function. Adjust settings like number of copies, lightness/darkness, and two-sided copying. Press the 'Start' button to begin copying.

Figure 5.2: Paper loaded in the Automatic Document Feeder for copying or scanning multiple pages.
5.3 Skanowanie
Place your document in the ADF or on the scanner glass. On the control panel, select the 'Scan' function. Choose your desired scan destination (e.g., Scan to Email, Scan to Network, Scan to USB). Configure scan settings such as resolution and file format. Naciśnij „Start”, aby rozpocząć skanowanie.

Figure 5.3: The scanner lid open, showing the flatbed for scanning single pages or delicate documents.
5.4 Faksowanie
Connect the provided fax cord to the printer's fax port and a telephone wall jack. Place your document in the ADF or on the scanner glass. On the control panel, select the 'Fax' function. Enter the recipient's fax number and press 'Start'.
6. Konserwacja
6.1 Wymiana tonera
When the printer indicates low toner, order a replacement Xerox toner cartridge. Open the front access panel, remove the old cartridge by pulling it out, and insert the new cartridge until it locks into place. Close the panel.
6.2 Czyszczenie
Regularnie czyść zewnętrzną część drukarki miękką, miękką szmatką.amp Ściereczka. Do czyszczenia szyby skanera należy używać niepozostawiającej włókien ściereczki i nieściernego środka do czyszczenia szyb. Unikać spryskiwania szyby środkiem czyszczącym bezpośrednio.
6.3 Usuwanie zacięć papieru
If a paper jam occurs, the control panel will display instructions. Open the indicated access covers and carefully remove any jammed paper, pulling in the direction of the paper path. Ensure all paper fragments are removed before closing the covers.
7. Rozwiązywanie Problemów
W tej sekcji omówiono typowe problemy, na które możesz natrafić:
- Drukarka nie odpowiada: Check power connections, network cable, and ensure the printer is online. Restart both the printer and your computer.
- Słaba jakość druku: Check toner levels. Perform a print quality diagnostic from the printer's control panel or software. Clean the print heads if necessary (refer to the printer's internal menu).
- Zacięcia papieru: Follow the instructions on the control panel to locate and clear the jam. Ensure paper is loaded correctly and not creased or damaged.
- Problemy ze skanowaniem: Verify network connectivity. Ensure the scanner glass and ADF are clean. Check scan settings on the control panel.
For more complex issues, consult the full documentation on the provided CD or the Xerox support webstrona.
8. Specyfikacje
| Funkcja | Specyfikacja |
|---|---|
| Wymiary produktu | 19.5" gł. x 19.5" szer. x 21.7" wys. |
| Waga przedmiotu | 48 funta |
| Maksymalny rozmiar nośnika | 8.5 x 14 cali |
| Maksymalna pojemność arkuszy wejściowych | 2350 arkuszy |
| Maksymalna rozdzielczość wydruku czarno-białego | 1200 x 1200 dpi |
| Maksymalna prędkość druku monochromatycznego | 47 stron na milion |
| Maksymalna prędkość kopiowania (czarno-białe) | 6.2 seconds (first copy out) |
| Drukowanie dwustronne | Automatyczny |
| Interfejs sprzętowy | Ethernet, USB |
| Pojemność pamięci masowej | 2 GB |
| Liczba procesorów | 2 |
| Typ atramentu do drukarki | Toner |
| Typ skanera | Document (ADF and Flatbed) |
9. Gwarancja i wsparcie
The Xerox VersaLink B405/DN Monochrome Multifunction Printer comes with a standard one-year warranty. For warranty claims, technical support, or service inquiries, please contact Xerox customer support directly. Refer to the official Xerox website or the documentation included with your product for contact details and further support resources.