Drukarka Xprinter XP-Q200
Instrukcja obsługi drukarki termicznej Xprinter XP-Q200
Model: XP-Q200
Marka: Xprinter
1. Wprowadzenie i koniecview
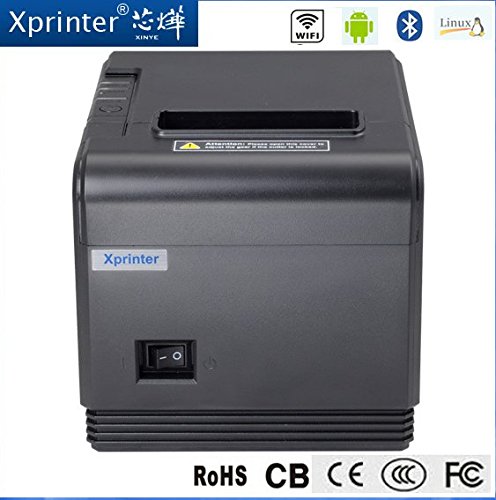
This manual provides detailed instructions for the setup, operation, and maintenance of your Xprinter XP-Q200 80mm Thermal Printer. The XP-Q200 is a high-speed thermal receipt printer designed for various operating systems including Windows, Android, and iOS. It offers versatile connectivity options such as USB, Bluetooth, and Ethernet, making it suitable for a wide range of business environments.

Rycina 1.1: Przód view of the Xprinter XP-Q200 Thermal Printer.
2. Informacje dotyczące bezpieczeństwa
Please read the following safety precautions carefully before using the printer to ensure safe and proper operation:
- Do not touch the thermal print head immediately after printing, as it may be hot.
- Use only the power adapter supplied with the printer. Using an incorrect adapter may damage the printer or cause fire.
- Do not disassemble or modify the printer. Refer all servicing to qualified personnel.
- Keep the printer away from water, moisture, and direct sunlight.
- Upewnij się, że drukarka jest umieszczona na stabilnej i równej powierzchni.
3. Zawartość opakowania
Sprawdź, czy w opakowaniu drukarki znajdują się wszystkie elementy wymienione poniżej:
- Xprinter XP-Q200 Thermal Printer Unit
- Zasilacz
- Kabel USB
- Thermal Paper Roll (initial)
- Instrukcja obsługi
4. Funkcje produktu
The Xprinter XP-Q200 offers a range of features designed for efficient and reliable thermal printing:
- Szybkie drukowanie: Achieves print speeds of up to 260mm/sec with an integrated auto cutter.
- Wiele interfejsów: Equipped with USB, Bluetooth, and Ethernet connectivity for flexible integration.
- Szeroka kompatybilność: Supports Windows, Linux, and Android operating systems.
- Logo and Barcode Support: Allows for downloading and printing of store logos (BMP file format) and various barcode types on thermal paper.
- Obsługa papieru: Designed to handle thermal paper rolls up to 80x80mm.
- International Language Support: Supports a variety of international languages and scripts.
- Alarmy błędów: Features print job tips and error alarm functions for operational awareness.
- Black Mark Detection: Includes a black mark detection function for specific printing applications.
- Missing Orders Function: Incorporates a feature to help avoid "missing orders."
- Możliwości monitorowania: Supports Ethernet and Serial port monitoring functions.
- Przechowywanie logo NV: Provides 256K Bytes of NV Logo download storage.
Rycina 4.1: Przód view highlighting connectivity options.
5. Konfiguracja
5.1 Konfiguracja fizyczna
- Rozpakuj drukarkę i usuń wszystkie materiały ochronne.
- Place the printer on a stable, flat surface near a power outlet and your host device.
- Connect the power adapter to the printer's power port and then plug it into a wall outlet.
5.2 Ładowanie papieru termicznego
- Press the cover open button (usually located on the side or front) to open the printer's top cover.
- Insert the thermal paper roll into the paper compartment with the printing side facing the thermal print head. Ensure the roll unwinds from the bottom.
- Wyciągnij niewielką ilość papieru poza obcinarkę.
- Close the top cover firmly until it clicks into place. The printer will automatically feed the paper to the correct position.
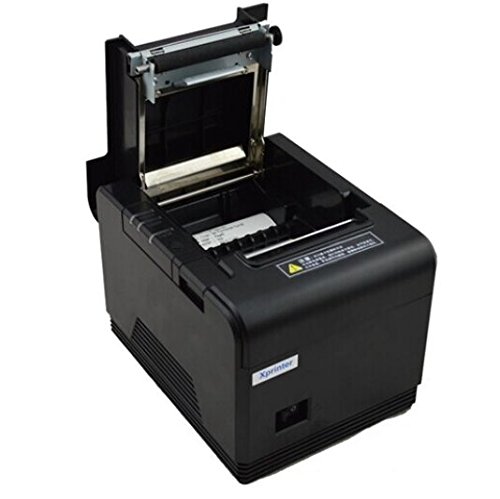
Figure 5.1: Loading thermal paper into the printer.
5.3 Podłączanie do urządzenia
The XP-Q200 supports USB, Bluetooth, and Ethernet connections.

Rysunek 5.2: Tył view drukarki z portami łączności.
5.3.1 Połączenie USB
- Podłącz jeden koniec kabla USB do portu USB drukarki, a drugi koniec do portu USB komputera.
- The computer should detect the printer automatically.
5.3.2 Połączenie Bluetooth (dla Androida/iOS)
- Upewnij się, że drukarka jest włączona.
- On your Android or iOS device, go to Bluetooth settings and enable Bluetooth.
- Szukaj available devices. The printer should appear as "XP-Q200" or similar.
- Select the printer to pair. The default PIN is usually "0000" or "1234".
- Once paired, you can select the printer from your application's print settings.
5.3.3 Połączenie Ethernet
- Podłącz kabel Ethernet do portu Ethernet drukarki i routera lub przełącznika sieciowego.
- The printer will obtain an IP address automatically via DHCP. For static IP configuration, refer to the advanced settings utility provided with the printer drivers.
5.4 Instalacja sterownika
For Windows and Linux systems, you will need to install the appropriate printer drivers. Drivers are typically available on the Xprinter official website or on a CD included with the printer. Follow the on-screen instructions during installation.
6. Instrukcja obsługi
6.1 Podstawowe drukowanie
Once the printer is connected and drivers are installed (if applicable), you can send print jobs from your application. Ensure the printer is powered on and has paper loaded.
- From your application (e.g., POS software, web browser), select the print option.
- Choose "Xprinter XP-Q200" from the list of available printers.
- Adjust any print settings as needed (e.g., paper size, copies).
- Kliknij „Drukuj”, aby wysłać zadanie do drukarki.
6.2 Logo and Barcode Printing
The XP-Q200 supports custom logo and barcode printing. Refer to the printer's utility software (usually provided with drivers) for instructions on how to upload logos (BMP format) to the printer's NV memory and configure barcode printing settings.
7. Konserwacja
7.1 Czyszczenie drukarki
Regularne czyszczenie pomaga zachować jakość druku i wydłuża żywotność drukarki.
- Głowica drukująca: Delikatnie przetrzyj wacikiemampened with isopropyl alcohol to gently wipe the thermal print head. Allow it to dry completely before closing the cover. Clean the print head regularly, especially if print quality degrades.
- Wałek dociskowy: Clean the rubber platen roller with a soft cloth dampnasączone alkoholem izopropylowym.
- Zewnętrzny: Przetrzyj obudowę drukarki miękką, suchą ściereczką. Nie używaj środków czyszczących o właściwościach ściernych ani rozpuszczalników.
7.2 Usuwanie zacięć papieru
Jeśli wystąpi zacięcie papieru:
- Wyłącz drukarkę.
- Otwórz górną pokrywę.
- Carefully remove any jammed paper. Ensure no small pieces of paper remain inside.
- Close the top cover firmly.
- Turn the printer back on.
8. Rozwiązywanie Problemów
This section addresses common issues you might encounter with your XP-Q200 printer.
| Problem | Możliwa przyczyna | Rozwiązanie |
|---|---|---|
| Drukarka się nie włącza | Power cable loose; Power outlet faulty; Power adapter faulty | Check power connections; Try a different outlet; Contact support if adapter is faulty. |
| Brak wydruku | No paper; Paper loaded incorrectly; Printer offline; Driver issue | Load paper correctly; Check printer status; Reinstall drivers. |
| Niska jakość druku | Print head dirty; Low quality paper; Print head worn out | Clean print head; Use recommended thermal paper; Contact support for service. |
| Zacięcie papieru | Paper loaded incorrectly; Foreign object inside | Refer to Section 7.2 for clearing jams. |
| Bluetooth/Ethernet connection fails | Incorrect pairing; Network issue; IP address conflict | Re-pair device; Check network cables/settings; Verify IP address. |
9. Specyfikacje
| Funkcja | Specyfikacja |
|---|---|
| Nazwa modelu | XP-Q200 |
| Technologia druku | Termiczny |
| Prędkość drukowania | 260 mm/sek |
| Wyjście drukarki | Monochromia |
| Technologia łączności | Bluetooth, USB, Ethernet |
| Rozmiar arkusza | Thermal (80mm) |
| Drukowanie dwustronne | Tak |
| Kolor | Czarny |
| Typ kontrolera | iOS, Android |
| Zawarte komponenty | Papier |
| Funkcja specjalna | USB |
| Typ skanera | Przenośny |
Ask a question about this manual
Ask about setup, troubleshooting, compatibility, parts, safety, or missing instructions. Manuals+ will review the question and use this page’s manual context to help answer it.