
Della 048-GM-48183
Della Portable Ice Maker User Manual
Model: 048-GM-48183
1. Ważne instrukcje bezpieczeństwa
Please read all instructions carefully before operating your new ice maker. Retain this manual for future reference.
- Ensure the appliance is connected to a grounded power outlet (120 Volts, 60 Hz).
- Do not immerse the power cord, plug, or any part of the unit in water or other liquids.
- Należy nadzorować dzieci podczas korzystania z urządzenia.
- Odłączaj kostkarkę do lodu od gniazdka, gdy jej nie używasz, przed czyszczeniem lub podczas konserwacji.
- Nie używaj żadnego urządzenia, jeśli przewód lub wtyczka są uszkodzone, ani po awarii urządzenia lub po jego uszkodzeniu w jakikolwiek sposób.
- Do zbiornika na wodę należy wlewać wyłącznie wodę pitną.
- Nie zasłaniaj otworów wentylacyjnych. Zapewnij odpowiednią cyrkulację powietrza wokół urządzenia.
- This appliance is certified ETL, CSA, and UL Listed for safety.
2. Koniec produktuview
The Della Portable Ice Maker is designed for convenience, producing bullet-shaped ice cubes quickly. It features an easy-to-use control panel and a transparent viewokno.

Rysunek 2.1: Ogólnie view of the Della Portable Ice Maker.

Rysunek 2.2: Wnętrze view with the lid open, revealing the ice basket and ice-making mechanism.
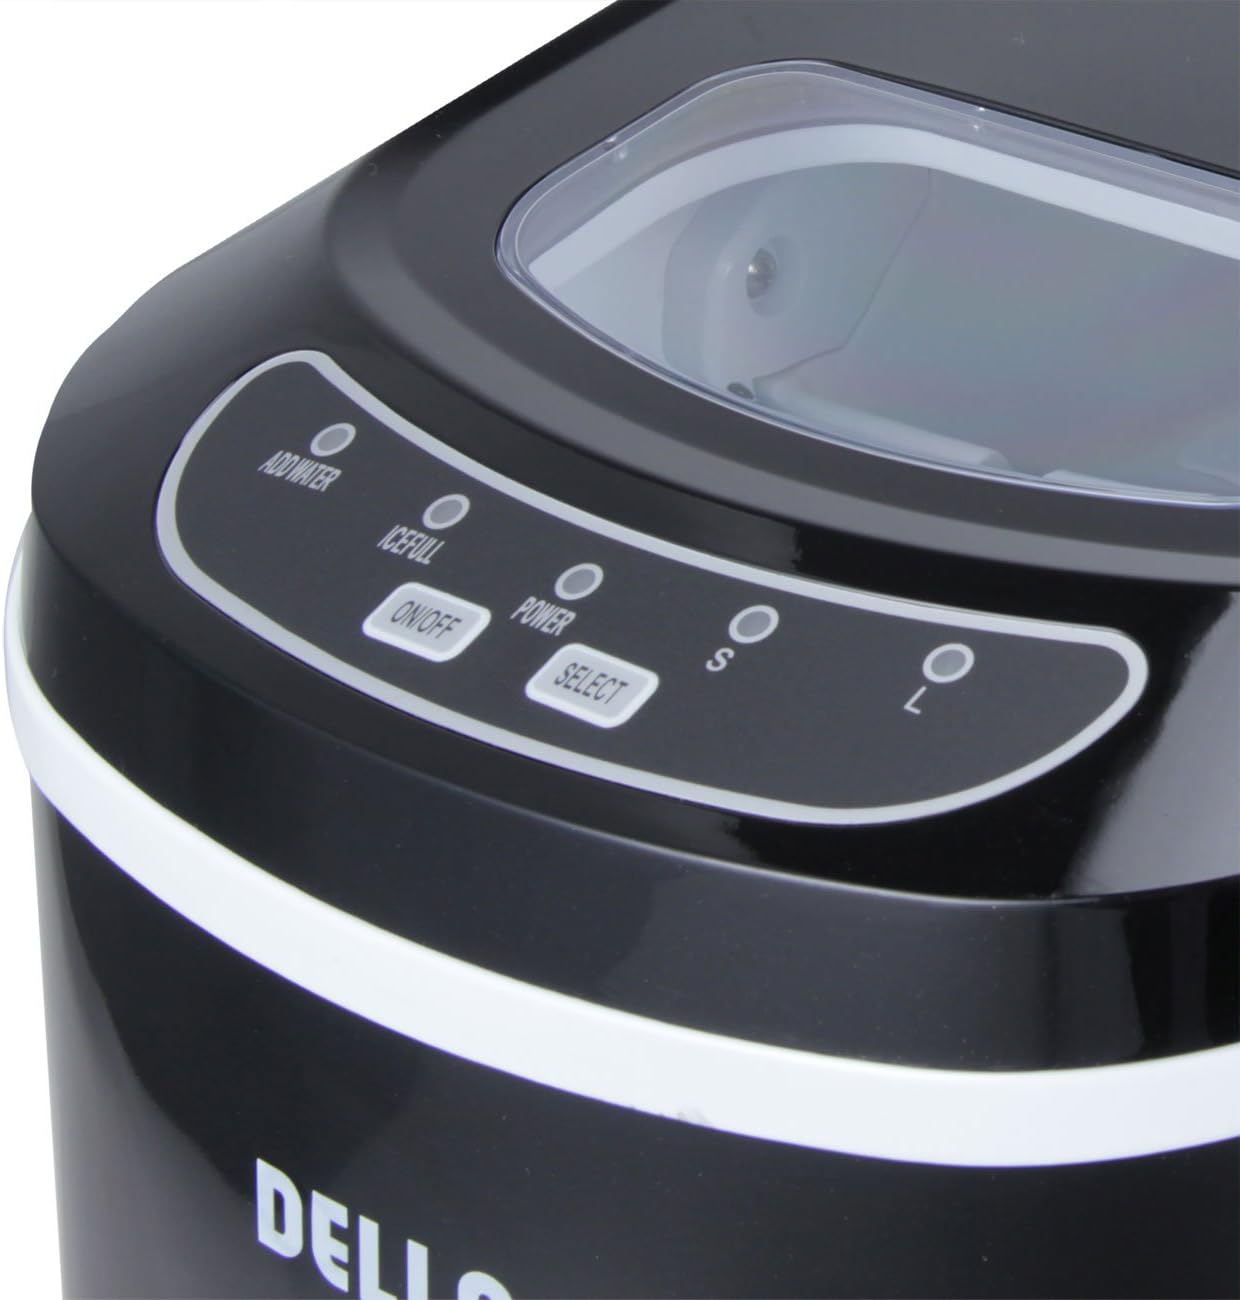
Rysunek 2.3: Szczegółowy view of the intuitive control panel with indicator lights and buttons.

Figure 2.4: The ice basket containing freshly made bullet ice cubes and the included scoop.

Figure 2.5: The ice making prongs where ice cubes are formed.

Figure 2.6: The drain plug for easy water removal from the reservoir.

Figure 2.7: The removable ice basket and scoop for convenient ice transfer.
3. Konfiguracja
- Rozpakowywanie: Ostrożnie usuń wszystkie materiały opakowaniowe. Sprawdź, czy nie uległy uszkodzeniu podczas transportu.
- Umieszczenie: Place the ice maker on a flat, stable surface away from direct sunlight and heat sources. Ensure there is at least 4 inches of clearance around the unit for proper ventilation.
- Czyszczenie wstępne: Before first use, clean the interior of the unit, including the water reservoir and ice basket, with a soft cloth and mild detergent. Rinse thoroughly with clean water.
- Allow to Rest: After transport, allow the ice maker to stand upright for at least 1 hour before plugging it in. This allows the refrigerant to settle.
- Podłączenie zasilania: Podłącz urządzenie do uziemionego gniazdka elektrycznego.
4. Działanie
- Dodaj wodę: Otwórz pokrywę i wlej wodę pitną do zbiornika na wodę do linii MAX. Nie przepełniaj.
- Włączanie: Press the "ON/OFF" button to start the ice making cycle. The "POWER" indicator light will illuminate.
- Wybierz rozmiar lodu: Press the "SELECT" button to choose between small (S) or large (L) ice cubes. The corresponding indicator light will illuminate.
- Produkcja lodu: The ice maker will begin producing ice in as little as 6 minutes. The ice will drop into the ice basket.
- Wskaźniki:
- The "ADD WATER" indicator will light up when the water level in the reservoir is low. Add more water to continue ice production.
- The "ICE FULL" indicator will light up when the ice basket is full. Remove ice to allow the machine to continue making ice.
- Przechowywanie lodu: For best results, transfer ice from the ice basket to a freezer for long-term storage, as the ice maker is not a freezer and will not keep ice frozen indefinitely.
- Wyłączone: Press the "ON/OFF" button to stop the ice making process.
5. Konserwacja
Regularne czyszczenie i konserwacja zapewnią długowieczność i optymalną wydajność Twojej kostkarki do lodu.
5.1 Czyszczenie
- Codzienne sprzątanie: Przetrzyj powierzchnię zewnętrzną miękką,amp płótno.
- Internal Cleaning (Weekly/Bi-weekly):
- Odłącz urządzenie.
- Wyjmij koszyk na lód.
- Drain any remaining water from the reservoir by removing the drain plug located at the bottom of the unit.
- Clean the interior with a solution of warm water and mild detergent. Use a soft cloth or sponge.
- Rinse the interior thoroughly with clean water, ensuring no detergent residue remains. Drain all rinse water.
- Wytrzyj wnętrze czystą, miękką ściereczką.
5.2 Przechowywanie
If the ice maker will not be used for an extended period, drain all water, clean the unit thoroughly, and allow it to dry completely before storing in a cool, dry place.
6. Rozwiązywanie Problemów
| Problem | Możliwa przyczyna | Rozwiązanie |
|---|---|---|
| Wskaźnik „DODAĆ WODĘ” jest włączony. | Zbiornik na wodę jest pusty lub poziom wody jest zbyt niski. | Nalej wody pitnej do zbiornika do linii MAX. |
| Wskaźnik „Lód pełny” jest włączony. | Kosz na lód jest pełny. | Wyjmij lód z koszyka. |
| Ice cubes are too small or clumping. | Water temperature is too high, or ambient temperature is too high. | Use colder water. Place the unit in a cooler environment. |
| Kostkarka do lodu nie produkuje lodu. | No power, low water, or internal malfunction. | Check power connection. Add water. If problem persists, contact customer support. |
| Urządzenie jest głośne. | Normal operation sounds (compressor, water pump, ice dropping). | This is normal. Ensure unit is on a stable, level surface. |
7. Specyfikacje
| Marka | Della |
| Nazwa modelu | Przenośna kostkarka do lodu |
| Wymiary produktu (dł. x szer. x wys.) | 14.5" gł. x 9.75" szer. x 12.75" wys. |
| Capacity (Ice Basket) | 1.5 funtów |
| Daily Ice Making Capacity | Do 26 funtów |
| Cotage | 230 watów |
| Tomtage | 120 wolty |
| Chłodziwo | R134a |
| Waga przedmiotu | 21 funta |
| Kolor | Czarny |
| Metoda instalacji | Blat |
| Pojemność zbiornika na wodę | 2.3 kwarta |
8. Gwarancja i wsparcie
This Della Portable Ice Maker comes with a 30 Day Money Back warranty. For any issues or support inquiries, please refer to the official user manual or contact the manufacturer directly.
You can also download the official User Manual (PDF) for this product: Pobierz instrukcję obsługi (PDF)
Ask a question about this manual
Ask about setup, troubleshooting, compatibility, parts, safety, or missing instructions. Manuals+ will review the question and use this page’s manual context to help answer it.