1. Informacje dotyczące bezpieczeństwa
Please read all instructions carefully before operating the appliance to ensure safe and efficient use. Retain this manual for future reference.
- Bezpieczeństwo elektryczne: Upewnij się, że urządzenie jest podłączone do prawidłowo uziemionego gniazdka elektrycznego o odpowiednim napięciu.tage as specified on the product label. Do not use extension cords.
- Wentylacja: Zachowaj odpowiednią ilość miejsca wokół urządzenia, aby zapewnić odpowiednią wentylację. Zablokowane otwory wentylacyjne mogą prowadzić do przegrzania i spadku wydajności.
- Ciężki sprzęt AGD: This appliance is heavy. Use appropriate lifting techniques and equipment when moving to prevent injury.
- Czyszczenie: Disconnect power before cleaning or performing any maintenance. Use non-abrasive cleaners.
- Materiały łatwopalne: Nie przechowuj substancji wybuchowych ani materiałów łatwopalnych wewnątrz lub w pobliżu lodówki.
2. Koniec produktuview
The True TUC-60-HC is a 60-inch two-section undercounter refrigerator designed for commercial use, featuring solid stainless steel doors and a robust construction for durability and performance.
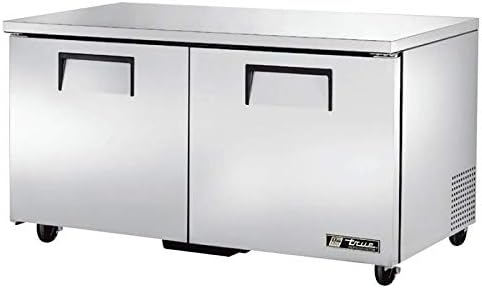
Przód view of the True TUC-60-HC undercounter refrigerator, showcasing its stainless steel finish and two solid doors.
Główne cechy:
- 60-inch width, two-section design
- Solid stainless steel doors
- 15.5 Cubic Feet capacity
- Automatyczny system rozmrażania
- Undercounter installation type
- Trwała konstrukcja ze stali nierdzewnej
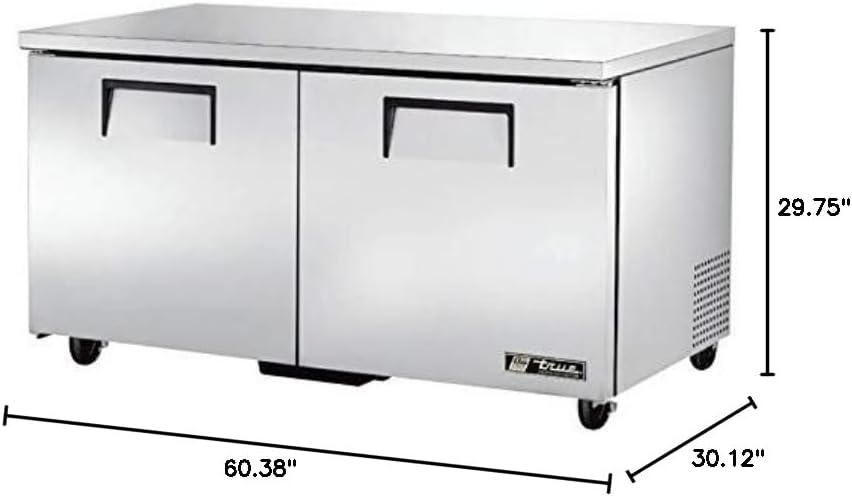
Diagram showing the dimensions of the True TUC-60-HC refrigerator: 60.38 inches width, 30.13 inches depth, and 29.75 inches height.
3. Konfiguracja
3.1 Rozpakowanie
- Ostrożnie usuń wszystkie materiały opakowaniowe, łącznie z taśmą i foliami ochronnymi.
- Sprawdź urządzenie pod kątem uszkodzeń transportowych. Wszelkie uszkodzenia należy natychmiast zgłosić przewoźnikowi.
- Remove any internal packing materials and accessories.
3.2 Umieszczenie
- Place the refrigerator on a strong, level surface capable of supporting its weight when fully loaded.
- Ensure adequate air circulation around the unit. Do not block the condenser air intake or exhaust vents.
- Avoid direct sunlight or proximity to heat-generating appliances (ovens, stoves) to maintain optimal performance.
3.3 Podłączenie elektryczne
- Before plugging in, ensure the power supply matches the voltagi i amperage requirements listed on the unit's serial tag.
- Plug the unit directly into a dedicated, grounded electrical outlet. Do not use adapter plugs or extension cords.
3.4 Czyszczenie początkowe
- Before first use, clean the interior and exterior surfaces with a mild soap and water solution.
- Wytrzyj do sucha miękką szmatką.
4. Instrukcja obsługi
4.1 Włączanie i kontrola temperatury
- After setup, plug in the unit. The compressor will start automatically.
- Allow the refrigerator to run for several hours (typically 2-4 hours) to reach its set temperature before loading products.
- Temperature settings are typically adjusted via a digital controller located on the front or interior of the unit. Refer to the specific controller's instructions for detailed adjustment procedures.
4.2 Załadunek lodówki
- Distribute items evenly on the shelves to ensure proper air circulation.
- Do not overload shelves beyond their weight capacity.
- Avoid blocking the internal air vents to maintain consistent temperatures.
4.3 Obsługa drzwi
- Ensure doors close completely after each use to maintain internal temperature and energy efficiency.
- Check door gaskets regularly for wear or damage that could compromise the seal.
5. Konserwacja
5.1 Regularne czyszczenie
- Wnętrze: Clean the interior weekly with a mild, non-abrasive cleaner and warm water. Rinse thoroughly and dry.
- Zewnętrzny: Wipe down stainless steel surfaces regularly with a soft cloth and a stainless steel cleaner to maintain appearance.
- Wężownica skraplacza: The condenser coil should be cleaned monthly or quarterly, depending on the operating environment. Disconnect power, locate the coil (usually at the rear or bottom), and use a brush or vacuum cleaner to remove dust and debris. A dirty coil reduces efficiency and can lead to compressor failure.
5.2 Kontrola uszczelek
- Inspect door gaskets monthly for cracks, tears, or stiffness. Damaged gaskets can lead to air leaks and increased energy consumption.
- Clean gaskets with warm, soapy water to keep them pliable and ensure a good seal.
5.3 Automatyczne odszranianie
This unit features an automatic defrost system, eliminating the need for manual defrosting. Ensure the drain pan is clear and the drain line is not obstructed to allow proper water evaporation.
6. Rozwiązywanie Problemów
Przed skontaktowaniem się z serwisem,view Oto najczęstsze problemy i rozwiązania:
| Problem | Możliwa przyczyna | Rozwiązanie |
|---|---|---|
| Urządzenie nie chłodzi | No power; thermostat set too high; dirty condenser coil; door left open | Check power supply; adjust thermostat; clean condenser coil; ensure door is closed |
| Nadmierny hałas | Unit not level; loose components; fan obstruction | Level the unit; check for loose parts; clear fan obstruction |
| Woda na podłodze | Clogged drain line; drain pan overflow | Clear drain line; ensure drain pan is correctly positioned |
7. Specyfikacje
| Funkcja | Szczegół |
|---|---|
| Marka | PRAWDA |
| Numer modelu | TUC-60-HC |
| Wymiary produktu | 30.13" gł. x 60.38" szer. x 29.75" wys. |
| Pojemność | 15.5 stóp sześciennych |
| Typ instalacji | Pod ladą |
| Współczynnik kształtu | Pod ladą |
| Funkcja specjalna | Kompaktowy |
| Kolor | Stal nierdzewna |
| System rozmrażania | Automatyczny |
| Rodzaj materiału drzwi | Stal nierdzewna |
| Liczba półek | 5 |
| Liczba drzwi | 2 |
| Orzecznictwo | NEMA |
8. Gwarancja i wsparcie
For warranty information or technical support, please refer to the warranty card included with your product or visit the official TRUE webDane kontaktowe do działu obsługi klienta są zazwyczaj dostępne na stronie producenta. webstrona.