
Wstęp
The Thule Circuit Low-Profile Fork-Mount Bike Rack (Model 526XT) is designed to provide secure and convenient transportation for your bicycle on your vehicle's roof. Its low-profile design contributes to aerodynamic efficiency. This manual provides essential information for the proper installation, operation, and maintenance of your bike rack.

Rysunek 1: Koniecview of the Thule Circuit Low-Profile Fork-Mount Bike Rack.
Co jest w pudełku
Przed rozpoczęciem instalacji sprawdź, czy wszystkie komponenty są obecne:
- Thule Circuit Bike Rack main assembly
- Fork mount skewer mechanism
- Ratcheting rear wheel strap
- Mounting hardware for roof rack attachment
- Instrukcja obsługi (ten dokument)
Konfiguracja i instalacja
Follow these steps for proper installation of the Thule Circuit bike rack onto your vehicle's roof rack system. Universal tool-free mounting is supported for most rack types.
- Prepare Roof Rack: Ensure your vehicle's roof rack crossbars are clean and properly secured according to their manufacturer's instructions.
- Pozycja stojaka: Place the Thule Circuit bike rack on the crossbars. The front mounting mechanism should align with the front crossbar, and the rear wheel tray with the rear crossbar.
- Attach Front Mount: Use the universal tool-free mounting system to secure the front of the bike rack to the front crossbar. Ensure a snug fit to prevent movement.
- Attach Rear Mount: Secure the rear of the bike rack to the rear crossbar using the provided hardware. The ratcheting wheel strap assembly should be positioned over the rear crossbar.
- Sprawdź bezpieczeństwo: After installation, firmly shake the bike rack to ensure it is securely attached to your vehicle's roof rack. All mounting points should be tight and free from play.

Rysunek 2: Strona view of the Thule Circuit bike rack, illustrating its low-profile projekt.

Figure 3: Detail of the fork mount with the locking skewer and adjustment dial.
Instrukcja obsługi
Properly loading and securing your bicycle is crucial for safe transport. The Thule Circuit is compatible with standard 9mm axles and most disc brakes.
- Zdejmij przednie koło: Before placing the bike on the rack, remove the front wheel of your bicycle.
- Pozycja roweru: Lift the bicycle onto the roof rack. Align the front fork dropouts with the fork mount skewer on the rack.
- Secure Front Fork: Engage the fork dropouts onto the skewer. Use the same-side adjustment dial to tighten the skewer securely. The skewer should be tight enough to hold the bike firmly without damaging the fork. A Thule One-Key lock cylinder (sold separately) can be inserted into the skewer for added security.
- Bezpieczne tylne koło: Place the rear wheel into the integrated wheel cradle. Use the ratcheting wheel strap to firmly secure the rear wheel to the tray. Ensure the strap is tight and the wheel cannot move.
- Kontrola końcowa: Before driving, gently shake the bicycle to confirm it is stable and securely fastened at both the fork and the rear wheel.

Figure 4: A bicycle securely mounted on the Thule Circuit rack.
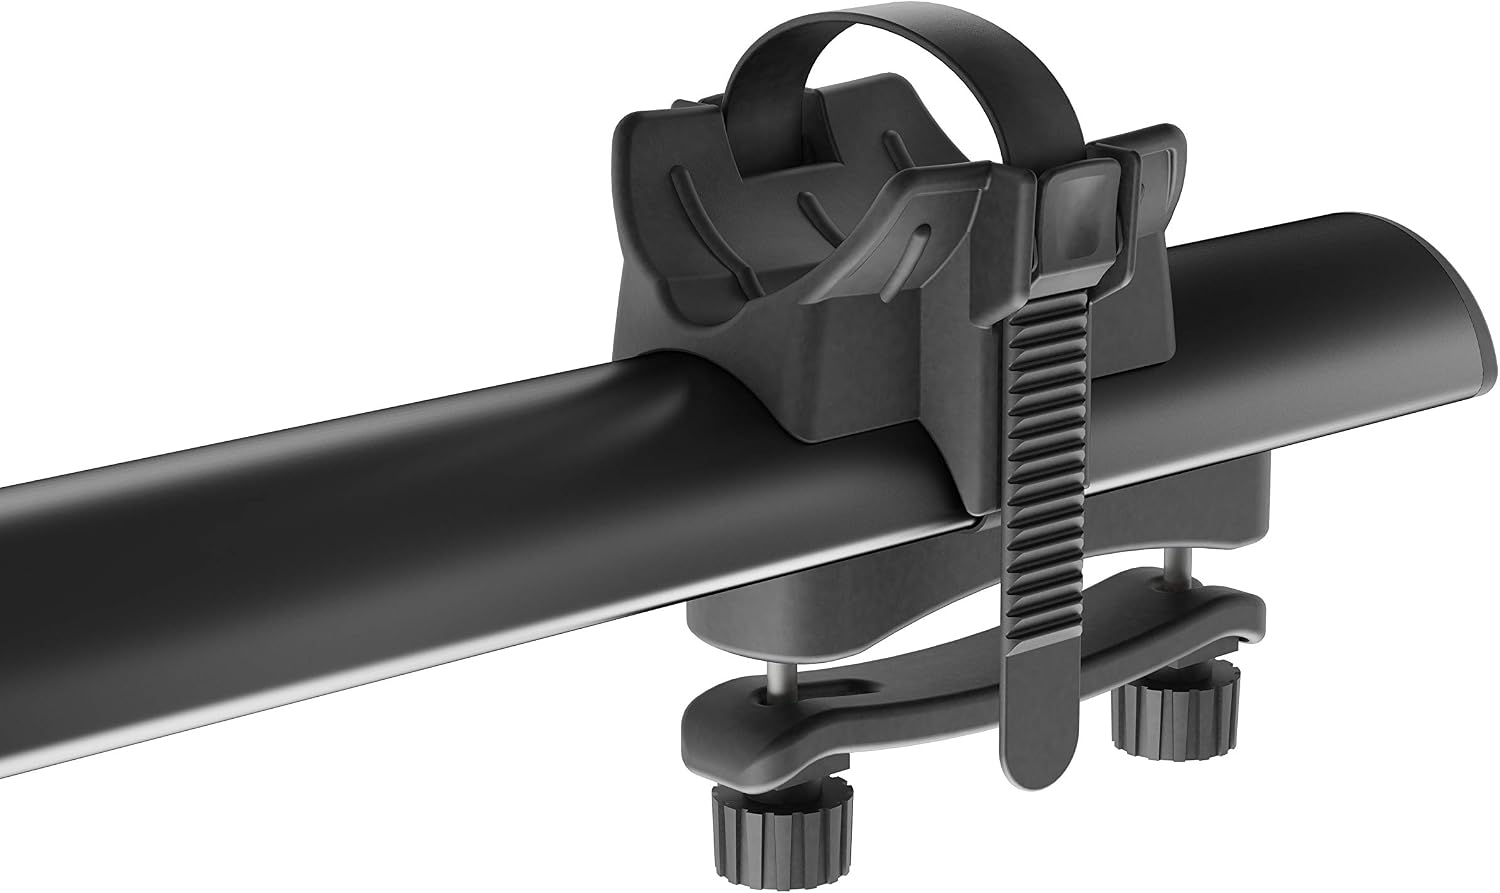
Figure 5: Detail of the ratcheting wheel strap securing the rear wheel.
Konserwacja
Regular maintenance ensures the longevity and safe operation of your Thule Circuit bike rack.
- Czyszczenie: Clean the rack regularly with mild soap and water, especially after exposure to road salt, dirt, or harsh weather conditions. Rinse thoroughly and dry.
- Kontrola elementów złącznych: Periodically check all bolts, nuts, and straps for tightness. Re-tighten as necessary.
- Smarowanie: Apply a small amount of silicone spray or light lubricant to moving parts, such as the skewer mechanism, to ensure smooth operation.
- Składowanie: When not in use for extended periods, consider removing the bike rack from your vehicle and storing it in a dry, protected area to prevent wear from environmental exposure.
Rozwiązywanie problemów
This section addresses common issues you might encounter with your bike rack.
- Rack Rattles or Moves:
- Ensure all mounting hardware securing the rack to the crossbars is tightened correctly.
- Verify that the fork mount and rear wheel strap are fully secured when a bike is loaded.
- Bike Not Stable:
- Check the fork skewer tension. It should be firm enough to prevent any movement of the fork.
- Ensure the rear wheel strap is ratcheted down tightly.
- Difficulty Installing/Removing Bike:
- For the fork skewer, ensure the adjustment dial is set appropriately for your bike's fork width. It may require initial adjustment.
- Ensure the quick-release lever on the skewer is fully open before attempting to remove the bike.
- Rack Does Not Fit Crossbars:
- The Thule Circuit is designed for Thule rack systems, round bars, and most factory racks. If you have an unusual crossbar profile, consult Thule's official support for compatibility.
Specyfikacje
| Funkcja | Specyfikacja |
|---|---|
| Marka | Thule |
| Numer modelu | 526XT |
| Tworzywo | Aluminium |
| Kolor | Czarny |
| Pozycja Wymiary (dł. x szer. x wys.) | 55 x 5.6 x 5.25 cala |
| Waga przedmiotu | 6.8 funta |
| Nośność | 35 funty (15.9 kg) |
| Typ montażu | Strap Mount (to crossbars), Fork Mount (for bike) |
| Compatible Axle Type | Standard 9mm axles (carbon fork dropout compatible) |
| Zawarte komponenty | Bike rack and mounted parts |
| UPC | 091021159495 |
Informacje o gwarancji
Thule products are tested and are subject to strict quality controls. The Thule Circuit Low-Profile Fork-Mount Bike Rack comes with a manufacturer's warranty covering defects in materials and workmanship. For specific warranty terms, conditions, and registration, please refer to the official Thule webstronę internetową lub kartę gwarancyjną dołączoną do zakupu. Zachowaj dowód zakupu na wypadek roszczeń gwarancyjnych.
Wsparcie
For further assistance, detailed diagrams, or specific questions not covered in this manual, please utilize the following resources:
- Oficjalna instrukcja obsługi (PDF): Plik do pobrania w formacie PDF
- Thule Webstrona: Odwiedzać www.thule.pl for product information, FAQs, and customer service contact details.
- Obsługa klienta: Contact Thule customer support directly for personalized assistance.