1. Wprowadzenie
This manual provides detailed instructions for the installation, configuration, and maintenance of your ASUS H110M-D motherboard. The ASUS H110M-D is designed to support 6th generation Intel Core i7/i5/i3/Pentium/Celeron processors with an LGA 1151 socket, featuring DDR4 memory support up to 32GB, integrated graphics, and Intel Turbo Boost Technology 2.0. It is a Micro ATX form factor motherboard, ideal for building compact yet capable systems.
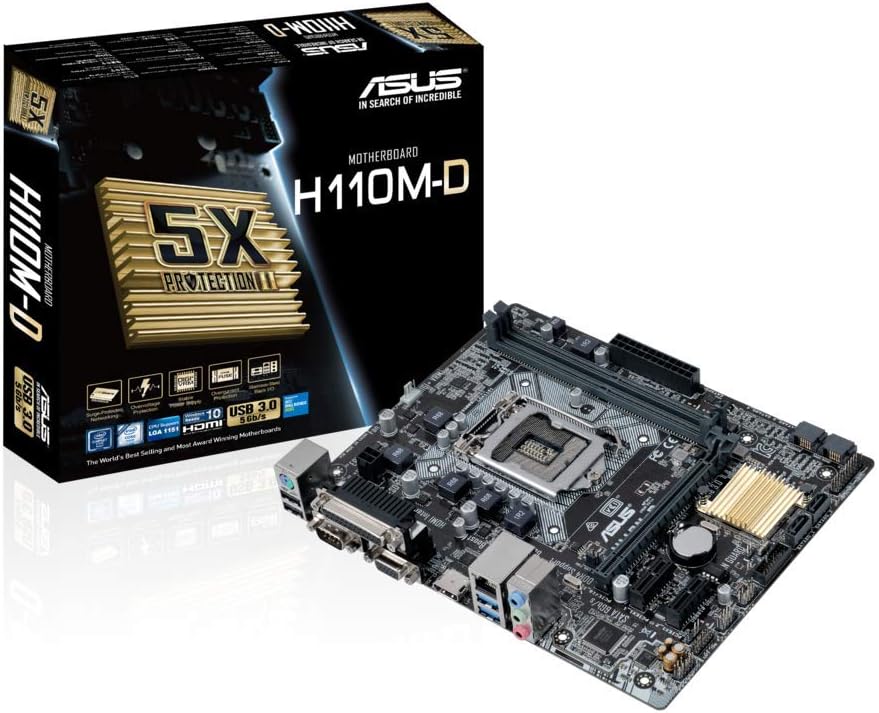
Figure 1.1: ASUS H110M-D Motherboard and Packaging.
This image displays the ASUS H110M-D motherboard alongside its retail packaging, highlighting its compact Micro ATX form factor and key features.
2. Informacje dotyczące bezpieczeństwa
- Zawsze odłączaj przewód zasilający od gniazdka ściennego przed dotknięciem jakiegokolwiek elementu.
- Wear an anti-static wrist strap or frequently touch a grounded object to prevent electrostatic discharge (ESD) damage.
- Aby zapobiec przegrzaniu, zadbaj o odpowiednią wentylację obudowy komputera.
- Nie wystawiaj płyty głównej na działanie wilgoci i ekstremalnych temperatur.
3. Konfiguracja i instalacja
3.1. Sprawdzenie zgodności
WAŻNY: Before proceeding with installation, verify the compatibility of your CPU and RAM with the ASUS H110M-D motherboard. Refer to the official ASUS website for the latest CPU and memory Qualified Vendor Lists (QVL). This motherboard supports Intel Socket 1151 for 6th generation Core i7/i5/i3/Pentium/Celeron processors and DDR4 memory up to 32GB.
3.2. Układ płyty głównej

Figure 3.1: ASUS H110M-D Motherboard Top View.
Ten obraz przedstawia całościowy widok z góry na dół view of the motherboard, illustrating the placement of the CPU socket, RAM slots, PCIe slots, and various connectors.
3.3. Kroki instalacji komponentów
- Zainstaluj procesor: Carefully align the CPU with the socket (LGA 1151) and gently place it. Close the retention arm to secure the CPU.
- Zainstaluj chłodzenie procesora: Apply thermal paste (if not pre-applied) and install the CPU cooler according to its instructions. Connect the CPU fan cable to the CPU_FAN header.
- Instalacja modułów pamięci: Open the clips on the DDR4 DIMM slots. Align the memory modules with the key notch and press firmly until the clips snap into place. This motherboard has two DDR4 slots.
- Montaż płyty głównej: Secure the motherboard into your PC case using the appropriate standoffs and screws.
- Podłącz kable zasilające: Podłącz 24-pinowe złącze zasilania ATX i 8-pinowe (lub 4-pinowe) złącze zasilania procesora do płyty głównej.
- Podłącz urządzenia pamięci masowej: Use SATA 6Gbps cables to connect your SSDs/HDDs to the SATA ports on the motherboard.
- Zainstaluj karty rozszerzeń: Insert graphics cards or other PCIe expansion cards into the appropriate PCIe slots (e.g., PCIe 3.0 x16 for graphics).
- Podłącz kable panelu przedniego: Connect the power button, reset button, USB ports, audio jacks, and LED indicators from your PC case to the corresponding headers on the motherboard. Refer to the motherboard manual's detailed diagrams for correct pin assignments.
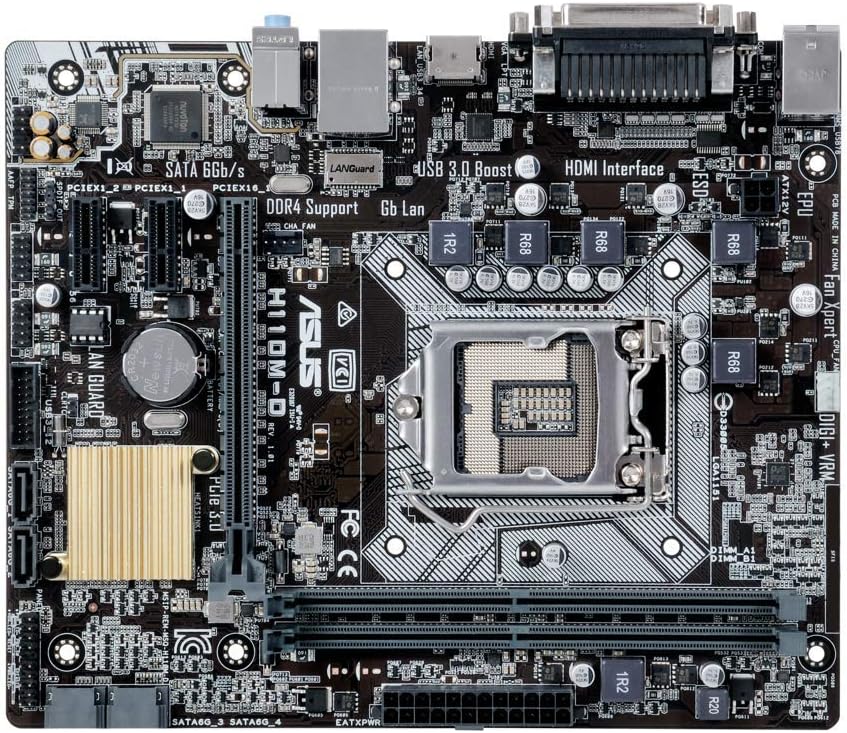
Figure 3.2: CPU Socket and Memory Slots.
To zbliżenie view highlights the LGA 1151 CPU socket and the two DDR4 memory slots, crucial for proper component installation.
3.4. Połączenia tylnego panelu I/O
Connect your peripherals to the rear I/O panel. This motherboard includes various ports such as USB 2.0, USB 3.0, HDMI, VGA, DVI, LAN, and audio jacks.
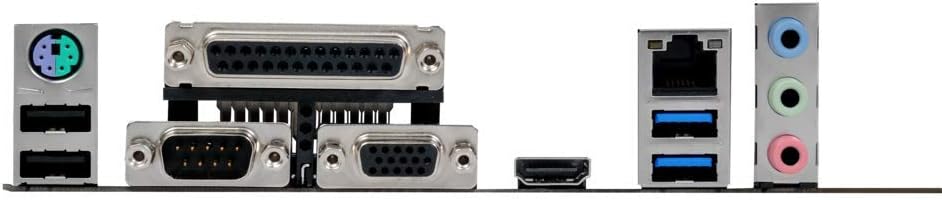
Rysunek 3.3: Tylny panel wejścia/wyjścia.
This image shows the various input/output ports available on the rear of the motherboard, including USB, video outputs (VGA, HDMI), and audio jacks.
4. Obsługa systemu
4.1. Konfiguracja BIOS-u
Upon first boot, or by pressing the USUNĄĆ key during startup, you can enter the UEFI BIOS utility. The ASUS BIOS is designed to be intuitive, offering both a simple EZ Mode and an advanced mode for detailed configuration. Here you can set boot order, configure system settings, and monitor hardware.
4.2. Instalacja sterownika
After installing your operating system (e.g., Windows 10), install the necessary drivers for the motherboard components. These drivers are typically provided on a support CD included with the motherboard or can be downloaded from the official ASUS support website. Key drivers include chipset, audio (Realtek), LAN, and graphics drivers (if using integrated graphics).
4.3. First Boot and OS Installation
Ensure all connections are secure. Power on your system. If all components are correctly installed, the system should boot to the BIOS or your operating system installation media. Follow the on-screen prompts to install your preferred operating system.
5. Konserwacja
- Usuwanie kurzu: Regularly clean dust from inside your PC case and motherboard components using compressed air. Ensure the system is powered off and unplugged.
- Aktualizacje BIOS-u: Okresowo sprawdzaj wsparcie techniczne ASUS website for BIOS updates. Updating the BIOS can improve compatibility, stability, and performance. Follow ASUS's specific instructions for BIOS flashing carefully.
- Aktualizacje sterowników: Aktualizuj sterowniki, aby zapewnić optymalną wydajność i zgodność z nowym oprogramowaniem i sprzętem.
- Sprawdzanie komponentów: Periodically inspect cables and connections to ensure they are secure and free from damage.
6. Rozwiązywanie Problemów
6.1 Brak wyświetlacza/brak rozruchu
- Sprawdź, czy wszystkie kable zasilające (24-pinowy ATX, 8-pinowy CPU) są solidnie podłączone.
- Wymień moduły RAM. Spróbuj uruchomić komputer z tylko jedną kością RAM.
- Ensure the graphics card (if dedicated) is properly seated and has power. If using integrated graphics, ensure the monitor is connected to the motherboard's video output.
- Wyczyść pamięć CMOS (informacje o położeniu zworek znajdziesz w instrukcji płyty głównej).
6.2. Problemy z dźwiękiem
- Ensure audio drivers are correctly installed.
- Check front panel audio cable connection to the motherboard header.
- Sprawdź ustawienia wyjścia audio w swoim systemie operacyjnym.
- Ensure audio is enabled in the BIOS.
6.3. Front Panel Connector Issues (e.g., Speaker)
- Double-check the front panel header connections. The manual provides detailed diagrams for correct pin assignments. Incorrect connection is a common cause for issues like non-functional speakers or power buttons.
7. Specyfikacje
| Funkcja | Specyfikacja |
|---|---|
| Marka | ASUS |
| Nazwa modelu | H110M-D |
| Gniazdo procesora | LGA 1151 |
| Kompatybilne procesory | Intel Core i7/i5/i3/Pentium/Celeron (6th Gen) |
| Zestaw układów scalonych | Intel H110 |
| Technologia pamięci | Pamięć DDR4 SDRAM |
| Maksymalna obsługiwana pamięć | 32 GB |
| Prędkość zegara pamięci | 2133 MHz (up to 667 MHz listed, but 2133 is standard for H110 DDR4) |
| Współczynnik kształtu | Mikro ATX |
| Wymiary | Wymiary 23 x 3 x 28 cm |
| Waga | 812 gramów |
| Porty USB | USB 2.0, USB 3.0 |
| Interfejs wideo | HDMI, VGA (D-Sub) |
| Interfejs pamięci masowej | SATA 6Gbps |
| Łączność bezprzewodowa | 801.11ac (if applicable, though typically via add-in card) |
Note: Specifications are subject to change without notice. For the most up-to-date information, please visit the official ASUS webstrona.
8. Gwarancja i wsparcie
ASUS products are manufactured to the highest quality standards. This motherboard comes with a standard manufacturer's warranty. For detailed warranty terms and conditions, please refer to the warranty card included with your product or visit the official ASUS support webstrona.
8.1. Wsparcie techniczne
If you encounter any issues that cannot be resolved using this manual, please contact ASUS technical support. You can find contact information and additional resources on the official ASUS support webstrona: www.asus.com/pl/support/
8.2. Zasoby internetowe
- ASUS Download Center: For drivers, utilities, BIOS updates, and manuals.
- ASUS FAQ: Frequently asked questions and troubleshooting guides.