Wstęp
Thank you for choosing the Hoover DV70 DV11 Handheld Vacuum Cleaner. This manual provides essential information for the safe and efficient operation, maintenance, and troubleshooting of your appliance. Please read it thoroughly before first use and keep it for future reference.
Ważne instrukcje bezpieczeństwa
- Przed czyszczeniem lub konserwacją należy zawsze odłączyć urządzenie od zasilania.
- Nie używaj odkurzacza do zbierania wody lub mokrych substancji.
- Nie zbieraj materiałów łatwopalnych, gorącego popiołu ani ostrych przedmiotów.
- Trzymaj włosy, luźne ubrania, palce i inne części ciała z dala od otworów i ruchomych części.
- Nie używaj odkurzacza, jeśli przewód zasilający lub wtyczka są uszkodzone.
- To urządzenie jest przeznaczone wyłącznie do użytku domowego.
- Ensure the dust container is correctly fitted before use.
Produkt ponadview
Familiarize yourself with the components of your Hoover DV70 DV11 vacuum cleaner.
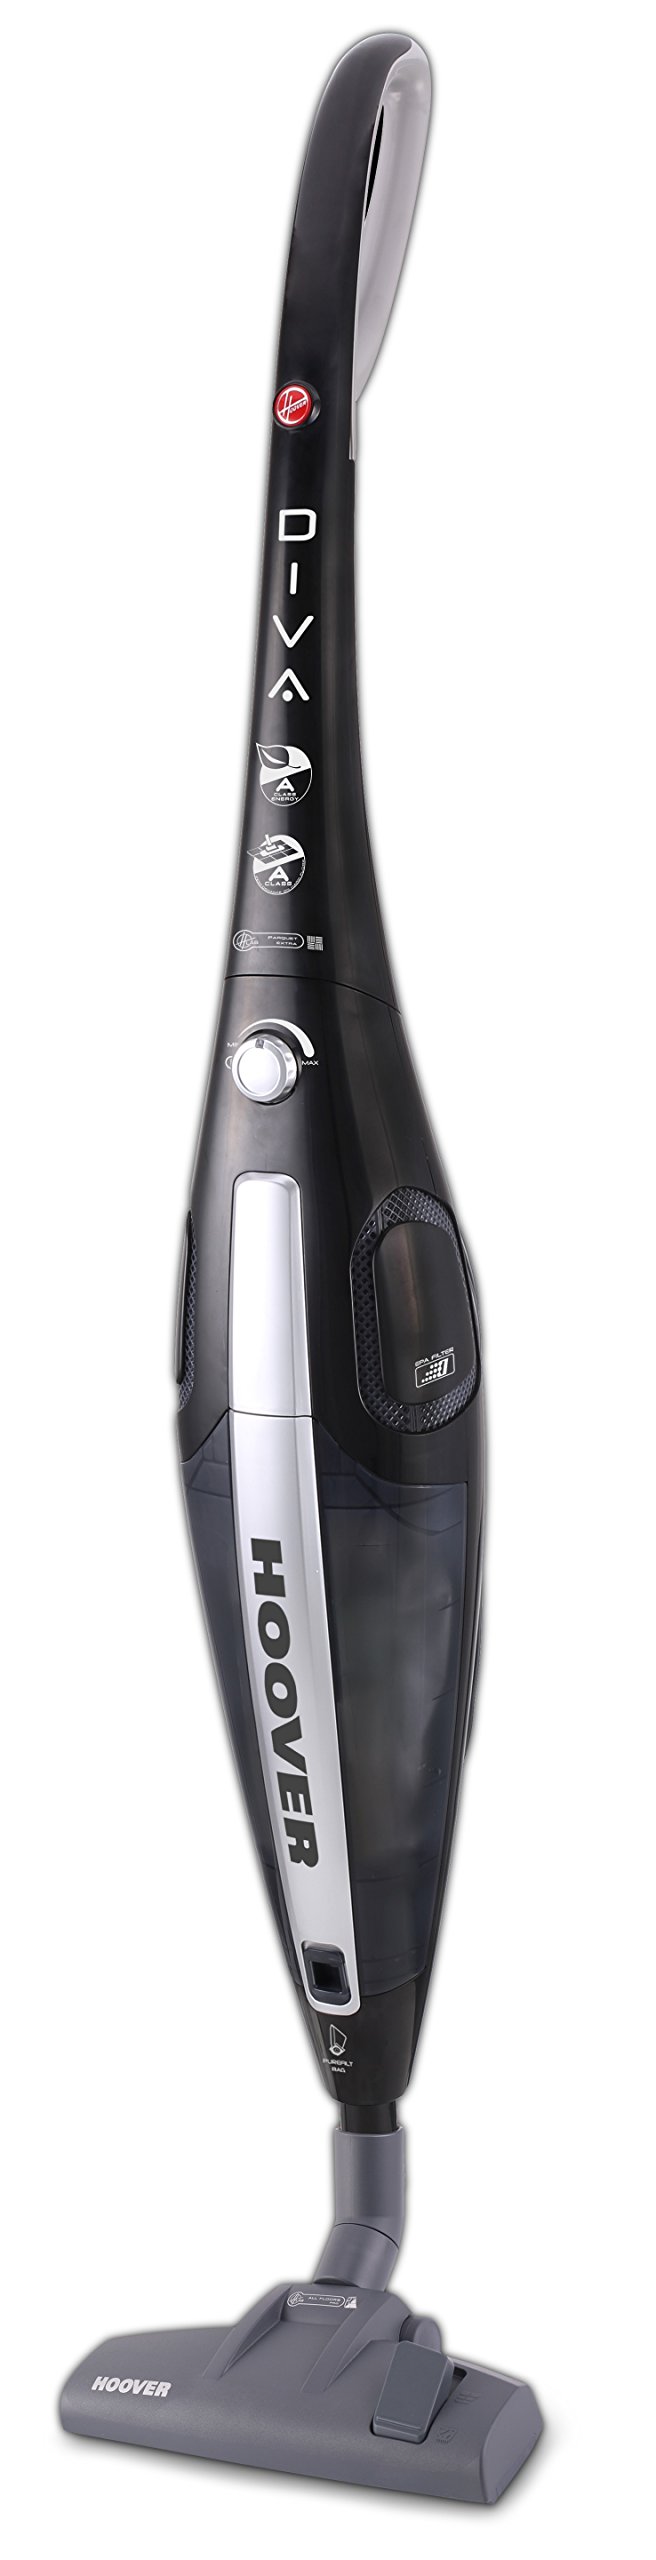
Figure 1: Hoover DV70 DV11 Handheld Vacuum Cleaner. This image shows the full assembly of the vacuum cleaner, highlighting its sleek black and silver design with the handle, main body, and floor nozzle.
- Uchwyt
- Power Button / Performance Control
- Przycisk zwalniający pojemnik na kurz
- Pojemnik na kurz
- Zespół filtra
- Floor Nozzle (Switchable)
- Easy Parquet Nozzle (for hard floors)
- Przewód zasilający
Konfiguracja i montaż
Aby złożyć odkurzacz przed pierwszym użyciem, wykonaj poniższe czynności.
- Rozpakuj komponenty: Carefully remove all parts from the packaging. Ensure all components listed in the Product Overview Sekcja jest obecna.
- Dołącz uchwyt: Włóż uchwyt do korpusu odkurzacza, aż zatrzaśnie się pewnie.
- Connect Floor Nozzle: Attach the desired floor nozzle (either the switchable floor nozzle or the Easy Parquet nozzle for hard floors) to the bottom of the main body. Ensure it is firmly connected.
- Podłączenie zasilania: Rozwiń przewód zasilający i podłącz go do odpowiedniego gniazdka elektrycznego.
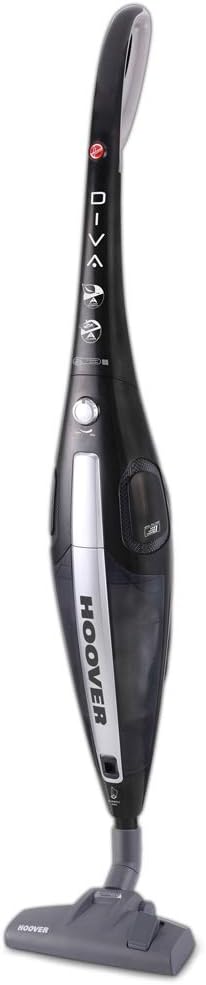
Rycina 2: Przód view of the Hoover DV70 DV11. This image provides a clear view of the main body and handle, useful for assembly reference.
Instrukcja obsługi
- Włączanie/wyłączanie: Press the power button located on the main body to turn the vacuum cleaner on. Press it again to turn it off.
- Kontrola wydajności: Your vacuum cleaner features electronic performance control. Adjust the suction power as needed for different surfaces or cleaning tasks using the control on the device.
- Używanie dysz:
- Użyj switchable floor nozzle for general cleaning on various floor types.
- For delicate hard floors, attach the Easy Parquet nozzle to prevent scratches and ensure effective cleaning.
- Dust Container Level: Monitor the dust container level indicator. Empty the container when it reaches the maximum fill line to maintain optimal suction performance.
Konserwacja i czyszczenie
Regularna konserwacja zapewnia długowieczność i optymalną wydajność odkurzacza.
Opróżnianie pojemnika na kurz
- Odłącz zasilanie: Always unplug the vacuum cleaner from the power outlet before emptying.
- Usuń pojemnik na kurz: Press the dust container release button and carefully detach the dust container from the main body.
- Pusta zawartość: Umieść pojemnik na kurz nad koszem na śmieci i otwórz dolną klapkę, aby opróżnić nagromadzony kurz i zanieczyszczenia.
- Podłącz ponownie: Close the flap and reattach the dust container to the vacuum cleaner, ensuring it clicks securely into place.
Czyszczenie filtrów
It is recommended to clean the filters regularly, especially if you notice a decrease in suction power.
- Filtry dostępu: With the dust container removed, locate the filter assembly.
- Usuń filtry: Carefully remove the filters. Depending on your model, these may be washable.
- Wyczyść filtry:
- For washable filters: Rinse under cold running water until the water runs clear. Do not use detergents.
- For non-washable filters: Tap gently over a bin to remove dust. Do not wash.
- Filtry suche: Allow washable filters to air dry completely for at least 24 hours before reinserting. Do not use a dryer or heat.
- Ponowny montaż: Once dry, reinsert the filters into the assembly and reattach the dust container.
Rozwiązywanie problemów
Jeśli masz problemy z odkurzaczem, zapoznaj się z poniższymi, częstymi problemami i ich rozwiązaniami.
| Problem | Możliwa przyczyna | Rozwiązanie |
|---|---|---|
| Odkurzacz nie włącza się. | Niepodłączony; gniazdko elektryczne uszkodzone; przycisk zasilania nie naciśnięty. | Check power cord connection; try a different outlet; press power button firmly. |
| Niska moc ssania. | Dust container full; filters clogged; nozzle blocked. | Empty dust container; clean or replace filters; check nozzle for obstructions. |
| Nietypowy dźwięk podczas pracy. | Obstruction in the brush roll or hose; motor issue. | Turn off and unplug the vacuum. Inspect brush roll and hose for blockages and remove them. If noise persists, contact customer support. |
Specyfikacje
| Funkcja | Szczegół |
|---|---|
| Marka | Odkurzacz |
| Nazwa modelu | DF70_DV11011 |
| Numer modelu | DV70 DV11 |
| Cechy specjalne | Dust container level indicator |
| Źródło zasilania | Elektryczny przewodowy |
| Waga przedmiotu | 3.9 kilograma |
| Pojemność | 1.8 litrów |
| Cotage | 750 watów |
| Współczynnik kształtu | Stick |
| Kolor | Wielobarwność |
| Poziom hałasu | 79 decybeli |
| Przenośny | Tak |
| Typ sterowania | Sterowanie ręczne |
| Technologia łączności | Wi-Fi |
| Klasa efektywności energetycznej | A (from A to G) |
| Roczne zużycie energii | 27 kWh/rok |
| Carpet Cleaning Class | C (from A to G) |
| Hard Floor Cleaning Class | A (from A to G) |
| Dust Emission Class | B (from A to G) |
Gwarancja i obsługa klienta
For warranty information, please refer to the warranty card included with your product or visit the official Hoover website. If you require further assistance, have questions, or need to report a problem not covered in this manual, please contact Hoover customer support.
You can typically find contact details for customer support on the Hoover webstronie lub w dokumentacji zakupu.