
1. Wprowadzenie
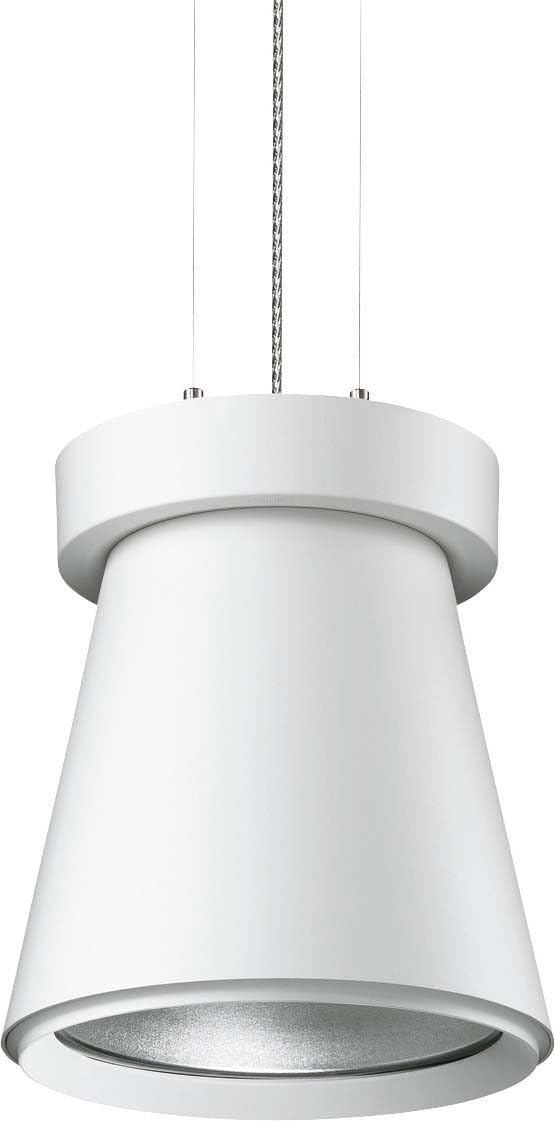
This manual provides essential instructions for the safe installation, operation, and maintenance of your Philips Uni Cone Compact Pendant Lamp, model MPK561 #68009600. Please read this manual thoroughly before installation and keep it for future reference.
2. Informacje dotyczące bezpieczeństwa
OSTRZEŻENIE: Electrical installation should only be performed by a qualified electrician. Disconnect power before installation or servicing.
- Ensure the main power supply is switched off before commencing any work.
- Sprawdź, czy objętość zasilaniatage pasuje do objętościtage specified on the luminaire label.
- Do not install the luminaire on a damp lub przewodzącej powierzchni.
- Używaj tylko określonego lamp rodzaje i cotages. This luminaire uses a G12 base metal halide lamp (70W).
- Trzymaj materiały łatwopalne z dala od oprawy.
- Nie dotykaj lamp or luminaire housing immediately after use, as they may be hot.
3. Zawartość opakowania
Verify that all components are present and undamaged before installation.
- Philips Uni Cone Compact Pendant Lamp fixture (1 unit)
- Elementy montażowe (śruby, kotwy)
- Instrukcja instalacji (niniejsza instrukcja)
- Uwaga: Lamp bulb (G12, 70W metal halide) may be included or sold separately depending on the specific product package. Refer to your purchase details.
4. Instrukcje instalacji
Aby przeprowadzić prawidłową instalację, wykonaj poniższe kroki. Zaleca się zlecenie instalacji profesjonaliście.
- Przygotuj obszar instalacji: Ensure the power supply to the installation area is switched off at the circuit breaker. Mark the desired mounting location on the ceiling.
- Zamontuj płytę sufitową: Secure the provided ceiling plate to the ceiling using appropriate screws and anchors. Ensure it is firmly attached to a structural element.
- Podłącz okablowanie: Connect the electrical wires from the ceiling to the luminaire's terminal block. Ensure correct polarity (Live, Neutral, Earth). All connections must be secure.
- Zamontuj oprawę oświetleniową: Carefully attach the pendant lamp fixture to the ceiling plate, ensuring all connections are properly seated and secured. Adjust the suspension cables to the desired height.
- Zainstaluj Lamp Żarówka: If not already installed, insert the G12 metal halide lamp do lamp holder. Ensure it is seated correctly and securely. Do not overtighten.
- Kontrola końcowa: Double-check all connections and ensure the luminaire is securely mounted. Restore power at the circuit breaker.
5. Instrukcja obsługi
The Philips Uni Cone Compact Pendant Lamp is designed for straightforward operation.
- Włączanie/wyłączanie: Once installed and wired correctly, the lamp is operated via a standard wall switch connected to its power supply.
- Czas rozgrzewki: metalohalogenek lamps require a short warm-up period to reach full brightness and color stability. This typically takes a few minutes.
- Czas ponownego uderzenia: Jeśli lamp is switched off, it may require a cool-down period before it can be reignited. Attempting to switch it on immediately after turning it off may result in a delay before it lights up again.
6. Konserwacja
Regularna konserwacja gwarantuje optymalną wydajność i długowieczność oprawy oświetleniowej.
- Czyszczenie: Disconnect power before cleaning. Use a soft, dry cloth to wipe the exterior of the luminaire. Do not use abrasive cleaners or solvents.
- Lamp Wymiana: Disconnect power and allow the lamp to cool completely before attempting replacement. Carefully remove the old G12 lamp i włóż nowy tego samego typu i wattage (70W metal halide). Ensure proper seating.
- Kontrola: Periodically inspect the suspension cables and electrical connections for any signs of wear or damage. If any damage is found, consult a qualified electrician.
7. Rozwiązywanie Problemów
| Problem | Możliwa przyczyna | Rozwiązanie |
|---|---|---|
| Lamp nie świeci. | Brak zasilania. Wadliwy lamp żarówka. Nieprawidłowe okablowanie. | Sprawdź wyłącznik automatyczny i wyłącznik ścienny. Zamień lamp żarówka. Sprawdź połączenia przewodów (skonsultuj się z elektrykiem). |
| Lamp migocze lub przygasa. | Lamp zbliżający się koniec życia. Luźne połączenie. Nieprawidłowe lamp typ. | Zamień lamp żarówka. Sprawdź połączenia elektryczne. Ensure correct G12 70W metal halide lamp jest używany. |
| Lamp takes a long time to warm up. | Normal operation for metal halide lamps. Lamp zbliżający się koniec życia. | Należy zapewnić sobie wystarczająco dużo czasu na rozgrzewkę. Rozważ wymianę lamp bulb if warm-up time becomes excessively long. |
8. Specyfikacje
- Marka: Philips
- Numer modelu: MPK561 #68009600
- Lamp Typ: metalohalogenkowe Lamp
- Lamp Opierać: G12
- Lamp Cotage: 70 W
- Liczba żarówek: 1
- Urządzenie operacyjne: Standard EVG (Electronic Ballast)
- Tworzywo: Aluminium
- Źródło zasilania: Elektryczny przewodowy
- Typ montażu: Monopunkt
9. Gwarancja i wsparcie
For warranty information and technical support, please refer to the documentation provided with your purchase or visit the official Philips webZachowaj dowód zakupu na wypadek roszczeń gwarancyjnych.
Oficjalny Philips Webstrona: www.philips.pl