1. Wprowadzenie
Thank you for choosing the SCHWAIGER DCR600HD Full HD Cable TV Receiver. This manual provides essential information for the safe and efficient use of your device. Please read these instructions carefully before installation and operation, and keep them for future reference.
2. Instrukcje bezpieczeństwa
- Zasilanie: Only use the power adapter supplied with the device. Ensure the voltage pasuje do lokalnego źródła zasilania.
- Wentylacja: Do not block ventilation openings. Ensure adequate space around the receiver for proper airflow to prevent overheating.
- Wilgoć: Keep the device away from water, moisture, and high humidity. Do not expose it to rain or splashes.
- Czyszczenie: Przed czyszczeniem odłącz zasilanie. Użyj miękkiej, suchej ściereczki. Nie używaj środków czyszczących w płynie ani aerozolu.
- Lokalizacja: Place the receiver on a stable, flat surface. Avoid direct sunlight, heat sources, and strong magnetic fields.
- Serwisowanie: Nie próbuj samodzielnie otwierać ani naprawiać urządzenia. Wszelkie prace serwisowe zleć wykwalifikowanemu personelowi.
3. Zawartość opakowania
Proszę sprawdzić, czy w paczce znajdują się następujące elementy:
- SCHWAIGER DCR600HD Cable TV Receiver
- Zdalne sterowanie
- Power Cable (integrated or separate adapter)
- Instrukcja obsługi (ten dokument)
4. Koniec produktuview
4.1 Panel przedni
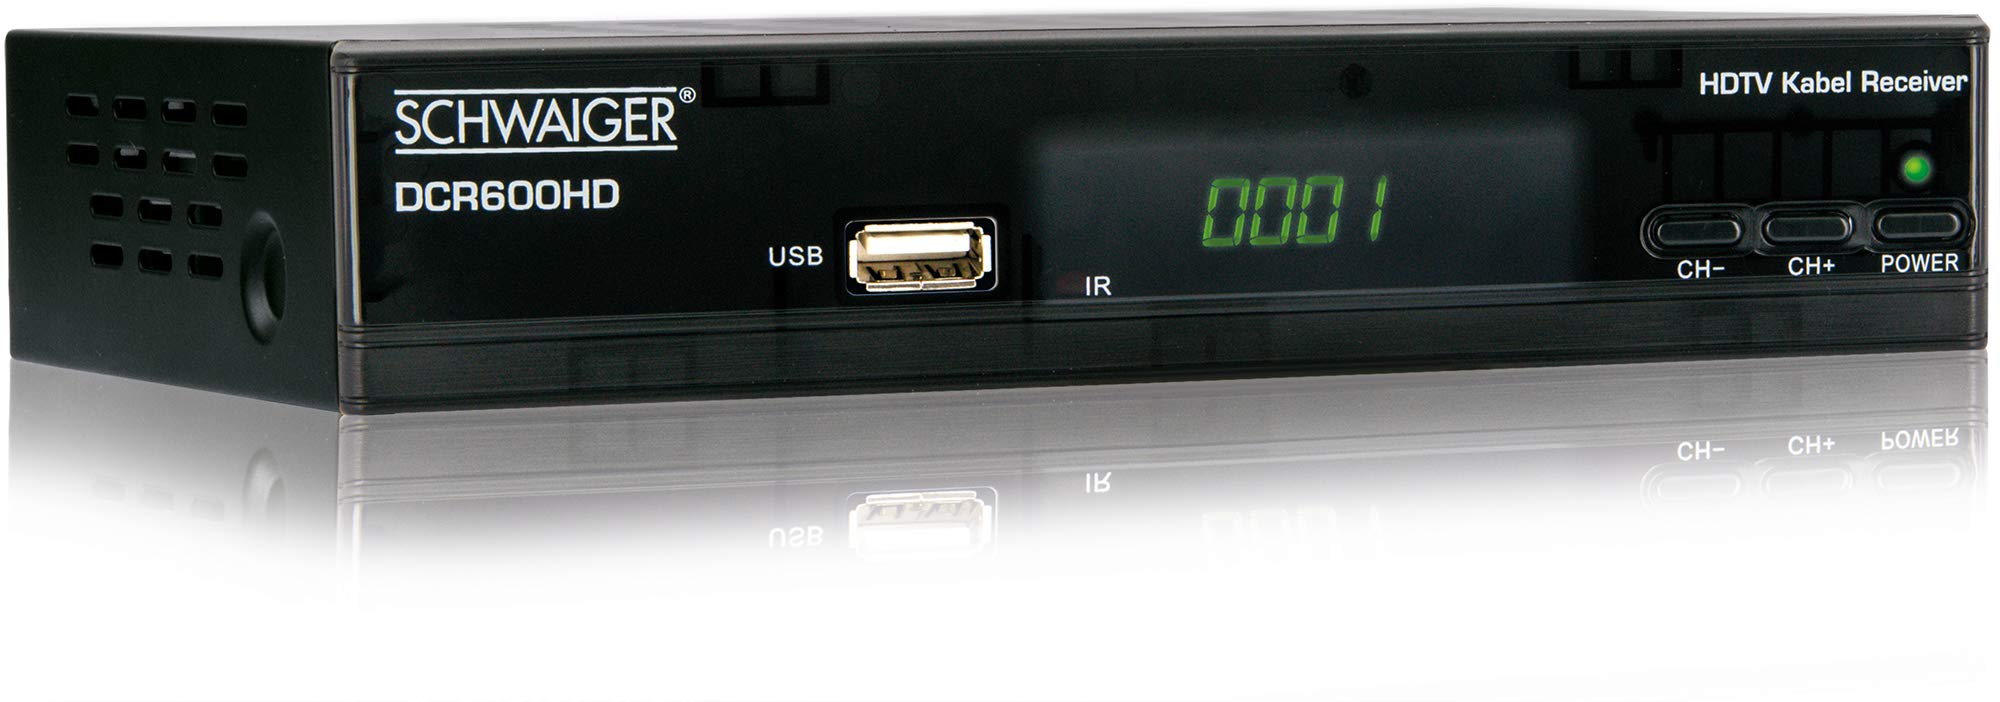
Obraz: Przód view of the SCHWAIGER DCR600HD receiver, showing the display, USB port, IR receiver, and control buttons.
- Wyświetlacz: Pokazuje numer kanału lub godzinę.
- Port USB: Do podłączania urządzeń pamięci masowej USB w celu odtwarzania multimediów.
- IR: Odbiornik podczerwieni do pilota.
- CH- / CH+: Buttons for changing channels.
- MOC: Button to turn the receiver on or off (standby).
4.2 Panel tylny

Obraz: Tył view of the SCHWAIGER DCR600HD receiver, displaying various input and output ports.
- Wejście RF: Input for connecting to your cable TV network.
- ETHERNET / LAN: For network connection (if supported for updates or specific services).
- HDMI: Wyjście interfejsu multimedialnego wysokiej rozdzielczości umożliwiające podłączenie do telewizora HD.
- TV SCART (CVBS): SCART output for connecting to older TVs or other devices.
- ~220-240V 50/60Hz: Wejście zasilania odbiornika.
4.3 Pilot zdalnego sterowania

Obraz: Layout of the SCHWAIGER DCR600HD remote control, showing various function buttons.
The remote control allows you to operate all functions of your receiver. Familiarize yourself with the button layout for easy navigation.
5. Konfiguracja
5.1 Podłączanie odbiornika
- Connect to Cable Network: Connect your cable TV antenna cable to the WEJŚCIE RF port na tylnym panelu odbiornika.
- Połącz z telewizorem:
- For High Definition (HD) picture quality, connect an HDMI cable from the HDMI port on the receiver to an HDMI input on your TV.
- For standard definition (SD) or older TVs, connect a SCART cable from the TV SCART (CVBS) port on the receiver to the SCART input on your TV.
- Podłącz zasilanie: Plug the power cable into the receiver's power input and then into a wall outlet.
- Włącz telewizor: Switch on your television and select the correct input source (HDMI or SCART) corresponding to your connection.
5.2 Pierwsza instalacja
Po pierwszym włączeniu odbiornik zazwyczaj przeprowadzi Cię przez proces początkowej konfiguracji:
- Wybór języka: Use the remote control to select your preferred language for the on-screen menus.
- Wybór kraju: Select your country. This helps configure regional settings and channel frequencies.
- Skanowanie kanałów: The receiver will prompt you to perform an automatic channel scan. Confirm to start scanning for available cable TV channels. This process may take several minutes.
- Zapisz ustawienia: Once the scan is complete, save the found channels. Your receiver is now ready for use.
6. Instrukcja obsługi
6.1 Podstawowa obsługa
- Włączanie/wyłączanie: Naciśnij MOC button on the remote control or front panel to switch the receiver on or to standby mode.
- Wybór kanału: Użyj CH+ / CH- buttons on the remote or front panel to change channels sequentially. Alternatively, use the number buttons to directly enter a channel number.
- Regulacja głośności: Użyj Objętość + / TOM- buttons on the remote control to adjust the audio volume.
- Niemy: Naciśnij NIEMY button to temporarily turn off the sound. Press again to restore.
6.2 Elektroniczny przewodnik po programach (EPG)
The EPG provides a schedule of current and upcoming TV programs.
- Naciśnij EPG button on the remote control to access the Electronic Program Guide.
- Navigate through channels and program times using the arrow buttons.
- Naciskać OK Do view szczegółowe informacje o wybranym programie.
6.3 Odtwarzanie multimediów przez USB
Możesz odtwarzać multimedia files (AVI, MKV, MP3) from a USB storage device.
- Insert a USB flash drive or external hard drive into the USB port na panelu przednim.
- The receiver should detect the USB device and prompt you to open the media player, or you can access it via the main menu.
- Poruszaj się po swoim files and folders using the arrow buttons and press OK to select and play a file.
- Use the media control buttons (Play, Pause, Stop, Fast Forward, Rewind) on the remote control for playback.
6.4 Teletekst
Access teletext services provided by broadcasters.
- Naciśnij TTX button on the remote control to activate teletext.
- Use the number buttons to enter page numbers or the arrow buttons to navigate.
- Naciskać TTX again to exit teletext.
7. Konserwacja
- Czyszczenie: Regularly wipe the receiver with a soft, dry, lint-free cloth. Do not use abrasive cleaners, waxes, or solvents.
- Wentylacja: Ensure that the ventilation slots are not obstructed by dust or other objects.
- Aktualizacje oprogramowania: Okresowo sprawdzaj producenta website for any available software updates for your model. Follow the instructions provided with the update carefully.
8. Rozwiązywanie Problemów
Jeśli masz problemy z odbiornikiem, zapoznaj się z poniższymi typowymi problemami i rozwiązaniami:
| Problem | Możliwa przyczyna / rozwiązanie |
|---|---|
| Brak obrazu i dźwięku |
|
| Pilot nie działa |
|
| Podczas skanowania nie znaleziono żadnych kanałów |
|
| USB media not playing |
|
9. Specyfikacje
| Funkcja | Opis |
|---|---|
| Nazwa modelu | DCR600HD |
| Typ produktu | Digital DVB TV Tuner / Digital Player |
| Kolor | Czarny |
| Wymiary (szer. x gł. x wys.) | Wymiary: 17 cm x 4.5 cm x 10 cm |
| Waga | 380 gramów |
| Technologia łączności | HDMI, USB, SCART, RF |
| Kompatybilne urządzenia | Telewizja |
| Kodowanie wideo | H.264 |
| Obsługiwane rozdzielczości | 576i, 576p, 720p, 1080i, 1080p |
| Proporcje obrazu | 4:3, 16:9 |
| Tryb wyjścia audio | Stereofoniczny |
| Obsługiwane formaty audio | MP3 |
| Obsługiwane typy mediów | AVI, MKV, MP3 |
| Łączna liczba portów USB | 1 (USB 4-pin Type A) |
| Wszystkie porty HDMI | 1 |
| Pobór mocy | 3.8 W |
| Tomtage | 240 wolty |
| Cechy specjalne | Electronic Program Guide (EPG), Teletext, Built-in Bluetooth (Note: Bluetooth functionality may vary by region/firmware) |
| Zdalne sterowanie | Dołączony |
10. Gwarancja i wsparcie
For warranty information and technical support, please refer to the documentation included with your product packaging or visit the official SCHWAIGER webZachowaj paragon jako dowód zakupu na wypadek reklamacji.